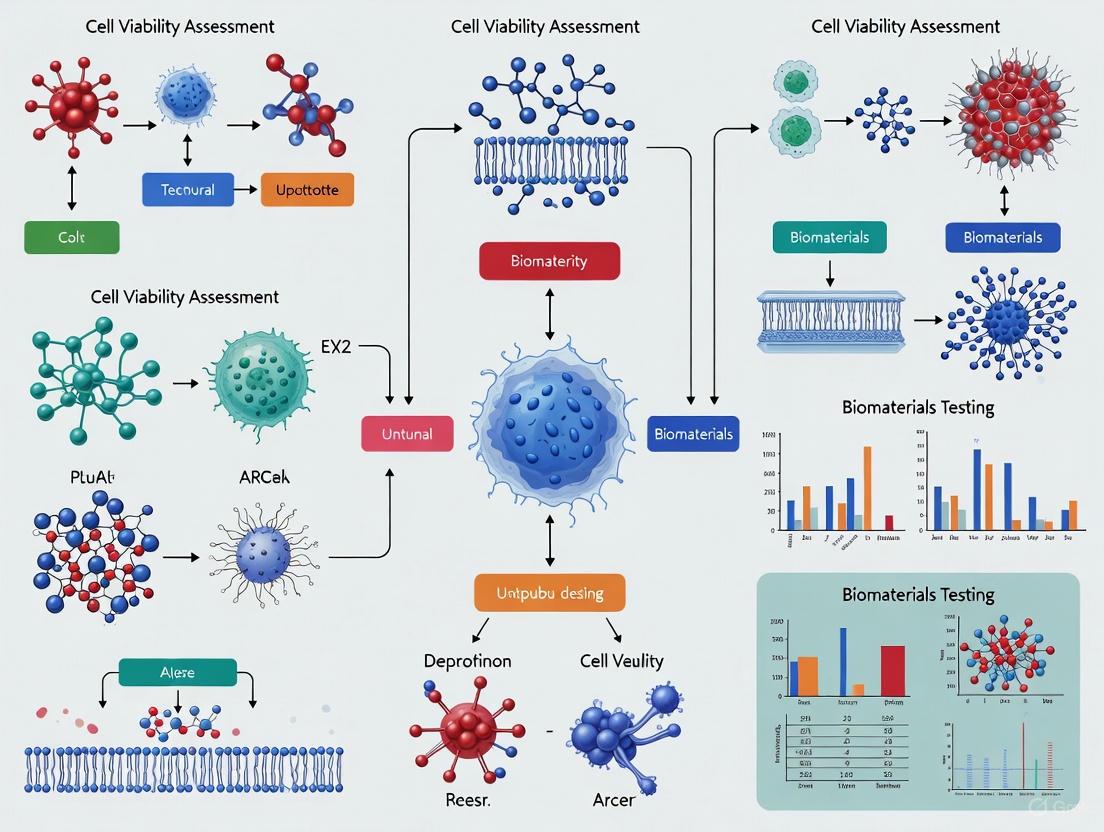
Advanced Strategies for Robust Cell Viability Assessment in Biomaterials Testing
Accurate cell viability assessment is fundamental for the preclinical evaluation of biomaterials, directly impacting the development of safe and effective medical products.
Advanced Strategies for Robust Cell Viability Assessment in Biomaterials Testing
Abstract
Accurate cell viability assessment is fundamental for the preclinical evaluation of biomaterials, directly impacting the development of safe and effective medical products. This article provides a comprehensive guide for researchers and drug development professionals, exploring the foundational principles of cell viability and cell death. It delves into a comparative analysis of established and emerging methodological approaches, from dye exclusion assays to high-content flow cytometry, with a specific focus on their application in challenging particulate systems. The content further addresses critical troubleshooting and optimization strategies to combat poor replicability, and concludes with frameworks for the rigorous validation and comparative analysis of methods, ultimately advocating for standardized, precise, and predictive viability testing protocols in biomaterial science.
Understanding Cell Viability: Principles and Significance in Biomaterial Biocompatibility
Defining Cell Viability and Cell Death Pathways in a Biomaterial Context
Technical Support Center
Troubleshooting Guides & FAQs
FAQ: Method Selection and Fundamentals
What is the fundamental difference between cell viability and cytotoxicity assays? Cell viability assays measure the proportion of live, healthy cells in a population, typically through indicators like metabolic activity, ATP content, or cell proliferation. In contrast, cytotoxicity (cell toxicity) assays directly measure a substance's capacity to damage or kill cells, often by detecting markers of cell death like loss of membrane integrity. [1] Essentially, viability assays report on health, while toxicity assays report on damage.
Which cell viability assay is most reliable for my biomaterial? No single assay is universally best; the choice depends on your biomaterial's properties and research question. Flow Cytometry (FCM) is often superior for quantitative analysis and distinguishing between live, apoptotic, and necrotic cells, especially for particulate systems. [2] However, colorimetric assays like MTT are widely used for high-throughput screening. Crucially, you must confirm the assay is compatible with your material, as some biomaterials can interfere with signals. [3] [4]
My biomaterial is auto-fluorescent. Which viability assay should I avoid? You should avoid or carefully validate assays based on fluorescence detection, such as standard fluorescence microscopy (FM) or fluorometric assays. The background signal from your material can lead to false positives or negatives. [2] In this case, colorimetric assays like MTT or LDH, or flow cytometry with careful gating to exclude auto-fluorescent particles, may be more reliable. [2] [4]
Troubleshooting Guide: Common Experimental Issues
Problem: Low cell viability detected across all groups, including controls.
- Potential Cause 1: Cytotoxic effects from the biomaterial fabrication process, such as residual solvents, initiators, or processing aids.
- Solution: Thoroughly wash and sterilize the biomaterial prior to testing. Use extraction media to leach out potential residues. [4]
- Potential Cause 2: Excessive shear stress during bioprinting or processing.
- Solution: For bioprinting applications, optimize printing parameters like pressure, nozzle size, and speed to minimize shear forces on cells. [5]
Problem: Inconsistent results between MTT and LDH assays.
- Potential Cause: Interference from culture medium supplements or material leachates. For example, nicotinamide (Vitamin B3) can enhance mitochondrial metabolism (affecting MTT) and alter NAD+/NADH ratios (affecting LDH). [3]
- Solution: Validate your assay results with a direct viability method that relies on a different principle, such as a live/dead fluorescence stain based on membrane integrity. [3]
Problem: Fluorescence microscopy and flow cytometry yield different viability percentages.
- Potential Cause: This is a known issue, particularly with particulate biomaterials. Fluorescence microscopy may have sampling bias and background interference, while flow cytometry offers higher precision and single-cell quantification. [2]
- Solution: Trust the flow cytometry data when high precision is needed. A strong correlation has been shown between the methods (r=0.94), but FCM is more accurate under high cytotoxic stress, capable of distinguishing specific death pathways like early and late apoptosis. [2]
Experimental Protocols & Data Standardization
Standardized Protocol: Viability Assessment of Particulate Biomaterials via Flow Cytometry
This protocol is adapted from a study evaluating Bioglass 45S5 cytotoxicity on SAOS-2 osteoblast-like cells. [2]
1. Sample Preparation:
- Prepare biomaterial particles in different size ranges (e.g., <38 µm, 63–125 µm, 315–500 µm).
- Treat cells with various concentrations of particles (e.g., 25, 50, 100 mg/mL) for defined periods (e.g., 3h and 72h).
2. Cell Staining for Multiparametric Flow Cytometry:
- Harvest cells and prepare a single-cell suspension.
- Stain cells using a cocktail of fluorescent probes:
- Hoechst: Stains all nucleated cells (viability marker).
- DiIC1: Stains live cell mitochondria (viability marker).
- Annexin V-FITC: Binds to phosphatidylserine exposed on the outer leaflet of the plasma membrane during early apoptosis.
- Propidium Iodide (PI): A membrane-impermeant dye that stains DNA in late apoptotic and necrotic cells with compromised membranes.
- Incubate according to manufacturer specifications, protected from light.
3. Flow Cytometry Acquisition & Analysis:
- Acquire data on a flow cytometer (e.g., FACSDiva software on a FACSCanto II).
- Use the following gating strategy to classify cell populations: [2]
- Viable cells: Hoechst⁺ / DiIC1⁺ / Annexin V⁻ / PI⁻
- Early Apoptotic: Hoechst⁺ / Annexin V⁺ / PI⁻
- Late Apoptotic: Hoechst⁺ / Annexin V⁺ / PI⁺
- Necrotic: Hoechst⁺ / Annexin V⁻ / PI⁺
The workflow for this protocol is outlined below.
Standardized Protocol: Macrophage Phenotyping via Membrane Order Sensing
This protocol uses Di-4-ANEPPDHQ fluorescence to differentiate macrophage phenotypes, a method that can be adapted for studying immune cell responses to biomaterials. [6]
1. Cell Culture and Polarization:
- Use THP-1 monocyte cell line. Culture in RPMI 160 media with 20% FBS.
- Differentiate into M0 macrophages using 150 nM PMA for 24 hours.
- Polarize into M1 macrophages using 100 ng/mL LPS and 20 ng/mL IFN-γ for 72 hours.
- Polarize into M2 macrophages using 20 ng/mL IL-4 and 20 ng/mL IL-13 for 72 hours.
2. Fluorescence Staining and Imaging:
- Seed polarized macrophages in 12-well plates.
- Stain cells with 2:1000 Di-4-ANEPPDHQ in serum-free media for 1 hour.
- Fix cells with 4% formaldehyde for 20 minutes in the dark.
- Counterstain nuclei with DAPI (1:1500 in PBS) for 15 minutes.
3. Analysis:
- Image using a fluorescence microscope.
- Analyze the fluorescence emission shift. M1 macrophages show a depolarized membrane (red shift), while M2 macrophages show a hyperpolarized membrane (blue shift). [6]
| Method | Principle | Key Readout | Advantages | Limitations | Best for Biomaterial Context |
|---|---|---|---|---|---|
| Flow Cytometry (FCM) | Multi-parametric scattering & fluorescence | Viability %, apoptosis/necrosis distinction | High-throughput, quantitative, distinguishes death pathways | Requires single-cell suspension, specialized instrument | Particulate systems; precise subpopulation analysis |
| Fluorescence Microscopy (FM) | Visual imaging of fluorescent stains | Morphology, direct visualization | Direct cell imaging, spatial context | Sampling bias, autofluorescence interference, low throughput | Initial adhesion and morphological assessment |
| MTT Assay | Mitochondrial reductase activity | Formazan product (Absorbance) | Easy, cost-effective, high-throughput | False positives from metabolic stimulants; insoluble product | High-throughput screening (with validation) |
| LDH Assay | Lactate dehydrogenase release from damaged cells | Formazan product (Absorbance) | Measures membrane damage, easy | False positives from non-death related LDH release | Quantifying direct membrane damage/necrosis |
| ATP Assay | Cellular ATP content via luciferase | Luminescence signal | Highly sensitive, correlates with metabolically active cells | Does not distinguish cell death type | Real-time viability of 3D bioprinted constructs [5] |
| Particle Size | Concentration (mg/mL) | Incubation Time | Viability (Fluorescence Microscopy) | Viability (Flow Cytometry) | Dominant Cell Death Pathway (via FCM) |
|---|---|---|---|---|---|
| < 38 µm | 100 | 3 h | 9% | 0.2% | Necrosis / Late Apoptosis |
| < 38 µm | 100 | 72 h | 10% | 0.7% | Necrosis / Late Apoptosis |
| 315-500 µm | 100 | 72 h | >70% (estimated) | >70% (estimated) | Viable (Low cytotoxicity) |
| Control (No particles) | 0 | 72 h | >97% | >97% | Viable |
The Scientist's Toolkit: Research Reagent Solutions
Table 3: Essential Reagents for Cell Viability and Death Pathway Analysis
| Reagent / Assay | Function / Target | Key Application in Biomaterial Testing |
|---|---|---|
| Propidium Iodide (PI) | DNA intercalator, membrane impermeant | Labels dead cells with compromised plasma membranes in flow cytometry and fluorescence microscopy. [2] [1] |
| Annexin V (FITC conjugate) | Binds phosphatidylserine (PS) | Detects early-stage apoptosis, where PS is externalized but the membrane is still intact. [2] |
| MTT Tetrazolium | Reduced by mitochondrial enzymes | Colorimetric assay to measure metabolic activity as an indicator of cell viability. [4] [1] |
| LDH Assay Kit | Detects Lactate Dehydrogenase enzyme | Measures cytotoxicity by quantifying LDH released from cells with damaged membranes. [3] [4] |
| Hoechst 33342 | Cell-permeant DNA stain | Labels all nucleated cells, used to identify the total cell population in multiplex assays. [2] |
| Di-4-ANEPPDHQ | Voltage-sensitive dye sensing membrane order | Detects changes in membrane lipid order, used to differentiate immune cell phenotypes like M1/M2 macrophages. [6] |
| CD64 & CD206 Antibodies | Cell surface markers (M1 & M2) | Used with flow cytometry to definitively identify pro-inflammatory (M1) and anti-inflammatory (M2) macrophage polarization. [6] |
Cell Death Pathway Signaling
Understanding the specific cell death pathway activated by a biomaterial is crucial for interpreting biocompatibility. The following diagram illustrates the key signaling pathways of apoptosis, necroptosis, and pyroptosis.
The Critical Role of Accurate Viability Data in Preclinical Biomaterial Evaluation
Troubleshooting Guides
Guide 1: Addressing Inconsistent Viability Readings Between Techniques
Problem: Cell viability measurements for the same biomaterial sample differ significantly between analysis techniques (e.g., fluorescence microscopy vs. flow cytometry).
Explanation: Different techniques have varying sensitivities, sample preparation protocols, and are susceptible to different interference factors. For instance, fluorescence microscopy (FM) can be affected by material autofluorescence and sampling bias, whereas flow cytometry (FCM) provides high-throughput, quantitative single-cell analysis but requires cells in suspension [2].
Solution:
- Validate with a reference technique: If results are inconsistent, use a more precise technique like flow cytometry for validation. One study showed a strong correlation (r=0.94) between FM and FCM data, but FCM demonstrated superior precision, especially under high cytotoxic stress from bioactive glass particles [2].
- Characterize biomaterial properties: Assess if your biomaterial has strong autofluorescence or light-scattering properties that could interfere with fluorescence microscopy. Biomaterials like polymers and glasses can "inhibit fluorescence imaging" and limit analysis [2].
- Use control materials: Implement control materials, such as reference beads, to benchmark image quality (focus, brightness) in image-based assays like trypan blue exclusion. This helps standardize measurements across instruments and users [7].
Guide 2: Managing Biomaterial-Induced Interference in Viability Assays
Problem: The biomaterial itself interferes with the viability assay, leading to false positives or negatives.
Explanation: Particulate biomaterials can cause background signals in fluorescence imaging. Furthermore, as they dissolve, they can alter the local microenvironment (e.g., pH), which independently affects cell health and dye performance [2].
Solution:
- Monitor environmental changes: Track the pH of the culture medium. The dissolution of ions from bioactive materials like Bioglass 45S5 can significantly increase pH, contributing to cytotoxicity and confounding results [2].
- Select a less susceptible method: If using FM is problematic due to interference, switch to FCM. Flow cytometry can overcome issues of autofluorescence and light scattering by rapidly analyzing large numbers of cells and providing objective quantification [2].
- Optimize staining protocols: For image-based assays, ensure the staining protocol is optimized for your specific biomaterial-cell system. This may involve adjusting dye concentration or incubation time to improve the signal-to-noise ratio.
Guide 3: Minimizing Variability in Image-Based Viability Measurements
Problem: High variability in cell viability results when using image-based systems like trypan blue exclusion or fluorescence microscopy.
Explanation: Image acquisition and analysis steps are significant sources of variability. Factors like focal plane, brightness, and image analysis algorithm parameters can drastically alter the reported viability [7].
Solution:
- Control image focus and brightness: Use control beads to establish a reproducible focal plane and benchmark light intensity. One study showed that the same cell sample could yield viability results ranging from 19% to 70% simply due to a change in focus [7].
- Systematically optimize analysis parameters: Use a design of experiments (DOE) approach to evaluate the sensitivity of the viability measurement to image analysis parameters (e.g., cell size, shape, brightness). Optimize these parameters using health-compromised cell samples, as they are most sensitive to parameter changes [7].
- Increase sample size: Fluorescence microscopy typically samples only a few fields of view, which can lead to sampling bias. Where possible, increase the number of fields of view analyzed or use a method like FCM that analyzes a much larger cell population [2].
Frequently Asked Questions (FAQs)
FAQ 1: When should I use flow cytometry over fluorescence microscopy for viability assessment?
Use flow cytometry when you require:
- High-throughput, quantitative data from a large number of cells [2].
- Superior precision and statistical resolution, particularly under conditions of high cytotoxic stress [2].
- Distinction between different cell death modes (e.g., early/late apoptosis vs. necrosis) using multiparametric staining [2].
- To overcome background interference from particulate biomaterials [2].
Use fluorescence microscopy when:
- You need direct visualization of cell morphology and spatial distribution on or near the biomaterial [2].
- Your available instrumentation is limited to microscopy.
- The biomaterial does not cause significant autofluorescence or light scattering.
FAQ 2: How does biomaterial particle size and concentration affect cell viability?
Particle size and concentration are critical factors. Studies on bioactive glass (Bioglass 45S5) have demonstrated a clear trend: smaller particles and higher concentrations cause greater cytotoxicity [2]. For example:
- Particles < 38 µm at 100 mg/mL reduced cell viability to below 10% as measured by FM.
- Larger particles (315-500 µm) at the same concentration were significantly less cytotoxic. This is often linked to increased ion release and a more pronounced pH change in the microenvironment with smaller particles and higher doses [2].
FAQ 3: What are the key sources of error in a standard trypan blue viability assay?
The main sources of error in the trypan blue dye exclusion assay occur at each step of the measurement process [7]:
- Sample Preparation: Inconsistent mixing of dye and cell suspension.
- Data Collection (Image Acquisition):
- Focus: Viability counts are highly dependent on the focal plane.
- Brightness/Exposure: Variations in light intensity affect cell appearance.
- Data Analysis (Image Analysis):
- Algorithm Parameters: Inappropriate settings for cell size, shape, or brightness can misclassify viable and non-viable cells.
FAQ 4: Why is it important to use relevant cell lines for cytotoxicity testing?
Using biologically relevant cell lines is crucial because:
- Cell lines are often tumor-derived and may not represent the specific cells and tissues that will contact the medical device in vivo [8].
- Primary cells, such as human blood-derived monocytes that differentiate into macrophages, may provide a more accurate model for the foreign body reaction than proliferative, tumor-derived macrophage cell lines [8].
- The appropriate cell line for the intended application should be utilized to generate biologically meaningful cytotoxicity data [8].
Table 1: Comparison of Cell Viability Measured by Fluorescence Microscopy (FM) and Flow Cytometry (FCM). Data adapted from a study exposing SAOS-2 cells to Bioglass 45S5 particles [2].
| Particle Size (µm) | Concentration (mg/mL) | Time (h) | Viability by FM (%) | Viability by FCM (%) |
|---|---|---|---|---|
| Control | - | 3 | >97 | >97 |
| < 38 | 100 | 3 | 9 | 0.2 |
| < 38 | 100 | 72 | 10 | 0.7 |
Table 2: Impact of Image Analysis Parameters on Reported Viability. Settings for features like size, shape, and brightness can significantly alter results, especially for health-compromised cells [7].
| Cell Sample Health Status | Impact of Image Analysis Parameter Settings |
|---|---|
| Healthy Cells | Low to moderate sensitivity to parameter changes. |
| Health-Compromised/Less Viable Cells | Profound effect on reported viability; requires careful parameter optimization. |
Experimental Protocols
Protocol 1: Assessing Cytocompatibility via Flow Cytometry
This protocol is for evaluating the cytotoxicity of particulate biomaterials on adherent cells using multiparametric flow cytometry to distinguish viable, apoptotic, and necrotic populations [2].
- Cell Culture: Seed osteoblast-like cells (e.g., SAOS-2) in culture plates and allow them to adhere.
- Biomaterial Treatment: Expose cells to the biomaterial (e.g., Bioglass 45S5 particles) at varying sizes (e.g., <38 µm, 63-125 µm, 315-500 µm) and concentrations (e.g., 25, 50, 100 mg/mL) for defined periods (e.g., 3 h and 72 h).
- Cell Harvesting: After incubation, harvest cells from the plate using a gentle method like trypsinization.
- Staining: Resuspend the cell pellet in staining solution containing a multiparametric dye cocktail. A typical cocktail may include:
- Hoechst: Stains DNA for cell identification.
- DiIC1: Labels active mitochondria in viable cells.
- Annexin V-FITC: Binds to phosphatidylserine exposed on the surface of cells in early apoptosis.
- Propidium Iodide (PI): Enters cells with compromised membranes (late apoptotic and necrotic cells).
- Incubation: Incubate the cell suspension according to dye manufacturers' instructions, protected from light.
- Flow Cytometry Analysis: Analyze the stained cells on a flow cytometer. Use unstained and single-stained controls to set up compensation and gating.
- Data Analysis: Classify cell populations based on staining patterns:
- Viable: Hoechst+, DiIC1+, Annexin V-, PI-.
- Early Apoptotic: Hoechst+, Annexin V+, PI-.
- Late Apoptotic/Necrotic: Hoechst+, Annexin V+, PI+.
Protocol 2: Controlled Trypan Blue Viability Measurement
This protocol incorporates controls to minimize variability in trypan blue-based measurements [7].
- Sample and Stain: Mix a volume of cell suspension with an equal volume of 0.4% trypan blue solution.
- Load Control Beads: For instruments that allow it, use a suspension of control beads (e.g., ViaCheck beads) to establish a reference focal plane and benchmark image quality.
- Image Acquisition: Load the trypan blue/cell mixture into a counting chamber and acquire images. If using an automated system, ensure the focus is calibrated using the control beads.
- Image Analysis Optimization (Prior to Experiment):
- Use a design of experiments (DOE) approach.
- Systematically vary image analysis parameters (e.g., cell diameter, brightness threshold, circularity) using a sample of known, low viability.
- Identify the set of parameters that provides the most accurate and consistent results against a manual count or standard.
- Analysis: Run the optimized analysis protocol on your experimental samples.
- Calculation: Viability (%) = (Number of viable cells / Total number of cells) × 100.
Experimental Workflows and Pathways
Diagram 1: Cell Viability Measurement Process
Diagram 2: Technique Selection Workflow
The Scientist's Toolkit: Research Reagent Solutions
Table 3: Key Reagents for Cell Viability and Cytocompatibility Assessment.
| Reagent / Material | Function / Application |
|---|---|
| Propidium Iodide (PI) | A DNA stain that is excluded by viable cells. Commonly used in live/dead assays to identify necrotic cells or those with compromised membranes [2]. |
| Fluorescein Diacetate (FDA) | A cell-permeant esterase substrate. Conversion to fluorescein in live cells labels them green. Often used with PI for simultaneous live/dead staining in fluorescence microscopy [2]. |
| Annexin V-FITC | Binds to phosphatidylserine (PS) on the outer leaflet of the cell membrane, a marker for early apoptosis. Used in flow cytometry in combination with PI to distinguish early apoptotic (Annexin V+/PI-) from late apoptotic/necrotic (Annexin V+/PI+) cells [2]. |
| Hoechst Stains | Cell-permeant blue fluorescent DNA stains. Used to identify all nucleated cells in a sample for normalization in flow cytometry or to locate nuclei in microscopy [2]. |
| Trypan Blue | A diazo dye excluded by intact membranes of viable cells. A standard for brightfield microscopic cell counting and viability determination using manual or automated systems [7]. |
| Control Beads (e.g., ViaCheck) | Used as a reference material to establish a consistent focal plane and benchmark image quality (focus, brightness) in image-based viability analyzers, reducing instrumental variability [7]. |
Troubleshooting Guides and FAQs
How does autofluorescence interfere with biomaterial testing, and how can I mitigate it?
Autofluorescence is the natural emission of light by biological structures and is a common source of background noise in fluorescence-based assays. This signal can obscure specific fluorescence from labels and dyes, leading to inaccurate cell viability and functionality assessments [9] [10] [11].
Mitigation Strategies:
- Optical Filtering: Use optical filters to isolate the emission spectrum of your specific fluorescent dye from the broader autofluorescence signal [10] [11].
- Shift to Longer Wavelengths: Use fluorophores that excite and emit in the near-infrared (NIR) range (e.g., Cy7, Alexa Fluor 750), as most biomaterial autofluorescence occurs in the UV-green spectrum [9].
- Choose Alternative Imaging Modalities: For thick samples, confocal or multiphoton microscopy can minimize out-of-focus autofluorescence. Bioluminescence imaging avoids the issue entirely, as it does not require excitation light [9].
- Chemical and Processing Controls: Use phenol red-free media and non-fluorescent cultureware. Aldehyde fixatives can create fluorescent crosslinks; consider replacing them with non-aldehyde alternatives [9].
Table 1: Common Sources of Autofluorescence in Biological Samples
| Endogenous Fluorophore | Localization | Typical Excitation/Emission (nm) | Potential Impact on Assays |
|---|---|---|---|
| NAD(P)H [9] [11] | Cytoplasm, Mitochondria | Ex: 340 / Em: 450 [9] | Metabolic activity assays; high background in live-cell imaging. |
| Flavins (FAD) [9] [11] | Mitochondria | Ex: 380-490 / Em: 520-560 [9] | Interferes with green fluorescent protein (GFP) variants. |
| Collagen [9] [10] | Extracellular Matrix | Ex: 270-340 / Em: 390-410 [9] [11] | Strong background in tissue samples and engineered scaffolds. |
| Elastin [9] [11] | Extracellular Matrix, Skin | Ex: 350-450 / Em: 420-520 [9] | Interferes with blue-green fluorophores. |
| Lipofuscin [9] [11] | Lysosomes, Aging Cells | Ex: 345-490 / Em: 460-670 [9] | Broad spectrum can interfere with multiple channels. |
| Tryptophan [9] | Most Proteins | Ex: 280 / Em: 350 [9] | Found in most folded proteins, pervasive background. |
What are the best practices for detecting and managing particulate interference in cell viability assays?
Particulates, including biomaterial debris or aggregates of therapeutic cells, can interfere with viability assays by adsorbing assay components, chemically reacting with reagents, or altering light absorption [12] [13].
Mitigation Strategies:
- Include Particle-Only Controls: Always run cell-free control experiments with your particles at the tested concentrations to identify interference [12].
- Assay Validation: If particles interfere with a standard assay (e.g., MTT), switch to an orthogonal method with a different detection principle. For example, if MTT is affected, use a flow cytometry-based viability assay [12] [2].
- Characterize Particulates: Use methods like Side Illumination Membrane Imaging (SIMI) to detect and characterize extrinsic particulates and contaminants in your samples [13].
Table 2: Common Viability Assays and Potential Particulate Interference
| Assay | Measurement Principle | Common Particulate Interferences |
|---|---|---|
| MTT [12] | Metabolic reduction of tetrazolium salt to colored formazan | Carbonaceous particles can directly reduce MTT to formazan without cells [12]. |
| LDH [12] | Measures lactate dehydrogenase enzyme released from damaged cells | Particles can adsorb or inactivate the LDH enzyme, reducing the measured signal [12]. |
| Fluorescence Microscopy [2] | Visual counting of live/dead cells with fluorescent stains | Particles can cause background autofluorescence and light scattering, inhibiting imaging [2]. |
| Flow Cytometry [2] | Quantitative analysis of fluorescently-labeled single cells in suspension | Less susceptible to particulate background, but cell-particle aggregates can cause analysis errors [2]. |
How can sampling bias affect the accuracy of my biomaterial research outcomes?
Sampling bias is a systematic error that occurs when the sample collected is not representative of the whole, leading to unreliable and non-reproducible results. In biomaterials research, this can misrepresent the true performance of a material [14] [15] [16].
Mitigation Strategies:
- Standardize Collection: Use the same collection device, manufacturer, and personnel for all samples to minimize technical variation [15].
- Randomize Processing: Randomize samples during extraction, staining, and analysis to ensure technical variation is spread equally and does not correlate with experimental groups [15].
- Account for Heterogeneity: For solid tissues or scaffolds, use homogenization and representative sampling where possible to overcome spatial bias, rather than relying on a single small biopsy [16].
- Blinded Analysis: Ensure that the personnel analyzing the data are blinded to the experimental groups to prevent conscious or unconscious bias during data interpretation.
Flow Cytometry vs. Fluorescence Microscopy: Which is better for assessing cytotoxicity of particulate biomaterials?
Both techniques are valid but have different strengths. A 2024 study directly comparing them for bioactive glass (BG) cytotoxicity found that while both showed a strong correlation (r=0.94), flow cytometry (FCM) offered superior precision, sensitivity, and could distinguish between apoptosis and necrosis [2].
Experimental Protocol from Literature [2]:
- Cell Line: SAOS-2 osteoblast-like cells.
- Treatment: Exposure to Bioglass 45S5 particles of different sizes (<38 µm, 63–125 µm, 315–500 µm) at concentrations of 25, 50, and 100 mg/mL for 3 and 72 hours.
- Viability Staining:
- Fluorescence Microscopy (FM): Used Fluorescein Diacetate (FDA) for live cells and Propidium Iodide (PI) for dead cells.
- Flow Cytometry (FCM): Used multiparametric staining with Hoechst (nuclei), DiIC1 (mitochondria), Annexin V-FITC (apoptosis), and PI (necrosis).
- Key Finding: Under high cytotoxic stress (<38 µm particles at 100 mg/mL), FM assessed viability at 9%, while the more sensitive FCM measured it at 0.2-0.7%, revealing FCM's greater ability to detect rare live cells in a largely dead population [2].
Table 3: Comparison of Flow Cytometry and Fluorescence Microscopy for Viability Assessment
| Parameter | Flow Cytometry (FCM) | Fluorescence Microscopy (FM) |
|---|---|---|
| Principle | Quantitative analysis of cells in suspension [2] | Direct imaging of cells on a substrate [2] |
| Throughput | High-throughput; analyzes thousands of cells rapidly [2] | Low-throughput; limited to a few fields of view [2] |
| Quantification | Highly precise, automated cell counting [2] | Can be semi-quantitative; prone to operator bias [2] |
| Sensitivity | High; better at detecting rare cell populations [2] | Lower; can miss rare events [2] |
| Spatial Information | No | Yes; provides morphological context [2] |
| Cell State Discrimination | Excellent; can resolve viable, apoptotic, and necrotic populations [2] | Limited; typically distinguishes only live/dead [2] |
| Impact of Autofluorescence | Can be gated out during analysis [2] | Can inhibit imaging and analysis [2] |
The Scientist's Toolkit: Key Research Reagent Solutions
Table 4: Essential Materials and Reagents for Robust Cell Viability Assays
| Item | Function & Rationale |
|---|---|
| Phenol Red-Free Media | Eliminates background fluorescence from the culture medium, crucial for fluorescence imaging and assays [9] [17]. |
| Glass-Bottom Culture Plates | Provide a non-fluorescent substrate for high-resolution imaging, avoiding the strong autofluorescence of plastic [9]. |
| Non-Aldehyde Fixatives | Prevent the formation of fluorescent crosslinks that occur with common fixatives like formaldehyde and glutaraldehyde [9]. |
| Near-Infrared (NIR) Dyes | Fluorophores (e.g., Cy7, Alexa Fluor 750) whose excitation/emission profiles avoid the common ranges of biological autofluorescence [9] [10]. |
| Mechanical Lysis Kits (Bead-Beating) | Ensure efficient and uniform lysis of diverse cell types and microbes for unbiased DNA/RNA extraction in molecular analyses [15]. |
| Enzymatic Assay Kits with Orthogonal Readouts | Having kits for the same endpoint (e.g., viability) but different principles (e.g., MTT vs. LDH vs. ATP) allows for cross-validation against particulate interference [12]. |
The Organisation for Economic Co-operation and Development (OECD) provides a standardized classification for cell viability assessment methods, which is crucial for ensuring consistency, reliability, and regulatory compliance in scientific research, particularly in toxicology and biomaterials testing [18]. These standardized methods are globally accepted and help in comparing and validating results across different studies, which is essential for the approval of new drugs, chemicals, and biomedical products [18]. The OECD categorizes cell viability methods into four main groups based on their operating principles: non-invasive cell structure damage, invasive cell structure damage, cell growth, and cellular metabolism [18]. Some novel methods, such as those based on cell membrane potential, represent emerging categories not yet formally incorporated into the OECD framework [18].
For researchers evaluating biomaterials for applications such as dental pulp regeneration or retinal prostheses, selecting the appropriate OECD-categorized viability method is a critical first step in biocompatibility assessment [3] [19]. These classifications help researchers navigate the extensive array of available techniques by grouping them according to their fundamental measurement approaches, enabling more informed methodological selections that align with specific research endpoints and material characteristics.
OECD Method Classifications and Technical Comparison
Table 1: OECD Classification of Cell Viability Assessment Methods
| OECD Category | Example Methods | Measurement Principle | Common Applications | Key Advantages |
|---|---|---|---|---|
| Structural Cell Damage (Non-invasive) | LDH assay, AK assay, G3PDH assay | Detection of cytoplasmic enzymes leaked from damaged cells | High-throughput screening, acute toxicity testing | Measures released markers without cell disruption |
| Structural Cell Damage (Invasive) | Trypan blue, propidium iodide, esterase cleavage assays | Dye penetration into compromised cells or enzymatic conversion within viable cells | Basic research, routine cell culture monitoring | Direct visualization, cost-effective |
| Cell Growth | Proliferation assays, BrdU incorporation | Measurement of population doubling or DNA synthesis | Long-term toxicity studies, growth factor response | Direct correlation with proliferative capacity |
| Cellular Metabolism | MTT, WST-1, ATP assays | Detection of metabolic activity or ATP content | Drug sensitivity testing, metabolic inhibition studies | High sensitivity, applicability to various cell types |
Table 2: Technical Comparison of Common Cell Viability Assays
| Assay Method | OECD Category | Detection Mechanism | Signal Readout | Throughput Capacity |
|---|---|---|---|---|
| LDH Assay | Structural damage (non-invasive) | Lactate dehydrogenase release from damaged cells | Colorimetric (490 nm) | High |
| Trypan Blue | Structural damage (invasive) | Membrane impermeability dye exclusion | Microscopic counting | Low to medium |
| MTT Assay | Cellular metabolism | Mitochondrial reduction of tetrazolium salt | Colorimetric (570 nm) | Medium to high |
| WST-1 Assay | Cellular metabolism | Mitochondrial dehydrogenase activity | Colorimetric (440-450 nm) | High |
| ATP Assay | Cellular metabolism | Cellular ATP content | Bioluminescence | High |
| BrdU Assay | Cell growth | DNA synthesis incorporation | Colorimetric/fluorescence | Medium |
OECD Cell Viability Classification Framework
Troubleshooting Guides and FAQs
Method Selection and Interpretation
How do I select the most appropriate viability assay for my biomaterials research? Consider your experimental endpoint, material properties, and cell type when selecting an assay. For initial biocompatibility screening of materials, combine methods from different OECD categories. For example, use a metabolic assay (e.g., WST-1) with a membrane integrity assay (e.g., LDH) to capture different aspects of cellular response [3]. Materials that actively influence cellular metabolism, such as those containing NAD+ precursors like nicotinamide, may require membrane integrity assays rather than metabolic assays for accurate viability assessment [3].
Why do I get conflicting results between different viability assays? Different assays measure distinct physiological aspects of cells. Metabolic assays like MTT and WST-1 may show preserved activity in stressed but viable cells, while membrane integrity assays like LDH might indicate contemporaneous damage [18] [3]. Cells undergoing senescence may remain metabolically active while having ceased proliferation, giving different signals across assay categories [18]. Always interpret results within the context of your specific experimental conditions and biomaterial properties.
Technical Issues and Optimization
How can I address high background signal in LDH assays? High background in LDH assays can result from several factors: (1) FBS in culture media contains inherent LDH activity - use serum-free media during the assay period; (2) Cellular stress during handling can cause LDH release - minimize mechanical disturbance; (3) Material interference - include material-only controls without cells to account for background signal [18]. For biomaterials testing, ensure your material isn't adsorbing the formazan product or directly interfering with the enzymatic reaction [20].
What causes inconsistent results in tetrazolium-based assays (MTT, WST-1) with biomaterials? Tetrazolium reduction assays are particularly susceptible to interference from materials with redox activity or those that scavenge electrons [18]. Nanomaterials, in particular, can directly reduce tetrazolium salts, leading to false positive signals [18]. To address this: (1) Include comprehensive material-only controls; (2) Consider using ATP assays instead, as they are less prone to chemical interference; (3) Optimize incubation time to ensure the signal is within the linear range [21].
Why does trypan blue staining sometimes overestimate viability? Trypan blue can underestimate cell death with short incubation periods because it requires time to penetrate compromised membranes [18]. However, prolonged incubation can lead to dye aggregate dissociation, staining viable cells and causing viability overestimation [18]. Optimize incubation time for your specific cell type, typically 3-5 minutes, and count cells immediately after mixing with trypan blue. For biomaterials that affect membrane permeability, consider confirming results with a fluorescent viability dye like propidium iodide [20].
Detailed Experimental Protocols
LDH Release Assay Protocol
Principle: This non-invasive method measures lactate dehydrogenase (LDH) release from cells with damaged membranes, a marker of irreversible cell death [18].
Materials Required:
- LDH assay kit (commercially available)
- Serum-free cell culture medium
- 96-well flat-bottom plates
- Microplate reader capable of reading at 490 nm
- Test biomaterials
Procedure:
- Seed cells in 96-well plates at optimal density and incubate overnight.
- Expose cells to test biomaterials for desired treatment period.
- Following incubation, centrifuge plates at 250 × g for 5 minutes to pellet cells and debris.
- Transfer 50 μL of supernatant from each well to a new 96-well plate.
- Add 50 μL of LDH reaction mixture to each well containing supernatant.
- Incubate for 30 minutes at room temperature, protected from light.
- Measure absorbance at 490 nm, with reference wavelength at 630-650 nm.
- Calculate percentage cytotoxicity: (Experimental LDH release - Spontaneous LDH release) / (Maximum LDH release - Spontaneous LDH release) × 100.
Troubleshooting Notes:
- Maximum LDH release is determined by lysing control cells with 1% Triton X-100.
- Spontaneous LDH release comes from untreated control cells.
- For biomaterials that sediment, ensure uniform distribution during treatment and avoid sampling settled material during supernatant transfer [18] [20].
WST-1 Cell Viability Assay Protocol
Principle: This metabolism-based assay measures the reduction of water-soluble tetrazolium salt (WST-1) to formazan by mitochondrial dehydrogenases in viable cells [21].
Materials Required:
- WST-1 reagent
- 96-well tissue culture-treated plates
- Microplate reader (440-450 nm with 600-650 nm reference)
- CO₂ incubator
Procedure:
- Seed cells in 96-well plates at optimized density (typically 5,000-20,000 cells/well depending on cell type).
- Incubate for 24-96 hours under standard culture conditions.
- Add WST-1 reagent directly to each well (10 μL per 100 μL culture medium).
- Incubate for 0.5-4 hours, monitoring color development periodically.
- Measure absorbance at 440-450 nm with a reference wavelength above 600 nm.
- Calculate cell viability: (Absorbance of treated cells / Absorbance of untreated cells) × 100.
Technical Considerations:
- Optimal incubation time with WST-1 varies by cell type and must be determined empirically.
- Include blank controls (medium + WST-1, no cells) to subtract background.
- For biomaterials testing, include material-only controls (material + medium + WST-1) to detect interference.
- The assay is non-radioactive, provides rapid results, and is more sensitive than MTT [21].
- Unlike MTT, the formazan product is water-soluble, eliminating the need for solubilization steps [21].
WST-1 Assay Workflow
Research Reagent Solutions
Table 3: Essential Reagents for Cell Viability Assessment
| Reagent/Chemical | Function | Application Examples | Key Considerations |
|---|---|---|---|
| WST-1 Reagent | Tetrazolium salt reduced by mitochondrial dehydrogenases to water-soluble formazan | Metabolic activity measurement in viability assays | More sensitive than MTT, no solubilization required [21] |
| MTT Reagent | Tetrazolium salt reduced to insoluble formazan crystals | Historical standard for metabolic activity assessment | Requires solubilization with organic solvents [22] |
| LDH Assay Kit | Measures lactate dehydrogenase release from damaged cells | Membrane integrity assessment, cytotoxicity testing | Can have high background; requires serum-free conditions [18] |
| Trypan Blue Solution | Vital dye excluded by intact membranes | Direct cell counting, basic viability assessment | Incubation time critical; can underestimate death [18] |
| Propidium Iodide | DNA-binding fluorescent dye impermeant to live cells | Flow cytometry, fluorescence microscopy | Distinguishes late apoptotic/necrotic cells [20] |
| Annexin V-FITC | Binds phosphatidylserine exposed on apoptotic cells | Apoptosis detection in combination with PI | Identifies early apoptotic cells [20] |
| ATP Detection Reagents | Luciferase-based detection of cellular ATP | Highly sensitive viability measurement | Less prone to chemical interference than tetrazolium assays [18] |
| BrdU Labeling Reagents | Thymidine analog incorporated into DNA during synthesis | Cell proliferation measurement | Requires DNA denaturation for detection [18] |
The OECD classification system provides a valuable framework for selecting and interpreting cell viability assessment methods in biomaterials research. By understanding the principles, advantages, and limitations of assays across different categories—structural damage, cell growth, and cellular metabolism—researchers can make informed decisions that enhance the reliability of their biocompatibility evaluations. The troubleshooting guidance and detailed protocols presented here address common experimental challenges, particularly those encountered when working with novel biomaterials. As the field advances, emerging methods based on cell membrane potential and other novel parameters will likely expand these standardized classifications, further refining our ability to accurately assess cell-material interactions.
A Practical Guide to Cell Viability Methods for Biomaterial Testing
Dye Exclusion and Membrane Integrity Assays (Trypan Blue, Propidium Iodide)
Accurate assessment of cell viability is a critical component in biomaterials testing research, where the interaction between cells and novel materials must be precisely quantified to determine biocompatibility and cytotoxic effects. Dye exclusion assays serve as fundamental tools for these assessments, providing insights into cell membrane integrity—a key indicator of cell health. This technical support center focuses on two principal techniques: the Trypan Blue exclusion assay and Propidium Iodide staining. Within the context of a thesis aimed at improving cell viability assessment methodologies, this resource addresses the specific challenges researchers encounter when applying these assays to biomaterials research. The following sections provide detailed troubleshooting guides, frequently asked questions, standardized protocols, and visual workflows to support researchers, scientists, and drug development professionals in obtaining reliable and reproducible viability data.
Troubleshooting Guides
Trypan Blue Assay Troubleshooting
Problem: Inconsistent Viability Measurements Between Replicates
| Possible Cause | Explanation | Recommended Solution |
|---|---|---|
| Prolonged dye incubation | Trypan blue is toxic and can gradually damage cells, leading to false positives for dead cells over time [23]. | Strictly limit incubation time to 3-5 minutes after mixing cells with the dye [24] [25]. |
| Subjectivity in manual counting | Distinguishing between faintly stained cells and cellular debris is prone to human error [23]. | Use an automated cell counter for consistency. For manual counts, establish clear, objective criteria and have multiple researchers count the same sample. |
| Dye precipitation | Aged Trypan blue solutions can form aggregates and crystals that may be mistaken for stained cells [26] [25]. | Filter the Trypan blue solution through a 0.2 µm filter prior to use to remove crystals and aggregates [26]. |
| High concentration of dead cells | Trypan blue is less accurate for samples with viability below 70%, often overestimating viability compared to fluorescent methods [26]. | For low-viability samples, confirm results with a more sensitive fluorescent method, such as propidium iodide. |
Problem: Low Cell Count Accuracy
| Possible Cause | Explanation | Recommended Solution |
|---|---|---|
| Improper sample mixing | Cells can settle quickly, leading to uneven distribution and inaccurate counts in the hemocytometer [25]. | Mix the cell suspension thoroughly and consistently immediately before loading the chamber. |
| Incorrect chamber loading | Over- or under-filling the counting chamber disrupts the capillary action and volume, making counts invalid. | Ensure the liquid is drawn into the chamber by capillary action without overflow or bubbles. |
| Cell clumping | Aggregated cells make it impossible to count individual cells accurately. | Gently vortex the cell suspension. If clumping persists, use a pipette tip to gently disaggregate or filter the sample. |
Propidium Iodide (PI) Assay Troubleshooting
Problem: High Background Fluorescence or False Positives
| Possible Cause | Explanation | Recommended Solution |
|---|---|---|
| Presence of RNA | PI binds to both DNA and RNA. Cytoplasmic RNA staining can cause a diffuse red glow, misinterpreted as a dead cell [27]. | Treat samples with RNase A during the staining procedure to digest RNA and ensure staining is specific for nuclear DNA [27]. |
| Inadequate washing steps | Residual serum or culture media components can contribute to background signal. | Include 2-3 wash steps with PBS or buffer after cell harvesting and before adding PI to remove extracellular debris [27]. |
| Fc receptor binding | In certain immune cells, antibodies can bind non-specifically to Fc receptors, causing false positives [28]. | Block cells with Bovine Serum Albumin (BSA) or an Fc receptor blocking reagent prior to staining [28]. |
| Extended staining time | Fluorescence can fade if cells are left in PI for extended periods, and dye may eventually penetrate live cells. | Analyze samples within 30 minutes of staining and protect them from light [29]. |
Problem: Weak or No Fluorescence Signal
| Possible Cause | Explanation | Recommended Solution |
|---|---|---|
| Insufficient permeabilization | For fixed cells, the dye cannot access nuclear DNA if the membrane is not adequately permeabilized. | For intracellular staining, use an appropriate permeabilization agent like ice-cold methanol or Triton X-100 [28]. |
| Photobleaching | PI is light-sensitive and prolonged exposure to light can degrade the fluorophore. | Keep stained samples in the dark from the staining step through analysis. |
| Incorrect instrument settings | The flow cytometer or fluorescence microscope may not be configured for PI's excitation/emission. | Ensure instruments are set for excitation around 535 nm and emission collection around 617 nm [29]. |
Frequently Asked Questions (FAQs)
1. What is the core principle behind dye exclusion assays? Dye exclusion assays are based on the fundamental integrity of the cell membrane. Viable cells possess intact plasma membranes that act as a barrier, preventing certain dyes from entering the cell. In contrast, non-viable (dead or dying) cells have compromised membranes, allowing these dyes to pass through, bind to intracellular components, and stain the cell [24] [27]. Trypan Blue binds to intracellular proteins, while Propidium Iodide intercalates with nucleic acids.
2. When should I choose Trypan Blue over Propidium Iodide, and vice versa? The choice depends on your equipment, application, and required sensitivity.
- Trypan Blue is ideal for a quick, simple viability check when using a brightfield microscope or an automated cell counter. It is best suited for cultured cell lines with viabilities greater than 70% [26]. It is not suitable for fixed cells or for distinguishing between early and late apoptotic stages.
- Propidium Iodide is the preferred choice for flow cytometry analysis and when performing co-staining with other fluorescent markers (e.g., Annexin V for apoptosis). It is more sensitive and allows for the analysis of complex cell populations [27]. PI can also be used on fixed and permeabilized cells.
3. Why does my Trypan Blue assay show higher viability than my PI assay, especially in a stressed cell population? This is a common observation and is often not a discrepancy but a reflection of the assays' different sensitivities. A cell in the early stages of apoptosis may still have an intact membrane that excludes the larger Trypan Blue molecule but may be permeable to the smaller PI molecule or be detectable with Annexin V [23]. PI is therefore better at identifying early membrane changes. Furthermore, Trypan blue is known to overestimate viability in samples that are below 70% viable when compared to fluorescent-based methods [26].
4. Can I use PI on live cells without fixation? Yes, for a simple viability assessment, PI can be used on live, unfixed cells. In this case, it will only enter and stain cells with permanently damaged membranes (necrotic/late apoptotic cells). However, if you need to stain for intracellular targets, you must fix and permeabilize the cells, and PI will then stain all cells' nuclei [28] [27].
5. How can I minimize false positives in my PI staining? The primary cause of false positives in PI staining is the binding to RNA. This can be mitigated by adding RNase to your staining solution [27]. Additionally, ensuring proper washing to remove unbound dye and optimizing antibody concentrations (if doing co-staining) to reduce non-specific binding are effective strategies.
Experimental Protocols
Detailed Protocol: Trypan Blue Exclusion Assay
This protocol is adapted for use with a hemocytometer and brightfield microscope [24] [25].
Materials:
- Cell suspension
- 0.4% Trypan Blue solution (filtered through a 0.2 µm filter)
- Phosphate-Buffered Saline (PBS), serum-free
- Hemocytometer
- Microscope
- Microcentrifuge tubes and pipettes
Procedure:
- Prepare Cell Suspension: Centrifuge an aliquot of cells at 100 × g for 5 minutes. Discard the supernatant and resuspend the cell pellet in 1 ml of serum-free PBS or medium. Note: Serum proteins can stain with Trypan blue and must be avoided for accurate results [24].
- Mix with Dye: Mix 10-20 µl of the cell suspension with an equal volume of 0.4% Trypan Blue solution. Gently vortex or pipette to mix.
- Incubate: Allow the mixture to incubate at room temperature for no more than 3-5 minutes [24].
- Load Chamber: Apply a drop of the mixture to the edge of the hemocytometer chamber, allowing it to be drawn under the coverslip by capillary action.
- Count Cells: Place the hemocytometer on the microscope stage and focus on the grid. Count the unstained (viable) and stained (non-viable) cells in the four corner quadrants (each with 16 smaller squares).
- Calculate Viability:
- Total viable cells per ml = (Average viable count per quadrant × Dilution Factor × 10⁴)
- Total cells per ml = (Average total count per quadrant × Dilution Factor × 10⁴)
- Percentage Viability (%) = (Total viable cells per ml / Total cells per ml) × 100
- Dilution Factor is typically 2 for a 1:1 mix.
Detailed Protocol: Propidium Iodide Viability Staining for Flow Cytometry
This protocol is for assessing viability in a population of live, unfixed cells [27] [29].
Materials:
- Cell suspension
- Propidium Iodide (PI) stock solution (e.g., 1 mg/mL)
- Staining buffer (e.g., PBS with 0.1% BSA)
- RNase A (optional, but recommended)
- Flow cytometry tubes
Procedure:
- Harvest and Wash Cells: Harvest up to 1 × 10⁶ cells by centrifugation. Wash the cells by adding 2 mL of staining buffer, centrifuging at 300 × g for 5 minutes, and carefully decanting the supernatant. Repeat this wash step once more [27].
- Prepare Staining Solution: Dilute PI in staining buffer to a final working concentration of 1-5 µg/mL. If performing DNA content analysis for cell cycle, include RNase A (e.g., 100 µg/mL) in this solution.
- Stain Cells: Resuspend the cell pellet in 0.5 - 1 mL of the PI staining solution. Gently vortex to mix.
- Incubate: Incubate the cells in the dark for 15-30 minutes at 4°C or room temperature [27] [29].
- Analyze: Analyze the cells by flow cytometry within 30 minutes. Use a blue laser (488 nm) for excitation and collect fluorescence emission using a detector filter around 617 nm (e.g., PE-Texas Red or PI-specific filter). Viable cells will be PI-negative, while dead cells will be PI-positive.
Assay Workflow and Decision Diagram
The following diagram illustrates the logical workflow for selecting and performing the appropriate dye exclusion assay.
The Scientist's Toolkit: Research Reagent Solutions
The table below details key reagents and their functions in dye exclusion assays.
| Item | Function / Application | Key Considerations |
|---|---|---|
| Trypan Blue (0.4%) | A vital dye used to stain dead cells with compromised membranes for viability counting [26] [24]. | Carcinogenic; handle with care. Filter (0.2 µm) before use to remove crystals. Incubate with cells for no more than 5 min [26] [25]. |
| Propidium Iodide (PI) | A fluorescent nucleic acid stain that enters dead cells, used in flow cytometry and microscopy [27] [29]. | Light-sensitive; store in dark. Can stain RNA; use RNase for DNA-specific staining. Suspected carcinogen [27]. |
| Acridine Orange (AO) | A cell-permeant nucleic acid stain that intercalates with DNA (green) and binds to RNA (red) in lysosomes [23]. | Often used as a counterstain with Trypan blue or PI to provide more information on subcellular compartments [23]. |
| RNase A | An enzyme that degrades RNA. | Critical for PI-based cell cycle analysis to eliminate RNA-associated background fluorescence [27]. |
| Hemocytometer | A microscope slide with a gridded chamber for manually counting and assessing cell concentration and viability. | Requires practice for accuracy. Loading technique is critical to avoid bubbles and ensure correct volume [24]. |
| Annexin V | A protein that binds to phosphatidylserine (PS), which is externalized in early apoptosis. | Used in combination with PI to distinguish between viable (Annexin V-/PI-), early apoptotic (Annexin V+/PI-), and late apoptotic/necrotic (Annexin V+/PI+) cells [27]. |
Metabolic Activity Assays (MTT, Resazurin, ATP Assays)
This technical support guide provides targeted troubleshooting and methodological support for researchers using metabolic activity assays in biomaterials testing. A cornerstone of cell viability assessment, these assays are crucial for evaluating the cytotoxicity of novel biomaterials, a process mandated by regulatory agencies for new drug products and medical devices [30]. However, data inconsistencies in pre-clinical studies highlight a critical need for standardized protocols to ensure reliability and reproducibility [31]. This resource, designed within the context of a thesis on improving cell viability assessment, addresses common pitfalls in MTT, Resazurin, and ATP assays to enhance the robustness of your research findings.
Troubleshooting Guides
Resazurin Assay Troubleshooting
| Problem | Possible Cause | Solution |
|---|---|---|
| Low Signal Intensity | Short incubation time; Suboptimal cell confluence; Incorrect wavelengths [31]. | Optimize incubation time (e.g., 1.5-4 hours); Ensure cells are in log growth phase (~9 x 10³ to ~9 x 10⁴ cells/cm²); Use optimal Ex/Em wavelengths (e.g., 545/590 nm) [31]. |
| High Background Fluorescence | Contaminated reagents; Light exposure [32]. | Filter-sterilize resazurin working solution; Aliquot and store reagents at -20°C; Protect plates from light during incubation [31]. |
| Inconsistent Results Between Replicates | Uneven cell seeding; Meniscus formation in wells [33]. | Ensure a homogeneous cell suspension when seeding; Use hydrophobic plates to minimize meniscus; Check for cell distribution with well-scanning settings on plate reader [33]. |
MTT Assay Troubleshooting
| Problem | Possible Cause | Solution |
|---|---|---|
| Precipitate Not Forming or Dissolving | Insufficient incubation time; Inadequate solubilization [34]. | Ensure full 4-hour incubation with MTT; Confirm SDS-HCl solution is fresh and properly mixed; Extend post-solubilization incubation to 4 hours [34]. |
| High Background Absorbance | Contaminated medium or reagents; Particulate matter in wells [32]. | Use clean, sterile equipment; Centrifuge cell culture medium if precipitate is suspected; Include a control well with medium and MTT only (no cells) [34]. |
| Poor Linear Range | Cell density outside optimal range [34]. | Perform a cell titration experiment (e.g., 10³–10⁵ cells/well) to generate a standard curve and determine the optimal seeding density for your cell line [34]. |
ATP Assay (Luminescence) Troubleshooting
| Problem | Possible Cause | Solution |
|---|---|---|
| High Background Luminescence (RLU) | Dirty luminometer chamber; Static electricity; Contaminated assay tubes [35]. | Clean the instrument chamber regularly; Ground yourself before testing (e.g., touch a metal faucet); Use a different brand of gloves or location to reduce static; Use new, clean assay tubes [35]. |
| Device Won't Take Reading | Depleted battery; Software/connection issue [35]. | Charge the PhotonMaster Bluetooth Module (PBM) via a wall outlet for at least 40 minutes; Clear the device memory; Power cycle the device by draining the battery completely and recharging [35]. |
| Unexpectedly Low Signal | Loss of reagent activity; Incorrect sample storage [36]. | Avoid repeated freeze-thaw cycles of reagents by aliquoting; Ensure samples are processed promptly; Luciferase reaction has a limited half-life, ensure read times are consistent [36]. |
Optimized Experimental Protocols
Standardized Resazurin Assay for A549 Cells in Biomaterial Testing
This protocol is optimized for A549 cells and can be adapted for cytotoxicity testing of biomaterials on other adherent cell lines [31].
Key Reagent Solutions:
- Resazurin Stock Solution: 10 mM in PBS, sterile-filtered, stored at -20°C [31].
- Resazurin Working Solution (WS): 44 µM in complete cell culture medium, prepared fresh before use [31].
- Cell Culture Medium: Use medium with 1% FBS during the assay to reduce background fluorescence [31].
Step-by-Step Methodology:
- Cell Seeding: Seed A549 cells in a 96-well plate at densities ranging from ~9 x 10³ cells/cm² (low) to ~9 x 10⁴ cells/cm² (high) in 100 µL of complete medium. Incubrate overnight for firm attachment [31].
- Treatment: Expose cells to the biomaterial or test compound for the desired duration.
- Assay Initiation: Gently remove the medium from wells. Add 100 µL of freshly prepared Resazurin WS to each well. Include wells with WS only (no cells) as blanks [31].
- Incubation: Incubate the plate for 1.5 to 4 hours at 37°C with 5% CO₂. Protect from light [31].
- Signal Measurement: Transfer the metabolized resazurin WS to a new 96-well plate for reading. Measure fluorescence intensity using a plate reader with excitation at 545 nm and emission at 590 nm [31].
MTT Assay Protocol for Cytocompatibility Screening
This colorimetric protocol is suitable for initial, high-throughput screening of biomaterial cytotoxicity [34].
Key Reagent Solutions:
- MTT Stock Solution: 12 mM in PBS. Store at 4°C for up to four weeks [34].
- SDS-HCl Solubilization Solution: 10% SDS in 0.01 M HCl. Mix until dissolved and use promptly [34].
Step-by-Step Methodology:
- Cell Seeding and Treatment: Seed cells (e.g., 10⁴–10⁵ cells/well) in a 96-well plate and treat with the test biomaterial for 24-48 hours [34].
- Washing: Remove the medium and wash cells with 100 µL of fresh medium or PBS [34].
- MTT Addition: Add 10 µL of the MTT stock solution to each well containing 100 µL of fresh medium [34].
- Formazan Formation: Incubate the plate for 4 hours at 37°C in a CO₂ incubator [34].
- Solubilization: Add 100 µL of the SDS-HCl solution to each well to dissolve the formazan crystals [34].
- Signal Measurement: Mix the solution by pipetting and read the absorbance at 570 nm using a microplate reader [34].
Data Analysis and Instrumentation
Key Quantitative Parameters for Resazurin Assay
The table below summarizes critical performance metrics for a standardized resazurin assay on A549 cells, which are essential for validating your experimental setup [31].
| Parameter | Value / Method | Experimental Context |
|---|---|---|
| Optimal Wavelengths | Ex: 545 nm / Em: 590 nm | Determined for A549 cells to maximize signal-to-noise ratio [31]. |
| Incubation Time | 1.5 - 4 hours | Time-dependent; longer incubations may be needed for very low cell densities [31]. |
| Limit of Blank (LoB) | Calibration Curve Method | Estimated from very low confluence curve (3.5 x 10²–1.8 x 10³ cells/cm²) after 4h incubation [31]. |
| Limit of Detection (LoD) | Calibration Curve Method | Estimated and validated with 10 sample replicates [31]. |
| Limit of Quantification (LoQ) | Calibration Curve Method | Estimated and validated with 10 sample replicates [31]. |
Microplate Reader Configuration Guide
Proper instrument setup is vital for assay reproducibility. The following settings should be optimized [33].
| Setting | Recommendation | Rationale |
|---|---|---|
| Gain | Set using the most concentrated sample; avoid saturation. | Amplifies signal; too high a gain saturates detector, too low fails to detect dim signals [33]. |
| Number of Flashes | 10-50 flashes per well. | Balances data variability and read time. More flashes reduce variability but increase read time [33]. |
| Focal Height | Adjust to just below the liquid surface or at the cell layer. | Maximizes signal intensity. Requires consistent sample volumes across the plate [33]. |
Frequently Asked Questions (FAQs)
Q1: My metabolic assay shows interference from my biomaterial. How can I address this? Interference is common with particulate biomaterials, which can cause autofluorescence or light scattering [2]. Solutions include:
- Physical Separation: Use a porous transwell insert to separate cells from particulates during the assay.
- Background Subtraction: Include control wells containing only the biomaterial in culture medium and subtract this background signal from test wells.
- Alternative Assay: Switch to a different detection method. For example, if your material interferes with fluorescence (Resazurin), use a luminescence-based ATP assay, or vice-versa [2].
Q2: Can I multiplex metabolic assays with other cell health readouts? Yes, but with caution. Metabolic assays (luminescent or colorimetric) cannot be multiplexed with each other in the same well as they use overlapping detection signals [36]. However, they can often be multiplexed with assays that measure different parameters, such as apoptosis (e.g., Caspase-3/7 activity) or necrosis. Always run controls to confirm that the assays do not interfere with each other [36].
Q3: What is the best way to normalize data from a metabolic activity assay? Normalization is critical for accurate interpretation. Common methods include:
- Cell Number: Normalize against total DNA content using a DNA quantification assay.
- Total Protein: Perform a total protein assay (e.g., BCA assay) on the same sample lysate.
- Parallel Plating: Seed an identical "normalization plate" at the same time as the assay plate. At the end of the treatment, use the cells in this plate for direct cell counting or protein/DNA quantification.
Q4: Why might I get a high signal in my viability assay when other indicators suggest cell death? A high signal can be misleading and is often caused by:
- Assay-Specific Interference: Some test compounds can directly reduce tetrazolium salts like MTT or WST-1, independent of cellular enzymes [21].
- Temporal Discrepancy: Metabolic activity can persist in the early stages of cell death. A cell may be committed to die (as seen in morphology) but still have active mitochondria.
- Population Heterogeneity: The signal may be driven by a small, highly metabolic subpopulation of cells, masking the death of the majority. Always correlate metabolic activity data with other viability measures, such as membrane integrity (e.g., propidium iodide staining) or direct morphological observation [2].
Research Reagent Solutions
The following table lists essential materials and their functions for successfully performing metabolic activity assays in a biomaterials research context.
| Item | Function | Example / Note |
|---|---|---|
| Resazurin Sodium Salt | Cell-permeant blue dye reduced to pink, fluorescent resorufin by metabolically active cells [31]. | Prepare a 10 mM stock in PBS; aliquot and store at -20°C [31]. |
| MTT Tetrazolium Salt | Yellow substrate reduced to purple, insoluble formazan crystals by mitochondrial dehydrogenases [34]. | Requires a solubilization step (e.g., with SDS-HCl) before reading [34]. |
| ATP Assay Reagents | Luciferase enzyme uses ATP from viable cells to produce oxyluciferin, generating luminescent light [30]. | Highly sensitive; requires a luminometer for detection [30]. |
| White Opaque Microplates | Reflect and amplify weak luminescent signals, maximizing sensitivity [33]. | Essential for ATP assays; can also be used for fluorescence [33]. |
| Cell Culture Medium (1% FBS) | Low-serum medium for use during resazurin incubation to reduce background fluorescence [31]. | Standard 10% FBS medium can be replaced for the assay step [31]. |
| SDS-HCl Solution | Solubilizes insoluble formazan crystals produced in the MTT assay into a colored solution [34]. | Must be used promptly after preparation [34]. |
Enzyme Release Assays (Lactate Dehydrogenase - LDH) and Their Limitations
Lactate dehydrogenase (LDH) release assays are a cornerstone technique for quantifying cell viability and cytotoxicity in biomaterials testing and drug development research. The assay measures the release of the stable cytosolic enzyme LDH into the cell culture supernatant when cell membrane integrity is compromised due to damage or death, such as by necrosis, apoptosis, or other cytotoxic events [37].
The fundamental principle relies on a coupled enzymatic reaction where LDH catalyzes the conversion of lactate to pyruvate, simultaneously reducing NAD⁺ to NADH. The generated NADH then drives the reduction of various substrates—such as tetrazolium salts, resazurin, or luciferase-based reporters—to produce measurable colorimetric, fluorescent, or luminescent signals. The intensity of this signal is directly proportional to the amount of LDH released and, consequently, to the degree of cellular damage [37]. This makes LDH assays a valuable, non-destructive tool for longitudinal monitoring of cell health in response to therapeutic compounds, biomaterials, or other experimental conditions.
Biochemical Principles and Detection Methods
The Core Enzymatic Reaction
LDH is a cytoplasmic oxidoreductase enzyme ubiquitous in all cell types. Its primary physiological role is to catalyze the reversible conversion of pyruvate to lactate, coupled with the oxidation of NADH to NAD⁺, which is essential for sustaining glycolysis under anaerobic conditions [37]. In the context of a cytotoxicity assay, this activity is harnessed and measured extracellularly.
The standard detection method involves a coupled enzyme reaction [37] [38]:
- LDH present in the culture supernatant catalyzes the oxidation of lactate to pyruvate, generating NADH from NAD⁺.
- The NADH then reduces a detector compound (e.g., a tetrazolium salt) via the enzyme diaphorase.
- This reduction produces a measurable signal, such as a colored formazan product.
The following diagram illustrates the workflow of a typical LDH release assay, from cell culture to signal detection:
Types of LDH Assays
LDH assays are available in several formats, each with distinct advantages [37]:
- Colorimetric Assays: These are the most common and economical. They typically use tetrazolium salts like INT, which are reduced to a red formazan product. The absorbance is measured with a spectrophotometer (~490 nm) and is directly proportional to cytotoxicity [37] [38].
- Fluorometric Assays: These offer enhanced sensitivity and broader linear ranges. They often use resazurin, which is reduced by NADH to the highly fluorescent compound resorufin [37].
- Bioluminescent Assays: These are the most sensitive and are ideal for low cell numbers or small sample sizes. They generate a luminescent signal via a luciferase-catalyzed reaction and are well-suited for complex 3D culture systems [37].
Essential Materials and Reagents
The following toolkit is essential for performing a standard LDH release assay. Commercial kits typically provide these components in optimized formulations [37].
Table 1: Research Reagent Solutions for LDH Assays
| Reagent/Material | Function | Key Considerations |
|---|---|---|
| LDH Assay Buffer & Substrate Mix | Contains lactate, NAD⁺, and a detector (e.g., tetrazolium salt). Drives the coupled enzymatic reaction. | Specific components vary by assay type (colorimetric, fluorometric). Avoid repeated freeze-thaw cycles [37]. |
| Lysis Solution (e.g., Triton X-100) | Positive control reagent. Lyses cells to release total cellular LDH, representing maximum LDH release [37]. | Use at an optimized concentration to ensure complete lysis without assay interference. |
| NADH Standard | Control for standard curve generation and validation of assay performance. | - |
| Stop Solution (e.g., Acetic Acid) | Terminates the enzymatic reaction, stabilizing the signal before reading [37]. | Not all assay protocols require a stop solution. |
| 96-well Microplates | Platform for cell culture and supernatant assay. | Use clear plates for colorimetric assays; black for fluorescent. |
| Microplate Reader | Instrument for detecting assay signal (absorbance, fluorescence, or luminescence). | Must be compatible with the assay type and well format. |
Common Experimental Issues and Troubleshooting
Despite its widespread use, researchers often encounter specific technical challenges with LDH assays. The table below outlines common problems, their causes, and solutions.
Table 2: LDH Assay Troubleshooting Guide
| Problem | Potential Cause | Recommended Solution |
|---|---|---|
| High Background in Medium Control | High inherent LDH activity in animal serum used in culture media [39] [38]. | Reduce serum concentration to 1-5% in the assay medium or use serum-free conditions during the treatment period [39]. |
| High Background in Spontaneous Control (Untreated Cells) | 1. Excessive cell density [38].2. Mechanical damage from vigorous pipetting [38]. | 1. Re-optimize and reduce the cell seeding density.2. Handle cell suspensions gently during plating and medium changes. |
| Low Signal in Experimental/Treated Wells | 1. Insufficient cell number [38].2. Low cytotoxicity of the test agent. | 1. Perform a cell titration experiment to determine the optimal seeding density for the assay.2. Verify the cytotoxic potential of your test compound. |
| High Variability Between Replicates | 1. Air bubbles in wells during reading [38].2. Inconsistent pipetting during supernatant collection or reagent addition. | 1. Centrifuge the plate briefly or carefully pop bubbles with a fine needle before reading.2. Use calibrated, multi-channel pipettes and ensure thorough mixing of reagents. |
| Incomplete Digestion or Unexpected Banding Patterns | This issue is specific to restriction enzyme digests in molecular biology, not LDH cytotoxicity assays. The information in the search results pertains to a different technique [40]. | Not applicable to LDH release assays. Focus on causes and solutions listed for cytotoxicity testing. |
Limitations of LDH Release Assays
While LDH assays are a powerful tool, they possess inherent limitations that researchers must consider when designing experiments and interpreting data, especially in the context of advanced culture models.
- Serum Interference: A significant drawback is that fetal bovine serum (FBS) and other animal sera used in standard culture media contain intrinsic LDH activity. This leads to elevated background readings, which can mask low levels of cytotoxicity and reduce the assay's dynamic range. To mitigate this, assays are often restricted to serum-free or low-serum conditions, which may not represent physiologically relevant growth environments and can shorten the viable culture duration [39].
- Variable LDH Stability: LDH enzyme activity diminishes over time, which complicates longitudinal comparisons if samples are not processed immediately. This is a particular challenge for long-term 3D culture experiments [41].
- Assay Variability: LDH assays can exhibit higher intra- and inter-assay variability compared to other viability assays, potentially affecting reproducibility [39].
- Normalization Challenges in 3D Cultures: In traditional 2D cultures, normalization to seeded cell number is straightforward. However, in complex 3D models like spheroids and organoids, accurately quantifying cell number without destructive processing is difficult. Relying on the size of the 3D construct may not be proportional to the actual cell number, leading to inaccurate viability calculations [41].
- Inability to Distinguish Cell Death Mechanisms: The assay detects membrane integrity loss, a late-stage event in cell death. It cannot differentiate between the primary modes of death, such as necrosis versus apoptosis, especially in their early phases [37].
- Signal Saturation at High Cytotoxicity: At high levels of cell death, the LDH release can saturate the detection system, leading to an underestimation of cytotoxicity. This can be addressed by diluting the supernatant sample prior to analysis [42].
Optimized Protocol for Complex 3D Cultures
Adapting the LDH assay for 3D cultures, such as organoids and spheroids, requires specific modifications to overcome the limitations mentioned above. The following optimized protocol is derived from recent research [41].
Workflow for 3D Culture LDH Assay
Key Steps for 3D Adaptation:
- Conditioned Medium Collection: After treatment, carefully collect the conditioned medium from the 3D cultures without disturbing the constructs.
- LDH Stabilization: To address LDH instability, mix the conditioned medium with a dedicated LDH preservation buffer and store at -20°C. This maintains LDH activity for up to one month, enabling batch analysis and longitudinal study comparisons [41].
- Normalization via Total Protein: To overcome normalization challenges, lyse a parallel set of treated and untreated 3D constructs. Quantify the total protein content of the lysates using an assay like BCA or Bradford. Normalize the LDH activity measured in the conditioned medium to the total protein content from the corresponding lysates. This step is critical for accurate and comparable viability assessment, as it accounts for variations in organoid size, cell density, and cellular content [41].
- Data Analysis: Calculate the percentage cytotoxicity by comparing normalized LDH activity in treated samples to untreated (spontaneous) and fully lysed (maximum) controls.
Frequently Asked Questions (FAQs)
Q1: Can the LDH assay differentiate between apoptosis and necrosis? No, the LDH assay primarily detects the loss of plasma membrane integrity, which is a late event in both apoptosis and necrosis. It is not suitable for distinguishing between the specific mechanisms of cell death. Techniques like caspase activity assays or flow cytometry with Annexin V/PI staining are required for that purpose.
Q2: My LDH readings are low even with a known cytotoxic agent. What could be wrong? This is most commonly due to an insufficient number of cells. We recommend performing a cell titration experiment to determine the optimal cell density that provides a robust signal-to-background ratio for your specific cell type and culture format [38].
Q3: Is the LDH assay suitable for longitudinal studies on the same culture? Yes, this is a key advantage. Because the assay only requires small volumes of conditioned medium, it allows for non-destructive, longitudinal monitoring of the same culture well over time. The critical steps are to use the preservation buffer for sample storage and to employ the protein normalization method for 3D cultures to ensure data comparability across time points [41] [42].
Q4: How does the LDH assay compare to other viability assays like MTT or ATP-based assays? The LDH assay directly measures membrane damage, while MTT and similar tetrazolium assays measure metabolic activity. ATP assays (e.g., CellTiter-Glo) measure metabolic competence. A key operational advantage of the LDH assay is that it does not require reagent penetration into cells, making it particularly suitable for dense 3D structures where penetration can be a limiting factor for other assays [42].
Troubleshooting Guides & FAQs
Frequently Asked Questions
Q1: What are the most common factors affecting image quality in fluorescence microscopy? Three common factors significantly influence fluorescence microscopy image quality: brightness, resolution, and instrument maintenance [43]. Image brightness depends on sufficient excitation light and the use of high-quality, high-numerical-aperture objective lenses to gather maximum emitted light. Resolution can be optimized by using appropriate coverslips and ensuring objective lenses are clean and free of excess oil or dust. Regular, gentle maintenance of the microscope in a clean, stable environment is crucial for consistent performance [43].
Q2: My sample shows very weak or no fluorescence signal. What could be wrong? Weak or absent signal can stem from several issues related to your sample, antibodies, or imaging settings [44]:
- Antibody Issues: The primary antibody might not be validated for your specific application (e.g., immunofluorescence on your sample type) or may be used at too low a concentration. Always perform a titration to find the optimal concentration [44].
- Accessibility: For intracellular targets, ensure your staining protocol includes a permeabilization step (e.g., with Triton X-100) so antibodies can access the epitope [45].
- Microscope Settings: Confirm you are using the correct light source and filter set for your fluorophore. Increase the gain or exposure time during acquisition to capture more signal [45].
- Photobleaching: If the fluorescent tag has been bleached by over-exposure to light, the signal will be lost. Use antifade mounting media and minimize light exposure before imaging [44].
Q3: How can I reduce high background or non-specific staining in my images? High background is a common challenge that can often be resolved with the following steps [44] [45]:
- Autofluorescence: Include an unstained control to determine your sample's innate autofluorescence level. Use autofluorescence quenchers (e.g., TrueBlack) or avoid blue fluorescent dyes, which are particularly susceptible to this issue [44].
- Antibody Concentration: High concentrations of primary or secondary antibodies can cause non-specific binding. Titrate your antibodies to find the lowest concentration that gives a specific signal [44] [45].
- Insufficient Blocking or Washing: Increase the duration of blocking and ensure thorough washing between antibody incubation steps with ample buffer volume [44].
- Secondary Antibody Cross-reactivity: Always run a secondary-only control (no primary antibody). If staining is observed, use highly cross-adsorbed secondary antibodies to prevent non-specific binding [44] [45].
Q4: For cell viability assessment, how does fluorescence microscopy compare to flow cytometry? Both FM and flow cytometry (FCM) are widely used for cell viability, but they have distinct trade-offs, especially in biomaterials research [2]. The table below summarizes a direct comparison from a study on bioactive glass cytotoxicity:
| Feature | Fluorescence Microscopy (FM) | Flow Cytometry (FCM) |
|---|---|---|
| Principle | Direct imaging of stained cells on a substrate [2]. | Quantitative analysis of cells in suspension as they pass a laser [2]. |
| Throughput | Lower; relies on sampling a few fields of view, prone to sampling bias [2]. | High-throughput; rapidly analyzes thousands of cells individually [2]. |
| Quantification | Can be labor-intensive and less precise, often requiring manual counting [2]. | Highly precise and automatic; provides objective viability percentages [2]. |
| Sensitivity | Can be limited by autofluorescence and light scattering from particulate biomaterials [2]. | High sensitivity; better at distinguishing subpopulations (e.g., early vs. late apoptosis) under high cytotoxic stress [2]. |
| Key Advantage | Visual confirmation of cell morphology and spatial context [2]. | Superior statistical power and ability to multiplex multiple viability parameters [2]. |
A strong correlation (r = 0.94) has been observed between FM and FCM data, confirming that both can track trends in viability. However, FCM often provides greater precision, particularly in challenging conditions like high cytotoxicity [2].
Q5: What are some best practices for maintaining a fluorescence microscope? Proper maintenance is key to preserving image quality and instrument longevity [43]:
- Environment: Keep the microscope in a clean, dark, smoke-free room with minimal vibration and stable air circulation. Cover the microscope when not in use [43].
- Lens Cleaning: Clean objective lenses regularly and gently. First, use compressed gas to remove loose dust. Then, using a lens cloth or Q-tip, apply a gentle optical solvent (absolute ethanol or distilled water are common choices) by wiping in gentle, center-outwards circular motions. Avoid corrosive solvents like ammonia or acetone, which can damage lens coatings [43].
- Light Source: Be aware of the lamp's lifespan. Flickering or uneven illumination are signs that the lamp needs replacement [43].
Troubleshooting Common Problems
The following table outlines specific issues, their potential causes, and recommended solutions.
| Problem | Possible Causes | Recommended Solutions |
|---|---|---|
| Weak / No Signal | Incorrect filter set; low gain/exposure [45]; photobleaching [44]; over-fixation [45]; insufficient antibody concentration or incubation time [44]. | Verify filter sets for your fluorophore [45]. Increase gain/exposure settings [45]. Add antifade reagent to mounting medium [43] [44]. Optimize fixation time; perform antigen retrieval [45]. Titrate antibodies; increase incubation time [44]. |
| High Background | Autofluorescence [44]; non-specific antibody binding [44] [45]; insufficient blocking/washing [44]; antibody concentration too high [44] [45]. | Use an autofluorescence quencher [44]. Include secondary antibody-only control; use cross-adsorbed secondaries [44]. Optimize blocking agent and time; increase wash frequency and volume [44]. Titrate down antibody concentration [44] [45]. |
| Photobleaching | Prolonged or intense light exposure during imaging [43] [44]. | Use antifading reagents in the mounting medium [43] [44]. Reduce light intensity or exposure time [43]. Use the microscope's shutter to block light when not acquiring images [43]. |
| Blurry Images / Poor Resolution | Dirty objective lens [43]; incorrect coverslip thickness [43]; sample drift or vibration. | Clean objective lens gently with appropriate solvent [43]. Use coverslips with a thickness (e.g., 0.17 mm) matched to the objective's correction collar [43]. Ensure microscope is on a stable, vibration-free table. |
| Fluorescence Crosstalk (Multicolor) | Spectral overlap between fluorophores [44]. | Perform controls with each stain alone to check for bleed-through [44]. Choose dyes that are spectrally well-separated [44]. Optimize acquisition settings (sequential scanning) to minimize cross-talk [44]. |
The Scientist's Toolkit: Research Reagent Solutions
| Item | Function / Application |
|---|---|
| Propidium Iodide (PI) | A classic cell-impermeant DNA-binding stain used to identify dead cells with compromised membranes. It is fluorescent upon binding to nucleic acids [46]. |
| SYTOX Dead Cell Stains | A family of easy-to-use, cell-impermeant nucleic acid stains available in multiple colors. They are non-fluorescent in solution and exhibit strong fluorescence upon binding DNA, making them ideal for dead cell discrimination with minimal background [46]. |
| Calcein AM | A cell-permeant dye converted by intracellular esterases into a fluorescent, cell-impermeant product. It is used to label live cells [43]. |
| TrueBlack Autofluorescence Quencher | Used to reduce lipofuscin and other types of autofluorescence in tissue samples, thereby improving the signal-to-background ratio [44]. |
| EverBrite Mounting Medium | An antifade mounting medium that helps preserve fluorescence signal and reduces photobleaching during microscopy and storage [44]. |
| Image-iT DEAD Green & Fixable Viability Dyes | Amine-reactive dyes that covalently bind to proteins in cells with compromised membranes. They are fixable, allowing samples to be permeabilized and stained with intracellular antibodies after viability assessment [46]. |
Experimental Protocol: Cell Viability Assay via FM for Biomaterial Cytotoxicity
This protocol is adapted from a comparative study on biomaterial cytotoxicity, using fluorescent live/dead staining to assess the viability of cells exposed to particulate biomaterials [2].
1. Sample Preparation (Biomaterial Treatment)
- Seed your chosen cell line (e.g., SAOS-2 osteoblast-like cells) in an appropriate multi-well plate (e.g., 96-well black plate for imaging) and allow them to adhere [2].
- Treat cells with the biomaterial of interest (e.g., Bioglass 45S5 particles) at varying concentrations (e.g., 25, 50, 100 mg/mL) and particle sizes for the desired incubation periods (e.g., 3h and 72h) [2]. Include an untreated control.
2. Staining with Fluorescent Dyes
- Prepare a working solution of fluorescent viability dyes. A common combination is Fluorescein Diacetate (FDA) for live cells (metabolically active) and Propidium Iodide (PI) for dead cells (membrane-compromised) [2].
- At the end of the treatment period, remove the culture medium and wash the cells gently with buffer (e.g., PBS).
- Add the FDA/PI staining solution to the cells and incubate for a specified time (e.g., 1 hour) at 37°C, protected from light [2].
3. Image Acquisition
- After incubation, replace the staining solution with fresh buffer or antifade reagent to preserve fluorescence [43].
- Image the cells using a fluorescence microscope with appropriate filter sets for FDA (e.g., FITC filter) and PI (e.g., RFP filter). Use consistent exposure times and gain settings across all samples for quantitative comparison [2].
4. Image and Data Analysis
- Count the number of live (green) and dead (red) cells in multiple, randomly selected fields of view for each sample.
- Calculate the percentage of cell viability using the formula:
- % Viability = [Number of Live Cells / (Number of Live Cells + Number of Dead Cells)] × 100
Experimental Workflow & Signal Pathway Diagram
The diagram below illustrates the logical workflow for planning, executing, and troubleshooting a fluorescence microscopy experiment for cell viability assessment.
Diagram Title: FM Experiment Workflow & Troubleshooting
High-Throughput Quantitative Analysis with Flow Cytometry (FCM)
Frequently Asked Questions (FAQs)
Q1: Why is assessing cell viability crucial in flow cytometry for biomaterials testing? Accurate cell viability assessment is fundamental because non-viable cells can bind antibodies non-specifically and exhibit unusual autofluorescence, leading to the spurious identification of abnormal cell populations and inaccurate quantitative results [47]. In biomaterials testing, where samples may be subjected to cytotoxic stress from materials like bioactive glasses, distinguishing true biological responses from artifacts caused by dead cells is essential for reliable data [2].
Q2: My flow cytometry data shows a weak or absent fluorescence signal. What are the common causes? A weak or absent signal can stem from several issues related to your sample, reagents, or instrument [48] [49]:
- Insufficient Target Induction: The treatment may not have adequately induced the expression of your target molecule.
- Suboptimal Fixation/Permeabilization: For intracellular targets, an incorrect fixation or permeabilization protocol can prevent antibody access.
- Fluorochrome-Antigen Mismatch: A dim fluorochrome (e.g., FITC) may have been paired with a low-abundance antigen.
- Incorrect Instrument Settings: The laser and photomultiplier tube (PMT) settings on the cytometer may not be compatible with the fluorochrome's excitation and emission spectra.
- Photobleaching: Excessive light exposure during staining can degrade fluorochromes [49].
Q3: How can I reduce high background fluorescence in my samples? High background is often due to non-specific binding or autofluorescence [48] [49] [50]. Key solutions include:
- Fc Receptor Blocking: Use Bovine Serum Albumin or specific Fc receptor blocking reagents to prevent non-specific antibody binding [48] [49].
- Exclude Dead Cells: Dead cells cause high non-specific staining. Incorporate a viability dye (e.g., Propidium Iodide, 7-AAD, or a fixable viability dye) into your panel and gate out dead cells during analysis [48] [49] [51].
- Optimize Washes: Increase the number or duration of wash steps to remove unbound antibody [49] [50].
- Titrate Antibodies: Too much antibody can cause high background; ensure optimal concentration is used [48].
- Check Compensation: High background can result from poor compensation; verify single-stained controls [49].
Q4: What steps can I take to optimize my workflow for high-throughput flow cytometry? Increasing throughput requires strategies to streamline both sample preparation and data acquisition [52]:
- Switch to Plates: Using 96-well plates instead of tubes significantly speeds up sample handling and data acquisition.
- Premix Antibodies: Prepare antibody cocktails in advance to reduce pipetting steps and improve reproducibility (ensure antibody compatibility).
- Concentrate Samples: Maintain a high cell concentration to ensure an adequate event rate without increasing the sample flow rate, which can compromise data resolution.
- Automate: Utilize automated plate loaders and sample preparation systems to enable 24/7 operation and improve reproducibility.
- Avoid Freshly Thawed Cells: Thawed cells can form excessive aggregates; use freshly isolated cells or rest cells post-thaw [52].
Troubleshooting Guide
The table below summarizes common issues, their causes, and recommended solutions.
| Problem | Possible Causes | Recommendations |
|---|---|---|
| Weak/No Signal [48] [49] | - Inadequate fixation/permeabilization- Dim fluorochrome for rare target- Photobleaching- Incorrect laser/PMT settings | - Validate fixation/permeabilization protocol for your target.- Pair low-abundance antigens with bright fluorochromes (e.g., PE).- Protect samples from light during staining.- Verify instrument settings match fluorochrome specs. |
| High Background [48] [49] [50] | - Non-specific Fc receptor binding- Presence of dead cells- Excessive antibody- Poor compensation | - Implement an Fc receptor blocking step.- Use a viability dye and gate out dead cells.- Titrate antibodies to optimal concentration.- Check and adjust compensation using single-stained controls. |
| Low Event Rate/Clogging [48] [52] | - Cell aggregates- Clogged flow cell- Sample concentration too low | - Filter cells before analysis; use DNase and EDTA.- Run cleaning cycle (e.g., 10% bleach, then dH₂O).- Ensure adequate cell concentration. |
| Unusual Scatter Properties [48] [50] | - Cellular damage from processing- Sample contamination | - Handle samples gently; avoid harsh vortexing.- Use proper aseptic technique. |
| Poor Cell Cycle Resolution [48] | - Flow rate too high- Insufficient DNA staining | - Use the lowest flow rate setting.- Ensure adequate incubation with DNA dye (e.g., PI/RNase). |
Key Experimental Protocols
Protocol 1: Quantitative Viability Assessment for Particulate Biomaterials
This protocol is adapted from a study comparing flow cytometry and fluorescence microscopy for assessing the cytotoxicity of Bioglass 45S5 on SAOS-2 osteoblast-like cells [2].
1. Cell Culture and Treatment:
- Culture SAOS-2 cells (or other relevant cell line) under standard conditions.
- Treat cells with the particulate biomaterial (e.g., Bioglass 45S5) across a range of particle sizes (e.g., <38 µm, 63–125 µm, 315–500 µm) and concentrations (e.g., 25, 50, 100 mg/mL) for defined timepoints (e.g., 3 h and 72 h) [2].
2. Staining for Viability and Apoptosis:
- Harvest cells, ensuring a single-cell suspension.
- Multiparametric Staining for Flow Cytometry: Stain cells with a cocktail of fluorescent probes to distinguish different cell states. The study used Hoechst (for DNA/content), DiIC1 (for mitochondrial membrane potential), Annexin V-FITC (for phosphatidylserine exposure in early apoptosis), and Propidium Iodide (PI, for late apoptosis/necrosis) [2].
- Viability Dye Staining for Microscopy: As a comparison, stain cells with Fluorescein Diacetate (FDA) for live cells and Propidium Iodide (PI) for dead cells, then visualize by fluorescence microscopy [2].
3. Data Acquisition and Analysis:
- Flow Cytometry: Acquire data on a flow cytometer, collecting a sufficient number of events for statistical significance (e.g., >10,000 events per sample). Use a robust gating strategy to exclude debris and doublets, then identify populations:
- Data Correlation: Analyze the correlation between viability percentages obtained from flow cytometry and fluorescence microscopy to validate methods [2].
Protocol 2: Optimizing High-Throughput Sample Preparation
This protocol provides a streamlined workflow for preparing multiple samples in parallel [52].
1. Plate-Based Setup:
- Prepare your cells in a 96-well U-bottom or V-bottom plate. This format allows for simultaneous centrifugation and wash steps, drastically reducing handling time.
2. Staining Procedure:
- Antibody Cocktail: Premix all directly conjugated antibodies and viability dye into a single master cocktail. Distribute the cocktail evenly to each well. This minimizes pipetting errors and improves reproducibility [52].
- Fc Block: Include a step to incubate cells with an Fc receptor blocking reagent before adding the antibody cocktail.
- Washes: Perform washes by adding wash buffer to each well, centrifuging the entire plate, and decanting the supernatant.
3. Final Resuspension and Acquisition:
- After the final wash, resuspend all samples in a fixed volume of flow cytometry buffer.
- Filter the entire sample through a mesh strainer into flow cytometry tubes or load the plate directly onto an automated plate loader.
Workflow and Relationship Diagrams
High-Throughput FCM Troubleshooting Pathway
The diagram below outlines a logical pathway for diagnosing and resolving common issues in high-throughput flow cytometry experiments.
Multiparametric Viability Assessment
This workflow details the key steps and gating strategy for a comprehensive cell health assessment using flow cytometry, particularly after biomaterial exposure.
The Scientist's Toolkit: Research Reagent Solutions
The table below lists essential reagents and their functions for cell health assays in flow cytometry, particularly in the context of biomaterials testing.
| Reagent | Function & Application |
|---|---|
| Propidium Iodide (PI) | DNA-binding dye that is excluded by live cells. Used to identify dead cells with compromised membranes in viability and cell cycle assays [2] [51]. |
| Annexin V-FITC | Binds to phosphatidylserine (PS), which is externalized during early apoptosis. Used in conjunction with PI to distinguish viable (Annexin V-/PI-), early apoptotic (Annexin V+/PI-), and late apoptotic/necrotic (Annexin V+/PI+) cells [2] [49] [51]. |
| 7-AAD | A viability dye similar to PI but with different spectral properties. It is also excluded by viable cells and used to identify dead cells [47] [51]. |
| Fixable Viability Dyes | These dyes (e.g., eFluor dyes) covalently bind to amines in dead cells and withstand fixation, allowing for dead cell exclusion in intracellular staining protocols [48]. |
| JC-1 / TMRM | Mitochondrial membrane potential (ΔΨm) sensors. Used to assess mitochondrial health; a loss of ΔΨm is an indicator of early apoptosis or cellular stress [51]. |
| Dihydroethidium (DHE) | Cell-permeant dye oxidized by superoxide radical to form a red-fluorescent product. Used to measure reactive oxygen species (ROS) and oxidative stress [51]. |
| Fc Receptor Blocking Reagent | Used to block Fc receptors on cells (e.g., on monocytes/macrophages) to prevent non-specific antibody binding and reduce background staining [48] [49]. |
| Brefeldin A / Monensin | Protein transport inhibitors used in intracellular cytokine staining. They block protein secretion, trapping cytokines in the Golgi apparatus and endoplasmic reticulum for detection [49]. |
Frequently Asked Questions (FAQs)
FAQ 1: What is the most fundamental consideration when choosing a cell viability assay for biomaterial testing? The most fundamental consideration is the specific research question you are trying to answer. The assay must be matched to whether you are measuring cytotoxicity, cell proliferation, metabolic activity, or the number of viable cells in a sample for normalization in other cell-based assays [22]. The mechanism of the assay (e.g., measuring metabolic activity, membrane integrity, or ATP content) must align with the biological information you seek.
FAQ 2: Why might my viability assay show a high signal, but my cells appear unhealthy under the microscope? This discrepancy can occur if the assay measures a parameter that persists in compromised cells. For instance, metabolic activity-based assays (like MTT) can overestimate viability because cells that are dying or stressed may still have active mitochondrial enzymes for a period, reducing tetrazolium salts and generating a signal [22] [53]. Always corroborate quantitative assay data with qualitative morphological observations.
FAQ 3: How do I handle suspected chemical interference from my biomaterial's degradation products in a colorimetric assay? Chemical interference is a known issue, particularly with reducing agents that can non-enzymatically reduce tetrazolium salts [22]. To confirm interference:
- Run control wells containing your culture medium with the assay reagent and various concentrations of the biomaterial's extract without any cells.
- If these controls show increased absorbance compared to a blank, chemical interference is likely. In such cases, switch to an assay based on a different principle, such as a membrane integrity assay (e.g., using propidium iodide) or an ATP detection assay [22] [54].
FAQ 4: My biomaterial is for an implant application. Are there specific regulatory standards for cytotoxicity testing? Yes, medical devices and biomaterials must undergo stringent biocompatibility testing as outlined in international standards. ISO 10993-5 specifically describes in vitro methods for cytotoxicity testing [53]. This standard identifies three main test types: extract, direct contact, and indirect contact tests. Your testing strategy should be designed to meet these regulatory requirements.
FAQ 5: When should I use a DNA-binding viability dye like propidium iodide versus a fixable viability dye? Use propidium iodide (PI) for simple, immediate analysis of dead cells in samples that will not be fixed, permeabilized, or subjected to intracellular staining, as PI requires the dye to remain in the buffer during acquisition [54]. Use fixable viability dyes (FVDs) when your protocol involves fixation, permeabilization, intracellular staining, or if you need to cryopreserve samples for later analysis. FVDs covalently bind to cellular proteins, so the staining survives these processes, ensuring dead cells can still be identified [54].
Troubleshooting Guides
Problem 1: High Background or Excessive Signal in Metabolic Assays
| Symptom | Possible Cause | Solution |
|---|---|---|
| Elevated signal in blank/control wells with no cells. | Spontaneous reduction of the assay reagent (e.g., tetrazolium salt). | Prepare reagent fresh; avoid extended exposure to light; check that culture medium is not at an elevated pH [22]. |
| Chemical interference from compounds in the test sample. | Perform a control experiment without cells to test for interference directly [22]. Consider using a different type of assay. | |
| High signal in all wells, making it difficult to distinguish between viable and non-viable cells. | Assay incubation time is too long. | Optimize the incubation time. The signal should be in the linear range relative to cell number [22]. |
| Excessive cell number per well. | Perform a cell titration experiment to determine the optimal seeding density for the assay [22]. |
Problem 2: Low or No Signal in Viability Assays
| Symptom | Possible Cause | Solution |
|---|---|---|
| Low signal across all wells, including positive controls. | The assay reagent has degraded or was prepared incorrectly. | Use fresh reagent and verify preparation protocol. For MTT, ensure the solution is filter-sterilized and stored protected from light [22]. |
| Insufficient number of viable, metabolically active cells. | Check cell health and count before seeding. Ensure cells are in log-phase growth for proliferation assays, as contact-inhibited or confluent cells may have reduced metabolic activity [22]. | |
| The solubilization step (for MTT) was ineffective. | Ensure the solubilization solution (e.g., with SDS) is at the correct pH and temperature to fully dissolve the formazan crystals [22]. | |
| Signal is lower than expected only in wells containing the biomaterial. | The biomaterial is directly cytotoxic. | This is the expected result. Confirm with a complementary assay (e.g., membrane integrity) and morphological observation. |
| The biomaterial absorbs the assay reagent or product. | This is a common issue. Consider using a different assay format or analyzing the supernatant if the biomaterial is removed before reading. |
Problem 3: Poor Reproducibility and High Variability Between Replicates
| Symptom | Possible Cause | Solution |
|---|---|---|
| High coefficient of variation (%CV) between technical replicates. | Inconsistent cell seeding. | Ensure a homogeneous cell suspension and use careful pipetting technique during seeding. |
| Edge effects in the microplate. | Use microplates designed to minimize evaporation and consider using a humidified chamber during incubation. | |
| Inconsistent preparation of the biomaterial extract or its contact with cells. | Standardize the extraction protocol (e.g., ratio of material to extraction medium, temperature, duration) as per guidelines like ISO 10993-12 [53]. | |
| Variability between different experiment days or analysts. | Lack of assay qualification. | As research advances toward clinical phases, assays should be qualified and validated. Establish intermediate precision by having different analysts perform the assay on different days to characterize expected variability [55]. |
Quantitative Data for Assay Selection
Table 1: Comparison of Common Cell Viability Assay Types
| Assay Type | Principle / Marker | Detection Method | Key Advantages | Key Limitations |
|---|---|---|---|---|
| Metabolic Activity (e.g., MTT, MTS, CCK-8) [22] [30] [53] | Reduction of tetrazolium salts by metabolically active cells. | Colorimetric | User-friendly, rapid, cost-effective; suitable for high-throughput screening. | Does not directly measure proliferation; signal depends on metabolic rate, which can be altered by culture conditions. |
| Membrane Integrity (e.g., Trypan Blue, PI, 7-AAD) [54] [53] | Dye exclusion by intact membranes of live cells. | Colorimetric (microscope) or Fluorescent (flow cytometry) | Simple, direct count of live/dead cells based on a physical property. | Manual counting is prone to error; does not provide information on metabolic state. |
| ATP Detection [22] [30] [53] | Measurement of cellular ATP levels using luciferase. | Luminescence | Highly sensitive; rapid signal loss upon cell death; directly correlates with metabolically active cell number. | More expensive; requires a luminometer; sensitive to compounds that affect luciferase activity. |
| Protease Activity [22] | Detection of active proteases in viable cells using fluorogenic substrates. | Fluorescence | Can be used for real-time monitoring of viable cells over time. | Signal may persist in recently dead cells; can be cell-type dependent. |
| PMA-qPCR [56] | Selective detection of DNA from cells with intact membranes. | qPCR | Discriminates between live and dead cells in a mixed microbial community; avoids culture-based underestimation. | Overestimates cells that are membrane-intact but not viable (VBNC state); requires DNA extraction and PCR optimization. |
Table 2: Global Cell Viability Assays Market Snapshot (2024-2034) [30]
| Metric | Value | Details |
|---|---|---|
| Market Size (2024) | USD 1.89 Billion | Base year valuation. |
| Projected Market Size (2034) | USD 4.24 Billion | Reflecting a growing and critical field. |
| Compound Annual Growth Rate (CAGR) | 8.54% (2025-2034) | Strong, sustained growth. |
| Dominant Assay Type (2024) | Metabolic Activity-based | 50% market share. |
| Dominant Technology (2024) | Colorimetric | 45% market share. |
| Leading Application (2024) | Pharmaceutical & Biotech Research | 60% market share. |
Detailed Experimental Protocols
Protocol 1: MTT Assay for Cytotoxicity Testing of Biomaterial Extracts
This protocol is adapted from the NCBI Assay Guidance Manual and a 2025 study on magnesium composite cytotoxicity [22] [53].
Principle: Metabolically active cells reduce the yellow tetrazolium salt MTT to purple, insoluble formazan crystals. The amount of formazan, dissolved and quantified colorimetrically, is proportional to the number of viable cells.
Materials (Research Reagent Toolkit):
| Reagent/Material | Function | Example / Note |
|---|---|---|
| MTT Reagent | Tetrazolium substrate that is reduced by viable cells. | Thiazolyl Blue Tetrazolium Bromide (e.g., Sigma-Aldrich Cat.# M2128), dissolved at 5 mg/mL in DPBS [22]. |
| Solubilization Solution | Dissolves the insoluble formazan crystals for reading. | A solution of 40% DMF, 16% SDS, and 2% acetic acid, pH 4.7 [22]. DMSO can also be used. |
| Cell Line | Model system for testing biomaterial toxicity. | L-929 mouse fibroblast cells are commonly used per ISO 10993-5 standards [53]. |
| Multi-well Plate Reader | Instrument to measure absorbance of the dissolved formazan. | Spectrophotometer capable of reading at 570 nm, with a reference wavelength of 630 nm optional [22]. |
Procedure:
- Cell Seeding and Incubation: Seed cells in a 96-well plate at an optimal density (e.g., 1x10⁴ cells/well for L-929) and culture for 24 hours to allow attachment.
- Exposure to Test Material: Prepare extracts of your biomaterial using an appropriate medium (e.g., DMEM with serum) as per ISO 10993-12. Aspirate the culture medium from the cells and replace it with the biomaterial extract or control media. Incubate for the desired period (e.g., 24, 48, or 72 hours).
- MTT Incubation: After the exposure period, add the MTT solution to each well to a final concentration of 0.2-0.5 mg/mL. Return the plate to the incubator for 1-4 hours.
- Solubilization: Carefully remove the medium containing MTT. Add the solubilization solution (e.g., 100 μL per well) and incubate until all formazan crystals are dissolved.
- Measurement and Analysis: Measure the absorbance of each well at 570 nm. Calculate cell viability as a percentage of the untreated control groups.
Protocol 2: Viability Staining for Flow Cytometry with Fixable Viability Dyes (FVD)
This protocol is essential for immunophenotyping studies where you need to exclude dead cells that non-specifically bind antibodies [54].
Principle: Fixable Viability Dyes (FVDs) are amine-reactive dyes that penetrate cells with compromised membranes (dead cells) and covalently bind to intracellular proteins. After fixation, these cells remain brightly stained, allowing for their exclusion during flow cytometry analysis.
Materials (Research Reagent Toolkit):
| Reagent/Material | Function | Example / Note |
|---|---|---|
| Fixable Viability Dye (FVD) | Labels dead cells for exclusion in complex staining panels. | Available in various colors (e.g., eFluor 450, 780) to match your flow cytometer and other markers [54]. |
| Protein- and Azide-free PBS | Staining buffer for the FVD step. | Prevents quenching of the dye reaction by amines present in proteins and azides. |
| Flow Cytometry Staining Buffer | Buffer for antibody staining and washing. | Typically contains protein and azides to reduce non-specific binding. |
| Antibodies | For staining cell surface or intracellular targets. | Titrated for optimal concentration. |
Procedure (Standard Staining in Tubes):
- Cell Preparation: Harvest and wash cells twice with protein- and azide-free PBS. Resuspend the cell pellet at 1-10 x 10⁶ cells/mL in the same buffer.
- Viability Staining: Add 1 μL of FVD per 1 mL of cell suspension and vortex immediately. Incubate for 30 minutes at 2–8°C, protected from light.
- Wash: Wash cells 1-2 times with Flow Cytometry Staining Buffer to remove unbound dye.
- Immunostaining: Proceed with standard cell surface or intracellular antibody staining protocols. The viability staining is compatible with fixation and permeabilization steps.
- Acquisition and Analysis: Acquire data on a flow cytometer. Use a single-stained control of the FVD (e.g., on heat-killed cells) for proper compensation.
Experimental Workflow and Selection Logic
The following diagram illustrates a logical workflow for selecting the appropriate cell viability assay based on your research question and biomaterial type.
Optimizing Assay Performance and Overcoming Common Pitfalls
This technical support center provides troubleshooting guidance for researchers working on cell viability assessment within biomaterials testing. The following FAQs address common sources of experimental variability and offer solutions to enhance data reliability and reproducibility.
Frequently Asked Questions
What are the major advantages of XTT over MTT for assessing cell viability on biomaterials?
The XTT assay offers several key advantages that make it suitable for biomaterials research, particularly in high-throughput screening scenarios.
- Water-Soluble Formazan Product: Unlike MTT, the formazan product formed during the XTT reduction process is water-soluble. This eliminates the need for a solubilization step with organic solvents, which can introduce cytotoxicity, additional handling errors, and variability. It also allows for direct measurement from culture plates [57].
- Simplified Protocol and HTS Compatibility: The removal of the solubilization step streamlines the workflow, making the XTT assay easier to automate and more compatible with high-throughput screening (HTS) platforms. This is crucial for efficiently testing the large number of conditions often present in biomaterial studies [57].
- Kinetic Measurements: Because the formazan product remains soluble in the culture medium, absorbance can be measured at multiple time points without disrupting the experiment. This enables dynamic monitoring of cell viability changes in response to a biomaterial over time [57].
The table below summarizes the core differences:
| Feature | XTT Assay | MTT Assay |
|---|---|---|
| Formazan Solubility | Water-soluble | Water-insoluble |
| Solubilization Step | Not required | Required (using organic solvents) |
| Protocol Complexity | Simpler | More steps |
| Kinetic Measurements | Possible | Not easily performed |
| HTS Compatibility | High | Lower due to the solubilization step |
| Risk of Solvent Cytotoxicity | Lower risk | Potential risk due to solvents [57] |
How can the use of electron-coupling reagents in XTT assays lead to variability?
A key source of variability in XTT assays stems from the use of electron-coupling agents like phenazine methosulfate (PMS).
- Potential Cytotoxicity: PMS can exhibit cellular toxicity at higher concentrations, which can negatively impact cell viability and lead to an underestimation of true metabolic activity [57].
- Non-Enzymatic Reduction and Background Signal: PMS can mediate the non-enzymatic reduction of the XTT reagent even in the absence of cells, particularly if reducing agents are present in the culture medium. This can cause elevated background absorbance and lead to false-positive signals or an overestimation of cell viability [57].
Troubleshooting Guide:
- Optimize Concentrations: Carefully titrate the concentration of PMS to find the level that provides adequate signal enhancement without causing cellular toxicity.
- Include Proper Controls: Always run control wells containing your culture medium and XTT/PMS reagents but no cells. This allows you to measure and subtract the background signal caused by non-enzymatic reduction.
- Consider Assay Time: Lengthened incubation times can exacerbate background issues. Establish a standard incubation period and avoid exceeding it.
Why is protein adsorption a critical factor in biomaterials testing, and how can it be controlled?
Uncontrolled protein adsorption, or biofouling, is a primary event that dictates downstream biological responses to a biomaterial. The proteins that adsorb to a material's surface influence subsequent cell adhesion, activation, and overall biocompatibility [58].
Sources of Variability in Protein Adsorption Studies:
- Protein Concentration and Source: The concentration of protein in solution significantly impacts the amount and type of proteins that adsorb. Using diluted serum versus undiluted serum, or serum from different sources, can yield vastly different results [58].
- Experimental Conditions: Factors such as pH, ionic strength, and temperature can alter protein conformation and binding behavior. Deviations from physiological conditions can change adsorption profiles [58].
- Fluorescent Labels: When using fluorescently labeled proteins to study adsorption, the labels themselves can increase protein hydrophobicity and alter their orientation on the material surface, affecting the results [58].
Recommended Protocols for Characterization:
- Mimic Physiological Conditions: Use protein solutions at concentrations and ionic strengths that reflect the intended biological environment of the biomaterial (e.g., use undiluted blood serum for vascular implants).
- Standardize Reagents: Use consistent, freshly prepared protein sources and buffer systems across all experiments to minimize batch-to-batch variability.
- Account for the Vroman Effect: Be aware that adsorbed protein populations can change over time as proteins with higher surface affinity displace initially adsorbed proteins. Consider time as a key variable in your experimental design [58].
How do biomaterial surface properties independently affect cell adhesion and viability?
Beyond protein-mediated effects, the intrinsic physical and chemical properties of the biomaterial itself directly regulate cell behavior.
- Surface Stiffness: Cells can sense and respond to the mechanical properties of their substrate. Surface stiffness can control cell adhesion in vitro and influence cell signaling, differentiation, and viability [58].
- Surface Topography and Roughness: The physical micro- and nano-structure of a surface can significantly influence how cells adhere, spread, and align. Engineered surface patterns can be used to direct cell behavior [58].
High variability in signal can often be traced to reagent handling or cell-related factors.
Troubleshooting Guide:
- Reagent Precipitation: For assays like alamarBlue or PrestoBlue, the dye can precipitate, leading to varying concentrations. Always warm the reagent to 37°C and mix it thoroughly to ensure a homogenous solution before use [59].
- Pipetting Inaccuracy: Ensure your pipettors are properly calibrated and that pipette tips are securely attached to avoid volume discrepancies [59].
- Inconsistent Cell Seeding: Start with a uniform single-cell suspension and use careful, consistent technique when seeding cells into plates. Gently agitate the plate after seeding to distribute cells evenly.
- Edge Effects: Evaporation from the outer wells of a microplate can cause concentration differences. Consider using a humidified incubation chamber or plate seals to minimize evaporation, and be cautious when interpreting data from perimeter wells.
The Scientist's Toolkit: Key Research Reagent Solutions
| Reagent / Assay | Primary Function | Key Considerations |
|---|---|---|
| XTT Assay | Measures cell viability via metabolic reduction of tetrazolium salt to a water-soluble formazan dye [57]. | Susceptible to non-enzymatic reduction; requires optimization of electron-coupling agents like PMS. |
| MTT Assay | Measures cell viability via metabolic reduction to water-insoluble formazan crystals [57]. | Requires a solubilization step; less suitable for high-throughput screening. |
| Trypan Blue | A cell-impermeant dye used to stain non-viable cells for exclusion counting [59]. | Light-sensitive; can form precipitates; uptake rate is cell-type and health dependent. |
| Click-iT EdU Assay | Uses a click chemistry reaction to detect newly synthesized DNA, serving as a direct measure of cell proliferation [59]. | Sensitive to copper-chelating agents (e.g., EDTA); requires adequate cell fixation and permeabilization. |
| Annexin V Assays | Detects phosphatidylserine externalization on the cell membrane, an early marker of apoptosis [59]. | Cells must be allowed to recover after trypsinization to prevent false positives from temporary membrane damage. |
Experimental Pathway and Workflow Visualization
Biomaterial Viability Testing Workflow
Sources of Experimental Variability
XTT Reduction Mechanism
Addressing Evaporation, Edge Effects, and Solvent Cytotoxicity (e.g., DMSO)
Troubleshooting Guides
Why are my cell viability results inconsistent across the 96-well plate?
This problem is commonly known as the edge effect or evaporation effect. It manifests as inconsistent cell growth and viability in the outer wells of a microplate, particularly the 36 perimeter and corner wells [60].
- Root Cause: Evaporation of water and culture medium from the outer wells during incubation. This is often due to:
- Impact: Even a small volume loss (as low as 10%) can concentrate media components (e.g., salts) and metabolites, altering cell physiology and leading to biased, non-reproducible results [60]. This causes well-to-well variations in nutrient concentration and pH, which can affect downstream applications like PCR and ELISA [62].
- Solutions:
- Optimize Incubator Conditions: Maintain a humidified environment of at least 95% humidity. Evaporation is nearly four times higher at 80% humidity than at 90% [60].
- Minimize Incubator Disturbances: Limit the removal of plates for inspection and avoid unnecessary door openings [60].
- Use Specialized Microplates: Consider using plates with an evaporation buffer zone. For example, the Thermo Scientific Nunc Edge plate features a perimeter "moat" that can be filled with sterile water or 0.5% agarose. This design has been shown to reduce overall plate evaporation to less than 2% after seven days of incubation, ensuring well-to-well consistency [60].
- Avoid Blanking Outer Wells: Simply leaving the outer wells empty does not solve the concentric evaporation gradient affecting inner rows and is a wasteful use of resources [62].
How does DMSO as a solvent affect my cell-based assay results?
DMSO is a common solvent for water-insoluble compounds in cell-based assays, but it possesses intrinsic cytotoxic properties that can confound experimental outcomes [63].
- Root Cause: DMSO can induce cellular stress responses, including apoptosis and metabolic disruption, even at low concentrations [63] [64].
- Impact:
- Concentration-Dependent Cytotoxicity: The cytotoxic effect is variable depending on cell type and exposure duration [63].
- Metabolic Disruption: Metabolomic profiling of fish cell lines revealed that DMSO exposure altered levels of numerous metabolites and significantly impacted 41 metabolic pathways, including amino acid, carbohydrate, and lipid metabolism. These disruptions were observed even at a concentration of 0.1% [64].
- Experimental Artifacts: Using a single, high-concentration DMSO vehicle control for all drug doses can lead to dose-response curves starting at viability values higher than 100% and large error bars [61].
- Solutions:
- Use the Lowest Possible Concentration: A concentration of 0.3125% DMSO has been shown to exhibit minimal cytotoxicity across most tested cancer cell lines over multiple time points [63].
- Employ Matched Solvent Controls: For each drug concentration tested, use a vehicle control with the same concentration of DMSO. This practice corrects for solvent-specific effects on cell viability [61].
- Avoid Storage in Diluted Form: Do not store diluted drugs in culture microplates for extended periods, even at 4°C or -20°C. Evaporation can lead to drug concentration and significantly alter cell viability results [61].
How can I reduce evaporation in my cell culture assays?
Evaporation is a major technical confounder that affects data robustness and reproducibility [61].
- Root Cause: Water loss from wells is driven by a humidity gradient between the incubator environment and the internal atmosphere of the culture plate.
- Impact: Evaporation leads to increased solute concentration, changes in osmolarity, and subsequent effects on cell physiology. It can also cause an edge effect, where outer wells evaporate faster [60] [62].
- Solutions:
- Ensure Incubator Humidity: This is the most critical factor. Always maintain ≥95% humidity [60].
- Use a Humidified CO₂ Incubator: A stable, humidified environment is non-negotiable for long-term cultures.
- Seal Plates Properly: Use Parafilm or specialized plate sealing films for long-term storage of reagents in plates, though this may not be suitable for cell culture during active incubation [61].
- Choose Plates with Evaporation Buffers: As discussed, plates with integrated water reservoirs (e.g., "moat" designs) can dramatically reduce evaporation [60].
- Avoid Overcrowding Incubators: Ensure proper air circulation around plates and avoid stacking them in a way that creates temperature gradients [62].
Frequently Asked Questions (FAQs)
What is a safe concentration of DMSO to use in cell culture?
A concentration of 0.3125% DMSO is generally a good choice as it has shown low toxicity in most tested cell lines [63]. However, the safe concentration limit is dependent on cell type and exposure duration [63]. It is crucial to perform a dose-response test for your specific cell line and assay conditions to determine a non-cytotoxic threshold. Some cell lines, like MCF-7, may show sensitivity at this concentration [63].
My incubator has high humidity, but I still see an edge effect. What else could be wrong?
Even with high general humidity, localized factors can cause problems. Frequent opening of the incubator door causes rapid drops in humidity and temperature [60]. Also, stacking plates can block airflow and create temperature gradients, where the top and bottom plates in a stack acclimate to 37°C faster than the middle plates, exacerbating the edge effect [62]. Ensure plates are spaced to allow for uniform heat distribution.
Is ethanol a better solvent than DMSO for cell-based assays?
Not necessarily. Evidence indicates that ethanol exhibits higher and more rapid cytotoxicity than DMSO [63]. One study found that ethanol reduced cell viability by more than 30% at a concentration as low as 0.3125% after just 24 hours of exposure [63]. In silico docking studies suggest the mechanisms differ: DMSO may interact with apoptotic proteins, while ethanol primarily disrupts metabolic processes and membrane integrity [63]. Therefore, DMSO is often the preferred solvent, but its concentration must be carefully managed.
How quickly can evaporation affect my assay?
Evaporation can have a significant impact in a short time. Studies show that storing diluted pharmaceutical drugs in 96-well plates for as little as 48 hours at 4°C or -20°C led to sufficient evaporation and concentration of the drug to significantly affect cell viability measurements [61]. For cells in incubation, the edge effect can cause critical volume loss in periphery wells much earlier in the culture period [60].
Table 1: Safe Solvent Concentration Guidelines
This table summarizes experimental data on the cytotoxic profiles of common solvents, providing a reference for establishing safe working concentrations in your assays [63].
| Solvent | Low-Toxicity Concentration | Cytotoxic Concentration | Key Observations and Mechanisms |
|---|---|---|---|
| DMSO | ≤ 0.3125% (v/v) | >0.3125% (cell-type dependent) | - Minimal cytotoxicity in most cell lines at 0.3125% [63].- Induces apoptosis; interacts with apoptotic and membrane proteins [63].- Causes metabolic disruptions even at 0.1% [64]. |
| Ethanol | Not established; generally more toxic than DMSO | ≥ 0.3125% | - Rapid, concentration-dependent cytotoxicity [63].- Reduces viability by >30% at 0.3125% after 24h [63].- Primarily interacts with metabolic proteins, disrupting membrane integrity [63]. |
Table 2: Evaporation Control: Plate Comparison
This table compares the performance of different microplate strategies in controlling for evaporation, a key factor in preventing the edge effect [60] [62].
| Plate / Strategy | Evaporation After 7 Days | Key Advantages | Key Limitations |
|---|---|---|---|
| Standard 96-Well Plate | >8% | Low cost, widely available. | High evaporation leads to significant edge effect and data variability [60]. |
| Plate with Blank Outer Wells | Not quantified | Simple, no additional cost. | - Wastes 37.5% of plate capacity [62].- Does not solve concentric evaporation gradient [62]. |
| Plate with PBS/Water in Outer Wells | Not quantified | Hydrates the plate, can limit evaporation. | - Risk of bacterial growth [62].- May not prevent temperature/pH gradients [62]. |
| TPP 96-Well Plate | ~10% (uniform across plate) | - Better well-to-well and vessel-to-vessel uniformity [62].- Improved gas and temperature uniformity [62]. | - Performance data from a single source. |
| Specialized Edge Plate (with moat) | <2% (with agarose fill) | - Dramatically reduces evaporation [60].- Eliminates edge effect; allows use of all 96 wells [60].- Suitable for automated workflows [60]. | - Higher cost than standard plates. |
Experimental Protocols
Protocol 1: Optimizing Cell Seeding Density for Viability Assays
Purpose: To determine the optimal cell seeding density that yields a consistent linear relationship between cell number and assay signal (e.g., MTT absorbance) for your specific cell line and assay duration [63].
Materials:
- Cell line of interest (e.g., HepG2, MCF-7)
- Complete cell culture medium
- 96-well flat-bottom tissue culture plate
- MTT reagent (or other viability assay reagents)
- Automated cell counter
- Microplate reader
Method:
- Harvest and Count Cells: Harvest cells during their exponential growth phase and create a single-cell suspension. Count cells using an automated cell counter [63].
- Prepare Cell Dilutions: Prepare a series of cell suspensions to achieve a range of seeding densities. A recommended range is 125 to 8000 cells per well [63].
- Seed Plate: Seed 100 µL of each cell density into the 96-well plate. Include wells with medium only as blank controls. Perform each condition in triplicate [63].
- Incubate: Incubate the plates at 37°C with 5% CO₂ for the desired time points (e.g., 24, 48, and 72 hours) [63].
- Perform Viability Assay: At each time point, add 10 µL of MTT reagent to each well. Incubate for 4 hours at 37°C. After incubation, dissolve the formazan crystals with 100 µL of solubilization solution [63].
- Measure Absorbance: Read the absorbance at 570 nm with a reference wavelength of 630 nm [63].
- Data Analysis: Generate a standard curve by plotting the measured absorbance against the known seeded cell number for each time point. Perform linear regression analysis. The optimal density is one that falls within the linear range of the curve across all time points, ensuring a consistent and quantifiable signal. A density of 2000 cells/well has been shown to be effective for several cancer cell lines [63].
Protocol 2: Assessing DMSO Cytotoxicity for Your Cell Line
Purpose: To empirically determine the maximum non-cytotoxic concentration of DMSO for a specific cell line and experimental setup.
Materials:
- Cell line of interest
- Sterile DMSO
- Cell culture medium (without serum, if required by subsequent assays)
- 96-well tissue culture plate
- Cell viability assay kit (e.g., MTT, resazurin)
Method:
- Prepare DMSO Dilutions: Prepare a series of DMSO dilutions in culture medium to cover a range of final concentrations (e.g., 0.1%, 0.3%, 0.5%, 1%, 2% v/v). Use a low-concentration DMSO medium (e.g., 0.1%) as the "untreated" control [63] [61].
- Seed and Treat Cells: Seed cells at the previously determined optimal density. After 24 hours, replace the medium with the DMSO-containing medium [63].
- Incubate and Measure: Incubate the cells for the desired treatment period (e.g., 24, 48, 72 h). Afterwards, perform the cell viability assay according to the manufacturer's protocol [63].
- Data Analysis: Calculate cell viability relative to the low-DMSO control. Apply the ISO 10993-5:2009 standard, which specifies that a reduction in cell viability exceeding 30% is indicative of cytotoxicity [63]. The highest DMSO concentration that does not cause a >30% reduction in viability can be considered the safe threshold for your experimental conditions.
Experimental Workflows and Pathways
Diagram 1: Troubleshooting Workflow for Edge Effect and Evaporation
Troubleshooting Workflow for Edge Effect
Diagram 2: Mechanism of Solvent-Induced Cytotoxicity
Mechanism of Solvent Cytotoxicity
The Scientist's Toolkit: Research Reagent Solutions
| Item | Function in Context | Key Consideration |
|---|---|---|
| Humidified CO₂ Incubator | Maintains a stable environment of 37°C, 5% CO₂, and ≥95% humidity to minimize evaporation from culture vessels [60]. | Regular calibration and monitoring of humidity and CO₂ levels are critical. |
| Specialized Microplates (e.g., with evaporation buffer) | Plates with a built-in "moat" surrounding the outer wells act as a humidity reservoir, dramatically reducing evaporation and eliminating the edge effect, allowing use of all 96 wells [60]. | The moat can be filled with sterile water or 0.5% agarose to prevent spillage in automated workflows [60]. |
| Low-Toxicity DMSO | A high-purity solvent for reconstituting water-insoluble compounds for cell-based assays. | The key is to use the lowest effective concentration, typically ≤0.3125% (v/v), and to always use matched solvent controls [63] [61]. |
| Plate Sealing Films | Used to create a temporary vapor barrier, useful for short-term storage of reagents in plates or during certain assay steps [61]. | May not be gas-permeable and are therefore unsuitable for long-term cell culture during active incubation. |
| Matched Solvent Controls | Vehicle controls containing the exact same concentration of solvent (e.g., DMSO) as the corresponding test wells. This is essential for accurately distinguishing solvent-induced effects from those caused by the experimental treatment [61] [64]. | Critical for generating reliable and interpretable dose-response data [61]. |
Optimizing Cell Seeding Density, Incubation Times, and Culture Conditions
Troubleshooting Guides
G1. Poor Cell Differentiation Outcomes
Problem: Inconsistent or low efficiency when differentiating stem cells into target lineages.
| Potential Cause | Diagnostic Steps | Recommended Solution |
|---|---|---|
| Suboptimal cell seeding density | Quantify expression of early differentiation markers (e.g., via RT-qPCR) and assess cell morphology. | For adipose-derived stem cell (ASC) epithelial differentiation on composite scaffolds, use a high density of 5 × 10⁶ cells cm⁻² [65]. For chondrogenesis of hAdMSCs in collagen/alginate hydrogels, a high density of 16 × 10⁶ cells/mL is required for superior collagen II and aggrecan deposition [66]. |
| Insufficient incubation time | Monitor the expression of early, mid, and late-stage differentiation markers over time. | For partial epithelial differentiation of ASCs, a submerged culture for 11 days is required. Transitioning to air-liquid interface (ALI) conditions for an additional 10-21 days is necessary for further maturation, but may require co-culture with primary epithelial cells to sustain terminal differentiation [65]. |
| Lack of essential environmental cues | Analyze the composition of the differentiation medium and the physical properties of the scaffold. | Ensure the culture medium is chemically defined and includes necessary supplements. For chondrogenesis in soft hydrogels, a scaffold stiffness of ~5-7 kPa can promote spontaneous differentiation without exogenous growth factors [66]. |
G2. Low Cell Viability in 3D Scaffolds or Hydrogels
Problem: High rates of cell death observed after seeding cells into three-dimensional constructs.
| Potential Cause | Diagnostic Steps | Recommended Solution |
|---|---|---|
| High solvent cytotoxicity | Perform a live/dead assay 24-48 hours after seeding. Test solvent-only control groups. | For most cancer cell lines, keep DMSO concentrations at or below 0.3125% (v/v) to minimize cytotoxicity. Ethanol exhibits higher toxicity and should be used with extreme caution, as it can reduce viability by over 30% even at 0.3125% [67]. |
| Inadequate nutrient diffusion | Section the construct and stain for viability in the core vs. periphery. Monitor glucose/lactate levels. | Optimize construct size and porosity. For hydrogels, ensure high initial viability (>95%) by selecting a biocomposite material (e.g., collagen/alginate). Note that a gradual decrease in DNA content may be due to physical cell loss from the degrading scaffold rather than death [66]. |
| Improper cell seeding technique | Measure encapsulation efficiency 24 hours post-seeding using DNA quantification [66]. | Standardize the seeding protocol. For C2C12 cells in collagen scaffolds, a dropwise addition of cell suspension is used, followed by an initial 1-hour incubation before adding more medium [68]. |
G3. Inconsistent Results in Cell Viability Assays
Problem: High variability and poor reproducibility in MTT or other viability assays.
| Potential Cause | Diagnostic Steps | Recommended Solution |
|---|---|---|
| Incorrect cell seeding density | Check confluency at the time of assay. Generate a standard curve of absorbance vs. cell number for your specific cell line. | Optimize density for each cell line and assay duration. A density of 2000 cells/well in a 96-well plate provided consistent linear results across six different cancer cell lines (HepG2, MCF-7, etc.) for MTT assays at 24, 48, and 72 hours [67]. |
| Interference from culture solvents | Include solvent control wells at all concentrations used in the experiment. | Use the lowest possible solvent concentration. DMSO at ≤0.3125% is generally safe for most cell lines, but its cytotoxicity is cell-type and exposure-time dependent [67]. |
| Non-uniform cell distribution | Microscopically inspect wells for even cell attachment after the adhesion period. | Use standardized, well-mixed cell suspensions and consistent pipetting techniques. For suspension cultures in shake flasks, ensure optimal agitation rate and orbital diameter (e.g., 110 RPM and 25 mm for HEK293 cells) for uniform culture conditions [69]. |
Frequently Asked Questions (FAQs)
F1. Why is cell seeding density so critical, and how do I find the optimum for my experiment?
Cell seeding density directly impacts cell-cell communication, nutrient consumption, and response to biochemical cues, thereby influencing key outcomes like proliferation, differentiation, and viability assay results [65] [67] [66].
Finding the optimum requires empirical testing. Seed your cells at a range of densities (e.g., 125 to 8000 cells/well for 2D assays [67], or 1x10⁶ to 16x10⁶ cells/mL for 3D hydrogels [66]) and culture them for the desired duration. Then, assess the outcome metric most critical to your study, such as:
- Gene expression of differentiation markers [65].
- Extracellular matrix deposition (e.g., collagen II) [66].
- Linear range of signal in a viability assay like MTT [67].
F2. What are the best practices for transitioning from adherent to suspension culture systems?
Transitioning to suspension culture, often necessary for scale-up, introduces new parameters that require optimization [69].
- Key Parameters to Optimize: Agitation rate, orbital diameter, and gas transfer are critical in suspension systems [69].
- Optimal Conditions for HEK293 Cells: One study found that an agitation rate of 110 RPM, an orbital diameter of 25 mm, and 85% relative humidity yielded the highest specific growth rate and shortest doubling time [69].
- Use of DOE: Employ Design of Experiment (DOE) methodologies to efficiently test multiple culture parameters simultaneously and understand their interactions, rather than using a slower one-factor-at-a-time approach [70].
F3. How long should my differentiation protocol be, and what if terminal differentiation is not achieved?
The required incubation time depends on the target cell lineage and the specific protocol.
- Epithelial Differentiation: For adipose-derived stem cells, an 11-day submerged culture can achieve partial differentiation, but full maturation requires transitioning to air-liquid interface (ALI) conditions for several more weeks [65].
- Sustaining Differentiation: If terminal differentiation is not sustained in long-term cultures (e.g., decreased marker expression after 32 days), introducing a co-culture system with relevant primary cells (e.g., bronchial epithelial cells) can help maintain the differentiated state by providing necessary secreted factors [65].
F4. How can I improve the reproducibility of my 3D cell culture models?
Reproducibility in 3D culture is challenged by variability in natural matrices like Matrigel. Key strategies include:
- Adoption of Defined Biomaterials: Use synthetic or highly defined hydrogels instead of tumor-derived extracts. This reduces batch-to-batch variability and improves experimental consistency [71].
- Standardization of Processes: Define and严格控制 Critical Process Parameters (CPPs), such as pH, dissolved oxygen, and nutrient feeding schedules, during cell expansion in bioreactors [72].
- Characterization of Hydrogel Properties: Control and document the physical properties of your scaffolds, such as stiffness, as they directly influence cell differentiation [66].
Experimental Protocols
P1. Protocol: Optimization of Cell Seeding Density for MTT Assays in 96-Well Plates
This protocol is adapted from a study optimizing density for six cancer cell lines [67].
1. Materials
- Cell lines of interest (e.g., HepG2, MCF-7)
- Complete cell culture medium
- DMSO or other solvent for test compounds
- 96-well cell culture plate, sterile
- MTT reagent and solubilization solution
- Automated cell counter
- Microplate reader
2. Method
- Step 1: Harvest and Count. Harvest cells during their exponential growth phase. Create a homogeneous cell suspension and count accurately using an automated cell counter.
- Step 2: Prepare Cell Dilutions. Prepare a series of cell suspensions targeting a range of seeding densities. The study [67] used 125, 250, 500, 1000, 2000, 4000, and 8000 cells per well in a 100 µL volume.
- Step 3: Seed Plate. Seed the cells into the 96-well plate, ensuring each condition is performed in at least triplicate. Include wells with medium only as a blank control.
- Step 4: Incubate. Culture the plates for the desired time points (e.g., 24, 48, 72 h).
- Step 5: Perform MTT Assay. At each time point, add 10 µL of MTT reagent to each well. Incubate for 4 hours at 37°C to allow formazan crystal formation. Add the solubilization solution and shake gently until all crystals are dissolved.
- Step 6: Analyze. Measure the absorbance at 570 nm. Plot the absorbance against the cell seeding density for each time point to identify the density that provides a linear and non-saturating signal.
P2. Protocol: Seeding and Viability Assessment of Cells in 3D Collagen Scaffolds
This protocol is based on a method for evaluating C2C12 cells in collagen scaffolds [68].
1. Materials
- UV-sterilized collagen scaffolds (e.g., 12 mm diameter)
- 24-well plate
- Complete cell culture medium
- Cell suspension (C2C12 or other cell line of interest)
- Calcein-AM solution (3 µM in PBS)
- Propidium Iodide (PI) solution (2 µg/mL in PBS)
- Phosphate-buffered saline (PBS)
- Confocal microscope with live-cell imaging capability
2. Method
- Step 1: Seed Cells. Place one collagen scaffold into each well of a 24-well plate. In a biosafety cabinet, add 100 µL of complete medium containing the desired number of cells (e.g., 1x10⁵, 5x10⁵, or 1x10⁶ cells) dropwise onto each scaffold.
- Step 2: Initial Adhesion. Incubate the plate at 37°C in a humidified incubator for 1 hour to allow for cell attachment.
- Step 3: Add Medium. After the initial adhesion period, carefully add 500 µL of complete medium to each well, ensuring the scaffold is submerged. Continue incubation for the desired period (e.g., 48 hours).
- Step 4: Stain for Viability. Remove the medium and wash the scaffolds with PBS. Add 500 µL of a staining solution containing both Calcein-AM (labels live cells green) and Propidium Iodide (labels dead cells red). Incubate for 10 minutes at 37°C.
- Step 5: Image. Image the scaffolds immediately using a confocal microscope (e.g., excitation/emission: 496/505-540 nm for Calcein-AM; 535/605-645 nm for PI). A temperature-controlled stage is recommended.
Data Presentation
Table 1: Optimized Cell Seeding Densities for Various Applications
Summary of quantitative findings from recent literature on optimal cell densities.
| Cell Type | Application / Assay | Optimal Seeding Density | Key Outcome / Rationale |
|---|---|---|---|
| Adipose-Derived Stem Cells (ASCs) [65] | Epithelial differentiation on bioengineered scaffolds | 5 × 10⁶ cells cm⁻² | Achieved the highest partial epithelial differentiation. |
| Human Adipose-Derived MSCs (hAdMSCs) [66] | Chondrogenesis in collagen/alginate hydrogels | 16 × 10⁶ cells/mL | Promoted superior deposition of collagen II and aggrecan. |
| Various Cancer Cell Lines (e.g., HepG2, MCF-7) [67] | MTT viability assay (96-well plate, 72h) | 2000 cells/well | Yielded consistent linear viability across multiple cell lines and time points. |
| C2C12 Cells [68] | Seeding into 3D collagen scaffolds | 1 × 10⁵ to 1 × 10⁶ cells per scaffold | Tested range for viability assessment inside 3D constructs. |
Table 2: Cytotoxicity Thresholds of Common Solvents
Safe concentration limits for DMSO and Ethanol in cell culture, based on MTT assays in cancer cell lines [67].
| Solvent | Recommended Safe Concentration | Cytotoxic Profile & Notes |
|---|---|---|
| DMSO | ≤ 0.3125% (v/v) | Showed minimal cytotoxicity across most cell lines at this concentration. Effect is variable and depends on cell type and exposure duration. |
| Ethanol | < 0.3125% (v/v) | Exhibited rapid, concentration-dependent cytotoxicity, reducing viability by >30% at 0.3125% after 24h. Requires extreme caution. |
Table 3: The Scientist's Toolkit: Essential Reagents and Materials
Key materials used in the featured experiments and their functions.
| Item | Function / Application | Example from Literature |
|---|---|---|
| Fibrin Sealant (e.g., Tisseel) | Acts as a cell-delivery vehicle and 3D matrix within scaffolds to enhance cell attachment and tissue ingrowth [65]. | Used to create a composite scaffold with porous polyethylene for airway tissue engineering [65]. |
| Collagen/Alginate Hydrogels | Provide a soft, protective 3D environment that can spontaneously promote chondrogenic differentiation of MSCs without exogenous growth factors [66]. | Used to study the effect of stiffness (~6 kPa) and cell density on hAdMSC chondrogenesis [66]. |
| Calcein-AM / Propidium Iodide (PI) | Fluorescent live/dead stain for visualizing and quantifying cell viability within 3D constructs. Calcein-AM (green) marks live cells, PI (red) marks dead cells [68]. | Used to assess the viability of C2C12 cells inside 3D collagen scaffolds after 48 hours of culture [68]. |
| CD105, CD73, CD90 Antibodies | Positive surface markers used for immunophenotyping of Mesenchymal Stem Cells (MSCs) to confirm identity as per ISCT criteria [72] [66]. | Used to characterize human adipose-derived stem cells (hAdMSCs) via flow cytometry [66]. |
| Design of Experiment (DOE) Software | Statistical tool for efficiently designing and analyzing complex experiments with multiple variables, accelerating media and process optimization [70]. | Used for media mixture screening and optimization for CHO cell cultures [70]. |
Workflow and Relationship Diagrams
Diagram 1: Cell Culture Optimization Workflow
Diagram 2: Key Factors Influencing Cell Viability
Strategies for Handling Particulate Biomaterials to Minimize Assay Interference
Technical Support Center
Troubleshooting Guide: Common Issues and Solutions
Problem: High background noise or false positives in fluorescence-based viability assays.
- Potential Cause: The particulate biomaterial itself exhibits autofluorescence, which overlaps with the detection wavelengths of common fluorescent dyes [2] [3].
- Solution: Conduct a control experiment by incubating the biomaterial in the assay reagents without cells to determine its intrinsic fluorescent signature. Switch to label-free techniques, such as optical diffraction tomography (ODT), if the interference is significant [73]. Alternatively, use colorimetric assays like MTT or WST-1, but verify they are not chemically interfered with by the material [3].
Problem: Inconsistent viability results between different assay types (e.g., MTT vs. LDH).
- Potential Cause: The assay principle may be directly affected by the material's properties. Particulates can alter local pH, or their ions can affect critical assay components [2] [3]. For instance, a high pH caused by bioactive glass can disrupt the chemical reduction in MTT assays [2].
- Solution: Validate assay results with a second, orthogonal method based on a different principle. If using MTT, confirm that the material does not directly reduce the tetrazolium salt. Correlate findings with a membrane integrity-based assay, such as LDH or a live/dead fluorescence stain using calcein-AM/PI [2] [3].
Problem: Inaccurate cell counting or analysis in flow cytometry.
- Potential Cause: Biomaterial particles can be similar in size to cells, leading to the instrument counting particles as cells. This can severely skew viability percentages [2].
- Solution: Use a multiparametric staining panel that includes specific cellular markers (e.g., Hoechst for DNA) to reliably gate on true cell populations. The distinct light-scattering properties (FSC/SSC) of particles can also be used to distinguish them from cells during analysis [2].
Problem: Material-induced cytotoxicity obscures the true biocompatibility of the biomaterial.
- Potential Cause: Small particles and high concentrations can cause significant cytotoxicity, sometimes due to ion release and subsequent pH changes, making it difficult to assess the baseline effect of the material's surface [2] [74].
- Solution: Systematically test a range of particle sizes and concentrations. The table below, based on data from a Bioglass 45S5 (BG) study, illustrates how smaller particles at higher doses induce greater cytotoxic stress, which can be quantified [2]. This allows researchers to identify non-toxic testing parameters.
Table 1: Cytotoxicity of Bioglass 45S5 Particles on SAOS-2 Osteoblast-like Cells [2]
| Particle Size (µm) | Concentration (mg/mL) | Viability at 3h (Flow Cytometry) | Viability at 72h (Flow Cytometry) | pH at 3h |
|---|---|---|---|---|
| < 38 | 100 | 0.2% | 0.7% | 9.40 ± 0.2 |
| 63-125 | 100 | 6.4% | 6.5% | 8.85 ± 0.1 |
| 315-500 | 100 | 83.5% | 87.3% | 8.35 ± 0.1 |
| Control (no particles) | - | >97% | >97% | 7.45 ± 0.1 |
Frequently Asked Questions (FAQs)
Q1: Should I use the direct or indirect contact method for testing solid particulate biomaterials?
- A: The choice is critical and depends on your research question. The indirect method (using material extracts) tests only for leachable toxins. The direct method (cells cultured on the material) assesses the combined effect of the surface topology and any released substances. A comparative study on chitosan-bioglass composites found that the direct method often provides a more complete and accurate picture of cell-material interactions, as the surface itself significantly influences cell attachment and proliferation [74]. It is recommended to use both methods for a comprehensive assessment at early development stages.
Q2: My biomaterial particles are interfering with fluorescence imaging. What are my options?
- A: You have several alternative strategies:
- Switch to Label-Free Imaging Techniques: Technologies like Optical Diffraction Tomography (ODT) or Multimodal Nonlinear Optical (MNLO) imaging can visualize particle-cell interactions in 3D without any labels by relying on the inherent refractive index or molecular vibrations of the materials [75] [73].
- Use Flow Cytometry: Flow cytometry can be a more robust quantitative tool in the presence of particulates, as it can analyze large numbers of cells and use specific cellular stains to gate out particulate interference [2].
- Validate with Colorimetric Assays: If fluorescence is unavailable, colorimetric assays like WST-1 can be used, but their reliability must be confirmed against a reference method for your specific material [3] [74].
Q3: How does particle size and concentration affect cytotoxicity readings?
- A: Size and concentration are inversely correlated with cell viability. As shown in Table 1, smaller particles have a larger surface area-to-volume ratio, leading to faster ion release and more significant changes in the local microenvironment (e.g., pH). Higher concentrations exacerbate this effect. It is crucial to conduct dose-response and size-range studies to identify a non-toxic window for your application [2].
Q4: What is the most reliable assay for cell viability in the presence of particulates?
- A: No single assay is universally perfect. The most reliable approach is to use a combination of orthogonal assays based on different principles. A 2025 study directly comparing fluorescence microscopy (FM) and flow cytometry (FCM) concluded that while both showed a strong correlation, FCM demonstrated superior precision, sensitivity, and the ability to distinguish between apoptosis and necrosis, especially under high cytotoxic stress [2]. Therefore, a combination of a metabolic assay (like WST-1), a membrane integrity assay (like LDH or propidium iodide via FCM), and direct imaging (if possible with label-free techniques) provides the most robust dataset.
Experimental Protocol: Comparing Viability Assays for Particulate Biomaterials
This protocol outlines a method to directly compare fluorescence microscopy and flow cytometry for assessing the cytotoxicity of particulate biomaterials, based on a published study [2].
1. Material Preparation:
- Obtain the particulate biomaterial (e.g., Bioglass 45S5) and sieve it into distinct size ranges (e.g., < 38 µm, 63-125 µm, 315-500 µm).
- Prepare a sterile stock dispersion (e.g., 2.56 mg/mL) by pre-wetting the particles with a small volume of ethanol (e.g., 0.5%), then dispersing in a 0.05 wt% Bovine Serum Albumin (BSA)-water solution using a standard sonication protocol [2] [76].
- Dilute the stock to desired final concentrations (e.g., 25, 50, 100 mg/mL) in complete cell culture medium.
2. Cell Culture and Treatment:
- Culture an appropriate cell line (e.g., SAOS-2 osteoblast-like cells or THP-1-derived macrophages).
- Seed cells in multi-well plates. For assays requiring direct comparison, use the same seeding density and plate format compatible with both microscopy and flow cytometry.
- Once cells adhere, expose them to the prepared particle dispersions. Include untreated cells as a negative control.
- Incubate for relevant time points (e.g., 3h and 72h).
3. Viability Staining and Analysis:
- For Fluorescence Microscopy (FM): Use a dual fluorescent stain such as Fluorescein Diacetate (FDA) for live cells (metabolic activity) and Propidium Iodide (PI) for dead cells (membrane integrity). After incubation with stains, image multiple, randomly selected fields. Viability is calculated as the percentage of live cells relative to the total number of cells.
- For Flow Cytometry (FCM): Use a multiparametric staining kit. Harvest cells (including those attached and in supernatant), and stain with a cocktail containing Hoechst (DNA content), DiIC1 (mitochondrial membrane potential), Annexin V-FITC (apoptosis), and PI (necrosis). Analyze on a flow cytometer. The viable cell population is identified as Hoechst-positive, Annexin V/PI-negative.
4. Data Correlation and Analysis:
- Calculate the percentage of viable cells from both FM and FCM data.
- Perform statistical analysis and linear regression to correlate the results from the two methods. A strong positive correlation (e.g., r = 0.94) validates the consistency of your findings, while discrepancies highlight potential assay interference [2].
The following workflow diagram summarizes the key decision points for selecting and validating a viability assay when working with challenging particulate biomaterials.
The Scientist's Toolkit: Research Reagent Solutions
Table 2: Essential Reagents and Materials for Particulate Biomaterial Testing
| Item | Function/Application | Key Considerations |
|---|---|---|
| BSA (Bovine Serum Albumin) | A dispersing agent for creating stable, endotoxin-free particle suspensions in medium [2] [76]. | Prevents particle agglomeration; use at low concentrations (e.g., 0.05 wt%). |
| Multiparametric Apoptosis/Necrosis Kit (Hoechst, DiIC1, Annexin V-FITC, PI) | For detailed cell death mechanism analysis via flow cytometry. Distinguishes viable, early/late apoptotic, and necrotic populations [2]. | Superior to simple live/dead stains for understanding the mode of cell death. |
| WST-1 Assay Reagent | A colorimetric assay for measuring mitochondrial activity and cell proliferation [74]. | Often more reliable than MTT; the formed formazan is water-soluble. |
| LDH Cytotoxicity Assay Kit | Measures lactate dehydrogenase release from cells with damaged membranes, a marker for irreversible cell death [3] [74]. | Use as an orthogonal method to metabolic assays to confirm results. |
| Calcein-AM / Propidium Iodide (PI) | A common fluorescent live/dead stain for fluorescence microscopy. Calcein-AM (live) is metabolized to green fluorescence; PI (dead) stains nuclear DNA in red [2]. | Check for material autofluorescence at the emission wavelengths of these dyes. |
| Optical Diffraction Tomography (ODT) | A label-free imaging technique that provides 3D quantitative phase images based on refractive index, allowing real-time tracking of particle-cell interactions [73]. | Ideal for visualizing uptake and cellular behavior without staining or labels. |
Improving Replicability and Reproducibility through Robust Assay Design
FAQs and Troubleshooting Guides
FAQ: Core Concepts and Selection
Q1: What is the difference between replicability and reproducibility in the context of cell-based assays?
A1: While sometimes used interchangeably, these terms describe distinct concepts critical for robust science:
- Replicability (Direct Replication): refers to the ability to reproduce a previously observed result by using the same experimental design, conditions, and data analysis as the original study within your own laboratory. [77] [78]
- Reproducibility (Analytic Replication or Systematic Replication): often refers to the ability of other researchers to replicate your findings in a different laboratory, either by reanalyzing your original data set or by performing a similar study under potentially different experimental conditions. [77] [78] Ensuring both is foundational to credible biomaterials testing.
Q2: How do I choose the most appropriate cell viability assay for my biomaterials research?
A2: The choice depends on what aspect of cell health you need to measure and your experimental constraints. Below is a structured comparison to guide your selection. [79] [22]
Table: Guide to Selecting Cell Viability and Cytotoxicity Assays
| Assay Type | What It Measures | Key Advantages | Key Limitations | Best for Biomaterials Research When You Need: |
|---|---|---|---|---|
| ATP-based Luminescence (e.g., CellTiter-Glo) [79] | Presence of ATP, indicating metabolically active cells. | High sensitivity, broad linear range, fast, less prone to artifacts. [79] [80] | Lysates cells, endpoint measurement. | A highly sensitive and robust readout of viable cell number in high-throughput formats. |
| Tetrazolium Reduction (e.g., MTT, WST-1) [79] [22] [21] | Cellular metabolic activity via mitochondrial dehydrogenase enzymes. | Well-established, colorimetric readout. | Long incubation; MTT produces insoluble formazan requiring solubilization. [79] [22] WST-1 is water-soluble but may require an electron acceptor. [21] | A cost-effective method where the equipment is limited to plate readers for absorbance. |
| Resazurin Reduction (e.g., CellTiter-Blue) [79] [22] | Cellular metabolic activity. | Relatively inexpensive, more sensitive than tetrazolium assays. [79] | Fluorescence of test compounds may interfere. [79] | A sensitive metabolic assay for lower-throughput studies. |
| Protease Activity (CellTiter-Fluor - Viability; CytoTox-Glo - Cytotoxicity) [79] | Live-cell protease activity (viability) or dead-cell protease release (cytotoxicity). | Can be multiplexed with other assays; no cell lysis required. [79] | Requires optimization of incubation time. | Multiplexing to simultaneously measure viable and dead cell populations in the same well. |
| Membrane Integrity (e.g., LDH release, DNA-binding dyes) [79] | Loss of membrane integrity, a marker of cell death. | Directly measures cytotoxicity. | Can miss early-stage apoptotic cells. | Specifically quantifying dead cells in a population after biomaterial exposure. |
The following workflow can help guide your initial assay selection:
Q3: Why is my assay signal unstable or declining over time, even in control wells?
A3: This is a common issue often related to cell health or assay conditions.
- Cause 1: Cell Overgrowth or Nutrient Depletion. If cells reach confluence or exhaust the culture medium during the assay, their metabolism will slow, reducing signal. [22]
- Troubleshooting: Optimize the initial cell seeding density and ensure the assay duration does not exceed the linear growth phase. Always generate a standard curve of signal versus cell number for your specific conditions. [80]
- Cause 2: Cytotoxicity of the Assay Reagent Itself. Some dyes, like MTT, can be toxic to cells, especially with prolonged incubation. [22]
- Troubleshooting: Titrate the reagent concentration and reduce the incubation time to the minimum required to generate a robust signal. Consider switching to a less toxic, non-lytic assay (e.g., RealTime-Glo MT or CellTiter-Fluor) if you need to monitor the same cells over time. [79]
FAQ: Experimental Design and Reproducibility
Q4: What are the most critical factors to ensure my cell viability data is reproducible across experiments and labs?
A4: Achieving reproducibility requires attention to both biological and technical details.
- Factor 1: Use of Authenticated, Low-Passage Cells. Using misidentified, cross-contaminated, or over-passaged cell lines is a major source of irreproducible data. [78] Serial passaging can lead to genetic drift and changes in phenotype. [78]
- Action: Use authenticated cell lines from reputable biorepositories, regularly test for mycoplasma, and use low-passage stocks for key experiments. Maintain detailed records of cell line history. [78]
- Factor 2: Rigorous Assay Optimization and Controls. A poorly optimized assay with high variability cannot produce reproducible results.
- Action: During development, optimize key parameters like cell seeding density, reagent incubation time, and stability of the signal. [80] On every plate, include positive controls (e.g., a known cytotoxic agent like staurosporine) and negative controls (vehicle only) to validate the assay performance and enable normalization. [81] [80]
- Factor 3: Transparent and Detailed Reporting. Reproducibility is hindered when methodological details are vague. [77]
- Action: Document all protocols, including data management and analysis steps, with enough detail for another researcher to repeat the experiment exactly. Specify software, algorithms, and any data cleaning procedures used. [77]
Q5: How can I be sure that my biomaterial is affecting cell viability and not just interfering with the assay chemistry?
A5: Assay interference is a critical consideration, especially with novel materials.
- Strategy 1: Use an Orthogonal Assay. Do not rely on a single method. Confirm your results using a second, conceptually different viability or cytotoxicity assay. [81] For example, if you see a reduction in an MTT (metabolic) assay, confirm it with an ATP-based assay or a direct count of dead cells using a membrane integrity dye (e.g., propidium iodide). [81] [82]
- Strategy 2: Include Interference Controls. Run control wells containing your biomaterial at the test concentrations in culture medium without cells. Measure these wells with your assay protocol. Any signal generated indicates direct chemical interference between your biomaterial and the assay reagents. [22]
- Strategy 3: Visual Confirmation. Whenever possible, use microscopy to visually inspect cell morphology and confluence to confirm that the quantitative data matches the qualitative appearance of the cells.
The Scientist's Toolkit: Essential Reagents and Materials
Table: Key Research Reagent Solutions for Cell Viability Assays
| Reagent / Material | Function in Assay | Key Considerations for Reproducibility |
|---|---|---|
| Authenticated Cell Lines [78] | The biological model system. Using misidentified cells invalidates all results. | Source from reputable biorepositories (e.g., ATCC). Perform regular authentication (e.g., STR profiling) and mycoplasma testing. [83] [78] |
| Tetrazolium Salts (MTT, XTT, WST-1) [79] [22] [21] | Substrate reduced by metabolically active cells to a colored formazan product. | MTT formazan is insoluble and requires a solubilization step. WST-1 formazan is water-soluble, simplifying the protocol. Titrate concentration and incubation time to minimize cytotoxicity. [21] |
| ATP Detection Reagents (e.g., CellTiter-Glo) [79] | Luciferase enzyme uses cellular ATP to generate luminescence. | Highly sensitive and linear. The reagent lyses cells, making it an endpoint assay. Signal is stable for extended periods, facilitating high-throughput processing. [79] |
| Protease Substrate (e.g., GF-AFC for viability, bis-AAF-R110 for cytotoxicity) [79] | Fluorogenic substrate cleaved by proteases unique to live cells or released from dead cells. | Allows for multiplexing. The live-cell assay is non-lytic, enabling kinetic measurements or downstream analysis on the same cells. [79] |
| Resazurin Dye [79] [22] | Blue dye reduced by metabolically active cells to pink, fluorescent resorufin. | Less expensive than some alternatives. Can be subject to interference from fluorescent test compounds. [79] |
| Multi-Well Plates (96-, 384-well) [80] | The vessel for high-throughput assay execution. | Use tissue culture-treated plates for optimal cell adhesion. Be aware of "edge effects"; use a plate layout that randomizes samples and includes edge wells filled with PBS to minimize evaporation. [80] |
Advanced Troubleshooting: Protocol Optimization
Issue: High Background Signal or Poor Signal-to-Noise Ratio
- Check for Contamination: Bacterial or fungal contamination will increase background metabolic signal. Maintain sterile technique.
- Optimize Reagent Concentration: A concentration that is too high can lead to high background in cell-free wells. A concentration that is too low will yield a weak signal. Perform a titration of the assay reagent against a fixed number of cells to find the optimal concentration. [22]
- Check Culture Medium Components: Some culture media with high reducing capacity can spontaneously reduce tetrazolium or resazurin dyes over time. Run a medium-only control (blank) to assess this background. [22]
Issue: High Well-to-Well Variability (Poor Z'-factor)
- Ensure Homogeneous Cell Seeding: Clumped cells lead to uneven signal generation. Create a single-cell suspension before seeding and use automated dispensers or multichannel pipettes for consistency. [80]
- Confirm Consistent Assay Conditions: Minor temperature fluctuations during reagent incubation can cause significant variability. Use a calibrated, humidified incubator and allow assay plates to equilibrate to temperature before reading.
- Calculate the Z'-factor: This statistical metric evaluates the quality and robustness of an assay for high-throughput screening. A Z'-factor > 0.5 is considered an excellent assay. [80] The formula is: ( Z' = 1 - \frac{3*(SD{sample} + SD{control})}{|Mean{sample} - Mean{control}|} )
The following diagram summarizes the key pillars of a reproducibility framework for your lab:
Validating and Selecting the Optimal Viability Assay for Your Research
FAQs: Resolving Common Experimental Challenges
Q1: My fluorescence signal is weak or absent when analyzing biomaterial samples. What should I check?
For Fluorescence Microscopy:
- Verify optical configuration: Ensure the microscope shutter is open, no neutral density (ND) filters are in use, and the correct filter cube is fully rotated into the light path [84] [85]. The exciter and barrier filters must be correctly combined for your specific fluorochrome [84].
- Maximize light gathering: Use objectives with the highest possible numerical aperture (NA), as image intensity in reflected light fluorescence is proportional to the fourth power of the objective's NA [84] [85]. For a 40X objective, increasing the NA from 0.65 to 1.0 can make the image more than five times brighter [84].
- Check the light source: Ensure high-energy sources (e.g., mercury or xenon burners) are properly aligned and have not exceeded their lifespan (typically 100-300 hours for mercury burners) [84] [85].
For Flow Cytometry:
- Confirm antibody and staining validity: Ensure the target expression was sufficiently induced. The antibody must be titrated for your specific experimental conditions, and fixation/permeabilization protocols must be appropriate for the target's location [86] [87].
- Optimize fluorochrome selection: Pair low-abundance (rare) target proteins with bright fluorochromes (e.g., PE). Save dimmer fluorochromes (e.g., FITC) for highly expressed targets [86].
- Validate instrument settings: Check that the laser and photomultiplier tube (PMT) settings on the cytometer are compatible with the excitation and emission spectra of the fluorochromes used [86].
Q2: How can I reduce high background and non-specific staining in my particulate system assays?
For Both Techniques:
- Minimize autofluorescence: Thoroughly wash your specimen to remove excess fluorochrome prior to mounting or analysis [84] [85]. Use fresh cells when possible, as fixed or stressed cells can have increased autofluorescence [87].
- Employ viability dyes: Use viability dyes like propidium iodide (PI) or 7-AAD to gate out dead cells, which are a major source of non-specific binding [86] [87].
For Flow Cytometry:
- Block Fc receptors: Use Bovine Serum Albumin or commercial Fc receptor blocking reagents to prevent non-specific antibody binding [86].
- Optimize washing and titrations: Increase the number, volume, or duration of wash steps. Titrate your antibodies, as using too much antibody is a common cause of high background [86] [87].
- Review compensation: High background can result from poor compensation. Ensure your compensation controls are brighter than the corresponding signal in your experimental sample [87].
For Fluorescence Microscopy:
- Clean optical elements: Dust, dirt, or excess immersion oil on objectives, filters, and other optical elements can scatter light and increase background. Clean them regularly using proper techniques [84] [85].
- Use high-quality components: Ensure immersion oil is PCB-free and has low autofluorescence. Use objectives where the lens elements and cements do not autofluoresce, especially when working with near-UV light [84].
Q3: My results are inconsistent from day to day. How can I improve reproducibility?
For Both Techniques:
- Standardize sample preparation: Adhere strictly to protocols for cell culture, biomaterial treatment, and staining. Inconsistent digestion times for adherent cells or trypsinization can alter surface antigen expression and cause variability in flow cytometry [87].
- Control the environment: Perform fluorescence microscopy in a darkened room to allow your eyes to adjust and to improve discernment of dim specimens [84]. Protect all fluorescent samples from excessive light exposure during staining and processing to prevent photobleaching [87].
- Use appropriate controls: Include all necessary controls in every experiment. For flow cytometry, this includes unstained cells, fluorescence-minus-one (FMO) controls, and isotype controls [86] [87].
For Flow Cytometry:
- Maintain the instrument: Use calibration beads to ensure the cytometer is performing consistently. A clogged flow cell can also cause issues and may require cleaning with a 10% bleach solution followed by distilled water [86].
For Fluorescence Microscopy:
- Align the system: Ensure the microscope's light source is properly centered and aligned. Check that all optical components are correctly seated in the light path [88].
Quantitative Data Comparison
The following table summarizes key findings from a 2025 comparative study that evaluated cell viability of SAOS-2 osteoblast-like cells exposed to particulate Bioglass 45S5 (BG), using both Fluorescence Microscopy (FM) and Flow Cytometry (FCM) [2] [89].
Table 1: Comparison of Cell Viability Assessment using FM and FCM
| Parameter | Fluorescence Microscopy (FM) | Flow Cytometry (FCM) |
|---|---|---|
| Staining Method | FDA (fluorescein diacetate) and Propidium Iodide (PI) [2] [89] | Multiparametric: Hoechst, DiIC1, Annexin V-FITC, and PI [2] [89] |
| Viability Reported (Control) | > 97% [2] [89] | > 97% [2] [89] |
| Viability Reported (<38 µm BG, 100 mg/mL, 3h) | 9% [2] [89] | 0.2% [2] [89] |
| Viability Reported (<38 µm BG, 100 mg/mL, 72h) | 10% [2] [89] | 0.7% [2] [89] |
| Key Strengths | Direct visualization of cells in their spatial context; suitable for initial screening [2] [89] | Superior precision and sensitivity; high-throughput; distinguishes cell death stages (early/late apoptosis, necrosis) [2] [89] |
| Statistical Correlation | A strong correlation was found between FM and FCM data (r = 0.94, R² = 0.8879, p < 0.0001) [2] [89] |
Table 2: Technical Comparison of FM and FCM in Particulate Systems
| Aspect | Fluorescence Microscopy | Flow Cytometry |
|---|---|---|
| Sample State | Cells in culture environment or on scaffolds [90] | Single cells in suspension [90] |
| Throughput | Lower (limited fields of view); manual or semi-automated analysis [2] | High (thousands of cells per second) [2] |
| Information Gathered | Fluorescence intensity, cell morphology, and spatial localization of signals [90] | Fluorescence intensity and light scatter (FSC/SSC) at a single-cell level [2] |
| Impact on Cells | Non-destructive; cells can be monitored over time [90] | Destructive; requires cell dissociation, which can alter protein expression and cause cell loss [90] |
| Effect of Particulates | Biomaterial autofluorescence can inhibit imaging and cause sampling bias [2] | Can be optimized to gate out particulate debris; analyzes large cell numbers for objective quantification [2] |
Experimental Protocols for Particulate Biomaterial Testing
Protocol 1: Cell Viability Assessment via Fluorescence Microscopy
This protocol is adapted from a study evaluating the cytotoxicity of bioactive glass particles on osteoblast-like cells [2] [89].
- Sample Preparation: Seed SAOS-2 osteoblast-like cells and treat them with Bioglass 45S5 particles of defined size ranges (e.g., <38 µm, 63-125 µm, 315-500 µm) at varying concentrations (e.g., 25, 50, 100 mg/mL) for the desired duration (e.g., 3h and 72h) [2] [89].
- Staining: Incubate cells with a live/dead staining solution. The study used FDA (fluorescein diacetate) for viable cells and PI (propidium iodide) for non-viable cells [2] [89].
- Image Acquisition: Use a fluorescence microscope with appropriate filter sets for FITC (for FDA) and TRITC/Texas Red (for PI). Acquire multiple, random fields of view to mitigate sampling bias [2].
- Analysis: Manually count or use image analysis software to quantify the number of live (green) and dead (red) cells. Calculate the percentage viability as (Number of Live Cells / Total Number of Cells) × 100 [2] [89].
Protocol 2: Multiparametric Cell Death Analysis via Flow Cytometry
This protocol provides a more detailed breakdown of cell populations, including apoptotic stages [2] [89].
- Cell Treatment & Harvest: Treat SAOS-2 cells with particulate biomaterials as described in Protocol 1. Harvest cells from the culture substrate, which may require trypsinization for adherent cells. Note that this dissociation step can introduce stress and artifact [2] [90].
- Staining: Resuspend the cell pellet in an appropriate buffer and incubate with a multiparametric stain cocktail. The cited study used:
- Hoechst: A DNA-binding dye for general cell identification.
- DiIC1: A mitochondrial dye for assessing membrane potential in live cells.
- Annexin V-FITC: To detect phosphatidylserine externalization, a marker of early apoptosis.
- Propidium Iodide (PI): To label cells with compromised membranes (late apoptotic and necrotic cells) [2] [89].
- Data Acquisition: Analyze the cell suspension on a flow cytometer equipped with the appropriate lasers and filters for the fluorochromes used. Collect a minimum of 5,000 events for your population of interest to ensure statistical robustness [2] [87].
- Gating and Analysis: Use flow cytometry analysis software to gate on single cells based on FSC and SSC. Then, create a bivariate plot (e.g., Annexin V vs. PI) to distinguish the populations:
The Scientist's Toolkit: Key Research Reagent Solutions
Table 3: Essential Reagents for Viability Assessment in Particulate Systems
| Reagent / Dye | Function / Target | Key Consideration |
|---|---|---|
| Propidium Iodide (PI) | DNA intercalator; labels nuclei of dead cells with compromised membranes [2] [89]. | Membrane-impermeant. Cannot be used with fixed, permeabilized cells as it will stain all nuclei. |
| FDA / Calcein AM | Acetoxymethyl ester hydrolyzed by intracellular esterases in live cells, producing green fluorescence [2] [89]. | Indicator of metabolic activity, a hallmark of viability. |
| Annexin V (conjugated) | Binds to phosphatidylserine (PS) exposed on the outer leaflet of the cell membrane during early apoptosis [2] [87]. | Requires calcium-containing buffer. Should be used with a viability dye (like PI) to distinguish from late apoptotic/secondary necrotic cells. |
| 7-AAD | DNA dye similar to PI; used as a viability marker in flow cytometry [87] [91]. | Often used as an alternative to PI in multicolor panels due to different spectral properties. |
| Hoechst Stains | Cell-permeant DNA dyes that label all nuclei; useful for identifying and counting total cells [2]. | Can be toxic with prolonged exposure. Use at the lowest effective concentration. |
| Fixation Solution (e.g., Formaldehyde) | Cross-links proteins to preserve cellular structures and arrest biological processes at the time of fixation [86] [87]. | Use methanol-free formaldehyde for intracellular targets to prevent protein loss. Concentration and fixation time must be optimized. |
| Permeabilization Buffer (e.g., Saponin, Triton X-100, Methanol) | Disrupts cell membranes to allow intracellular antibody or dye access [86] [87]. | Choice of detergent is critical. Saponin is milder; Triton X-100 is stronger; ice-cold methanol is required for some nuclear targets but can destroy some epitopes. |
Technical Support Center
Frequently Asked Questions (FAQs)
Q1: Why do smaller bioactive glass particles often show greater cytotoxicity than larger particles at the same concentration? A1: Smaller particles have a larger surface area-to-volume ratio, which accelerates the release of ions (such as sodium and calcium) into the culture medium. This rapid ionic exchange significantly increases the local pH, disrupting cellular homeostasis and leading to increased cell death [2]. Furthermore, their small size facilitates greater cellular uptake, which can cause physical damage to intracellular structures [92].
Q2: My cell viability results are inconsistent between assays. What could be the cause? A2: Inconsistencies can arise from several factors:
- Assay Interference: Particulate biomaterials can cause autofluorescence or light scattering, which interferes with fluorescence microscopy (FM) readings [2].
- Sampling Bias: FM analyzes only a few fields of view, which may not be representative, whereas flow cytometry (FCM) analyzes thousands of cells, providing more statistical power [2].
- Viability Marker: Different assays measure different parameters (e.g., metabolic activity, membrane integrity). Ensure the selected assay is appropriate for your specific bioactive glass formulation and cell type.
Q3: At what concentration does bioactive glass typically start to show cytotoxic effects? A3: Cytotoxicity is highly dependent on particle size and cell type. The threshold can vary significantly, but generally:
- For nanopowders, concentrations above 2 mg/mL can start to show significantly higher cytotoxicity compared to micropowders over 48 hours [93].
- For micron-sized particles (63-125 µm), concentrations may need to be much higher (e.g., 100 mg/mL) to induce substantial cytotoxicity within 72 hours [2].
- It is crucial to conduct a dose-response pilot study to determine the specific threshold for your experimental setup.
Q4: What is the recommended control for bioactive glass cytotoxicity experiments? A4: A positive control for cytotoxicity (e.g., cells treated with a known cytotoxic agent) and a negative control (cells with culture medium alone) should be included. Furthermore, it is essential to characterize the ionic composition and osmolality of the particle-conditioned medium, as these factors are key drivers of cytotoxicity [92].
Troubleshooting Guides
Problem: High Background Noise in Fluorescence-Based Viability Assays
- Potential Cause: Autofluorescence from the bioactive glass particles themselves.
- Solution:
- Verify the problem: Capture an image of the particles without cells. If a signal is detected in the relevant channel, autofluorescence is confirmed.
- Find the problem: Try using different fluorescent dyes or filter sets to find a channel with minimal interference.
- Repair the problem: Switch to a different detection method, such as luminescence-based assays (e.g., ATP assays) or flow cytometry, which are less susceptible to particulate interference [2] [94].
Problem: Low Cell Viability Across All Experimental Groups, Including Controls
- Potential Cause: The process of preparing the bioactive glass extract or conditioning the medium has altered its properties (e.g., pH, osmolality) to a toxic level.
- Solution:
- Verify the problem: Measure the pH and osmolality of the conditioned medium used for cell culture [92].
- Find the problem: Compare the measured values to the optimal range for your cell line. A pH above ~7.8 or significant osmolality shifts can be harmful.
- Repair the problem: Adjust the concentration of the bioactive glass or modify the medium conditioning protocol (e.g., reduce shaking time, use a different serum concentration) to maintain physiological pH and osmolality.
Problem: Inconsistent Results Between Technical Replicates in a 96-Well Plate
- Potential Cause: Uneven settlement or sedimentation of bioactive glass particles, leading to inconsistent exposure across wells.
- Solution:
- Verify the problem: Observe the plate visually after seeding to check for an uneven particle distribution.
- Find the problem: This is a common issue with particulate suspensions.
- Repair the problem: Ensure the particle suspension is homogenous before adding it to each well. Use gentle, continuous agitation during the seeding process if possible.
Experimental Data and Protocols
Table 1: Size-Dependent Cytotoxicity of Spherical Mesoporous Bioactive Glass (NMBGs) on MC3T3-E1 Osteoblasts [92]
| Particle Size (nm) | Key Finding on Intracellular Localization | Cytotoxicity Outcome |
|---|---|---|
| 61 - 174 | Transported via the lysosomal pathway and contained within lysosomes. | Lower cytotoxicity over time. |
| > 174 (e.g., 327, 484, 647) | Escape from lysosomes into intra-cytoplasmic vacuoles or the cytoplasm. | Higher cytotoxicity; can induce apoptosis due to lysosomal damage. |
Table 2: Dose- and Size-Dependent Viability of SAOS-2 Cells Exposed to Bioglass 45S5 [2]
| Particle Size (µm) | Concentration (mg/mL) | Cell Viability at 72h (Flow Cytometry) |
|---|---|---|
| < 38 | 25 | ~40% |
| < 38 | 100 | < 1% |
| 63 - 125 | 25 | ~75% |
| 63 - 125 | 100 | ~15% |
| 315 - 500 | 100 | ~85% |
Table 3: Comparison of Cell Viability Assessment Techniques [2]
| Method | Key Advantages | Key Limitations |
|---|---|---|
| Fluorescence Microscopy (FM) | Direct visualization of cells; accessible equipment. | Low throughput; subjective analysis; susceptible to material autofluorescence. |
| Flow Cytometry (FCM) | High-throughput; quantitative; multi-parameter data; can distinguish apoptosis. | Requires single-cell suspension; higher cost; complex data analysis. |
1. Preparation of Bioactive Glass Extracts:
- Sterilize bioactive glass particles (e.g., via autoclaving or UV irradiation).
- Prepare a range of concentrations (e.g., 0.5, 1, 2, 5, 10, 15, 20 mg/mL) in complete cell culture medium.
- Place the suspensions in a shaker incubator for 48 hours at 37°C to allow for ionic exchange.
- Centrifuge the suspensions (e.g., 4000 rpm for 10 minutes) and filter-sterilize the supernatant (0.2 µm filter) to obtain the particle-conditioned medium.
2. Cell Seeding and Treatment:
- Seed cells (e.g., osteoblasts or fibroblasts) in a 96-well plate at a standardized density (e.g., 2 x 10⁴ cells per well).
- Allow cells to adhere for 24 hours.
- Remove the normal growth medium and replace it with the prepared conditioned media extracts.
3. MTT Assay Execution:
- After the desired incubation period (e.g., 24 or 48 hours), remove the supernatant from the wells.
- Add a fresh medium containing MTT reagent (0.5 mg/mL final concentration) to each well.
- Incubate the plate for 2-4 hours at 37°C to allow for formazan crystal formation.
- Carefully remove the MTT solution and dissolve the formed formazan crystals in an organic solvent like Dimethyl Sulfoxide (DMSO).
- Measure the optical density (OD) of the solution spectrophotometrically at a wavelength of 540 nm.
4. Data Analysis:
- Calculate the percentage of cell viability using the formula:
% Cell Viability = (OD of Sample - OD of Blank) / (OD of Control - OD of Blank) * 100
The Scientist's Toolkit: Essential Research Reagents & Materials
Table 4: Key Reagents and Materials for Bioactive Glass Cytotoxicity Testing
| Item | Function/Application |
|---|---|
| MTT Assay Kit | A colorimetric assay to measure cell metabolic activity as a marker of viability [93]. |
| FDA/PI Stains | Fluorescent dyes for fluorescence microscopy (FM); FDA stains live cells (green), PI stains dead cells (red) [2]. |
| Annexin V-FITC / PI Apoptosis Kit | For flow cytometry (FCM) to distinguish between viable, early apoptotic, late apoptotic, and necrotic cell populations [2]. |
| Bioactive Glass Particles | The test material, available in various size ranges (nanopowder to micropowder) and compositions [92] [93]. |
| Cell Culture Plates (96-well) | Standard platform for conducting cell-based assays in replicates. |
| Osmometer | Critical instrument for measuring the osmolality of particle-conditioned media to rule out osmotic stress [92]. |
| pH Meter | Essential for verifying that the pH of the conditioned medium remains within a physiological range [92]. |
Experimental Workflows and Signaling Pathways
Bioactive Glass Cytotoxicity Experimental Workflow
Key Mechanisms of Bioactive Glass Cytotoxicity
Correlating Different Viability Readouts and Establishing Method Reliability
Core Concepts: Understanding Viability Assays
Cell viability assays are fundamental tools in biomaterials testing, used to assess cell health, proliferation, and cytotoxicity in response to new materials. The reliability of your research data hinges on selecting the appropriate assay and understanding what each method actually measures. This section addresses the core principles and common points of confusion.
FAQ: Why do different viability assays on the same biomaterial sample sometimes provide conflicting results?
Different assays measure distinct physiological aspects of a cell, and these aspects can be affected differently and at varying timescales by a biomaterial. The diagram below illustrates the core cellular functions that different classes of assays target.
Figure 1: Core Strategies in Cell Viability Analysis
Conflicting results are not necessarily errors but often reveal the complex, multi-faceted biological response of cells to your biomaterial [95]. For instance:
- A biomaterial might initially disrupt mitochondrial metabolism (affecting MTT assays) before causing physical membrane damage (affecting dye exclusion assays) [18] [95].
- Apoptosis vs. Necrosis: A material might induce programmed cell death (apoptosis), where cells maintain membrane integrity for a significant time. An apoptosis assay (e.g., Annexin V) would detect early death, while a membrane integrity assay (e.g., Trypan Blue) would not, leading to seemingly contradictory data where a population is dying but still "unstained" [95].
FAQ: What is the single most reliable cell viability assay for biomaterials research?
There is no single "most reliable" assay. The best choice depends entirely on your specific research question, the properties of your biomaterial, and your experimental setup [18] [96]. The key to reliability is orthogonal validation – using two or more assays based on different principles to build a complete and credible picture of cell health [95].
The table below summarizes the core characteristics of the major assay classes to guide your initial selection.
| Assay Category | What It Measures | Key Advantages | Inherent Limitations & Common Pitfalls |
|---|---|---|---|
| Membrane Integrity (e.g., Trypan Blue, LDH, Propidium Iodide) [18] [95] | Integrity of the cell plasma membrane. | Simple, cost-effective, rapid. Directly correlates with necrotic cell death. | Can miss early-stage apoptosis. Dyes can penetrate viable cells under stress or with prolonged incubation [18]. LDH background in serum can cause interference [18]. |
| Metabolic Activity (e.g., MTT, WST-8/CCK-8, Resazurin, ATP assays) [95] [30] | Mitochondrial function, reductase activity, or cellular ATP levels. | High-throughput, sensitive. Can detect stress before membrane rupture. | Metabolic rates vary with cell type and confluency. Biomaterials or test compounds that alter metabolism can cause false positives/negatives [95]. |
| Apoptosis (e.g., Annexin V, Caspase detection) [95] | Specific markers of programmed cell death. | Distinguishes between apoptosis and necrosis. Detects death at an early stage. | Requires specialized reagents and flow cytometry for best results. Apoptotic processes can sometimes be reversible (anastasis) [18]. |
| Proliferation & Biomass (e.g., CFSE, DNA content) [95] | Cell division rates or total DNA/protein content. | Provides dynamic growth data, identifies cytostatic effects. | Does not distinguish between viable and non-viable cells in a static population. |
Troubleshooting Guides
High Background Signal in Fluorescence-Based Assays
A high background signal can obscure your results and lead to an underestimation of cytotoxicity.
Problem: High fluorescence or luminescence signal in negative controls or sample wells, making it difficult to distinguish between live and dead cells.
Investigation & Resolution:
Figure 2: Troubleshooting High Background
- Primary Cause in Biomaterials Research: Material autofluorescence. Many polymers and glasses used in biomaterials can naturally fluoresce when excited by common microscope or cytometer lasers, creating a high background that masks the specific signal from your viability dyes [96].
- Solution: Always include a material-only control (biomaterial in media without cells) processed with your viability stain. If this control shows high signal, the assay is compromised. Consider switching to a non-fluorescence-based method, such as a luminescent ATP assay, which is less susceptible to this interference [30].
Inconsistency Between Metabolic and Membrane Integrity Data
This is a common issue that often reveals biologically relevant information rather than a technical failure.
Problem: Your metabolic assay (e.g., MTT, Resazurin) shows a significant drop in viability, while your membrane integrity assay (e.g., Trypan Blue, LDH) shows most cells are still intact.
Investigation & Resolution:
- Likely Biological Interpretation: Your biomaterial is likely causing early-stage cellular stress or apoptosis. Metabolic assays are highly sensitive and can detect mitochondrial dysfunction or a reduction in metabolic rate well before the cell proceeds to irreversible membrane damage [95]. This pattern is characteristic of a delayed cytotoxic response or the induction of programmed cell death.
- Action Plan:
- Corroborate with an Apoptosis Assay: Use an Annexin V/propidium iodide (PI) assay analyzed by flow cytometry. This will allow you to identify and quantify the population of cells that are in early apoptosis (Annexin V+/PI-), which explains the discrepancy [95] [96].
- Perform a Time-Course Experiment: Measure viability with both methods at multiple time points (e.g., 3, 24, 72 hours). You will likely observe the membrane integrity values eventually drop to match the metabolic data as cells progress to late apoptosis and necrosis [96].
Frequently Asked Questions (FAQs)
FAQ: When testing particulate biomaterials (e.g., powders, scaffolds), should I use fluorescence microscopy or flow cytometry?
This is a critical methodological choice. A 2025 comparative study on bioactive glass particles provides direct evidence for making this decision [96].
| Parameter | Fluorescence Microscopy (FM) | Flow Cytometry (FCM) |
|---|---|---|
| Principle | Visual imaging of stained cells on a surface. | Quantitative analysis of cells in suspension. |
| Best For | Visualizing cell attachment and morphology on material surfaces. | High-throughput, objective quantification of viability in large cell populations. |
| Key Advantage | Direct spatial context; see where cells are living/dying relative to the material. | Superior statistical power, precision, and ability to detect rare cell populations. |
| Major Pitfall with Particulates | Sample Bias & Interference: Particles can autofluoresce, scatter light, and obscure cells. Manual counting of a few fields is prone to bias and may miss detached cells [96]. | Requires Single-Cell Suspension: Cells must be detached from the material, which can be challenging and may selectively lose dead or weakly attached cells. |
| Recommendation | Use FM for qualitative assessment of cell-material interactions. | Use FCM for robust, quantitative dose-response and time-course studies, as it demonstrated higher sensitivity and precision in a direct comparison [96]. |
FAQ: How can I improve the reproducibility and reliability of my viability data?
- Assay Optimization: Do not use kits or protocols "out of the box." Perform a validation experiment to optimize key parameters like cell seeding density, reagent incubation time, and background subtraction for your specific cell-biomaterial system. As demonstrated with resazurin assays, proper optimization can reduce measurement uncertainty to below 10% [97].
- Use Multiple Assays (Orthogonal Validation): Never rely on a single assay. Confirm key findings with a second assay from a different category (e.g., correlate a metabolic WST-8 assay with a membrane integrity dye exclusion test) [95].
- Include Comprehensive Controls: Your experiments must include:
- Negative Control: Untreated, healthy cells.
- Positive Control: Cells treated with a known cytotoxic agent (e.g., hydrogen peroxide, detergent).
- Material Control: Biomaterial in media without cells to account for optical or chemical interference.
- Standardize Your Protocols: Create and adhere to detailed Standard Operating Procedures (SOPs) for all assays to ensure consistency across experiments and between different researchers [97].
Detailed Experimental Protocols
Direct Comparative Protocol: FM vs. FCM for Particulate Biomaterials
This protocol is adapted from a study that directly compared these techniques for assessing bioactive glass cytotoxicity [96].
Objective: To quantitatively compare the viability of cells exposed to particulate biomaterials using Fluorescence Microscopy (FM) and Flow Cytometry (FCM).
Materials:
- Test Material: Particulate biomaterial (e.g., Bioglass 45S5). Sieve into defined size ranges (e.g., <38 µm, 63-125 µm, 315-500 µm) [96].
- Cell Line: SAOS-2 osteoblast-like cells (or a relevant cell line for your application).
- Staining for FM: FDA (Fluorescein diacetate) and PI (Propidium Iodide).
- Staining for FCM: Hoechst 33342 (DNA stain), DiIC1 (mitochondrial marker), Annexin V-FITC, and PI.
Method:
- Cell Seeding and Treatment: Seed cells in well plates. The following day, treat with a range of biomaterial concentrations (e.g., 25, 50, 100 mg/mL) for defined time points (e.g., 3h and 72h).
- Fluorescence Microscopy (FM) Analysis:
- Staining: After treatment, incubate cells with FDA and PI.
- Imaging: Acquire multiple, random images per well using a fluorescence microscope.
- Quantification: Use image analysis software (e.g., ImageJ, CellProfiler) to automatically count FDA-positive (live) and PI-positive (dead) cells.
- Calculation: Viability (%) = [Live Cells / (Live Cells + Dead Cells)] * 100.
- Flow Cytometry (FCM) Analysis:
- Cell Harvesting: Gently trypsinize cells and combine with any non-adherent cells from the supernatant to avoid selection bias.
- Staining: Resuspend the cell pellet in a binding buffer and incubate with the cocktail of Hoechst, DiIC1, Annexin V-FITC, and PI.
- Acquisition: Analyze samples on a flow cytometer, collecting data for at least 10,000 events per sample.
- Gating Strategy:
- Gate on cells using FSC-A vs. SSC-A to exclude debris.
- Use Hoechst staining to exclude doublets.
- Classify populations:
- Viable: Annexin V-/PI-
- Early Apoptotic: Annexin V+/PI-
- Late Apoptotic/Necrotic: Annexin V+/PI+
Expected Outcome: This protocol will generate two sets of viability data. FCM is expected to show higher sensitivity, especially under high cytotoxic stress, and will provide additional data on the mode of cell death (apoptosis vs. necrosis) [96].
Protocol for Optimizing a Resazurin (Alamar Blue) Assay
Resazurin assays are popular for their simplicity and safety, but they require optimization for reliable results [97].
Objective: To determine the optimal cell seeding density and resazurin incubation time for a specific cell line in the presence of a biomaterial.
Materials:
- Resazurin sodium salt solution.
- 96-well cell culture plate.
- Microplate reader.
Method:
- Cell Seeding Gradient: Seed your cell line in a 96-well plate at a range of densities (e.g., 1,000 to 50,000 cells/well in doubling dilutions). Include wells with media only (no cells) for background subtraction.
- Incubation and Assay: Allow cells to adhere overnight.
- Add Resazurin: Add a standardized volume of resazurin solution to each well (e.g., 10% of total media volume).
- Kinetic Reading: Immediately place the plate in a pre-warmed microplate reader and take a fluorescence measurement (Ex ~560 nm, Em ~590 nm). Repeat measurements every 30-60 minutes over a period of 4-8 hours.
- Data Analysis:
- Subtract the average signal of the media-only wells from all sample readings.
- Plot the fluorescence signal over time for each cell density.
Interpretation and Optimization:
- The optimal incubation time is within the linear phase of the signal increase for your chosen cell density. Avoid over-incubation, as the signal can plateau and lead to underestimation of viability.
- The optimal cell density is one that yields a strong, measurable signal above background after a reasonable incubation period (e.g., 1-4 hours). A density that is too high will exhaust the reagent too quickly, while one that is too low will yield a weak signal.
The Scientist's Toolkit: Essential Research Reagents & Materials
The following table lists key reagents and instruments used in the field for cell viability assessment, as referenced in the studies.
| Item Name | Function / Principle | Example Assays / Techniques |
|---|---|---|
| Trypan Blue [18] [95] | Membrane-impermeant dye that enters dead cells with compromised membranes, staining them blue. | Dye Exclusion Assays (manual or automated cell counting). |
| Propidium Iodide (PI) [18] [95] [96] | Membrane-impermeant DNA intercalating dye that fluoresces red upon binding to DNA in dead cells. | Flow Cytometry, Fluorescence Microscopy (live/dead staining). |
| Lactate Dehydrogenase (LDH) [18] [95] | Cytosolic enzyme released into culture medium upon membrane damage. Measured in supernatant. | LDH Release Assay (colorimetric). |
| MTT / WST-8 (CCK-8) [18] [95] [30] | Tetrazolium salts reduced by metabolically active cells to colored formazan products. | Metabolic Activity Assays (colorimetric). |
| Resazurin (Alamar Blue) [97] | Blue compound reduced to pink, fluorescent resorufin by living cells. | Metabolic Activity Assays (fluorometric/colorimetric). |
| Annexin V [95] [96] | Binds to phosphatidylserine (PS), which is externalized to the outer leaflet of the plasma membrane in early apoptosis. | Apoptosis Detection (typically used with PI and analyzed by Flow Cytometry). |
| ATP Assay Reagents [95] [30] | Luciferase enzyme uses ATP from viable cells to produce light. Signal is proportional to ATP concentration. | Luminescent Cell Viability Assays. |
| Automated Cell Counter [18] | Instrument to automate the counting and viability analysis of cells using dye exclusion principles. | Trypan Blue-based viability. |
| Flow Cytometer [95] [96] | Instrument for multiparametric, single-cell analysis of fluorescence and light scatter. | High-throughput viability, apoptosis, and cell cycle analysis. |
| Microplate Reader | Instrument to detect absorbance, fluorescence, or luminescence in multi-well plates. | High-throughput analysis of colorimetric, fluorescent, and luminescent viability assays. |
Evaluating Sensitivity, Statistical Power, and Ability to Distinguish Apoptosis from Necrosis
Frequently Asked Questions (FAQs)
FAQ 1: My viability data from fluorescence microscopy (FM) and flow cytometry (FCM) for the same particulate biomaterial sample are conflicting. Which result should I trust? Conflicting results often arise from the fundamental differences between these techniques. Flow cytometry is generally more sensitive and quantitative, especially in challenging conditions.
- Root Cause: Fluorescence microscopy can be adversely affected by particulate biomaterials, which cause autofluorescence and light scattering, inhibiting fluorescence imaging and leading to inaccurate viability counts. Furthermore, FM typically analyzes only a few fields of view, making it susceptible to sampling bias [2].
- Solution: Prioritize the flow cytometry data. A recent comparative study demonstrated a strong correlation between FM and FCM (r = 0.94) but found that FCM provides superior precision and statistical resolution, particularly under high cytotoxic stress. For instance, with highly cytotoxic <38 µm Bioglass particles, FCM measured viability at 0.2%, while FM reported 9%, with FCM offering more robust single-cell quantification [2].
- Preventive Steps: When working with particulate systems, use flow cytometry as the primary quantitative method. Fluorescence microscopy can be used complementarily for visual confirmation of cell morphology and attachment, but not as the sole source of quantitative data.
FAQ 2: How can I definitively distinguish between apoptosis and necroptosis in my cell culture model? Distinguishing between these pathways requires a multi-parametric approach assessing specific morphological, biochemical, and membrane integrity hallmarks.
- Root Cause: Apoptosis and necroptosis can occur simultaneously in cell populations exposed to the same stimulus. Relying on a single marker can lead to misclassification [98].
- Solution: Employ a panel of markers analyzed via flow cytometry or high-content imaging. The table below outlines the key differentiating features [99] [98] [100]:
| Parameter | Apoptosis | Necroptosis |
|---|---|---|
| Key Biochemical Marker | Activation of Caspase-3 (cleaved Caspase-3+) [99] | Phosphorylation of RIPK3 and MLKL [98] |
| Membrane Integrity | Generally maintained in early stages (Cisplatin-/PI-) [99] | Lost early in the process (Cisplatin+/PI+) [99] |
| Morphological Hallmarks | Cell shrinkage, nuclear condensation (pyknosis), and formation of apoptotic bodies [98] [100] | Cytoplasmic swelling (oncosis) and plasma membrane rupture [98] |
| Example Gating Profile | CC3+Cisplatin- (early apoptosis) [99] | CC3-Cisplatin+ (primary necrosis/necroptosis) [99] |
FAQ 3: My experiment requires high-throughput, label-free viability assessment. What are my options? Traditional staining methods can be limiting for continuous monitoring. Emerging label-free technologies are addressing this need.
- Root Cause: Staining-based methods are endpoint assays, introduce potential toxicity, and have lower throughput due to manual processing [2] [101].
- Solution: Investigate Optical Coherence Tomography (OCT). A recent study demonstrated a label-free method using OCT to assess the viability of Jurkat cells in a 3D volume. The technique analyzes temporal signal intensity fluctuations to estimate viability, allowing for individual cell assessment within a vial without contamination risk [101].
- Experimental Protocol: Cells are transferred to a closed vial. A 3D OCT scan is performed externally. To induce death, hydrogen peroxide is added, and measurements are repeated after two hours. Viability is estimated based on changes in signal fluctuations across the 3D volume post-processing [101].
FAQ 4: What is PANoptosis, and why is it relevant to my research on inflammatory bone disease? PANoptosis is a newly defined, intertwined form of inflammatory programmed cell death that has significant implications for disease pathology.
- Root Cause: In inflammatory diseases, cell death pathways do not always operate in isolation. There is crosstalk between apoptosis, necroptosis, and pyroptosis [102].
- Solution: Recognize that all three death pathways can be activated concurrently in a catastrophic burst of inflammation, a process termed PANoptosis. This has been identified in conditions like COVID-19, tumors, and cerebral infarction. In bone infection models, TNF-α has been shown to induce PANoptosis, which severely impairs osteogenic differentiation. Inhibition of key regulators like NLRP3 can rescue cells from this combined death fate, suggesting it's a valuable therapeutic target [102].
- Visual Aid: The following diagram illustrates the complex crosstalk between the different cell death pathways that can lead to PANoptosis.
Troubleshooting Guides
Problem: Low Statistical Power in Detecting Differences in Cell Death Low statistical power can mask true biological effects, leading to false negative conclusions.
| Potential Cause | Recommended Action | Experimental Protocol & Rationale |
|---|---|---|
| Insufficient Sample Size (n) | Perform a power analysis before the experiment. | Use pilot data to estimate the effect size and variability. For flow cytometry, a study comparing methods achieved high correlation (R² = 0.8879) by using large cell counts per sample, which provides a more precise estimate of the percentage of dead cells compared to microscopy that counts only a few fields of view [2]. |
| High Data Variability | Standardize cell handling and use a higher-precision instrument. | Ensure consistent cell passage number, reagent incubation times, and temperature. Switch from fluorescence microscopy to flow cytometry. One study highlighted FCM's superior precision, as it rapidly analyzes thousands of cells in suspension, minimizing sampling bias and operator-dependent errors inherent in manual FM counting [2]. |
| Inadequate Assay Sensitivity | Use a multiplexed approach targeting multiple death hallmarks. | Rather than a single viability dye, use a multi-parameter assay. For example, a protocol using Hoechst (DNA), DiIC1 (membrane potential), Annexin V-FITC (apoptosis), and PI (necrosis) can distinguish viable, early apoptotic, late apoptotic, and necrotic populations in a single run, increasing the assay's sensitivity to detect specific death subtypes [2]. |
Problem: Inability to Resolve Apoptosis from Necroptosis Misclassification of cell death type can lead to incorrect mechanistic conclusions.
| Potential Cause | Recommended Action | Experimental Protocol & Rationale |
|---|---|---|
| Relying on a Single Marker | Implement a multi-color flow cytometry panel. | Protocol: Co-stain cells with Annexin V (binds to phosphatidylserine, exposed in apoptosis), a viability dye like PI (stains necrotic cells with compromised membranes), and antibodies against key markers like cleaved Caspase-3 (apoptosis) and phospho-MLKL (necroptosis). Rationale: This allows for the simultaneous identification of multiple populations: Annexin V+/PI- (early apoptotic), Annexin V+/PI+ (late apoptotic/secondary necrotic), Annexin V-/PI+ (necroptotic/primary necrotic), and cleaved Caspase-3+ or pMLKL+ cells [99] [98] [100]. |
| Ignoring Morphological Clues | Combine biochemical staining with high-content image analysis. | Protocol: After staining with death markers, use a high-content imaging system to capture cell images. Quantify not only fluorescence but also morphological parameters like cell size (shrinkage in apoptosis vs. swelling in necroptosis) and nuclear condensation. Rationale: This provides a direct link between biochemical markers and the classic morphological hallmarks of each death type, strengthening the classification [98] [100]. |
| Pathway Crosstalk | Employ genetic or pharmacological inhibitors. | Protocol: Treat cells with a specific inhibitor (e.g., Z-VAD-FMK for pan-caspase inhibition to block apoptosis, or Necrostatin-1 for RIPK1 inhibition to block necroptosis) alongside your stimulus. Then, measure cell death. Rationale: If death is reduced by a caspase inhibitor, it confirms an apoptotic component. If death is paradoxically enhanced upon caspase inhibition, it suggests the removal of Caspase-8's suppression of necroptosis, revealing a necroptotic component [99] [98]. |
The Scientist's Toolkit: Research Reagent Solutions
This table details essential reagents for studying programmed cell death, drawing from established commercial assays and research literature.
| Reagent / Assay | Function / Target | Key Application in Cell Death Detection |
|---|---|---|
| Annexin V (e.g., FITC conjugate) | Binds to phosphatidylserine (PS) | Detection of early-stage apoptosis, as PS is translocated to the outer leaflet of the plasma membrane [100]. |
| Propidium Iodide (PI) | DNA intercalator, membrane impermeant | Discrimination of late apoptotic/necrotic cells (PI-positive) from early apoptotic and live cells (PI-negative) based on loss of membrane integrity [2] [100]. |
| Cisplatin (viability stain) | DNA binder, membrane impermeant | Similar to PI, used in mass cytometry and flow cytometry to identify cells with compromised plasma membranes [99]. |
| Antibody: Cleaved Caspase-3 | Detects activated Caspase-3 | A definitive marker for cells undergoing apoptosis via both extrinsic and intrinsic pathways [99] [100]. |
| Antibody: Phospho-MLKL | Detects activated MLKL | A specific marker for the execution phase of necroptosis [98]. |
| Hoechst 33342 | Cell-permeant DNA stain | Used as a nuclear counterstain to identify all cells in a sample and assess nuclear morphology (condensation, fragmentation) [2]. |
| MitoProbe DiIC1(5) | Mitochondrial membrane potential sensor | Loss of mitochondrial membrane potential (ΔΨm) is an early event in intrinsic apoptosis; decreased fluorescence indicates mitochondrial health deterioration [100]. |
| Necrostatin-1 | RIPK1 inhibitor | A specific pharmacological inhibitor used to confirm the involvement of the necroptosis pathway in observed cell death [98]. |
Comparative Analysis of Key Methodologies
The choice of detection method significantly impacts the sensitivity, statistical power, and discriminatory capacity of your cell death assays. The following table provides a quantitative comparison of common techniques.
| Method | Throughput | Sensitivity & Key Differentiators | Best Use Case |
|---|---|---|---|
| Fluorescence Microscopy (FM) | Low to Medium | - Resolution: Limited by diffraction. - Viability Measurement: Can be impeded by particulate autofluorescence. - Quantification: Labor-intensive, prone to sampling bias from few fields of view [2]. | Initial visual confirmation of cell morphology and qualitative assessment of attachment on biomaterials. |
| Flow Cytometry (FCM) | High | - Sensitivity: High; can detect rare cell populations. - Viability Measurement: Highly precise and quantitative. - Multiplexing: Excellent; can simultaneously analyze multiple death parameters (e.g., Annexin V, PI, Caspase-3) on a single-cell basis [2]. | High-throughput, quantitative distinction of cell death subtypes (apoptosis vs. necrosis) in heterogeneous populations. |
| Mass Cytometry (CyTOF) | High | - Multiplexing: Very High; uses metal-tagged antibodies to measure >40 parameters simultaneously without signal overlap. - Application: Powerful for detailed signaling studies across cell subpopulations, e.g., mapping CC3 and membrane integrity [99]. | Deep, systems-level analysis of cell death pathways and their crosstalk in complex co-cultures or tissue samples. |
| Optical Coherence Tomography (OCT) | Medium (developing) | - Key Feature: Label-free and non-invasive. - Viability Measurement: Based on temporal signal fluctuations from single cells. - Throughput: Allows 3D monitoring of cells in a sealed vial, suitable for biomanufacturing [101]. | Long-term, kinetic monitoring of cell viability without the risk of stain-induced toxicity, ideal for bioreactor processes. |
Signaling Pathways in Programmed Cell Death
A clear understanding of the core signaling pathways is fundamental to designing effective detection experiments. The diagram below illustrates the key regulators and interactions in apoptosis and necroptosis.
Guidelines for Integrating Multiple Assays for Comprehensive Biomaterial Characterization
Integrating multiple assays is fundamental to advancing biomaterials science, moving beyond traditional "trial and error" approaches. Comprehensive characterization requires a holistic strategy that combines physicochemical material analysis with robust biological evaluation to accurately predict in vivo performance and biocompatibility. This guide provides a structured framework and troubleshooting advice for implementing a multi-assay workflow, ensuring your biomaterial characterization is thorough, reproducible, and clinically relevant.
Foundational Concepts: The 'Why' Behind Multi-Assay Integration
The Limitation of Single-Assay Approaches
Relying on a single viability assay provides an incomplete picture of biomaterial performance. Different assays probe different aspects of cellular response, and a material that performs well in one assay may show adverse effects in another. For instance, a biomaterial might show high metabolic activity (suggesting good compatibility) while simultaneously inducing significant apoptosis (suggesting toxicity). Integrated profiling overcomes the limitations of biased, low-throughput techniques like qPCR and Western blotting for predefined targets, which can miss undefined shifts in cell behavior and fail to predict systemic biological responses [103].
The Hierarchy of Biomaterial Characterization
Characterization should span multiple scales:
- Macro-scale: Physical and mechanical properties (e.g., tensile strength, hardness).
- Micro-scale: Surface morphology and topology (e.g., via SEM).
- Molecular-scale: Chemical composition, protein expression, and genetic responses.
A multi-scale approach is critical because length scales and time scales hidden in one loading scenario can arise with new mechanical or biochemical loading. Integrated experiment and modeling is crucial for dissecting these cross-scale interactions, such as how nanoscale fibril staggering determines the macroscopic hysteretic energy absorption in bone tissue [104].
Troubleshooting Guides & FAQs
This section addresses common challenges researchers face when integrating multiple characterization assays.
FAQ 1: How do I resolve conflicting results between different cell viability assays?
Observation: You obtain high cell viability with one assay (e.g., Fluorescence Microscopy) but low viability with another (e.g., Flow Cytometry).
| Potential Cause | Solution |
|---|---|
| Different assay principles & measured endpoints | Understand what each assay truly measures. Combine assays that measure different pathways (e.g., metabolic activity with membrane integrity). |
| Biomaterial interference | Conduct control experiments with the biomaterial alone (no cells) for each assay to check for background signal or dye absorption. |
| Sampling bias | FM may only sample a few fields of view, while FCM analyzes the entire population. Use FCM for quantitative population data and FM for spatial context. |
Supporting Data: A 2025 study directly comparing FM and FCM on Bioglass 45S5 highlighted their correlation but also key differences. For the most cytotoxic condition (<38 µm particles at 100 mg/mL), FM-assessed viability was 9% at 3 hours, whereas FCM measured 0.2% under the same conditions. The authors concluded that FCM offered superior precision and statistical resolution under high cytotoxic stress, though both showed a strong correlation (r=0.94) [2].
FAQ 2: My biomaterial is interfering with fluorescence-based assays. What can I do?
Observation: High background autofluorescence or light scattering from the biomaterial polymer or glass is inhibiting accurate fluorescence imaging or flow cytometry readings [2].
| Potential Cause | Solution |
|---|---|
| Material autofluorescence | Switch to dye-free assays where possible (e.g., phase-contrast imaging, MTT for metabolism). If using fluorescence, choose dyes with emission spectra far from the material's autofluorescence. |
| Particulate light scattering | For flow cytometry, use extensive washing and gating strategies to exclude particulate debris. For microscopy, use confocal microscopy to obtain optical sections and reduce out-of-focus light. |
FAQ 3: How can I better predict in vivo performance from my in vitro assays?
Observation: In vitro assays show promising results, but the biomaterial fails in animal models due to adverse immune reactions.
| Potential Cause | Solution |
|---|---|
| Oversimplified in vitro models | Incorporate immune cells, such as macrophages, into your testing workflow. The host immune/inflammatory response is a critical determinant of in vivo success [105]. |
| Lack of dynamic analysis | Move beyond single time-point snapshots. Use in silico modeling techniques like Principal Component Analysis (PCA) and Dynamic Network Analysis (DyNA) to analyze complex, time-dependent cell response data, which has shown promise in predicting in vivo remodeling outcomes [105]. |
Experimental Protocols for Key Integrated Workflows
Protocol: Integrated Viability & Apoptosis/Necrosis Assessment
This protocol combines a general viability assay with a more specific assay for cell death pathways.
1. Aim: To distinguish between overall viability, programmed cell death (apoptosis), and uncontrolled cell death (necrosis). 2. Primary Assay (Viability): Fluorescence Microscopy (FM) with FDA/PI. * Method: Seed cells on biomaterial. Stain with FDA (5 µg/mL) and PI (10 µg/mL) for 5-10 min. Image with a fluorescence microscope. Viable cells fluoresce green (FDA), non-viable cells fluoresce red (PI). 3. Secondary Assay (Death Mechanism): Flow Cytometry (FCM) with Multiparametric Staining. * Method: Harvest cells from the biomaterial. Stain with a cocktail of Hoechst (DNA content), DiIC1 (mitochondrial membrane potential), Annexin V-FITC (apoptosis marker), and PI (necrosis marker). Analyze on a flow cytometer. * Interpretation: This allows classification into viable (Annexin V-/PI-), early apoptotic (Annexin V+/PI-), late apoptotic (Annexin V+/PI+), and necrotic (Annexin V-/PI+) populations [2]. 4. Integration of Data: Use FM to confirm cell attachment and morphology on the material surface. Use FCM for quantitative, high-throughput analysis of death pathways across the entire cell population.
Protocol: Combining In Vitro Macrophage Response with In Vivo Prediction
This protocol uses an in vitro macrophage assay and in silico analysis to predict the in vivo host response.
1. Aim: To predict whether a biomaterial will lead to constructive remodeling or a foreign body reaction in vivo. 2. Primary Assay (In Vitro Macrophage Culture): * Method: Culture human monocyte-derived macrophages on the test biomaterials. Collect supernatant and cells over multiple time points (e.g., 6, 24, 72 hours). * Analysis: Quantify a panel of secreted chemokines/cytokines (e.g., via ELISA) and analyze cell surface markers (e.g., via FCM) for M1 (pro-inflammatory) and M2 (pro-remodeling) phenotypes [105]. 3. Secondary Analysis (In Silico Modeling): * Method: Subject the multi-parameter, time-course data from the macrophage assay to data-driven modeling techniques such as Principal Component Analysis (PCA) and Dynamic Network Analysis (DyNA). * Interpretation: These techniques identify hidden patterns and determinants in the complex data set that have been associated with either positive in vivo remodeling (M2-dominated) or a foreign body reaction (M1-dominated) [105].
The workflow for predicting in vivo outcomes integrates multiple analytical stages as shown in the following diagram:
The Scientist's Toolkit: Essential Reagents & Materials
The following table details key reagents and instruments used in the integrated assays discussed in this guide.
Table: Key Research Reagent Solutions for Integrated Biomaterial Characterization
| Item | Function/Application | Example from Context |
|---|---|---|
| Fluorescein Diacetate (FDA) | Fluorescent live-cell stain. Converted to green-fluorescent fluorescein by intracellular esterases in viable cells. | Used in Fluorescence Microscopy (FM) for viability assessment alongside PI [2]. |
| Propidium Iodide (PI) | Red-fluorescent nuclear stain. Impermeant to live cells, binds to DNA of dead cells with compromised membranes. | Used in both FM and Flow Cytometry (FCM) as a standard dead cell marker [2]. |
| Annexin V-FITC | Binds to phosphatidylserine (PS), which is externalized to the outer leaflet of the cell membrane during early apoptosis. | Used in multi-parametric FCM staining to distinguish apoptotic from necrotic cells [2]. |
| Hoechst Stains | Cell-permeant blue-fluorescent stains that bind to DNA in live and dead cells. Useful for gating on cell populations in FCM. | Part of the multiparametric FCM panel for analyzing viability and cell death [2]. |
| Flow Cytometer | Instrument for high-throughput, quantitative analysis of physical and chemical characteristics of cells or particles in suspension. | Provided superior precision and subpopulation distinction in cytotoxicity testing of particulate biomaterials [2]. |
| In Silico Modeling Tools (PCA, DyNA) | Data-driven computational techniques for unbiased analysis of complex, multidimensional biological data sets. | Used to identify determinants in macrophage response data that predict in vivo remodeling outcomes [105]. |
Advanced Workflow: Integrating Omics Technologies
For a truly holistic characterization, consider integrating high-throughput omics technologies. These can replace biased, low-throughput functional readouts and provide a global view of the biological response.
Table: Overview of Omics Techniques for Biomaterial Characterization
| Omics Technology | What it Measures | Application Example in Biomaterials |
|---|---|---|
| Genomics | The complete set of genes and their functions. | Understanding genetic predispositions to material integration or rejection [103]. |
| Transcriptomics | The complete set of RNA transcripts (mRNA) produced by the genome. | RNA-seq to ensure new materials do not adversely alter the global transcriptome landscape, leading to graft failure [103]. |
| Proteomics | The complete set of proteins expressed by a cell or tissue. | Identifying protein signatures of osteogenesis in MG-63 osteoblasts cultured on new biomaterials for bone tissue engineering [103]. |
| Metabolomics | The complete set of small-molecule metabolites. | Revealing how biomaterials influence metabolic pathways, essential for designing biointeractive materials [106]. |
The path from basic material analysis to a multi-omics understanding involves progressively more detailed biological interrogation, as illustrated below:
Conclusion
The reliable assessment of cell viability is not a one-size-fits-all endeavor but a critical, multi-faceted process in biomaterials testing. A deep understanding of foundational principles, combined with a strategic selection of methodological tools—where flow cytometry is increasingly demonstrating superior precision for quantitative analysis in complex systems—forms the basis of robust data. By proactively implementing optimization and troubleshooting protocols, researchers can significantly enhance the reproducibility of their findings. Ultimately, a validated, context-driven approach to viability testing, which may involve correlating multiple methods, is paramount. Future directions will likely involve the integration of advanced biosensors and AI-driven image analysis to further standardize assessments, improve predictive power for in vivo performance, and accelerate the translation of innovative biomaterials into clinical applications.
References
- 1. Overview of Cell and Survival | Viability Signaling Technology Cell [https://www.cellsignal.com/science-resources/cell-viability-and-survival]
- 2. Evaluating cell viability assessment techniques [https://pmc.ncbi.nlm.nih.gov/articles/PMC12492793/]
- 3. Biocompatibility of Biomedical Materials: Reliability of Cell ... [https://www.mdpi.com/2076-3417/15/19/10684]
- 4. A review of cytotoxicity testing methods and in vitro study ... [https://link.springer.com/article/10.1007/s10856-025-06951-x]
- 5. A review on cell damage, viability , and functionality during... [https://pmc.ncbi.nlm.nih.gov/articles/PMC9756521/]
- 6. Comparative analysis of RT-qPCR, flow cytometry, and Di ... [https://pmc.ncbi.nlm.nih.gov/articles/PMC12418842/]
- 7. Addressing Sources of Error in the Cell Viability ... [https://www.nist.gov/mml/bbd/biomaterials/addressing-sources-error-cell-viability-measurement-process]
- 8. Future challenges in the in vitro and in vivo evaluation ... [https://pmc.ncbi.nlm.nih.gov/articles/PMC4817327/]
- 9. A Biological Breakdown of Autofluorescence: Why Your ... [https://evidentscientific.com/en/insights/a-biological-breakdown-of-autofluorescence-why-your-samples-naturally-glow]
- 10. Autofluorescence - an overview [https://www.sciencedirect.com/topics/immunology-and-microbiology/autofluorescence]
- 11. Autofluorescence Spectroscopy and Imaging: A Tool for ... [https://pmc.ncbi.nlm.nih.gov/articles/PMC4289852/]
- 12. Particle-induced artifacts in the MTT and LDH viability assays [https://pmc.ncbi.nlm.nih.gov/articles/PMC3446248/]
- 13. Managing Particulate Contamination in Cell Therapy [https://www.halolabs.com/blog/particulate-contamination-in-cell-therapy/]
- 14. Sources of Bias in Specimens for Research About Molecular ... [https://pmc.ncbi.nlm.nih.gov/articles/PMC2816003/]
- 15. Identifying biases and their potential solutions in human ... [https://pmc.ncbi.nlm.nih.gov/articles/PMC8132403/]
- 16. Unbiased Sampling of Solid Tumor Tissue [https://www.sciencedirect.com/science/article/pii/S2211124720304605]
- 17. Interference and Artifacts in High-content Screening - NCBI - NIH [https://www.ncbi.nlm.nih.gov/books/NBK615088/]
- 18. An Overview of the Current State of Cell Viability ... [https://pmc.ncbi.nlm.nih.gov/articles/PMC11719996/]
- 19. Guidance for evaluating biomaterials' properties and ... [https://www.sciencedirect.com/science/article/pii/S0109564124003488]
- 20. In vitro blood cell viability profiling of polymers used in ... [https://www.nature.com/articles/s41598-017-10169-5]
- 21. WST-1 Assay: principles, protocol & best practices for cell ... [https://www.abcam.com/en-us/knowledge-center/cell-biology/wst-1-assay-principles-protocols-and-best-practices-for-cell-viability]
- 22. Cell Viability Assays - Assay Guidance Manual - NCBI Bookshelf [https://www.ncbi.nlm.nih.gov/books/NBK144065/]
- 23. Trypan Blue Exclusion Assay, Neutral Red, Acridine ... [https://www.intechopen.com/chapters/82523]
- 24. Trypan Blue Exclusion Test of Cell Viability - PMC [https://pmc.ncbi.nlm.nih.gov/articles/PMC6716531/]
- 25. Trypan Blue Assay Protocol | Technical Note 181 [https://www.denovix.com/tn-181-denovix-trypan-blue-assay-protocol/]
- 26. Trypan Blue Cell Viability Staining: Protocol & Applications [https://www.revvity.com/ask/viability-using-trypan-blue]
- 27. Propidium Iodide Applications & Common Issues [https://www.aatbio.com/resources/application-notes/propidium-iodide-applications-common-issues]
- 28. Flow Cytometry Troubleshooting Guide [https://www.cellsignal.com/learn-and-support/troubleshooting/flow-cytometry-troubleshooting-guide?srsltid=AfmBOorUzT34J-_BQR9S-LYN5l9TlMc0KnjHYu90kH3HwrSUOBSn5pLU]
- 29. Propidium Iodide Assay Protocol | Technical Note 183 [https://www.denovix.com/tn-183-denovix-propidium-iodide-assay-protocol/]
- 30. Cell Viability Assays Market Surging to USD 2.05 Billion ... [https://www.towardshealthcare.com/insights/cell-viability-assays-market-sizing]
- 31. Standardized Protocol for Resazurin-Based Viability ... [https://pmc.ncbi.nlm.nih.gov/articles/PMC11640476/]
- 32. What are some common sources of error in cell viability ... [https://www.aatbio.com/resources/faq-frequently-asked-questions/what-are-some-common-sources-of-error-in-cell-viability-assays]
- 33. The Ultimate Guide to Troubleshooting Microplate Assays [https://bitesizebio.com/81249/troubleshooting-microplate-assays/]
- 34. CyQUANT MTT Cell Proliferation Assay Kit Protocol [https://www.thermofisher.com/us/en/home/references/protocols/cell-and-tissue-analysis/protocols/vybrant-mtt-cell-proliferation-assay-protocol.html]
- 35. 2nd Generation ATP equipment troubleshooting guide [https://my.luminultra.com/hc/en-us/articles/12092335345421-2nd-Generation-ATP-equipment-troubleshooting-guide]
- 36. FAQ: Metabolic Activity Assays [https://www.promega.ee/resources/pubhub/faq/faq-metabolic-activity-assays/]
- 37. LDH assay kit guide: Principles and applications [https://www.abcam.com/en-us/knowledge-center/cell-biology/ldh-assay-kit-guide-principles-and-application]
- 38. LDH Cytotoxicity Assay FAQs [https://info.gbiosciences.com/blog/ldh-cytotoxicity-assay-faqs]
- 39. What are the drawbacks of LDH release assay? [https://www.aatbio.com/resources/faq-frequently-asked-questions/what-are-the-drawbacks-of-ldh-release-assay]
- 40. Restriction Enzyme Troubleshooting Guide [https://www.neb.com/en-us/tools-and-resources/troubleshooting-guides/restriction-enzyme-troubleshooting-guide?srsltid=AfmBOopwVCfpr4ih1p05HkrZZsRzVve1a463oSJyP6eD6ttQDYAgSK4u]
- 41. Development and Optimization of a Lactate ... [https://www.mdpi.com/2674-1172/3/2/8]
- 42. Application of LDH assay for therapeutic efficacy ... [https://www.nature.com/articles/s41598-021-97894-0]
- 43. Cellular Fluorescence Microscopy Troubleshooting & Best ... [https://www.aatbio.com/resources/application-notes/cellular-fluorescence-microscopy-troubleshooting-best-practices]
- 44. Troubleshooting Tips for Fluorescence Staining [https://biotium.com/tech-tips-protocols/troubleshooting-tips-for-fluorescence-staining/]
- 45. Immunofluorescence Troubleshooting | Tips & Tricks [https://www.stressmarq.com/support/technical-support/troubleshooting/immunofluorescence-troubleshooting/?srsltid=AfmBOoqlzqQzVoFuV9iDvAuhHInyJIKMYgNVyghaR5-VR8eIi_ITiuKE]
- 46. Cell Viability Assays | Thermo Fisher Scientific - ES [https://www.thermofisher.com/us/en/home/life-science/cell-analysis/cell-viability-and-regulation/cell-viability.html]
- 47. How and in what situations should viability of specimens ... [https://www.cytometry.org/web/q_view.php?id=78&filter=Set-up%20and%20Validation%20of%20Flow%20Cytometry%20Panels]
- 48. Flow Cytometry Troubleshooting Guide [https://www.cellsignal.com/learn-and-support/troubleshooting/flow-cytometry-troubleshooting-guide?srsltid=AfmBOorIJGhWdqjXHIQVzCAU7XJ1aPoRRZCQ_HDTjL_QgjiQ_kMJGPgP]
- 49. Flow Cytometry Troubleshooting Guide [https://www.bio-techne.com/applications/flow-cytometry/flow-cytometry-troubleshooting-guide]
- 50. Flow Cytometry Troubleshooting Guide [https://fluorofinder.com/flow-cytometry-troubleshooting/]
- 51. Comprehensive Guide to Cell Health Assays in Flow ... [https://www.aatbio.com/resources/assaywise/2023-12-1/comprehensive-guide-to-cell-health-assays-in-flow-cytometry-a-multidimensional-exploration]
- 52. 10 Tips for High-Throughput Flow Cytometry [https://www.bioradiations.com/10-tips-for-optimizing-high-throughput-flow-cytometry-assays1125/]
- 53. A review of cytotoxicity testing methods and in vitro study of ... [https://pmc.ncbi.nlm.nih.gov/articles/PMC12534221/]
- 54. BestProtocols: Viability Staining Protocol for Flow Cytometry [https://www.thermofisher.com/us/en/home/references/protocols/cell-and-tissue-analysis/protocols/viability-staining-flow-cytometry.html]
- 55. Selecting Bioanalytical Assays for FDA Approved Clinical ... [https://www.marinbio.com/company/selecting-bioanalytical-assays-fda-clinical-trials-commercialization/]
- 56. Practical application of PMA–qPCR assay for ... [https://pmc.ncbi.nlm.nih.gov/articles/PMC11631528/]
- 57. Introduction to XTT assays for cell-viability assessment [https://www.abcam.com/en-us/knowledge-center/cell-biology/xtt-assays-for-cell-viability-assessment]
- 58. Controlling Experimental Parameters to Improve ... [https://www.frontiersin.org/journals/chemistry/articles/10.3389/fchem.2020.604236/full]
- 59. Cell Viability, Proliferation, Cryopreservation, and ... [https://www.thermofisher.com/us/en/home/technical-resources/technical-reference-library/cell-analysis-support-center/cell-viability-proliferation-cryopreservation-apoptosis-support/cell-viability-proliferation-cryopreservation-apoptosis-support-troubleshooting.html]
- 60. Beating the edge effect | Laboratory News [https://www.labnews.co.uk/article/2028052/beating_the_edge_effect]
- 61. Optimization of cell viability assays to improve replicability ... [https://www.nature.com/articles/s41598-020-62848-5]
- 62. Eliminating Edge Effect in Cell Culture Plates [https://midsci.com/resources/blog/eliminatingedgeeffect.tpp/!ut/p/z1/04_Sj9CPykssy0xPLMnMz0vMAfIjo8zijYwcjTwMgw0C3J29jQ0CXU2MDAzdnA0NTI30w8EKDHAARwP9KGL041EQhd94L0IWAH1gVOTr7JuuH1WQWJKhm5mXlq8fkZqTmZuZB_RlXnpqSnpqalpaanKJXklBAdBBUXiNNDSEKsDjqILc0Igqn7RgT0dFRQD-Q1RW/dz/d5/L2dJQSEvUUt3QS80TmxFL1o2XzIyQTJIMVMwUEdDSzMwUUU0MjAxRkMxMDUy/]
- 63. Optimizing Cell Density and Unveiling Cytotoxic Profiles of ... [https://pmc.ncbi.nlm.nih.gov/articles/PMC12388702/]
- 64. Metabolic disruptions induced by low concentrations of ... [https://www.sciencedirect.com/science/article/pii/S0166445X25001195]
- 65. Optimization of seeding cell density for differentiation of ... [https://www.sciencedirect.com/science/article/abs/pii/S0301468125000374]
- 66. Influence of Cell Seeding Density and Material Stiffness on ... [https://pmc.ncbi.nlm.nih.gov/articles/PMC11941925/]
- 67. Optimizing Cell Density and Unveiling Cytotoxic Profiles of ... [https://www.mdpi.com/2409-9279/8/4/93]
- 68. 2.6. Optimization of the Cell Seeding Density [https://bio-protocol.org/exchange/minidetail?id=17486481&type=30]
- 69. Optimizing HEK293 cell cultures for gene therapy ... [https://infors-ht.com/en/blog/optimizing-hek293-cell-cultures-for-gene-therapy-applications-the-role-of-incubator-flexibility]
- 70. Rapid Development and Optimization of Cell Culture Media [https://www.biopharminternational.com/view/rapid-development-and-optimization-cell-culture-media]
- 71. Current advances and prospects in biomaterials-guided ... [https://www.sciencedirect.com/science/article/pii/S2666138125000131]
- 72. Identification of critical process parameters and quality ... [https://pmc.ncbi.nlm.nih.gov/articles/PMC12408662/]
- 73. Three-dimensional label-free visualization of the ... [https://www.sciencedirect.com/science/article/pii/S0304389423009615]
- 74. The Preliminary Assessment of New Biomaterials ... [https://pmc.ncbi.nlm.nih.gov/articles/PMC9657594/]
- 75. Molecule-Resolved Visualization of Particulate Matter on ... [https://pmc.ncbi.nlm.nih.gov/articles/PMC8156198/]
- 76. Towards a harmonized testing strategy for nanofibers by ... [https://www.nature.com/articles/s41598-025-15423-9]
- 77. A Guide to Reproducibility in Preclinical Research - PMC [https://pmc.ncbi.nlm.nih.gov/articles/PMC6314499/]
- 78. Improving accuracy and reproducibility in life science ... [https://www.atcc.org/resources/white-papers/improving-accuracy-and-reproducibility-in-life-science-research]
- 79. How to Measure Cell Viability [https://www.promega.com/resources/guides/cell-biology/cell-viability/]
- 80. Developing Robust In Vitro Cell -Based Assays for High Throughput... [https://www.marinbio.com/developing-robust-in-vitro-cell-based-assays-for-high-throughput-screening-hts/]
- 81. Do We have a Satisfactory Cell ? Review of the... Viability Assay [https://pubmed.ncbi.nlm.nih.gov/30251606/]
- 82. Cell viability & viability assays: 7 facts to be aware of [https://www.susupport.com/blogs/knowledge/cell-viability-viability-assays-7-facts-to-be-aware-of]
- 83. Reproducibility Resources and Guidelines by Topic | Columbia [https://research.columbia.edu/reproducibility-resources-guidelines-topic]
- 84. Optimization and Troubleshooting [https://evidentscientific.com/en/microscope-resource/knowledge-hub/techniques/fluorescence/troubleshoot]
- 85. Fluorescence - Optimization and Troubleshooting [https://micro.magnet.fsu.edu/primer/techniques/fluorescence/troubleshoot.html]
- 86. Flow Cytometry Troubleshooting Guide [https://www.cellsignal.com/learn-and-support/troubleshooting/flow-cytometry-troubleshooting-guide?srsltid=AfmBOorosHunkIiFHRG-cfL8YqjSwdThejhN3tgKxpYVld-vXqx1TjGu]
- 87. Flow Cytometry Troubleshooting Guide [https://www.novusbio.com/support/support-by-application/flow-cytometry/troubleshooting?srsltid=AfmBOorZmEBmJwgf4EN2aPai9u0nemjvY2v2pXQK8fDIoIeczFr6PJfJ]
- 88. Slide scanning: Troubleshooting for fluorescence microscopy [https://www.mbfbioscience.com/help/neurolucida/Content/Ribbons/Acquire/SlideScanLegacy/SlideScan_TroubleshootFluo.htm]
- 89. Comparing Cell Viability: Flow Cytometry vs. Microscopy [https://bioengineer.org/comparing-cell-viability-flow-cytometry-vs-microscopy/]
- 90. Flow vs. Image Cytometry: Comparing Techniques to ... [https://evidentscientific.com/en/insights/flow-vs-image-cytometry-comparing-techniques-to-evaluate-large-cell-populations]
- 91. A Comparative Study Using Fluorescent Confocal ... [https://www.mdpi.com/2306-5354/9/10/515]
- 92. Size-Dependent Mechanism of Intracellular Localization and ... [https://pmc.ncbi.nlm.nih.gov/articles/PMC4924523/]
- 93. In-vitro Comparison of Cytotoxicity of Two Bioactive ... [https://pmc.ncbi.nlm.nih.gov/articles/PMC3813266/]
- 94. Cell Viability Assay Kits Strategic Roadmap: Analysis and ... [https://www.archivemarketresearch.com/reports/cell-viability-assay-kits-769439]
- 95. From dye exclusion to high-throughput screening: A review ... [https://www.sciencedirect.com/science/article/pii/S0734975025002502]
- 96. Evaluating cell viability assessment techniques: a comparative ... [https://biomedical-engineering-online.biomedcentral.com/articles/10.1186/s12938-025-01452-y]
- 97. Optimizing resazurin-based viability assays for P-MSC/ ... [https://pubmed.ncbi.nlm.nih.gov/40405215/]
- 98. Programmed cell death detection methods - PubMed Central [https://pmc.ncbi.nlm.nih.gov/articles/PMC9308588/]
- 99. Extrinsic apoptosis and necroptosis in telencephalic ... [https://www.nature.com/articles/s41418-025-01594-5]
- 100. Apoptosis Assays | Thermo Fisher Scientific - US [https://www.thermofisher.com/us/en/home/life-science/cell-analysis/cell-viability-and-regulation/apoptosis.html]
- 101. High throughput, label-free cellular viability assessment ... [https://www.sciencedirect.com/science/article/abs/pii/S1465324925004062]
- 102. Identification of the pyroptosis, apoptosis, and necroptosis ... [https://pmc.ncbi.nlm.nih.gov/articles/PMC12211273/]
- 103. Omics-based approaches to guide the design of biomaterials [https://www.sciencedirect.com/science/article/abs/pii/S1369702123000184]
- 104. Integrated Multiscale Biomaterials Experiment and Modeling [https://pmc.ncbi.nlm.nih.gov/articles/PMC6544164/]
- 105. Predicting In Vivo Responses to Biomaterials via Combined In ... [https://pmc.ncbi.nlm.nih.gov/articles/PMC4313398/]
- 106. Essential molecular biology methods in biomaterials ... [https://www.explorationpub.com/Journals/ebmx/Article/101344]