EIT System Calibration Methods: A Comprehensive Guide for Biomedical Researchers and Drug Development
Electrical Impedance Tomography (EIT) calibration is critical for ensuring measurement accuracy and reproducibility in biomedical research and pharmaceutical development.
EIT System Calibration Methods: A Comprehensive Guide for Biomedical Researchers and Drug Development
Abstract
Electrical Impedance Tomography (EIT) calibration is critical for ensuring measurement accuracy and reproducibility in biomedical research and pharmaceutical development. This article provides a detailed exploration of EIT calibration methodologies, from fundamental principles and contemporary techniques to troubleshooting, validation, and comparative analysis. We address the core needs of researchers and professionals by covering foundational concepts, practical applications of electrode contact impedance calibration and time-difference vs. absolute imaging approaches, strategies for optimizing signal quality and mitigating drift, and frameworks for validating system performance against phantoms and gold standards. This guide synthesizes current best practices to enhance the reliability of EIT data in applications from lung and brain monitoring to cell culture and organ-on-a-chip assays.
Understanding EIT Calibration: Core Principles and System-Specific Requirements
Troubleshooting Guides & FAQs
Q1: After calibration, my reconstructed images show unrealistic conductivity values (e.g., negative conductivities or extreme outliers). What could be the cause? A: This is typically a sign of a flawed Forward Model or incorrect boundary geometry. The calibration process maps voltage measurements to a specific model; if the model's mesh or electrode positions do not match the physical setup, the inverse solution becomes unstable. First, verify your finite element mesh accurately represents your tank/chamber dimensions and electrode placement. Re-run the forward solution with a known conductivity distribution to see if the simulated voltages match the order of magnitude of your raw measurements.
Q2: My calibration seems sensitive to small changes in electrode contact impedance or saline conductivity. How can I improve robustness?
A: This indicates high system condition number. Implement a two-stage calibration protocol. First, perform a hardware/V_H calibration using known resistors across electrode pairs to characterize the system's electronic gain and phase shift. Second, perform a saline/V_S calibration with a homogeneous phantom of known conductivity. Use a precision conductivity meter at the experiment's temperature to determine reference conductivity. The combined model σ = F( V_measured * (V_S / V_H) ) is more robust to contact impedance variations.
Q3: During time-difference imaging, I observe drift in the measured voltages, corrupting my differential images. How do I correct for this? A: Voltage drift is often thermal. Ensure your system has a warm-up period (≥30 mins). Implement a periodic reference measurement protocol. Throughout your dynamic experiment, intermittently switch back to the homogeneous calibration phantom (or a stable reference state) to measure baseline drift. Use linear interpolation between these reference measurements to correct the experimental data. A temperature probe in your electrode bath can provide a covariate for correction.
Q4: What is the minimum number of calibration standards required for accurate absolute EIT imaging? A: For a linearized, single-frequency system, at least two standards are theoretically required to solve for gain and offset. For robust absolute imaging, current research recommends a multi-point calibration using at least 4-5 saline phantoms spanning the expected conductivity range. This allows for detecting and correcting for non-linearity in the system response.
Experimental Protocol: Multi-Point Saline Calibration for Absolute EIT
Objective: To establish a stable transfer function between measured voltage and domain conductivity.
Materials: See "Research Reagent Solutions" below.
Method:
- Prepare 5 KCl saline solutions with concentrations pre-calculated to cover 0.2 S/m to 2.0 S/m.
- Measure each solution's exact conductivity (σ_ref) and temperature using a calibrated conductivity meter.
- Thermostat the EIT tank and solutions to 25.0°C ± 0.2°C.
- For each solution, in sequence:
- Fill the clean, dry EIT tank.
- Apply the standard EIT measurement protocol (e.g., adjacent current injection, all voltage measurements).
- Record the complete voltage data set
V_meas,i.
- For each measurement channel (k), fit the data
[σ_ref,i vs. V_meas,i,k]to a 2nd-order polynomial:σ_k = a_k * V_k^2 + b_k * V_k + c_k. - Store the calibration coefficients
a_k, b_k, c_kfor all channelsk. Apply to future unknown measurements:σ_reconstructed,k = a_k * V_unknown,k^2 + b_k * V_unknown,k + c_k.
Data Presentation
Table 1: Example Calibration Data for a Single Measurement Channel (k=12)
| Saline Standard | Reference Conductivity (S/m) | Mean Measured Voltage (V) | Std. Dev. (V) |
|---|---|---|---|
| 1 | 0.21 | 0.452 | 0.0012 |
| 2 | 0.50 | 0.987 | 0.0015 |
| 3 | 0.99 | 1.832 | 0.0018 |
| 4 | 1.48 | 2.675 | 0.0021 |
| 5 | 2.01 | 3.612 | 0.0023 |
Calibration Fit for k=12: σ = 0.154V² + 0.215V - 0.017 (R² = 0.9998)
Table 2: Impact of Calibration Method on Image Reconstruction Error
| Calibration Method | Mean Absolute Error (MAE) in S/m | Relative Image Error (L2) | Required Time |
|---|---|---|---|
| Single-Point (Offset) | 0.154 ± 0.021 | 28.5% | 5 min |
| Two-Point (Linear) | 0.062 ± 0.011 | 12.1% | 10 min |
| Multi-Point (Quadratic) | 0.018 ± 0.004 | 4.3% | 25 min |
| Dual (Hardware + Saline) | 0.012 ± 0.003 | 2.8% | 40 min |
The Scientist's Toolkit
Table 3: Essential Research Reagent Solutions for EIT Calibration
| Item | Function | Specification/Example |
|---|---|---|
| Potassium Chloride (KCl) | Primary solute for stable, low-polarization saline phantoms. | Analytical grade, >99.5% purity. |
| Deionized Water | Solvent for calibration phantoms to minimize ionic contaminants. | Resistivity ≥18 MΩ·cm at 25°C. |
| Precision Conductivity Meter | To determine reference conductivity of calibration standards. | Calibrated with NIST-traceable standards, ±0.5% accuracy. |
| Thermostatic Bath | Maintains constant temperature during calibration to control conductivity. | Stability ±0.1°C, compatible with EIT tank size. |
| Agar or Gelling Agent | Creates homogeneous solid phantoms for geometry validation. | Bacteriological grade agar at 1-2% w/v. |
| NIST-Traceable Standard Solutions | For calibrating the conductivity meter. | e.g., 1413 µS/cm KCl solution at 25°C. |
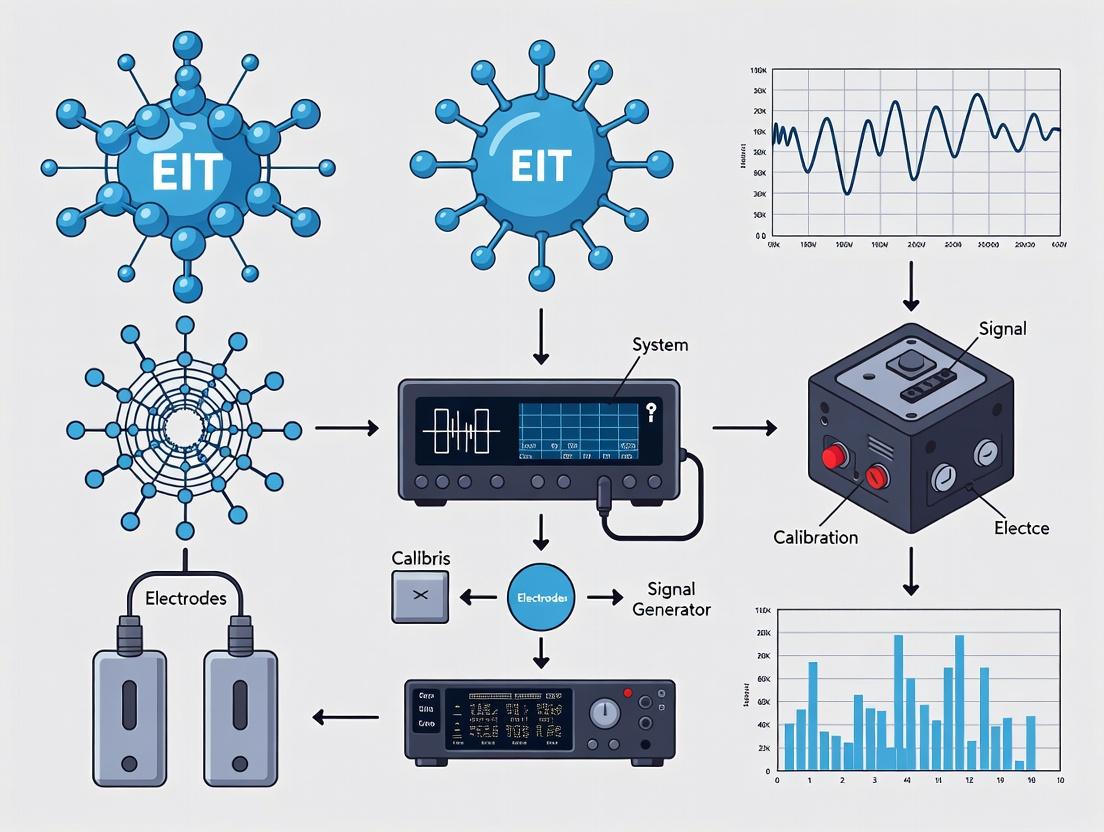
Visualization: EIT Calibration Workflow
EIT Calibration and Imaging Workflow
Visualization: Signal Transformation Path
From True Conductivity to Estimated Conductivity
Technical Support Center
Troubleshooting Guides & FAQs
Q1: During an EIT measurement, we observe significant baseline drift and unstable contact impedance. What could be the cause and how can we fix it? A1: Baseline drift and unstable impedance are commonly linked to poor electrode-skin contact or drying electrode gel.
- Troubleshooting Protocol:
- Check Electrode Gel: Ensure a sufficient, uniform layer of high-conductivity medical gel is applied. Rehydrate or replace dry gel.
- Skin Preparation: Gently abrade the skin with a mild abrasive pad to remove dead skin cells, then clean with alcohol to reduce contact impedance.
- Secure Attachment: Verify electrodes are firmly attached with medical tape or a strap to prevent movement.
- Hardware Check: If issues persist, use a multimeter to test cable continuity and check for loose connections at the electrode adapter board.
Q2: Our reconstructed EIT images show severe artifacts and poor spatial resolution. Which component of the pipeline is most likely at fault? A2: Image artifacts often stem from an inaccurate forward model or ill-posed inverse solution.
- Troubleshooting Protocol:
- Verify Electrode Positioning: Confirm all electrode positions are measured accurately and input correctly into the reconstruction software. Small errors here cause large artifacts.
- Calibrate Boundary Shape: Use a phantom of known, stable geometry (e.g., a saline tank) to calibrate the boundary shape used in the forward model.
- Adjust Regularization: Increase the regularization parameter (e.g., λ in Tikhonov regularization) to stabilize the solution, but be aware it trades off spatial resolution for stability. Perform an L-curve analysis to find the optimal value.
Q3: The measured voltage data from our EIT hardware is unusually noisy. How can we isolate the source of the noise? A3: Noise can originate from electronic, environmental, or physiological sources.
- Troubleshooting Protocol:
- Environmental Check: Ensure the system is away from strong alternating magnetic fields (power lines, motors). Use a Faraday cage if necessary.
- Hardware Self-Test: Run the hardware with a simple resistive phantom. If noise disappears, the issue may be with the subject/electrode interface.
- Power Line Filter: Apply a 50/60 Hz notch filter in software to remove mains interference. Ensure all equipment is grounded to a common point.
- Signal Averaging: Increase the number of signal averages per measurement frame, though this will reduce temporal resolution.
Q4: How do we validate the performance of a new calibration method for our EIT system within the context of a research thesis? A4: Validation requires a structured comparison against a gold standard or well-established method using defined metrics.
- Experimental Validation Protocol:
- Phantom Design: Create a dynamic phantom with targets of known conductivity and position (e.g., insulated rods moving in saline).
- Data Acquisition: Apply both the new calibration method and a standard method to the same raw data sets.
- Image Reconstruction: Use identical reconstruction algorithms post-calibration.
- Quantitative Analysis: Calculate and compare performance metrics (see Table 1).
Table 1: Key Metrics for EIT Calibration Method Validation
| Metric | Formula / Description | Optimal Value | ||
|---|---|---|---|---|
| Image Error | ‖σreconstructed − σtrue‖ / ‖σ_true‖ | Closer to 0 | ||
| Position Error | Distance between reconstructed and true target centroid (mm) | < 5% of tank diameter | ||
| Contrast-to-Noise Ratio (CNR) | μROI − μBackground | / √(0.5*(σ²ROI + σ²Background)) | Higher is better | |
| Signal-to-Noise Ratio (SNR) | μSignal / σNoise (in time-difference data) | > 80 dB |
Research Reagent & Materials Toolkit
Table 2: Essential Materials for EIT System Calibration Research
| Item | Function |
|---|---|
| Physiological Saline (0.9% NaCl) | Standard, stable conductivity medium for phantom construction and baseline measurements. |
| Agar or Polyacrylamide Gel | Solidifying agent for creating stable, shape-controlled phantoms with set conductivity. |
| Potassium Chloride (KCl) | Used to adjust the conductivity of saline or gel phantoms to match specific tissues (e.g., lung, blood). |
| Conductive Carbon Rubber Electrodes | Standard, flexible electrodes for patient/phantom measurements. |
| Disposable ECG Electrodes (Ag/AgCl) | Pre-gelled electrodes for quick setup; useful for reproducibility tests. |
| Insulating Rods (Plastic, Nylon) | Used as non-conductive targets in phantoms to simulate voids or lesions. |
| Conductive Targets (Metallic, Agar) | Used as high-conductivity targets in phantoms to simulate hemorrhages or tumors. |
| Precision Resistor Network | For bench-testing and validating the linearity and accuracy of EIT hardware. |
Experimental Workflow for Calibration Research
Title: EIT Calibration Method Validation Workflow
EIT System Data Acquisition and Reconstruction Pipeline
Title: Core EIT Image Reconstruction Pipeline
Technical Support Center
Troubleshooting Guides & FAQs
Q1: During an EIT scan, my reconstructed image shows severe artifacts around the electrode edges. What is the likely cause and how can I resolve it?
A: This is a classic symptom of unaccounted-for or variable contact impedance at the electrode-skin (or electrode-medium) interface. High or uneven contact impedance disrupts the assumed boundary conditions, causing significant current shunting and voltage measurement errors.
- Resolution Protocol:
- Pre-experiment Preparation: Clean and abrade the skin site (if in vivo) using alcohol and fine-grit sandpaper to remove the stratum corneum. For phantom studies, ensure electrodes are clean and fully submerged.
- Use Electrode Gel: Apply a consistent amount of high-conductivity electrolytic gel.
- Measure Contact Impedance: Prior to the main EIT data collection, perform a single-frequency impedance spectroscopy measurement at each electrode. A dedicated calibration fixture can be used.
- Apply Compensation: Integrate the measured contact impedance values into your reconstruction algorithm's forward model or use a four-electrode (tetrapolar) measurement technique which is less sensitive to contact impedance.
Q2: My EIT system shows consistent amplitude offsets when measuring known calibration phantoms. What should I check?
A: This indicates potential gain errors in the measurement hardware. Gain errors arise from tolerances in analog components (amplifiers, resistors) and can be time-varying or channel-dependent.
- Resolution Protocol:
- System Self-Test: Run the system's internal self-calibration routine, if available, which often applies known test signals.
- Calibration Load Measurement: Connect a precision reference resistor network (e.g., a known resistive phantom) to all channels.
- Data Collection & Comparison: Measure the voltage outputs across all channels. Compare the measured values to the expected values given the known input current and load.
- Calculate Correction Factors: Derive a channel-wise gain correction factor (Expected Voltage / Measured Voltage). Apply these factors as multiplicative coefficients to all subsequent measurement data from those channels.
Q3: I observe gradual degradation in image quality over long-term monitoring, even with stable phantoms. What could be drifting?
A: This is strongly indicative of phase drift in the system. Phase errors affect the accuracy of the real and imaginary component separation, crucial for frequency-difference or time-difference imaging. Drift can be caused by temperature fluctuations in analog filters, oscillators, and cables.
- Resolution Protocol:
- Baseline Phase Capture: At the beginning of an experiment or monitoring session, measure a stable reference load (e.g., a simple resistor). Record the phase angle for all measurement channels.
- Implement Periodic Re-Referencing: Schedule brief interruptions to re-measure the same reference load. Calculate the phase drift from baseline for each channel.
- Apply Phase Correction: Subtract the measured drift from the experimental data for the corresponding time period. For critical applications, implement a switched reference channel that continuously monitors a stable load.
Q4: How can I design a comprehensive calibration protocol for my research EIT system?
A: A robust protocol targets all three fundamental error sources sequentially. The following workflow is recommended within thesis research on calibration methods:
- Experimental Calibration Protocol:
- Contact Impedance Stabilization: Prepare the interface meticulously (abrade, gel, secure). Use electrodes with stable, high-surface-area materials (e.g., Ag/AgCl).
- Gain Calibration:
- Use a Precision Resistive Calibration Phantom with multiple discrete, known resistors.
- Measure voltage outputs for all possible drive-measure patterns.
- Generate a gain lookup table or matrix for correction.
- Phase Drift Monitoring:
- Integrate a stable reference impedance into the electrode switching matrix.
- Automatically switch to and measure this reference between frames or at fixed time intervals.
- Continuously correct for phase and minor amplitude drift in software.
Research Reagent Solutions & Essential Materials
| Item | Function in EIT Calibration Research |
|---|---|
| Ag/AgCl Electrodes | Provides a stable, non-polarizable electrode interface to minimize contact impedance and potential drift. |
| High-Conductivity Electrolyte Gel | Ensures consistent electrical coupling between electrode and subject/phantom, reducing contact impedance variability. |
| Precision Resistive Calibration Phantom | A network of resistors with tolerances <0.1% to provide absolute reference for quantifying and correcting gain errors. |
| Saline Phantoms with Insulating Inclusions | Anatomically realistic phantoms used for validation of calibration methods and image reconstruction algorithms. |
| Programmable Switching Matrix | Allows automated connection of calibration loads and reference impedances into the electrode array for inline calibration. |
| Lock-in Amplifier (or equivalent) | Provides precise measurement of voltage amplitude and phase, serving as a gold-standard reference for system validation. |
Table 1: Impact of Uncorrected Errors on Image Quality (Typical Values)
| Error Type | Typical Magnitude | Effect on Image Correlation Coefficient | Common Mitigation Method |
|---|---|---|---|
| Contact Impedance (Uneven) | 1 kΩ to 10 kΩ variation | Can reduce to <0.6 | Tetrapolar measurement, skin preparation |
| Gain Error (Channel-wise) | ±5% of full scale | Can reduce to 0.7-0.8 | Calibration load measurement & correction |
| Phase Drift | 0.5° to 2° per hour | Severe in multi-frequency imaging | Periodic reference measurement |
Table 2: Calibration Protocol Efficacy
| Calibration Step | Required Time | Reduction in Measurement Uncertainty | Recommended Frequency |
|---|---|---|---|
| Contact Impedance Check | 2-5 minutes | Up to 60% | Before each experiment session |
| Full System Gain Calibration | 10-20 minutes | Reduces error to <1% | Weekly or after hardware changes |
| Inline Phase Reference Measurement | 10-30 seconds per cycle | Limits drift to <0.1° | Between each EIT frame or every 5 minutes |
Experimental Protocols
Protocol 1: Characterizing Channel-Dependent Gain and Phase Objective: To map the complex gain (magnitude and phase) for all measurement channels in an EIT system. Methodology:
- Construct a passive, balanced resistive network that presents a known, stable impedance (e.g., 500Ω) between all electrode connection points.
- Connect this network to the EIT system's electrode array ports.
- Execute the system's standard data collection sequence (all drive-measure patterns) at the operational frequency.
- For each voltage measurement
V_measured, compute the complex gain:G = V_measured / V_expected, whereV_expectedis calculated from the known input current and network impedance. - Store the magnitude (
|G|) and phase (∠G) for each channel in a calibration file.
Protocol 2: Longitudinal Phase Drift Assessment Objective: To quantify temporal phase stability of the EIT hardware. Methodology:
- Place the system in a temperature-controlled environment.
- Connect a high-stability reference resistor (e.g., 0.01% tolerance, low temperature coefficient) between two designated calibration channels.
- Configure the system to continuously collect data from this reference resistor in a repeated, single pattern mode over 8-24 hours.
- Plot the phase of the measured voltage over time.
- Calculate the average drift rate (degrees per hour) and note any correlation with ambient temperature logs.
System Calibration & Error Correction Workflow
Title: EIT Calibration and Correction Workflow
Title: Primary Error Sources in an EIT System
Technical Support Center
Troubleshooting Guides & FAQs
Q1: During frequency-difference EIT (fdEIT) calibration, we observe significant phase drift at higher frequencies (>1 MHz). What could be the cause and how can we mitigate this? A: This is often caused by impedance mismatches in the signal path and cable capacitance. First, ensure all coaxial cables are of uniform length and type (e.g., 50Ω RG-58). Implement a two-port calibration using a vector network analyzer (VNA) on your electrode-sensor assembly prior to system integration. For in-system correction, use a reference impedance phantom with known dispersive properties. The protocol involves: 1) Measure open, short, and load (e.g., 100Ω) calibration standards at all operating frequencies. 2) Apply a linearity correction algorithm. Data from a recent study is summarized below:
Table 1: Typical Phase Drift Correction Factors for fdEIT (1-5 MHz range)
| Frequency (MHz) | Uncorrected Phase Error (Degrees) | Corrected Phase Error (Degrees) | Recommended Calibration Standard |
|---|---|---|---|
| 1.0 | 12.5 ± 2.1 | 0.8 ± 0.3 | Precision 100Ω Resistor |
| 2.5 | 28.4 ± 5.3 | 1.2 ± 0.5 | Custom RC Phantom (R=100Ω, C=10pF) |
| 5.0 | 45.7 ± 9.6 | 1.7 ± 0.6 | Custom RC Phantom (R=100Ω, C=5pF) |
Q2: In time-difference EIT (tdEIT), our baseline measurements become unstable over long-term experiments (>2 hours). How can we improve baseline stability? A: Long-term tdEIT drift is frequently attributed to electrode polarization and temperature fluctuation. Employ a four-electrode (tetrapolar) measurement technique to minimize polarization effects. Actively control the environmental temperature to ±0.5°C. A crucial step is to implement a periodic "baseline reset" protocol: Every 30 minutes, briefly suspend data collection, measure a stable reference saline phantom (0.9% NaCl, 2.2 S/m at 20°C), and use this to recalibrate the baseline admittivity. The workflow is as follows:
Diagram Title: tdEIT Baseline Stability Maintenance Workflow
Q3: When switching from fdEIT to tdEIT mode on our multi-frequency system, the reconstructed image contrast changes unexpectedly. Is this a calibration or a system issue? A: This is likely a calibration issue stemming from different system transfer functions for the two operating modes. Each mode must have its own independent calibration matrix. Do not assume a single calibration suffices. Follow this protocol: 1) For fdEIT, calibrate using a set of phantoms with known frequency-dependent conductivity spectra (e.g., saline-gelatin mixtures with varying ion concentrations). 2) For tdEIT, calibrate using a dynamic phantom where a known volume of conductive solution is introduced at a controlled rate (e.g., syringe pump). The key parameters differ, as shown:
Table 2: Calibration Parameter Comparison: fdEIT vs. tdEIT
| Parameter | fdEIT Calibration Focus | tdEIT Calibration Focus | ||||
|---|---|---|---|---|---|---|
| Primary Standard | Multi-frequency impedance analyzer | Precision timed injector system | ||||
| Key Metric | Complex Impedance (Z) vs. Frequency (f) | Conductivity Change (Δσ) vs. Time (t) | ||||
| Phantom Type | Stable, dispersive materials | Dynamic, flow-mimicking setup | ||||
| System Noise Floor | Typically < 0.1% of | Z | Typically < 0.05% of | Δσ | ||
| Calibration Interval | Before each experiment series | Before and validated during experiment |
Q4: How do we validate the accuracy of our fdEIT vs. tdEIT calibration in a biological tissue context? A: Validation requires a biophysical phantom that mimics both dispersive and dynamic properties of tissue. A recommended protocol involves creating a dual-chamber phantom: Chamber A contains a stable, frequency-dispersive agarose-saline mix (simulating background tissue). Chamber B is connected to a peristaltic pump to circulate a KCl solution, inducing time-difference conductivity changes. The experimental workflow is:
Diagram Title: Biophysical Phantom Validation Workflow for EIT
The Scientist's Toolkit: Research Reagent Solutions
Table 3: Essential Materials for Advanced EIT Calibration Experiments
| Item | Function in Calibration | Specification/Example |
|---|---|---|
| Vector Network Analyzer (VNA) | Provides gold-standard measurement of complex impedance for fdEIT electrode characterization. | 2-Port, 1 MHz - 10 MHz range (e.g., Keysight E5061B). |
| Custom RC Phantoms | Serve as stable, known dispersive loads for fdEIT system calibration. | Precision resistors (e.g., 100Ω, 1%) in parallel with NPO capacitors (e.g., 5-100pF). |
| Electrolytic Tank Phantom | Provides a homogeneous, isotropic medium for initial system validation and time-drift checks. | 0.9% NaCl solution in non-conductive tank, conductivity ~1.5 S/m at 20°C. |
| Syringe Pump with Conductivity Modulant | Creates precise, reproducible dynamic changes for tdEIT calibration. | Pump with rate 0.1-10 mL/min, modulant: 5% KCl solution. |
| Agarose-Saline-Graphite Phantoms | Creates stable, tissue-mimicking phantoms with reproducible dispersive properties. | 2% agarose, 0.1-0.9% NaCl, 0.1-1% graphite powder for heterogeneity. |
| Temperature-Controlled Chamber | Maintains constant environmental temperature to reduce thermal drift in tdEIT. | Stability ±0.5°C, sized to fit phantom and electrode array. |
| Gold-Plated Electrode Arrays | Minimize polarization impedance and improve long-term contact stability. | 16-32 electrodes, chlorided silver or gold-plated brass. |
Technical Support Center
Frequently Asked Questions (FAQs)
Q1: Why is my reconstructed EIT image exhibiting severe artifacts near the boundary, despite using a known conductivity phantom? A: This is a classic symptom of electrode model mismatch, often due to incorrect contact impedance values in the forward model. Calibration directly informs this by providing empirical measurements to correct the forward model. Ensure you have performed a robust boundary voltage measurement on a known homogenous phantom and used this data to update your electrode parameters (e.g., via the "Complete Electrode Model") before solving the inverse problem.
Q2: After changing my electrode gel or subject, my reconstructed images show a consistent baseline shift. What calibration step did I miss? A: You are likely observing the effect of variable contact impedance. This necessitates a "time-difference" calibration protocol. Before your experiment, acquire a reference frame of voltages. All subsequent inverse problem solutions should reconstruct the change from this baseline. For absolute imaging, a more rigorous pre-experiment calibration using multiple phantoms with known conductivities is required to define the system's sensitivity matrix accurately.
Q3: How often should I recalibrate my EIT system for longitudinal drug response studies? A: The calibration frequency is dictated by system drift. For high-precision studies, perform a validation measurement on a calibration phantom at the start of each imaging session. A drift of >2% in boundary voltage measurements for a stable phantom indicates the need for a full recalibration of the forward model parameters. Daily calibration is recommended for critical quantitative applications.
Q4: My reconstruction algorithm converges slowly or not at all after system hardware maintenance. How is this related to calibration? A: Hardware changes (e.g., replacing a cable, amplifier) alter the system's transfer function. The inverse problem solver relies on a forward model that is no longer valid. You must perform a full system re-calibration: (1) Measure voltages from phantoms with spatially distinct known conductivities. (2) Use this data to refine or rebuild your system's sensitivity matrix (Jacobian) before attempting image reconstruction.
Troubleshooting Guides
Issue: Poor Reproducibility in Serial Experiments Symptoms: High variance in reconstructed conductivity values for identical phantoms across days. Diagnosis: Unaccounted-for temporal system drift or environmental factors. Resolution Protocol:
- Implement a daily calibration workflow.
- Step 1: Acquire boundary voltage data from a standardized calibration phantom (e.g., saline of known conductivity and temperature).
- Step 2: Compute the mean amplitude and phase shift relative to the gold-standard reference dataset acquired during full system calibration.
- Step 3: If values exceed thresholds in Table 1, apply correction factors to the raw measurement data before reconstruction.
- Step 4: Re-measure the phantom to verify correction.
Issue: Spatial Distortion in Reconstructed Images Symptoms: Objects appear displaced or elongated compared to known phantom geometry. Diagnosis: Inaccurate geometric model of the electrode array and domain in the forward solver. Resolution Protocol:
- This indicates a fundamental error in the forward problem definition.
- Step 1: Perform a high-precision geometric calibration of the electrode positions (e.g., using CT imaging or laser scanning).
- Step 2: Update the finite element mesh (FEM) node locations with the measured electrode positions.
- Step 3: Recalculate the system sensitivity matrix (Jacobian) using the updated, calibrated forward model.
- Step 4: Validate with a phantom containing objects at known locations.
Table 1: Calibration Validation Thresholds for System Stability
| Parameter | Acceptable Drift Threshold | Corrective Action |
|---|---|---|
| Boundary Voltage Magnitude | ≤ 1.5% | Apply scaling factor to data |
| Boundary Voltage Phase | ≤ 0.5 degrees | Apply phase correction |
| Signal-to-Noise Ratio (SNR) | ≥ 80 dB | Check electrode contacts & amplifier |
| Homogeneous Phantom Reconstructed Conductivity SD | ≤ 2.5% | Recalibrate forward model |
Table 2: Common Calibration Phantom Types & Uses
| Phantom Type | Conductivity Profile | Primary Calibration Purpose | Key Advantage |
|---|---|---|---|
| Uniform Saline | Homogeneous, known | Electrode contact impedance, System gain | Simple, provides baseline for time-difference imaging |
| Concentric Cylinder | Two-tier, known | Spatial resolution verification, Forward model geometry | Tests algorithm's ability to resolve sharp boundaries |
| Off-center Inclusion | Homogeneous with one known target | Accuracy of reconstructed position & contrast | Validates symmetry and spatial accuracy of inverse model |
Experimental Protocols
Protocol: Empirical Electrode Impedance Calibration for Forward Model Enhancement Objective: To determine individual electrode contact impedances for integration into the Complete Electrode Model (CEM). Methodology:
- Preparation: Fill the EIT tank with a homogeneous electrolyte of precisely known conductivity (e.g., 0.9% saline at 22°C).
- Measurement: Using the EIT system, inject a known current pattern and measure the boundary voltages.
- Forward Solution: Compute the theoretical boundary voltages using the FEM forward solver with an estimated contact impedance.
- Optimization: Solve a minimization problem (e.g., using a Gauss-Newton approach) where the variable is the vector of contact impedances. The objective function is the difference between measured and modeled boundary voltages.
- Integration: The optimized contact impedance values are hard-coded into the forward model for all subsequent inverse problem reconstructions.
Protocol: Jacobian Matrix Calibration via Dual-Phantom Measurement
Objective: To generate an empirically calibrated sensitivity matrix (J) for improved inverse problem conditioning.
Methodology:
- Phantom A: Measure boundary voltages
V_afrom a homogeneous background phantom. - Phantom B: Measure boundary voltages
V_bfrom a phantom with a known, spatially extended conductivity perturbation (e.g., a different saline concentration throughout). - Conductivity Difference: Compute the known conductivity change
Δσbetween Phantom B and Phantom A. - Voltage Difference: Compute the measured voltage change
ΔV = V_b - V_a. - Jacobian Calculation: Estimate the system's Jacobian
Jusing the linear approximationΔV ≈ J * Δσ. ThisJcan be used directly or regularized and used as a prior in nonlinear reconstruction algorithms.
Diagrams
Title: How Calibration Links Forward & Inverse Problems for EIT Image Accuracy
Title: EIT System Calibration Validation & Correction Workflow
The Scientist's Toolkit: Research Reagent Solutions for EIT Calibration
| Item | Function in Calibration |
|---|---|
| Potassium Chloride (KCl) Solutions | Used to prepare saline phantoms with precise, temperature-dependent conductivity. Allows creation of a conductivity series for absolute calibration. |
| Agar or Polyvinyl Alcohol (PVA) Phantoms | Gelling agents to create stable, structured phantoms with well-defined, immobile inclusion boundaries for spatial accuracy calibration. |
| Conductivity Meter with Temperature Probe | Essential for independent, traceable measurement of phantom electrolyte conductivity, providing the ground truth for calibration. |
| Geometric Spacers & Electrode Templates | Ensure reproducible electrode positioning and tank geometry, which is critical for an accurate forward model mesh. |
| Bio-compatible Electrode Gel (Fixed Ag/AgCl) | Provides stable, low-impedance contact. Batch consistency reduces inter-session variability, minimizing the need for frequent contact impedance recalibration. |
Step-by-Step EIT Calibration Protocols: From Electrode Characterization to Clinical Translation
Electrode-Skin/Electrode-Solution Contact Impedance Measurement and Modeling
Troubleshooting Guides & FAQs
Q1: Why is my measured contact impedance unstable and drifting over time during a long-term EIT experiment?
A: Drift is commonly caused by electrolyte drying, skin hydration changes, or electrode polarization. For electrode-skin contacts, use a consistent, hydrating gel and an occlusive dressing. For electrode-solution contacts, ensure a sealed chamber to prevent evaporation. Employ a four-electrode (tetrapolar) measurement technique for the impedance measurement itself to eliminate the influence of polarization at the current-injecting electrodes. Incorporate a regular, brief recalibration pulse sequence into your EIT data acquisition protocol.
Q2: What is a typical acceptable range for contact impedance in thoracic EIT, and what happens if it's too high or too low?
A: For thoracic EIT using adhesive gel electrodes, a stable contact impedance between 50 Ω and 1 kΩ (at 10-100 kHz) is typically targeted. See Table 1 for implications.
Table 1: Contact Impedance Ranges and Implications for EIT
| Impedance Range | Likely Cause | Impact on EIT Measurement |
|---|---|---|
| Very High (>2 kΩ) | Poor adhesion, dry gel, hairy skin. | Increased measurement noise, signal attenuation, susceptibility to motion artifact. |
| Optimal (50Ω - 1 kΩ) | Good skin preparation, fresh gel. | High signal-to-noise ratio (SNR), stable boundary conditions for image reconstruction. |
| Very Low (<20Ω) | Excessive gel causing short-circuit, electrode bridging. | Reduced spatial resolution, potential signal crosstalk, distorted current patterns. |
Q3: How do I choose the right electrode material for my specific EIT calibration setup (e.g., Ag/AgCl vs. stainless steel)?
A: The choice depends on the interface (skin or solution) and frequency. Ag/AgCl electrodes are non-polarizable and ideal for DC to mid-frequency skin measurements, providing stable half-cell potentials. Stainless steel is polarizable and suitable for higher-frequency solution measurements where capacitance dominates. For precise EIT calibration phantoms, use noble metals like gold or platinum to minimize nonlinearities. Always match the electrode material used in calibration to that used in the final application.
Q4: My electrode-solution impedance model doesn't fit the measured data well at low frequencies. What model should I use?
A: The simple Randles circuit often fails at very low frequencies. Use a modified model with a Constant Phase Element (CPE) replacing the double-layer capacitor. The impedance of a CPE is Z_CPE = 1/[Q(jω)^α], where Q is a constant and α (between 0 and 1) accounts for surface inhomogeneity. This model, depicted in the pathway below, vastly improves fit for real-world rough or porous electrodes.
Q5: What is a step-by-step protocol for systematic contact impedance measurement for EIT system calibration?
A: Experimental Protocol: Tetrapolar Contact Impedance Measurement
Objective: To accurately measure the impedance of a single electrode interface (skin or solution) independent of lead and polarization impedances. Materials: See "Scientist's Toolkit" below. Procedure:
- Setup: Connect the Electrode Under Test (EUT) to both the current source (I+, I-) and voltage measurement (V+, V-) channels of an impedance analyzer or custom EIT front-end. Place the second "auxiliary" electrode (a large, high-quality electrode) in the same ionic environment (skin or solution).
- Current Injection: Inject a known, small-amplitude sinusoidal current (I) between the EUT (I+) and the auxiliary electrode (I-).
- Voltage Sensing: Measure the resulting voltage drop (V) between the same EUT (V+) and the auxiliary electrode (V-). This four-terminal connection ensures the measured voltage is across the interface of interest, excluding wire resistances.
- Sweep & Record: Sweep the frequency across your band of interest (e.g., 1 kHz to 1 MHz). Record the complex impedance Z(ω) = V(ω)/I(ω) at each frequency.
- Model Fitting: Fit the recorded spectrum to an appropriate electrical equivalent circuit model (e.g., Randles with CPE) using nonlinear least-squares software.
Title: Workflow for Tetrapolar Contact Impedance Measurement
Title: Detailed Contact Impedance Model with CPE
The Scientist's Toolkit
Table 2: Essential Research Reagents & Materials for Contact Impedance Studies
| Item | Function & Application |
|---|---|
| Ag/AgCl Pellet Electrodes | Non-polarizable reference/sensing electrodes for stable potential in physiological measurements. |
| Electrolyte Gel (e.g., 0.9% NaCl/KCl gel) | Provides ionic conductivity for electrode-skin interface, standardizes contact medium. |
| Electrochemical Impedance Spectrometer | Instrument for applying AC signals and precisely measuring complex impedance across frequency. |
| Conductivity Standard Solution (e.g., 0.1 M KCl) | Calibrates solution conductivity for electrode-solution interface experiments. |
| Adhesive Electrode Ag/AgCl Hydrogel Patches | Standardized, disposable interfaces for reproducible skin-contact impedance studies. |
| Skin Abrasion Gel (e.g., NuPrep) | Gently reduces stratum corneum resistance for more stable and lower electrode-skin impedance. |
| Finite Element Analysis (FEA) Software (e.g., COMSOL) | Models electric field distributions and quantifies impact of contact impedance on EIT images. |
| Nonlinear Curve-Fitting Software (e.g., ZView) | Fits measured impedance spectra to complex equivalent circuit models (Randles + CPE). |
Practical Guide to Boundary Voltage Calibration Using Homogeneous Phantoms
This guide is designed as a technical support resource within the broader thesis research on Electrical Impedance Tomography (EIT) system calibration methodologies. Achieving precise boundary voltage calibration is a foundational step for ensuring data fidelity in subsequent biological or pharmaceutical experiments, such as monitoring cell culture viability or drug efficacy in 3D tissue models.
Research Reagent Solutions & Essential Materials
The following table details key materials required for constructing homogeneous phantoms and performing calibration.
| Item Name | Function & Specification | Typical Supplier/Example |
|---|---|---|
| Agar Powder (Microbiological Grade) | Gelling agent for creating stable, conductive phantom matrices. | Sigma-Aldrich, Fisher Scientific |
| Sodium Chloride (NaCl), ACS Grade | Provides ionic conductivity to mimic biological tissue conductivity ranges (e.g., 0.1 S/m to 1 S/m). | VWR, Merck |
| Deionized Water (18.2 MΩ·cm) | Solvent for phantom solution; ensures minimal impurity-related conductivity. | Millipore or equivalent system |
| Polypropylene Cylindrical Tank | Physical mold for phantom; inert, non-conductive walls to ensure boundary conditions are defined by the saline/agar only. | Custom machining or standard labware |
| Stainless Steel Electrodes (Medical Grade) | Boundary electrodes for current injection and voltage measurement. | Custom EIT electrode arrays |
| Conductivity Meter with Temperature Probe | Validates phantom homogeneity and absolute conductivity value (±0.01 mS/cm accuracy). | Hanna Instruments, Mettler Toledo |
| Potassium Sorbate (or Sodium Azide) | Preservative to prevent microbial growth in agar phantoms during long-term storage. | Sigma-Aldrich |
Experimental Protocol: Phantom Preparation & Calibration Measurement
This detailed protocol is cited as the standard method within the thesis for establishing a baseline calibration dataset.
Objective: To fabricate a homogeneous, stable phantom of known conductivity and measure the boundary voltage set for system calibration.
Materials: As per table in Section 2.
Procedure:
Solution Preparation:
- Calculate required NaCl mass to achieve target conductivity (e.g., 0.5 S/m) for final phantom volume.
- Heat 80% of the required deionized water to ~90°C. Slowly stir in agar powder (e.g., 2-3% w/v) until fully dissolved.
- Dissolve the calculated NaCl mass and preservative (e.g., 0.1% w/v potassium sorbate) in the remaining cool deionized water.
- Combine the two solutions, mix thoroughly, and cool to ~50°C.
Phantom Casting:
- Pour the solution into the pre-cleaned cylindrical tank with the electrode array already mounted.
- Tap gently to remove air bubbles. Allow to set at room temperature for 1 hour, then refrigerate at 4°C for at least 4 hours to fully gel.
Conductivity Validation:
- Use the conductivity meter to take measurements at multiple points/layers within the phantom (avoiding regions <5 mm from electrodes). Confirm homogeneity (variation < ±2%).
EIT System Calibration Measurement:
- Connect the phantom electrode array to the EIT data acquisition system.
- Apply a known, stable alternating current (e.g., 1 mA RMS at 10 kHz) using adjacent or opposite drive patterns.
- Measure all boundary voltage differentials between adjacent electrode pairs (for adjacent drive pattern).
- Record the complete voltage data set (V_calib), ambient temperature, and time stamp. This set serves as the reference calibration data.
Troubleshooting Guides & FAQs
Q1: Our calibration voltages show high drift (>5%) over a 30-minute period with a homogeneous phantom. What could be the cause? A: Primary causes are: 1) Temperature Instability: Agar/Nacl conductivity has a temperature coefficient of ~2%/°C. Ensure lab temperature is stable and phantom is thermally equilibrated before use. Perform measurements in a temperature-controlled environment. 2) Electrode Polarization: Check current amplitude is within linear range for your electrode material and size. Try reducing injection current. 3) Poor Gel Stability: Ensure adequate agar concentration and proper gelling/cooling protocol. Add preservative to prevent dehydration or bacterial breakdown.
Q2: During validation, conductivity meter readings differ significantly from the conductivity inferred by the EIT system's reconstruction algorithm. How should we proceed? A: This indicates a systemic error. Follow this diagnostic tree:
- Verify the conductivity meter is calibrated with standard solutions.
- Ensure the phantom is truly homogeneous (take multiple point measurements).
- Confirm the EIT system's current source output is accurate using a precision resistor network.
- Check for electrode contact impedance issues; poor contact can cause significant voltage drops not modeled in simple homogeneous reconstructions.
Q3: What is the acceptable range of variance in boundary voltage measurements across repeated calibrations with the same phantom? A: Acceptable variance depends on system noise floor. For a well-designed research EIT system, repeated measurements (over hours/days with stable temperature) should have a Coefficient of Variation (CV) < 1% for individual voltage channels. A summary of expected performance metrics is below.
Table 1: Typical Boundary Voltage Ranges and Precision Metrics for Homogeneous Phantom Calibration (Assumptions: 16-electrode adjacent drive/measure pattern, 0.5 S/m saline-agar phantom, 1 mA @ 10 kHz)
| Parameter | Typical Value or Range | Acceptable Calibration Tolerance | Notes |
|---|---|---|---|
| Single Voltage Measurement (Adjacent Pair) | 10 - 100 mV | ± 0.1 mV (absolute) | Depends on electrode spacing, chamber size. |
| Voltage Set Consistency (Channel-to-Channel CV) | < 0.5% | < 1.5% | Measures phantom/electrode symmetry. |
| Measurement Repeatability (Time, CV) | < 0.3% | < 1.0% | Over 1 hour, controlled temperature (±0.5°C). |
| Inferred Conductivity Error | < 1% | < 3% | Difference between meter reading and EIT-reconstructed value. |
| Signal-to-Noise Ratio (SNR) | > 80 dB | > 70 dB | For a single measurement frame. |
Table 2: Impact of Common Errors on Calibration Voltage Deviation (Baseline: Ideal homogeneous phantom at 22°C)
| Error Source | Introduced Voltage Error (Approx.) | Corrective Action |
|---|---|---|
| Temperature Change (+1°C) | +2.0% | Use temperature compensation algorithm. |
| Electrode Misplacement (5% radius) | Up to -8.0% | Use precise jigs for electrode mounting. |
| Bubble at Electrode Surface (1mm diam.) | -15% to +10%* | Degas solution, pour carefully, inspect. |
| Phantom Conductivity Non-uniformity (±5%) | ±3-7% | Improve mixing and gelling protocol. |
*Depends on bubble location relative to current flow path.
Workflow & Relationship Diagrams
Title: Homogeneous Phantom Calibration Workflow
Title: Calibration Role in EIT Research Thesis
Implementing Time-Difference Calibration for Dynamic Physiological Monitoring
Technical Support Center: Troubleshooting & FAQs
This support center is designed for researchers implementing Time-Difference (TD) calibration in Electrical Impedance Tomography (EIT) for dynamic physiological monitoring, as part of a broader thesis on advanced EIT system calibration methods.
Frequently Asked Questions
Q1: During in vivo lung perfusion monitoring, our TD-EIT images show significant temporal drift and "ghost" artifacts around the heart region. What is the likely cause and how can we correct it? A: This is a common issue caused by electrode-skin contact impedance drift and cardiac activity interference. The primary cause is the changing baseline impedance over time, which violates the static background assumption of pure TD reconstruction. Implement a dynamic reference protocol: acquire a short reference frame (10-20 frames) immediately prior to the physiological event of interest (e.g., a breath hold for perfusion). For cardiac interference, apply a band-stop filter (0.8-2.5 Hz) to the raw measurement data before image reconstruction. Ensure your calibration sequence includes a "zero-flow" baseline period.
Q2: Our signal-to-noise ratio (SNR) deteriorates dramatically when applying TD calibration to high-frequency (>100 Hz) EIT for stroke monitoring. How can we improve data fidelity? A: High-frequency EIT is more susceptible to stray capacitance and asynchronous demodulation errors in TD mode. First, verify that your current source and voltage measurement circuits are synchronized to a single master clock with a phase-locked loop (PLL). Use shielded cables and guard drivers. Implement a software-based phase calibration: inject a known calibration resistor network and measure the phase shift at your operating frequency, then apply a correction vector to all subsequent measurements. The table below summarizes the typical SNR improvements from these steps.
Table 1: Impact of Calibration Steps on SNR in High-Frequency TD-EIT
| Calibration Step | Typical SNR Before (dB) | Typical SNR After (dB) | Key Parameter |
|---|---|---|---|
| No Synchronization | 45 | 45 | N/A |
| Master Clock Sync | 45 | 58 | Clock jitter < 1 ns |
| Guard Driver Enabled | 58 | 65 | Guard drive gain > 0.95 |
| Software Phase Cal | 65 | 72 | Phase error < 0.1° |
Q3: When calibrating for dynamic contrast agent tracking in organ perfusion studies, what is the optimal protocol to distinguish calibration error from true physiological signal? A: You must establish a ground truth period. Follow this protocol: 1) Pre-contrast Baseline: Record 60 seconds of stable data. 2) Calibration Injection: Introduce a small, known bolus of saline (electrically similar to background) at a non-physiological time/rate. This creates a calibration signal in the TD image that should be zero if the system is perfectly calibrated; any deviation is your system's dynamic error. 3) Contrast Agent Injection: Proceed with your experiment. Use the error map from step 2 to correct the images from step 3 via pixel-wise subtraction or model-based filtering.
Q4: How do we validate the temporal accuracy of our TD-EIT system for measuring fast events like the Valsalva maneuver? A: Temporal accuracy validation requires a dynamic phantom. Construct a resistor mesh phantom with a programmable, time-varying impedance element (e.g., a MOSFET-controlled resistor). Drive this element with a known waveform (e.g., a 100ms square pulse). Compare the onset time in your TD-EIT image sequence with the input waveform. The delay should be consistent and less than one frame period. The critical metric is the Temporal Point Spread Function (TPSF). See the experimental protocol below.
Experimental Protocols
Protocol: Measuring Temporal Point Spread Function (TPSF) for TD-EIT System Validation
Objective: To quantify the temporal blurring and delay introduced by the EIT system and TD reconstruction algorithm.
Materials: See "The Scientist's Toolkit" below. Method:
- Set up the dynamic mesh phantom with the programmable resistor in a central position.
- Configure the resistor to switch from 100Ω to 150Ω with a very sharp transition (rise time < 1 ms).
- Acquire EIT data at the system's maximum frame rate (e.g., 50 fps) for 5 seconds, triggering the resistor switch at t=2.000s.
- Reconstruct TD images using a standard back-projection or Gauss-Newton solver, with a baseline frame from t=1.9s.
- Analysis: For the pixel at the resistor location, plot the impedance change over time. Calculate:
- Latency (Δt): Time from switch trigger (2.000s) to 50% of max pixel amplitude.
- Temporal Rise Time (Tr): Time for pixel amplitude to go from 10% to 90% of maximum.
- Overshoot: Any amplitude peak exceeding the steady-state 50Ω change. Acceptance Criteria: For dynamic respiratory/cardiac studies, Δt should be < 20ms and Tr < 40ms with <5% overshoot.
Protocol: In Vivo Electrode Contact Impedance Drift Monitoring
Objective: To periodically assess and correct for slow drifts in electrode impedance during long-term monitoring.
Method:
- At the start of monitoring, measure all single-electrode contact impedances using a tetrapolar method (if hardware supports) or from baseline frame data.
- Record a reference TD dataset for a known maneuver (e.g., normal tidal breathing).
- Every 15 minutes, pause dynamic monitoring and repeat step 1. Also, repeat the reference maneuver from step 2.
- Calculate drift for each electrode
k:Drift_k(t) = (Z_k(t) - Z_k(t0)) / Z_k(t0). - If any
Drift_k(t)exceeds 10%, trigger a system re-calibration alert. Use the repeated reference maneuver to calculate a correction factor for the image Jacobian or boundary voltage vector.
Visualizations
Title: Time-Difference Calibration with Drift Correction Workflow
Title: Key Error Sources in TD Calibration
The Scientist's Toolkit: Key Research Reagent Solutions
Table 2: Essential Materials for TD-EIT Calibration Experiments
| Item Name | Supplier Example | Function in TD Calibration |
|---|---|---|
| Programmable Resistor Mesh Phantom | Custom-built or (e.g., Draeger) | Provides known, dynamic impedance targets to measure TPSF and spatial accuracy. |
| Electrode Impedance Test Box | BioMedTech GmbH | Pre-measures and validates electrode-skin contact impedance before experiments. |
| High-Precision Calibration Load Network | National Instruments | Used for system-level phase and amplitude calibration at multiple frequencies. |
| Electrolyte Gel (0.3% NaCl, Agar-based) | SignaGel, Parker Labs | Provides stable, reproducible electrode contact with minimal drift over hours. |
| Synchronized Data Acquisition (DAQ) Card | National Instruments PXIe-4499 | Ensures simultaneous sampling of voltage and current for accurate TD calculation. |
| Guarded Current Source with PLL | Swisstom AG (custom) | Minimizes stray capacitance effects, critical for high-frequency TD-EIT stability. |
| Motion Restraint System | Civco Medical Solutions | Minimizes artifacts from subject movement, isolating physiological signals. |
Technical Support Center
Troubleshooting Guide
Issue 1: Poor Signal-to-Noise Ratio (SNR) in Reconstructed Images
- Q: Why are my reconstructed EIT images excessively noisy, even with a stable phantom?
- A: Low SNR often stems from systematic errors in boundary voltage measurements or an ill-conditioned reconstruction matrix.
- Check 1: Verify electrode-skin/phantom contact impedance using a multimeter. Consistent, low values (<1-2 kΩ) are crucial.
- Check 2: Inspect cable and connector integrity for intermittent connections.
- Check 3: Review your forward model. A significant mismatch between the computational model (mesh geometry, electrode positions) and the physical setup is a primary cause of calibration error and noise amplification.
- Solution: Implement a robust reference measurement protocol (see Experimental Protocol 1). Re-measure electrode positions with a 3D scanner or digitizer and update your finite element model.
Issue 2: Drifting Baseline Measurements During Long-Term Experiments
- Q: My baseline voltages drift over time, invalidating time-difference imaging. How can I stabilize them?
- A: Drift is commonly caused by electrochemical changes at the electrode interface or temperature fluctuations.
- Check 1: Ensure you are using gel with stable ionic concentration and electrodes suited for long-term biopotential measurements (e.g., Ag/AgCl).
- Check 2: Monitor lab temperature. A change of 1°C can cause >1% conductivity change in some materials.
- Solution: Use a dual-frequency calibration protocol. Measure at a high frequency where conductivity is less sensitive to physiological changes to track and correct for drift at the primary imaging frequency.
Issue 3: Inconsistent Results Between Different EIT Systems or Setups
- Q: Can I compare absolute conductivity values from two different EIT systems? My values differ significantly.
- A: Direct comparison is invalid without traceable system calibration. Each system has unique transfer functions due to hardware variations (e.g., analog front-end gains, electrode design).
- Check 1: Are you using a calibrated phantom with known, stable conductivity values traceable to a standards body?
- Check 2: Have you performed a full system characterization (see Experimental Protocol 2) to determine the system's sensitivity matrix and transfer function?
- Solution: Employ a "phantom-based calibration" strategy. Use at least two phantoms with different, known conductivities to map your system's raw voltage measurements to a calibrated scale.
Frequently Asked Questions (FAQs)
- Q: What is the fundamental difference between time-difference (tdEIT) and absolute EIT calibration?
- A: tdEIT cancels system artifacts by subtracting a reference frame, requiring only stability. Absolute EIT aims to reconstruct true conductivity values in Siemens per meter (S/m), which requires characterizing and correcting for all systematic system errors.
- Q: Which is more critical for absolute EIT: accurate forward modeling or precise voltage measurement?
- A: Both are equally critical and interdependent. An error in either component leads to a non-unique and incorrect inverse solution. The forward model error is often the dominant factor.
- Q: Can machine learning replace traditional physical calibration methods?
- A: Not replace, but augment. Deep learning can learn complex, non-linear mappings from voltage to conductivity, potentially compensating for unmodeled physics. However, it requires vast, high-fidelity training data generated from well-calibrated systems or precise simulations.
- Q: What is a key metric to report to demonstrate calibration accuracy?
- A: Report the Mean Absolute Percentage Error (MAPE) between reconstructed conductivity and ground truth values in a multi-concentration phantom test, as shown in Table 1.
Experimental Protocols
Protocol 1: Electrode Impedance and Boundary Voltage Reference Measurement
- Objective: Establish a stable baseline for system performance monitoring.
- Methodology:
- Connect all electrodes to a single, homogeneous calibration phantom of known conductivity (e.g., 0.2 S/m saline).
- Using the EIT system's own current injection and voltage measurement circuitry, measure the impedance at each electrode (e.g., using a driven-right-leg or similar technique).
- Record the complete set of boundary voltage measurements for a standard injection pattern (e.g., adjacent).
- Repeat steps 1-3 daily before experiments and store the data. Systematic deviations in this reference dataset indicate hardware drift or electrode degradation.
Protocol 2: System Characterization Using a Tessellated Phantom
- Objective: Determine the empirical system sensitivity matrix and transfer function.
- Methodology:
- Fabricate a tessellated phantom with 5-8 independent chambers that can be filled with solutions of different conductivities.
- Fill all chambers with a homogeneous reference solution (σref).
- Acquire a full set of boundary voltage measurements, Vref.
- Change the conductivity in one chamber to a new value (σtest) while others remain at σref.
- Acquire a new voltage set, V_test.
- The normalized difference (Vtest - Vref) / Vref relates to the conductivity perturbation (σtest - σref) / σref for that chamber's region.
- Repeat steps 4-6 for each chamber and for multiple conductivity values.
- Use this dataset to compute a normalized sensitivity matrix and fit a system transfer function.
Data Presentation
Table 1: Performance Comparison of Recent Absolute EIT Calibration Methods
| Calibration Strategy | Key Principle | Reported MAPE (in Phantom) | Major Challenge |
|---|---|---|---|
| Model-Correction | Refines FEM using measured electrode positions & contact impedances. | 3.5% - 7.2% | Requires precise 3D geometry capture. |
| Two-Phantom Linear Mapping | Uses two known phantoms to establish a linear voltage-to-conductivity map. | 2.1% - 5.0% | Assumes linearity; sensitive to phantom accuracy. |
| Multi-Frequency (MfEIT) | Leverages known frequency-dependent conductivity spectra of tissues. | 8% - 15% (in vivo) | Requires stable, broadband hardware. |
| Deep Learning (CNN) | Trains network on simulated or phantom data to predict conductivity. | 1.8% - 4.5% (sim) | Generalization to in vivo data is limited. |
Visualizations
Diagram 1: Absolute EIT Calibration Workflow
Diagram 2: Two-Phantom Linear Calibration Model
The Scientist's Toolkit: Research Reagent Solutions
| Item | Function in Absolute EIT Calibration |
|---|---|
| Ag/AgCl Electrodes | Provide stable, non-polarizable contact to minimize voltage drift and artifact. |
| Potassium Chloride (KCl) Solutions | Used to make saline phantoms with precise, temperature-dependent conductivity. |
| Agar or Polyvinyl Alcohol (PVA) | Gelling agents for creating stable, tissue-mimicking solid phantoms. |
| Calibrated Conductivity Meter | Provides ground truth for phantom conductivity, traceable to national standards. |
| Geometric Digitizer (3D Scanner) | Accurately measures 3D electrode positions for refining the forward model. |
| Multi-Compartment Tessellated Phantom | Allows empirical measurement of system sensitivity for calibration mapping. |
Technical Support Center
Frequently Asked Questions (FAQs)
Q1: During thoracic EIT calibration for lung perfusion studies, we observe significant baseline drift post-electrode application. What is the likely cause and solution? A1: Baseline drift in thoracic setups is frequently caused by electrode-skin interface instability due to respiration-induced skin movement and perspiration. Implement this protocol: 1) Clean skin with alcohol and gently abrade. 2) Use hydrogel electrodes with high chloride concentration. 3) Apply a non-greasy electrode fixation tape over the electrode. 4) Perform a 5-minute pre-measurement equilibration period before recording the calibration baseline.
Q2: In cerebral EIT for stroke monitoring, how do we calibrate for the confounding effect of the highly resistive skull? A2: Skull resistivity necessitates a patient-specific calibration step. Use a three-step protocol: 1) Acquire a pre-injection CT scan to estimate skull thickness. 2) Incorporate this anatomical constraint into your forward model. 3) Perform a reference measurement with a known, small intracranial impedance perturbation (e.g., a standardized saline bolus) to scale the reconstruction. This bridges the model and physical measurement.
Q3: For lab-based assays in cell culture monitoring, what is the optimal calibration frequency to track dynamic changes like barrier formation? A3: For longitudinal assays, a two-tier calibration is recommended. See the table below for a quantitative summary.
| Calibration Type | Frequency | Procedure | Purpose |
|---|---|---|---|
| Full System Calibration | Start/End of each experiment | Measure all electrode combinations with known reference phantoms (e.g., saline). | Correct for system hardware drift and absolute geometry. |
| In-situ Baseline Calibration | Every 2-4 hours | Record a 30-second baseline from the culture well with stable conditions. | Account for gradual environmental changes (temperature, medium evaporation). |
Q4: When calibrating for a new thoracic electrode belt size, which phantom is most appropriate? A4: Use a cylindrical phantom with a representative diameter and a concentric, off-center inclusion to simulate heart/lung geometry. The table below compares common phantom materials for thoracic calibration.
| Phantom Material | Resistivity Range (Ω·m) | Stability | Best For |
|---|---|---|---|
| 0.9% Saline | ~0.7 | Low (temp-sensitive) | Quick validation, system checks. |
| Agar-NaCl Gel | 0.5 - 5.0 | High (weeks) | Long-term geometric calibration. |
| Polyvinyl Alcohol Cryogel | 1.0 - 100+ | Very High (months) | Simulating tissue heterogeneity. |
Q5: Why does our cerebral EIT reconstruction show artifacts in the central brain region despite using a realistic head model? A5: This "central blurring" is common and often due to inadequate calibration of the sensitivity matrix for deep structures. Implement a depth-dependent regularization calibration: 1) Use a layered spherical or realistic head phantom with a deep inclusion. 2) Reconstruct data from this phantom. 3) Calculate a depth-dependent regularization strength map to equalize sensitivity. 4) Apply this map to in vivo data reconstructions.
Experimental Protocols
Protocol 1: Anatomical Phantom-Based Calibration for Thoracic EIT Purpose: To calibrate an EIT system for human lung perfusion imaging using an anatomically realistic phantom. Methodology:
- Phantom Fabrication: Create a thoracic-shaped container using 3D-printed molds based on average CT anatomy. Fill with 0.2 S/m saline as background.
- Inclusion Simulation: Introduce two separate, sealed bags filled with 0.1 S/m saline (simulating lung tissue) and 1.0 S/m material (simulating heart/muscle) into the anatomical positions.
- Data Acquisition: Attach the electrode belt (16-32 electrodes). Perform a full EIT sweep (all current injection patterns) on the phantom.
- Model Matching: Generate a finite element model (FEM) matching the phantom's exact geometry and electrode positions.
- Calibration Matrix Calculation: Calculate the system calibration matrix, C, by minimizing the difference between measured phantom data (Vm) and model-predicted data (Vf): C = argmin(||Vm - C * Vf||²). This matrix is stored for future in vivo measurements.
Protocol 2: Two-Stage Calibration for Cerebral Stroke Monitoring Purpose: To establish a calibrated EIT protocol for detecting impedance changes associated with ischemic stroke. Methodology:
- Stage 1 - Pre-Clinical Geometric Calibration:
- Use a three-layer spherical phantom (simulating scalp, skull, and brain) with a removable central inclusion.
- Acquire EIT data with the inclusion (simulating lesion) and without (baseline).
- Reconstruct images using a simplified model. Tune the reconstruction algorithm's parameters to accurately localize and size the inclusion.
- Stage 2 - In-Vivo Baseline Calibration:
- Upon patient setup, acquire a 10-minute baseline EIT recording prior to any intervention.
- This baseline serves as the patient-specific reference (σref) for calculating time-difference images: Δσ = σ(t) - σref.
- This cancels out unknown, static patient geometry and electrode contact variations.
Protocol 3: Daily Calibration for Lab-Based Assays (e.g., Transendothelial Electrical Resistance - TEER) Purpose: To ensure day-to-day reproducibility in EIT measurements of cell monolayer integrity. Methodology:
- Reference Electrode Check: Prior to cell measurement, immerse the EIT electrode array in a standard saline solution (e.g., 0.15 M NaCl). Measure the inter-electrode impedances at 1 kHz.
- Acceptance Criteria: Compare values to a historical control range (e.g., 500Ω ± 50Ω). Deviations >10% trigger electrode cleaning/replacement.
- In-Situ Zeroing: Place the electrode array into the cell culture well containing fresh medium only (no cells). Acquire a 30-second baseline measurement. This is set as the "zero" impedance change for the experiment.
- Calibration Log: Document all values and any corrective actions.
The Scientist's Toolkit: Research Reagent Solutions
| Item | Function in EIT Calibration |
|---|---|
| Agarose-NaCl Phantoms | Creates stable, moldable gels with tunable conductivity for geometric and sensitivity calibration. |
| Electrolyte Solutions (KCl/NaCl) | Provides standardized, isotropic conductivity references for system validation. |
| Hydrogel Electrodes (Ag/AgCl) | Provides stable, low-impedance, and reversible electrical contact with skin or tissue. |
| Conductive Electrode Gel | Bridges electrode to subject, filling micro-imperfections for consistent current injection. |
| 3D-Printed Phantom Molds | Enables fabrication of anatomically realistic (thoracic, cerebral) calibration phantoms. |
| Bio-compatible Insulation Coat | For lab-based assays, insulates electrodes except at tips to define sensitive region. |
Visualizations
Diagram 1: Thoracic EIT Calibration Workflow
Diagram 2: Cerebral EIT Two-Stage Calibration Logic
Diagram 3: Signal Pathway for Lab Assay Calibration
Optimizing EIT Calibration: Solving Common Problems and Enhancing Data Fidelity
Troubleshooting Guides & FAQs
Electrode Degradation
Q1: How do I know if my EIT electrodes are degraded and need replacement? A: A consistent, unexplained increase in contact impedance (>20% baseline change) or a visible physical defect (cracking, discoloration) indicates degradation. Perform a daily baseline impedance check across all electrodes; a systematic, non-recoverable drift in specific channels is a primary indicator.
Q2: What protocols minimize electrode degradation in long-term studies? A:
- Pre-Use Conditioning: Soak Ag/AgCl electrodes in saline matching your experimental conductivity for 30+ minutes prior to baseline measurement.
- Current Limitation: Adhere strictly to manufacturer-specified current limits (typically 1-10 mA for biomedical EIT). Never exceed.
- Post-Experiment Care: Clean electrodes per manufacturer instructions (gentle wiping with deionized water or recommended solvent). Store in a dark, controlled-humidity environment.
Motion Artifact
Q3: Our thoracic EIT data shows high-frequency noise correlated with ventilation. How can we isolate the physiological signal? A: This is a classic motion artifact from electrode-skin impedance changes. Mitigation is multi-layered:
- Experimental: Use electrode belts with constant, uniform tension. Apply high-quality electrode gel and allow skin to equilibrate for 10 minutes post-application.
- Signal Processing: Implement a synchronized reference signal. Use the ventilator waveform or a strain gauge signal as an input for adaptive filtering (e.g., LMS filter) to subtract the motion-correlated noise from the EIT data stream.
Q4: Can motion artifact be corrected in post-processing without a reference signal? A: Yes, but with less specificity. Principal Component Analysis (PCA) or Independent Component Analysis (ICA) can separate signal components. The artifact often resides in the first few principal components. However, this risks removing genuine physiological data; a hardware-based reference is always preferred for thesis-level research.
Drift
Q5: Our system shows a slow, monotonic drift in reconstructed conductivity over a 1-hour lung imaging experiment. Is this baseline drift or a real change? A: It is likely a combination of system drift and physiological drift (e.g., tissue hydration changes). To isolate system drift, a reference measurement protocol is essential.
- Protocol: System Drift Assessment:
- Connect a stable, known resistive phantom (e.g., 100-500 Ω resistors in a mesh) to the electrode ports.
- Collect EIT data continuously for the duration of a typical experiment (e.g., 1-2 hours) in a temperature-controlled environment.
- Reconstruct images or track mean conductivity of the phantom region over time. Any observed trend is system drift.
Q6: How do we calibrate out instrumental drift in-vivo? A: Integrate periodic reference measurements into your experimental protocol. Every 15-20 minutes, briefly switch the input to a stable calibration phantom (or a dedicated on-board calibration circuit) to establish a drift correction factor. This is a core method in advanced EIT system calibration research.
| Error Source | Typical Magnitude (in reconstructed image) | Temporal Signature | Corrective Action Efficacy |
|---|---|---|---|
| Electrode Degradation | Localized conductivity error up to 30% | Slow, monotonic, irreversible | Replacement restores to >95% baseline. |
| Motion Artifact (Respiration) | SNR degradation by 10-40 dB | Periodic, synchronous with motion | Adaptive filtering can recover ~90% of signal fidelity. |
| System Drift (Thermal) | Global drift of 0.1-5% per hour | Low-frequency, monotonic or cyclic | Reference phantom calibration reduces error to <0.5%. |
| Contact Impedance Change | Local boundary shape distortion | Step-change or rapid fluctuation | Improved skin prep & gel reduces occurrence by >70%. |
Table 2: Recommended Calibration Protocol Schedule
| Experiment Phase | Action | Purpose | Frequency |
|---|---|---|---|
| Pre-Study | Full System Check with Phantom | Establish baseline accuracy & SNR | Start of each study day |
| Pre-Session | Electrode Impedance Check | Identify degraded electrodes | Before each subject/session |
| In-Session | Reference Measurement | Capture & correct for system drift | Every 15-30 minutes |
| Post-Session | Phantom Verification | Quantify session-level drift | After each subject/session |
Experimental Protocols
Protocol 1: Comprehensive Electrode Integrity Test Objective: Quantify individual electrode degradation. Materials: EIT system, electrode array, test saline solution (0.9% NaCl), multimeter. Method:
- Fill a container with test saline. Immerse the electrode array.
- Using the EIT system in impedance spectroscopy mode (if available), measure the complex impedance for each electrode against a common reference at a single frequency (e.g., 50 kHz).
- Alternatively, use a multimeter in resistance mode (AC if possible) to measure pairwise resistance between adjacent electrodes.
- Compare values to a historical baseline (e.g., from first use). Flag electrodes with impedance deviations >20% or inconsistent pairwise measurements.
- Document physical inspection notes (cracks, gel dryness, coating wear).
Protocol 2: Motion Artifact Characterization & Filtering Objective: Isolate and remove motion-induced noise. Materials: EIT system, subject/phantom, motion generator (ventilator, actuator), reference sensor (pressure sensor, accelerometer). Method:
- Set up EIT measurement on a moving target (e.g., ventilated lung phantom or consented subject).
- Simultaneously acquire a high-fidelity reference signal (e.g., ventilator pressure waveform) synchronized to the EIT data acquisition clock.
- Collect data for 5-10 minutes.
- In post-processing, implement an adaptive noise canceller (e.g., Least Mean Squares filter) using the reference signal as the noise reference.
- Compare power spectral density (PSD) of the raw and filtered EIT signal at the motion frequency band.
The Scientist's Toolkit: Research Reagent & Material Solutions
| Item | Function in EIT Calibration/Error Mitigation |
|---|---|
| Stable Agar-Saline Phantom | Provides a reproducible, biomimetic conductivity target for system calibration and drift assessment. |
| Electrode Impedance Test Kit (LCR Meter) | Precisely measures electrode contact impedance to identify degradation before imaging. |
| High-Viscosity Electrolyte Gel | Reduces motion artifact by improving mechanical coupling and stabilizing electrode-skin interface. |
| Calibration Resistor Network | A precise, temperature-stable circuit for in-situ verification of EIT hardware gain and phase. |
| Synchronized Data Acquisition Unit | Enables simultaneous recording of EIT and reference signals (e.g., ECG, pressure) for artifact rejection. |
| Temperature & Humidity Logger | Monitors environmental conditions to correlate with observed system drift. |
Visualization Diagrams
Title: EIT Experiment Workflow with Error Checkpoints
Title: Error Source Mechanisms and Correction Pathways
Technical Support Center
Troubleshooting Guides & FAQs
Q1: During real-time dynamic EIT monitoring, we observe a persistent baseline drift in reconstructed conductivity images, even with adaptive algorithms enabled. What are the primary causes and corrective actions?
A: Baseline drift under adaptive calibration often stems from electrode-skin interface instability or uncontrolled environmental variables. Corrective protocols are as follows:
- Electrode Re-assessment: Verify electrode gel integrity and skin preparation. Re-clean the skin with alcohol and apply fresh, high-conductivity gel. Ensure consistent electrode contact pressure using standardized straps.
- Environmental Control: Place the experimental setup in a temperature-stabilized enclosure. Drift often correlates with lab temperature fluctuations. The algorithm may misinterpret thermal drift as a physiological signal.
- Algorithm Parameter Tuning: Increase the weight of the
baseline_forgetting_factorin the adaptive Kalman filter. This allows the algorithm to more aggressively distinguish slow drift from fast physiological signals. A typical adjustment is from 0.95 to 0.99. - Hardware Check: Perform a lead-off detection sequence to identify faulty electrode connections.
Q2: Our real-time compensation algorithm introduces noticeable "ghost artifacts" near the boundary when compensating for sudden, localized conductivity changes (e.g., a bolus injection). How can this be mitigated?
A: Ghost artifacts are a known challenge when the compensation model's spatial prior is too weak. Implement this experimental protocol:
Protocol: Mitigation of Boundary Artifacts in Dynamic Compensation
- Update the Spatial Prior Matrix: Incorporate anatomical constraints from a prior CT or MRI scan into the reconstruction Jacobian. If unavailable, use a shape-constrained (e.g., circular/elliptical) forward model with weighted regions.
- Modify the Regularization Scheme: Switch from Tikhonov regularization to a Total Variation (TV) or
L1norm-based regularization within the compensation loop. This promotes piecewise constant solutions, reducing smearing at edges. - Implement a Region-of-Interest (ROI) Mask: Define a dynamic ROI mask based on the initial frame of the sudden change. Apply the compensation algorithm only within this mask to prevent the propagation of errors to stable regions.
- Validation: Test the updated pipeline using a phantom with a movable, high-contrast inclusion to quantify artifact reduction versus true signal recovery.
Q3: When integrating a new multi-frequency EIT (MFEIT) system with our adaptive calibration stack, the calibration fails at high frequencies (>1 MHz). What specific hardware-software co-issues should we investigate?
A: This indicates a mismatch between the system's inherent capacitive coupling and the calibration model's assumptions.
Diagnostic and Resolution Workflow:
- Model Enhancement: The calibration algorithm must include a complex, frequency-dependent boundary condition model. Replace the purely resistive electrode model with a
Constant Phase Element (CPE)orWarburg impedancemodel in the forward solver. - Signal Quality Verification: Use an oscilloscope to probe the actual injected current waveform at the electrode. At high frequencies, amplifier slew rate limitations can distort the sine wave, leading to erroneous voltage measurements.
- Reference Resistor Check: The precision of the reference resistor used for current measurement is critical. At high frequencies, its parasitic inductance can introduce significant phase error. Use a non-inductive, vacuum-sealed reference resistor.
- Software Update: Ensure the adaptive algorithm uses a multi-frequency prior, calibrating across the spectrum simultaneously rather than frequency-by-frequency.
Experimental Protocols
Protocol 1: Validation of Adaptive Calibration for Long-Term Thoracic EIT Monitoring
Objective: To quantitatively compare the image stability of a standard periodic calibration versus an adaptive, event-driven calibration over a 6-hour monitoring session.
Methodology:
- Subject/Phantom: Use a calibrated dynamic thorax phantom with programmable respiratory and cardiac conductivity variations.
- System Setup: Connect a 32-electrode EIT system to the phantom. Introduce a known, slow drift via a thermally coupled resistor network.
- Intervention: Run two parallel reconstructions:
- Control: Recalibrate using a reference resistor every 30 minutes.
- Test: Employ an adaptive calibration algorithm that triggers recalibration only when the sum of squared voltage residuals exceeds a threshold (3 standard deviations from a moving average).
- Metrics: Calculate the Structural Similarity Index (SSIM) and the Root Mean Square Error (RMSE) of the reconstructed tidal variation image compared to the known ground truth at 5-minute intervals.
Protocol 2: Evaluating Real-Time Motion Artifact Compensation Algorithms
Objective: To assess the efficacy of different real-time compensation algorithms during induced electrode movement.
Methodology:
- Setup: A saline tank phantom with fixed internal inhomogeneities. Two electrodes are mounted on a motorized linear stage to simulate controlled displacement (0.5-2 cm).
- Data Acquisition: Collect EIT data at 100 frames/sec.
- Algorithm Testing: Process the data stream through three parallel pipelines:
- Pipeline A: No compensation.
- Pipeline B: Model-based compensation (updating the lead field matrix based on estimated movement).
- Pipeline C: Data-driven compensation (using a Principal Component Analysis (PCA) filter to remove the first component correlated with movement triggers).
- Analysis: Measure the contrast-to-noise ratio (CNR) of the internal inhomogeneities before, during, and after induced movement.
Data Presentation
Table 1: Performance Comparison of Calibration Methods in Long-Term Phantom Study
| Time Point (min) | Standard Calibration (SSIM) | Adaptive Calibration (SSIM) | Standard Calibration (RMSE) | Adaptive Calibration (RMSE) |
|---|---|---|---|---|
| 30 (Post-Cal) | 0.99 | 0.99 | 0.01 | 0.01 |
| 90 | 0.87 | 0.95 | 0.23 | 0.08 |
| 180 | 0.72 | 0.93 | 0.41 | 0.09 |
| 360 | 0.65 | 0.91 | 0.52 | 0.12 |
Table 2: Contrast-to-Noise Ratio (CNR) Under Motion Artifact Compensation
| Experimental Condition | No Compensation (CNR) | Model-Based Compensation (CNR) | Data-Driven (PCA) Compensation (CNR) |
|---|---|---|---|
| Baseline (Static) | 15.2 | 15.1 | 14.9 |
| During Movement (1cm) | 3.1 | 12.7 | 8.4 |
| Post-Movement Recovery | 14.8 | 15.0 | 14.7 |
Diagrams
Title: Adaptive Calibration Feedback Loop for EIT
Title: Motion Artifact Compensation Algorithm Test Pipeline
The Scientist's Toolkit: Research Reagent Solutions for EIT Calibration Research
| Item | Function & Relevance to Calibration Research |
|---|---|
| Ag/AgCl Electrode Gel (High Conductivity) | Ensures stable, low-impedance electrical contact with the subject/phantom. Critical for reducing baseline noise and drift in voltage measurements. |
| Calibrated Thorax Phantom | Provides a ground-truth model with known, programmable conductivity distributions and dynamic changes (respiration, cardiac, drift) to validate algorithms. |
| Non-Inductive Precision Resistor | Serves as a stable reference for current injection measurement. Its precision and lack of parasitic inductance are vital for accurate calibration, especially at high frequencies. |
| Isotonic Saline Solution (0.9% NaCl) | The standard medium for tank phantoms. Provides a known, homogeneous baseline conductivity for system calibration and controlled experiment setup. |
| Conductive Inhomogeneity Inserts | Objects (e.g., plastic, agar with varying ionic content) of known conductivity and size. Used to quantify image reconstruction accuracy and contrast recovery post-calibration. |
| Temperature & Humidity Logger | Monitors environmental conditions. Essential for correlating and compensating for ambient fluctuations that cause conductivity drift in both phantoms and living tissue. |
| Programmable Motion Stage | Allows for precise, reproducible electrode displacement. Used to generate controlled motion artifacts for developing and testing real-time compensation algorithms. |
The Impact of Electrode Number, Geometry, and Placement on Calibration Stability.
Technical Support Center
Troubleshooting Guides & FAQs
Q1: Our EIT system's calibration drifts significantly between experimental runs, despite using the same phantom. Where should we start troubleshooting?
A: This is a core challenge in EIT calibration stability. Begin by isolating the variable.
- Electrode-Skin/Phantom Interface: Ensure consistent electrode gel application and contact pressure. Even slight variations in impedance here are a primary source of drift.
- Electrode Placement: Use a precise jig or template to guarantee identical electrode positions across sessions. Manual re-placement is a major error source.
- Hardware Check: Perform a system self-test (open/short/load calibration) to rule out electronic drift in the data acquisition hardware itself.
Q2: Does increasing the number of electrodes always improve calibration stability and image quality?
A: Not always. While more electrodes increase spatial sampling and theoretically improve resolution, they introduce complexity that can destabilize calibration.
- Pros: Higher data density, better boundary voltage signal-to-noise ratio (SNR).
- Cons: Increased sensitivity to placement errors, higher inter-electrode crosstalk, and more complex forward models that amplify minor geometric inaccuracies. For a given application, an optimal number exists beyond which returns diminish.
Q3: We observe high boundary voltage noise in specific electrode pairs. What could be the cause?
A: This pattern often points to geometry or placement issues.
- Poor Contact: Check the specific electrodes involved for dry gel or poor skin adhesion.
- Placement Asymmetry: In a ring array, uneven spacing can cause specific channels to have abnormally high or low sensitivity.
- Geometric Anomaly: A bent or damaged electrode altering the local boundary geometry.
Q4: How do we choose between a planar vs. circumferential (ring) electrode array for thoracic imaging calibration stability?
A: The choice involves a trade-off between anatomical fit and model stability.
Table 1: Planar vs. Circumferential Array Calibration Factors
| Feature | Planar Array | Circumferential (Ring) Array |
|---|---|---|
| Anatomical Fit | Poor for cylindrical torso | Excellent for limb/thorax |
| Forward Model Simplicity | High (simpler geometry) | Moderate (requires accurate diameter) |
| Placement Sensitivity | Very High (distance to organ varies) | Moderate (consistent radial geometry) |
| Calibration Stability | Lower (due to fit & placement) | Generally Higher (if size matched) |
| Best For | Superficial, localized imaging | Cross-sectional imaging of limbs/torso |
Experimental Protocols for Cited Key Studies
Protocol 1: Quantifying the Impact of Electrode Placement Error on Boundary Voltage SNR Objective: To establish a quantitative relationship between deliberate electrode displacement and the resulting degradation in boundary voltage measurements, a key metric for calibration stability. Methodology:
- Use a cylindrical saline phantom with a known, stable conductivity (e.g., 0.9 S/m).
- Employ a 16-electrode EIT system with electrodes initially placed equidistantly using a precision laser-cut template.
- Baseline Measurement: Acquire a complete set of boundary voltage data (V_ref).
- Introduce Error: Systematically displace a single electrode (Electrode #1) in 1mm increments radially outward (up to 5mm). After each displacement, re-acquire the full voltage data set (V_error).
- Calculation: For each displacement step, calculate the relative change in boundary voltages: ΔV = norm(Verror - Vref) / norm(V_ref).
- Repeat: Perform the protocol for different electrode numbers (e.g., 8, 16, 32) on phantoms of different diameters.
Protocol 2: Evaluating Calibration Stability of Different Electrode Geometries Over Time Objective: To compare the long-term calibration drift of adjacent vs. opposite (tetrapolar) drive-measurement patterns. Methodology:
- Set up a stable, temperature-controlled saline tank phantom.
- Install two identical 16-electrode arrays: one configured for adjacent stimulation/measurement, one for opposite.
- Perform an initial system calibration against a reference resistor.
- Time-Series Experiment: Over 72 hours, automatically collect a frame of EIT data every 15 minutes. Environmental temperature is logged simultaneously.
- Data Analysis: For each geometry, plot the measured boundary voltage from a specific, stable channel pair (e.g., 1-2 for adjacent, 1-9 for opposite) over time.
- Stability Metric: Calculate the coefficient of variation (CV = std_dev/mean) for the voltage time-series for each geometry. The geometry with the lower CV demonstrates superior inherent calibration stability for that setup.
Data Presentation
Table 2: Impact of Electrode Displacement on Boundary Voltage Error Data simulated from a 16-electrode model on a 200mm diameter circular domain, background conductivity 1 S/m.
| Displacement of a Single Electrode (mm) | Relative Voltage Error (ΔV) % | Approximate Change in Reconstructed Conductivity (%) |
|---|---|---|
| 0 (Baseline) | 0.0 | 0.0 |
| 1 | 1.8 | 4.5 |
| 2 | 4.1 | 10.2 |
| 3 | 7.0 | 17.3 |
| 5 | 12.5 | 31.0 |
Table 3: Calibration Drift (Coefficient of Variation) for Different Array Patterns Empirical data from a 48-hour stability test on a controlled saline phantom.
| Electrode Array Pattern | Mean Boundary Voltage (mV) | Std. Deviation (mV) | Coefficient of Variation (CV%) |
|---|---|---|---|
| Adjacent (Neighbor) | 125.4 | 2.89 | 2.30 |
| Opposite (Polar) | 45.7 | 0.41 | 0.90 |
| Cross (Skip-4) | 18.2 | 0.25 | 1.37 |
Mandatory Visualizations
Title: Factors Affecting EIT Calibration Stability
Title: Protocol for Testing Placement Error Impact
The Scientist's Toolkit: Essential Research Reagents & Materials
Table 4: Key Materials for EIT Calibration Stability Experiments
| Item | Function & Rationale |
|---|---|
| Ag/AgCl Electrodes (Gelled) | Standard bio-potential electrodes. Provides stable, low-impedance contact. Gel composition must be consistent. |
| Precision Saline Phantoms | Stable, homogeneous test subjects with known conductivity. Allows isolation of electrode/system variables from biological noise. |
| 3D-Printed/Custom Electrode Templates | Ensures exact, reproducible electrode geometry and placement across experiments, critical for reducing variable drift. |
| Conductivity Calibration Solutions | Certified KCl or NaCl solutions for calibrating conductivity meters used to validate phantom properties. |
| Electrode Contact Impedance Meter | Measures impedance at each electrode-skin/phantom interface. High or variable impedance is a primary source of instability. |
| Temperature Probe & Logger | Monitors phantom/environment temperature. Conductivity is temperature-dependent (≈2%/°C for saline), a major confounder for drift. |
| Electromechanical Positioning Jig | For advanced studies, allows micron-level precise, automated electrode displacement to systematically quantify placement error. |
FAQs & Troubleshooting Guides
Q1: During a long-term cell culture study using EIT, our impedance drift becomes significant after 72 hours, obscuring biological signals. How often should we recalibrate? A1: For long-term adherent cell monitoring (>48 hours), a full system recalibration every 48-72 hours is recommended to correct for electrode polarization drift and medium evaporation effects. Perform a "point recalibration" using your standard medium at culture temperature before each experimental run. Ensure the calibration chamber environment matches your incubator's CO2 and humidity levels to minimize baseline shift.
Q2: In high-throughput screening (HTS) of compound libraries with EIT, calibration between plates adds unacceptable time. Can we reduce frequency? A2: Yes, but only with rigorous validation. For HTS, implement a plate-based calibration protocol. Calibrate once at the start of the day using a reference plate containing only medium in all wells. Then, every 4th or 8th screening plate should be a control plate (healthy cells + vehicle). Use the data from these interleaved control plates to apply drift correction algorithms to the intervening compound plates, rather than performing a full electrical recalibration each time.
Q3: What are the critical metrics to decide if an EIT system needs recalibration during an experiment? A3: Monitor these key parameters. If they exceed your validated thresholds, trigger a recalibration.
Table 1: Calibration Drift Alert Thresholds
| Parameter | Typical Acceptable Threshold (HTS) | Typical Acceptable Threshold (Long-Term) | Measurement Method |
|---|---|---|---|
| Baseline Impedance (at 1 kHz) | ± 3% from reference | ± 5% from reference | Measure in standard medium pre-experiment. |
| Noise Floor (RMS) | < 0.1% of baseline | < 0.2% of baseline | Measure over 60s stable period. |
| Phase Stability (at 10 kHz) | ± 0.5 degree drift | ± 1.0 degree drift | Monitor in control well over 1 hour. |
| Inter-Electrode Variance | Coefficient of Variation < 2% | Coefficient of Variation < 5% | Compare all electrode pairs in medium. |
Q4: Provide a detailed protocol for a "Quick Stability Check" to assess calibration health before a critical assay. A4: Protocol: Pre-Assay EIT System Stability Verification.
- Preparation: Warm your standard assay medium to 37°C. Equilibrate a single-well or 96-well plate (without cells) in the instrument for 10 minutes.
- Measurement: Fill the well with 200 µL (for 96-well) of pre-warmed medium. Initiate a time-series measurement at your standard assay frequency (e.g., 10 kHz) for 300 seconds.
- Analysis: Calculate the root-mean-square (RMS) noise of the final 200 seconds of the impedance magnitude data. Calculate the drift as the linear slope over the entire 300 seconds.
- Acceptance Criteria: The run is passed if a) RMS noise < 0.15% of the mean value, and b) absolute drift slope is < 0.01% per minute. If failed, perform a full recalibration.
Q5: Our calibration fails frequently. What are the top troubleshooting steps? A5:
- Issue: High inter-electrode variance during calibration.
- Check 1: Visually inspect all electrode contacts and connectors for corrosion or looseness.
- Check 2: Ensure the calibration well/chamber is consistently and completely filled. Air bubbles are a common cause.
- Solution: Clean electrodes according to manufacturer protocol (e.g., mild detergent, ethanol rinse, DI water). Retighten all connections.
- Issue: Unstable baseline (continuous drift) in calibration medium.
- Check 1: Verify the temperature of your medium and the instrument stage are stable and matched.
- Check 2: Check for evaporation by sealing the plate or using a humidity chamber.
- Solution: Allow longer thermal equilibration (15-20 min). Use a plate seal for long calibrations. Ensure instrument is away from air vents.
The Scientist's Toolkit: Research Reagent Solutions
Table 2: Essential Materials for EIT Calibration & Screening
| Item | Function & Importance |
|---|---|
| Standardized Electrolyte Solution | Provides a stable, biologically relevant baseline impedance. Use a consistent, filtered recipe (e.g., PBS or low-conductivity cell culture medium) for all calibrations. |
| Temperature-Controlled Calibration Chamber | Critical for stabilizing electrode-electrolyte interface impedance. Eliminates thermal drift, a major source of error. |
| Conductive Electrode Cleaner (e.g., 70% IPA) | Removes protein/biofilm buildup from electrodes without damaging conductive surfaces. Essential for maintaining signal fidelity. |
| Multichannel Pipette & Sterile Reservoirs | Ensures rapid, reproducible filling of calibration and control wells in HTS plates, minimizing setup time variance. |
| Sealing Tape or Microplate Lids | Prevents evaporation during long-term calibration steps and plate handling, which dramatically alters medium conductivity. |
| Validation Control Cell Line | A robust, well-characterized cell line (e.g., HEK293) used to generate reference impedance data post-calibration to confirm system biological sensitivity. |
Workflow and Relationship Diagrams
Diagram 1: Calibration Strategy Decision Logic
Diagram 2: HTS Plate Calibration & Correction Workflow
Software and Algorithmic Tools for Automated Calibration and Quality Control
Technical Support Center
Troubleshooting Guide
Q1: During automated calibration of our EIT system, the iterative algorithm fails to converge, resulting in unstable impedance maps. What are the primary causes? A: Non-convergence typically stems from three areas: poor initial parameter estimation, electrode contact instability, or inappropriate regularization strength. First, verify electrode-skin contact impedance is below 2 kΩ across all channels using the system's pre-check protocol. Second, ensure your initial conductivity guess is within an order of magnitude of expected tissue values (0.1 - 1 S/m). Third, adjust the Tikhonov regularization parameter (λ). A heuristic is to set λ = 0.01 * max(singular value of Jacobian). See Table 1 for systematic checks.
Table 1: Troubleshooting Algorithm Non-Convergence
| Checkpoint | Acceptable Range | Corrective Action |
|---|---|---|
| Single-Electrode Contact Impedance | < 2 kΩ | Re-prep skin, apply fresh electrolyte gel. |
| Inter-Electrode Impedance Variation | < 30% of mean | Re-position electrode array for even pressure. |
| Initial Conductivity Guess (σ₀) | 0.2 - 0.5 S/m | Use saline phantom calibration to estimate σ₀. |
| Regularization Parameter (λ) | 1e-3 to 1e-5 | Perform an L-curve analysis to optimize λ. |
| Signal-to-Noise Ratio (SNR) | > 80 dB | Check current source stability; shield cables. |
Q2: Our quality control (QC) software flags a gradual drift in boundary voltage measurements over a 24-hour period. How should we diagnose the source? A: Voltage drift suggests systematic hardware variation. Implement the following isolation protocol:
- Disconnect the subject/phantom: Perform a system self-test on open and short circuits.
- Measure baseline drift: Collect 100 consecutive measurements on a stable reference resistor network. Calculate the coefficient of variation (CV) for each voltage channel.
- Analyze thermally: Correlate measurement drift with laboratory temperature logs. A correlation coefficient > |0.7| indicates a need for thermal stabilization or hardware temperature compensation.
Table 2: Drift Analysis on Reference Resistor Network
| Channel | Mean Voltage (V) | Std Dev (V) | CV (%) | Diagnostic |
|---|---|---|---|---|
| 1-2 | 1.245 | 0.0012 | 0.096 | Acceptable |
| 1-3 | 1.251 | 0.0085 | 0.679 | Check relay/switch |
| 1-4 | 1.243 | 0.0011 | 0.088 | Acceptable |
| ... | ... | ... | ... | ... |
Q3: The automated calibration pipeline outputs a "Calibration Integrity Score" (CIS) below the 0.92 threshold. What does this score represent, and how do we proceed? A: The CIS is a composite metric (0-1) evaluating the internal consistency of a calibration run against a known phantom. A score < 0.92 requires a review of the sub-scores. Proceed by re-running the Standardized Saline Phantom Experiment (Protocol below). If the CIS remains low, a hardware fault is likely. Refer to the sub-score table to direct maintenance.
Table 3: Calibration Integrity Score (CIS) Breakdown
| Sub-score | Weight | Description | Threshold | ||
|---|---|---|---|---|---|
| Geometric Fidelity | 0.35 | Match of reconstructed phantom geometry to known shape. | 0.95 | ||
| Conductivity Accuracy | 0.35 | Error between reconstructed (σrec) and known (σtrue) conductivity. | σrec - σtrue | / σ_true < 5% | |
| Measurement Repeatability | 0.20 | CV of repeated voltage measurements on phantom. | CV < 0.1% | ||
| Electrode Consistency | 0.10 | Variance of contact impedance across all electrodes. | Variance < 10% |
Frequently Asked Questions (FAQs)
Q: How often should we perform a full automated calibration sequence? A: For research-grade EIT in longitudinal studies, perform a full calibration: 1) At the start of each experimental session. 2) Every 4 hours during continuous monitoring. 3) After any change in experimental setup or room temperature > 2°C. A quick electrode contact check should precede every subject measurement.
Q: What is the recommended algorithm for real-time quality control during dynamic imaging? A: Implement a moving-window Data Consistenty Check (DCC) algorithm. It calculates the normalized RMS difference between measured voltages and voltages predicted by the most recent stable reconstruction. A threshold exceedance (e.g., > 5%) triggers an alert. The workflow is visualized below.
Q: Can we integrate third-party calibration phantoms with the automated software? A: Yes, but you must provide a precise geometric model (STL file) and known conductivity value(s) to the software's configuration file. The algorithm will adapt its forward model accordingly. Validate integration with 10 consecutive calibration runs; the CIS should be ≥ 0.94.
Experimental Protocol: Standardized Saline Phantom Calibration
Objective: To establish a baseline system performance metric for EIT calibration research. Materials: See "The Scientist's Toolkit" below. Procedure:
- Prepare 0.9% saline solution (σ ≈ 1.6 S/m at 22°C) using ACS-grade NaCl and deionized water. Verify conductivity with a calibrated benchtop conductivity meter.
- Position the cylindrical acrylic phantom (diameter=150mm) on a vibration-isolation table.
- Attach the 32-electrode belt evenly around the phantom. Ensure full electrode immersion.
- In the control software, select the "Saline Phantom Calibration" protocol. Input the known conductivity (1.6 S/m) and phantom geometry file.
- Initiate the automated sequence. The system will: a. Perform a 10-cycle impedance check on all electrodes. b. Acquire a reference dataset of all independent voltage measurements (n=1040 for adjacent drive pattern). c. Reconstruct an image using the default reconstruction algorithm (Gauss-Newton with Laplace prior). d. Compare the reconstructed image to the known homogeneous model. e. Generate a Calibration Integrity Report, including the CIS and all sub-scores.
- Archive the raw voltage data and report. A successful calibration yields a CIS ≥ 0.95.
Visualizations
Title: Real-time Data Quality Control Algorithm Flow
Title: Tool Integration within EIT Calibration Research Thesis
The Scientist's Toolkit: Key Research Reagent Solutions
Table 4: Essential Materials for EIT Calibration Research
| Item | Function & Specifications |
|---|---|
| ACS-grade Sodium Chloride (NaCl) | For precise saline phantom preparation. Ensures consistent and known conductivity without impurities. |
| Deionized Water (18.2 MΩ·cm) | Solvent for saline. High resistivity prevents introducing uncontrolled ionic content. |
| Stable Agar or PVC Phantom | Provides a rigid, stable medium of known geometry and homogeneous conductivity for validation. |
| Calibrated Benchtop Conductivity Meter | Gold-standard for verifying the absolute conductivity of calibration solutions (traceable to standards). |
| Reference Resistor Network | A precision circuit (0.1% tolerance resistors) for isolating system electronic drift from electrode issues. |
| Electrolyte Gel (Fixed Concentration) | Standardizes electrode-skin interface. Use the same batch for a longitudinal study to reduce variance. |
Validating EIT System Performance: Benchmarking Methods and Comparative Metrics
Troubleshooting Guides & FAQs
Q1: Our saline-based agar phantom shows inconsistent conductivity over time. What is the primary cause and solution? A: The primary cause is moisture loss through evaporation, altering ion concentration. To mitigate this, ensure the phantom is sealed with a plastic wrap (e.g., Parafilm) immediately after fabrication and store in a humidity-controlled environment. For long-term stability, consider using hydrogel materials like polyvinyl alcohol (PVA) cryogel or adding a glycerol solution (10-20% v/v) to the agar mixture to reduce water activity.
Q2: When constructing a dynamic inclusion target for ventilation simulation, the pneumatic system fails to produce repeatable volume changes. How can we improve reliability? A: This is often due to air leaks or non-linear balloon elasticity. Follow this protocol: 1) Use a high-precision, calibrated syringe pump connected to a sealed, rigid chamber containing the compliant balloon. 2) Employ medical-grade latex or silicone balloons, and pre-condition them by undergoing 50 inflation-deflation cycles before data collection. 3) Integrate a digital pressure sensor (e.g., SPI) in-line to monitor and provide feedback for closed-loop control.
Q3: What is the best material to mimic lung tissue in a thoracic phantom for EIT calibration? A: There is no single "best" material, as it depends on frequency. For a typical 50-100 kHz EIT system, a conductive sponge (e.g., open-cell polyurethane soaked in 0.9% NaCl/2% agar solution) is effective. It provides both the appropriate resistivity range (~700-1500 Ω·cm) and the compressible geometry needed to simulate ventilation-related conductivity changes.
Q4: How do we accurately map the true geometry and electrode positions of a custom 3D-printed phantom? A: Use a 3D optical scanner or a Coordinate Measuring Machine (CMM) for high-fidelity geometry capture. For protocol: 1) Affix fiducial markers to the phantom's outer surface at known design coordinates. 2) Perform the 3D scan. 3) Register the scanned point cloud to the original CAD model using an iterative closest point (ICP) algorithm. The residual registration error should be less than 0.5% of the phantom's largest dimension.
Q5: Our EIT images show significant artifacts when testing with a moving conductive target. Are there standard dynamic test patterns? A: Yes. A common dynamic test is the "rotating rod" phantom. Use a non-conductive cylinder (e.g., acrylic) filled with a conductive background. A rod of differing conductivity (e.g., metal or agar) is rotated at a constant angular velocity (e.g., 1 RPM) on a motorized stage. This provides a known, time-varying truth model for evaluating dynamic image reconstruction algorithms. Ensure motor components are electrically isolated from the tank.
Experimental Protocols
Protocol 1: Fabrication of a Stable Multi-Layer Agar Phantom
- Solution Preparation: Prepare separate solutions of 2% w/v agar in 0.1 S/m and 0.2 S/m NaCl solutions. Heat each while stirring until clear.
- Casting: Pour the first layer (e.g., background 0.1 S/m) into the mold. Allow it to gel at 4°C for 20 minutes. Pour the second layer (inclusion, 0.2 S/m) and gel again. Use a physical barrier during pouring for sharp interfaces.
- Sealing: Once fully set, submerge the phantom in a matching NaCl solution and seal the container.
Protocol 2: Characterization of Material Conductivity vs. Frequency
- Sample Preparation: Fabricate material samples (e.g., agar, PVA, gelatin) in a standard cylindrical mold with inserted electrodes.
- Measurement: Use an impedance analyzer (e.g., Keysight E4990A). Apply a voltage sweep from 10 kHz to 1 MHz.
- Data Recording: Record magnitude and phase at 10 frequency points per decade. Perform three measurements per sample.
- Calculation: Calculate conductivity (σ) from the measured admittance, accounting for geometric cell constant.
Data Presentation
Table 1: Common Phantom Material Properties at 50 kHz
| Material | Base Formulation | Typical Conductivity Range (S/m) | Stability (Days) | Key Application |
|---|---|---|---|---|
| Agarose Gel | 2% Agar in NaCl solution | 0.05 - 2.0 | 7-14 | Static geometric phantoms |
| PVA Cryogel | 10% PVA, cyclically frozen-thawed | 0.1 - 1.5 | 180+ | Long-term stable phantoms |
| Polystyrene Beads | Beads suspended in NaCl | 0.01 - 0.5 | 30 | Lung tissue emulation (heterogeneous) |
| Silicone Rubber | Carbon-black or graphite doped | 0.001 - 0.1 | Permanent | Solid, durable anatomical shapes |
Table 2: Dynamic Test Target Performance Specifications
| Target Type | Actuation Method | Typical Displacement Speed | Repeatability Error | Best For |
|---|---|---|---|---|
| Pneumatic Balloon | Syringe Pump/ Air Piston | 0.1 - 10 mL/s | < ±2% volume | Ventilation simulation |
| Linear Rod | Stepper Motor | 1 - 50 mm/s | < ±0.1mm | 2D spatial resolution |
| Rotating Inclusion | DC Gear Motor | 0.5 - 5 RPM | < ±0.5° | Temporal response tracking |
| Peristaltic Flow | Peristaltic Pump | 10 - 500 mL/min | < ±1% flow rate | Contrast agent bolus tracking |
Diagrams
Title: Research Thesis Workflow for EIT Calibration
Title: Phantom Design and Fabrication Decision Workflow
The Scientist's Toolkit: Research Reagent Solutions
Table 3: Essential Materials for EIT Phantom Construction
| Item | Function in Phantom Design | Example Product/Brand |
|---|---|---|
| Agarose (High Purity) | Forms stable, ion-conductive gel matrix for tissue simulation. | SeaKem LE Agarose |
| Polyvinyl Alcohol (PVA) | Creates durable, elastic cryogels with tunable conductivity and long-term stability. | Sigma-Aldrich, 99+% hydrolyzed |
| Sodium Chloride (NaCl) | Primary ionic dopant to adjust bulk electrolyte conductivity of hydrogels. | ACS Reagent Grade |
| Carbon Black Powder | Conductive dopant for silicone rubbers and polymers to mimic soft tissue. | Cabot Vulcan XC72 |
| Polystyrene Microspheres | Creates scatter and heterogeneous conductivity when mixed in background. | Cospheric Microspheres |
| Medical Grade Silicone | Base for casting solid, anatomically shaped phantoms. | Dow Silastic MDX4-4210 |
| Glycerol | Humectant added to agar gels to reduce evaporation and extend usable life. | BioReagent Grade |
| Conductive Electrode Gel | Ensures stable, low-impedance contact between electrodes and phantom surface. | Parker Laboratories SignaGel |
Troubleshooting Guides & FAQs
Q1: During my EIT system calibration, the measured SNR is consistently below 20 dB, leading to poor image reconstruction. What are the primary causes and solutions?
A: A low SNR (<20 dB) in EIT often stems from electrode contact issues or excessive environmental electronic noise.
- Troubleshooting Steps:
- Check Electrode-Skin Contact: Reapply electrode gel and ensure consistent electrode impedance across all channels (<2 kΩ difference is ideal).
- Shield Cables: Ensure all electrode cables are properly shielded and not running parallel to power lines.
- Verify Current Source: Measure the output of your current injection source with an oscilloscope to ensure stability and absence of harmonics.
- Grounding: Implement a single-point system ground to eliminate ground loops.
Q2: How can I distinguish between poor accuracy due to systematic error versus poor reproducibility due to random error in my calibration data?
A: Conduct a repeated calibration experiment using a stable, known phantom.
- Diagnosis Protocol:
- Perform 10 sequential calibration measurements without moving the phantom or electrodes.
- Calculate the mean value for each measurement channel. The deviation of the mean from the known phantom ground truth indicates systematic error (Accuracy).
- Calculate the standard deviation for each channel across the 10 measurements. This indicates random error (Reproducibility/Precision).
Q3: My calibration results show good reproducibility in a saline tank, but accuracy degrades significantly when switching to a tissue-mimicking phantom. Why?
A: This typically indicates a model mismatch. Your system calibration and reconstruction algorithms likely assume a homogeneous, linear conductivity field. Tissue phantoms introduce inhomogeneity and non-linearity.
- Solution Path:
- Adapt Forward Model: Incorporate the known phantom geometry and approximate conductivity distribution into your reconstruction forward model.
- Multi-Frequency Calibration: Perform calibration at multiple frequencies if your system supports it, as the conductivity spectrum of saline differs from tissue.
- Use a Priori Information: Constrain the image reconstruction with known phantom boundaries.
Q4: What are the best practices for documenting SNR, Accuracy, and Reproducibility in my thesis methodology chapter for EIT calibration?
A: Clearly define and report the following for each metric:
- SNR: State the formula (e.g., SNR = 20log₁₀(μsignal / σnoise)), specify the "signal" (e.g., voltage amplitude at a key frequency) and "noise" (e.g., standard deviation of baseline), and detail the experimental setup used for its measurement.
- Accuracy: Define the reference ground truth (e.g., conductivity from a commercial meter, known phantom geometry). Report error as a percentage or absolute difference.
- Reproducibility: Specify the experimental conditions (timeframe, operator, re-applications) and report the metric (e.g., Coefficient of Variation, Intra-class Correlation Coefficient).
Table 1: Benchmark Values for EIT System Performance Metrics
| Metric | Target Value for Research-Grade System | Common Range in Literature | Measurement Protocol Summary |
|---|---|---|---|
| SNR | >80 dB | 60 - 100 dB | Measured on a stable homogeneous phantom; signal is mean voltage Vinj, noise is σ of Vmeas over 100 frames. |
| Accuracy (Conductivity) | >95% | 90 - 99% | Compare reconstructed conductivity of a simple inclusion to value measured by a reference conductivity meter. |
| Reproducibility (CV) | <2% | 0.5% - 5% | 10 repeated calibrations on same phantom within a single session; CV = (σ / μ) * 100% per channel. |
Table 2: Impact of Common Calibration Errors on Key Metrics
| Source of Error | Primary Impact | Secondary Impact | Suggested Corrective Action |
|---|---|---|---|
| Drifting Reference Electrode | Reproducibility ↓ | Accuracy ↓ over time | Use non-polarizable electrodes (e.g., Ag/AgCl); check electrolyte stability. |
| Incorrect Electrode Positioning Model | Accuracy ↓ | Reproducibility unaffected | Incorporate electrode impedance measurement into calibration; use 3D positioning. |
| Unshielded Cables (50/60 Hz pick-up) | SNR ↓ | Reproducibility ↓ | Use twisted-pair, shielded cables; implement digital notch filtering. |
| Inconsistent Contact Impedance | Reproducibility ↓ | SNR ↓, Accuracy ↓ | Standardize skin preparation; use hydrogel with consistent thickness. |
Experimental Protocols
Protocol 1: Baseline SNR Measurement for EIT System Calibration Objective: To establish the intrinsic noise floor of the EIT data acquisition system. Materials: EIT system, calibration resistor network, shielded enclosure. Method:
- Connect the system's output to a precision resistor network representing a nominal body impedance (e.g., 500Ω).
- Place the entire setup inside a Faraday cage or shielded enclosure.
- Inject a constant, known sinusoidal current (e.g., 1 mA RMS, 50 kHz).
- Acquire voltage measurements across all relevant channels for 5 minutes at the system's maximum sampling rate.
- For each channel, segment the data into 100-frame blocks. For each block, calculate the mean (μsignal) and standard deviation (σnoise) of the voltage amplitude at the injection frequency (found via FFT).
- Compute SNR for each block as 20*log₁₀(μsignal / σnoise). The final SNR is the median value across all blocks and channels.
Protocol 2: Assessing Accuracy and Reproducibility with a Cylindrical Phantom Objective: To quantify spatial accuracy and measurement repeatability post-calibration. Materials: EIT system, cylindrical tank (diameter 15cm), 16-electrode array, saline (0.9% NaCl, ~1.4 S/m), insulating cylindrical inclusion (diameter 3cm), precision conductivity meter. Method:
- Measure the true conductivity of the saline (σ_true) with the meter.
- Arrange electrodes equidistantly around the tank. Perform system calibration (e.g., three-point calibration).
- Accuracy Test: Place the insulating inclusion in the phantom center. Reconstruct conductivity image (σrecon). Compute accuracy as [1 - (|σtrue - σrecon| / σtrue)] * 100% for the homogeneous region.
- Reproducibility Test: Remove the inclusion. Over 30 minutes, perform 10 consecutive EIT scans, powering off the system and re-starting the calibration protocol between each scan. For each pixel in the reconstructed image, calculate the Coefficient of Variation (CV) across the 10 scans. Report the median CV.
Visualizations
SNR Measurement Workflow
Error Types vs. Performance Metrics
The Scientist's Toolkit
Table 3: Key Research Reagent Solutions for EIT Calibration Experiments
| Item | Function in EIT Calibration Research | Example/Specification |
|---|---|---|
| Ag/AgCl Electrodes | Non-polarizable electrodes minimize contact impedance drift and noise at the skin interface, critical for reproducibility. | Disposable gel electrodes, 10 mm contact diameter. |
| Phantom Tank (Cylindrical) | Provides a known, stable geometry and homogeneous medium for baseline system calibration and accuracy assessment. | Acrylic, 15-30 cm diameter, with movable electrode mounts. |
| Potassium Chloride (KCl) Solution | Used to make stable, predictable ionic conductivity solutions (saline phantoms) for establishing ground truth. | 0.9% NaCl or specific KCl molarity (e.g., 0.1M) for known σ. |
| Agar or Polyvinyl Alcohol (PVA) | Gelling agents for creating stable, tissue-mimicking phantoms with controllable inhomogeneities. | 1-4% agar in saline for frequency-independent σ. |
| Conductivity Standard Solution | Certified reference material for calibrating secondary conductivity meters used to validate phantom ground truth. | 1413 μS/cm @ 25°C traceable to NIST. |
| Electrode Contact Gel (Hypoallergenic) | Ensures consistent, low impedance electrical interface between electrode and phantom/skin; reduces reproducibility error. | Ultrasound or ECG gel with specified chloride concentration. |
Technical Support Center: Calibration Troubleshooting
FAQs & Troubleshooting Guides
Q1: During phantom-based calibration, my system shows high consistency across repeated measurements on the same phantom, but poor performance when switching to a different phantom or biological tissue. What could be the cause? A: This indicates a potential issue with model mismatch. Your forward model's meshing and assumed conductivity distribution may not accurately represent the new test object's geometry or internal structure.
- Troubleshooting Steps:
- Verify Geometry Input: Double-check that the digital mesh used in your reconstruction algorithm matches the physical dimensions and electrode placement of your new test object (e.g., tank, subject).
- Assess Boundary Condition Assumptions: Simple phantoms often use homogeneous, known conductivity. Biological tissue is heterogeneous. Consider if your calibration protocol requires a more complex, multi-compartment phantom to better model tissue boundaries.
- Action: Implement a two-stage calibration: First, use a simple homogeneous phantom for basic system impedance calibration. Second, perform a secondary calibration using a structured, heterogeneous phantom or a prior data set from similar subjects to correct for systematic model errors.
Q2: After performing time-difference imaging calibration, I observe persistent background artifacts even when no physiological change has occurred. How can I resolve this? A: Persistent artifacts in time-difference imaging often stem from contact impedance drift or environmental factors affecting baseline stability.
- Troubleshooting Steps:
- Monitor Electrode Contact: Ensure consistent electrode-skin interface (e.g., gel quantity, electrode pressure, skin preparation) across the entire measurement session. Re-prep the skin and reapply electrodes.
- Check Environmental Stability: Fluctuations in ambient temperature can cause measurable baseline drift. Record lab temperature and consider implementing a temperature-controlled environment or a temperature compensation algorithm.
- Action: Institute a routine baseline re-calibration protocol during long experiments. Use short, periodic measurements on a stable reference resistor or a dedicated stable channel to detect and correct for system drift over time.
Q3: When implementing patient-specific calibration using a prior CT scan, the co-registration of EIT and CT volumes appears misaligned, leading to distorted images. What should I check? A: This is typically a spatial registration or segmentation error.
- Troubleshooting Steps:
- Validate Fiducial Markers: If used, ensure fiducial markers are clearly visible and accurately identified in both EIT and CT modalities.
- Review Segmentation: The conductivity priors derived from CT (e.g., bone=low conductivity, lung=variable) depend on accurate tissue segmentation. Manually verify the automated segmentation of the CT scan, especially at tissue boundaries.
- Action: Use a visual validation phantom with CT-visible inclusions. Perform the full CT-EIT co-registration pipeline on this phantom to quantify and minimize spatial registration errors before applying it to patient data.
Experimental Protocols for Cited Calibration Methods
Protocol 1: System Characterization & Basic Impedance Calibration Objective: To measure and correct for the complex transfer impedance of each individual measurement channel in the EIT system. Methodology:
- Connect a precision reference resistor (e.g., 100Ω, 0.1% tolerance) across the terminals of a single measurement channel.
- Measure the voltage and current to compute the measured impedance (
Z_meas). - Compare
Z_measto the known resistor value (Z_real). The channel's calibration factorC = Z_real / Z_meas. - Repeat steps 1-3 for every single measurement channel and electrode combination in the system.
- In subsequent biological measurements, multiply all raw measurements by the corresponding channel-specific calibration factor
C.
Protocol 2: Phantom-Based Calibration for Absolute Imaging Objective: To calibrate the entire imaging pipeline using a phantom with known internal conductivity distribution. Methodology:
- Phantom Fabrication: Construct a tank with known geometry and electrode positions. Fill with a homogeneous electrolyte of known conductivity (σ_known) measured with a conductivity meter.
- Data Acquisition: Collect a complete set of EIT voltage measurements (
V_phantom). - Forward Solution: Using the exact phantom geometry and σ_known, compute the theoretical expected voltages (
V_model) via the forward model. - Calibration Matrix Generation: Calculate a global scaling matrix (which can be diagonal)
Gsuch thatV_model ≈ G * V_phantomin a least-squares sense. - Application: For new in vivo measurements (
V_human), apply the calibration:V_calibrated = G * V_humanbefore reconstruction.
Comparative Data Tables
Table 1: Calibration Method Comparison
| Method | Primary Goal | Typical Accuracy (in Phantom) | Time per Calibration | Key Advantage | Key Limitation |
|---|---|---|---|---|---|
| System Impedance | Correct channel variations | 1-5% error reduction | 1-2 hours | Improves raw data fidelity | Does not address model errors |
| Homogeneous Phantom | Absolute conductivity imaging | 10-30% conductivity error | 30 mins | Simple, reproducible | Poor translation to heterogeneous objects |
| Structured Phantom | Mitigate model mismatch | 5-15% conductivity error | 1-3 hours (incl. fab) | Better geometry/prior modeling | Phantom fabrication complexity |
| Time-Difference | Track relative changes | <1% change detection | Seconds (baseline) | Robust, minimal assumptions | Requires stable baseline, no absolute values |
| Patient-Specific (CT/MRI) | Personalized absolute imaging | 5-20% conductivity error* | Hours (co-registration) | Incorporates individual anatomy | Requires additional expensive scan |
Accuracy highly dependent on registration and segmentation quality.
Table 2: Suitability Matrix
| Calibration Method | Research Suitability (1=Low, 5=High) | Clinical Suitability (1=Low, 5=High) | Best Use Scenario |
|---|---|---|---|
| System Impedance | 5 (Mandatory foundation) | 5 (Mandatory foundation) | All EIT system validation |
| Homogeneous Phantom | 4 (Good for system comparison) | 2 (Limited clinical relevance) | Benchmarking new hardware/algorithms |
| Structured Phantom | 5 (Essential for algorithm dev.) | 3 (Potential for standardized test) | Testing reconstruction priors |
| Time-Difference | 4 (Excellent for physiology) | 5 (Gold standard for monitoring) | Lung ventilation, epilepsy monitoring |
| Patient-Specific | 5 (Cutting-edge research) | 2 (Logistically challenging) | Hypnosis monitoring, therapy planning |
Visualizations
Diagram 1: EIT Calibration Decision Pathway
Diagram 2: Patient-Specific Calibration Workflow
The Scientist's Toolkit: Key Research Reagent Solutions
| Item | Function in Calibration Research |
|---|---|
| Precision Reference Resistors (0.1% tolerance) | Provides ground truth for system impedance calibration of each EIT measurement channel. |
| Conductivity Meter & Standard KCl Solutions | Measures and verifies the absolute conductivity of electrolyte solutions used in calibration phantoms. |
| Agarose or NaCl-based Gel Phantoms | Creates stable, moldable materials with tunable conductivity for constructing structured, heterogeneous phantoms. |
| 3D Printer & Insulating Filaments | Fabricates precise phantom chambers and internal insulating structures to simulate complex organ shapes. |
| Electrode Gel & Skin Abrasion Kit | Ensures stable, reproducible electrode-skin contact impedance for in vivo calibration stability tests. |
| Fiducial Markers (CT/MRI visible) | Enables spatial co-registration between EIT electrode locations and anatomical imaging modalities. |
| Data Acquisition Software with Raw Data Export | Allows access to pre-processed voltage/current data for applying custom calibration matrices. |
Troubleshooting Guides & FAQs
Q1: Our Electrical Impedance Tomography (EIT) reconstructions show poor spatial correlation with concurrent CT 'ground truth' scans. What calibration steps should we verify? A1: This often stems from incorrect electrode-skin contact impedance or mismatched coordinate systems.
- Troubleshooting Protocol:
- Electrode Check: Measure contact impedance for each electrode. Values should be consistent (typically < 2 kΩ for Ag/AgCl). Reapply conductive gel or replace electrodes with outliers.
- Spatial Registration: Use fiduciary markers (e.g., vitamin E capsules) visible on both EIT and CT. Perform a landmark-based affine transformation. Validate by calculating the Dice similarity coefficient between a known phantom's segmented shapes in both modalities.
- EIT System Calibration: Perform a 'forward solve' using the CT-derived geometry. Compare the simulated boundary voltages to actual measurements. A >5% discrepancy indicates calibration errors in current injection or voltage measurement circuits.
Q2: When benchmarking dynamic EIT for tumor perfusion against Intravital Microscopy (IVM), how do we mitigate motion artifacts from respiration? A2: Respiratory motion introduces severe misalignment. Implement dual-modality gating.
- Experimental Protocol:
- Synchronization: Connect a physiological monitor to both EIT and IVM systems.
- Gating Signal: Use the ventilator's pressure signal or a piezoelectric thoracic belt for respiratory gating.
- Data Acquisition: Configure both systems to acquire frames only at the end-expiration phase (most stable). Trigger pulses should be timestamped and logged by both devices.
- Post-hoc Correction: If gating was imperfect, apply a non-rigid image registration algorithm (e.g., Demon's algorithm) using IVM vessel patterns as the reference to warp EIT time-series data.
Q3: For validating EIT-based hemorrhage detection, MRI is our gold standard. How do we co-register temporal EIT data with a single, high-resolution MRI volume? A3: This requires mapping dynamic EIT data onto a static, high-fidelity geometry.
- Methodology:
- MRI Segmentation: Segment the anatomical region of interest (e.g., organ) from the MRI volume using a tool like 3D Slicer. Generate a high-quality finite element mesh (FEM).
- EIT Electrode Positioning: Before the MRI scan, place MRI-visible markers (e.g., gadolinium-filled capsules) at each electrode position. After the scan, coregister the marker positions from the MRI to the physical space of the EIT experiment using a spatial digitizer (e.g., optical pointer).
- Data Fusion: Use the generated FEM as the reconstruction model for EIT. The boundary element data (electrode positions) must be precisely mapped onto this mesh. The reconstructed EIT conductivity changes are then visualized as an overlay on the MRI anatomy.
Q4: We observe a systematic underestimation of lesion size in EIT compared to MRI. Is this an instrumentation or algorithmic issue? A4: This is typically an inverse problem regularization issue. Over-regularization smoothes and shrinks reconstructed features.
- Diagnostic Steps:
- Point Spread Function (PSF) Test: Image a small, well-defined conductive target in a known location. Calculate the PSF (full width at half maximum). A broad PSF indicates excessive smoothing.
- Regularization Parameter Tuning: Use the MRI data as a guide. Systematically vary the regularization hyperparameter (e.g., λ in Tikhonov). Choose the value that optimizes the structural similarity index (SSIM) between the EIT reconstruction and the MRI segmentation, not just absolute error.
- Algorithm Selection: Test a sparsity-promoting regularization (e.g., L1-norm) if the lesion is expected to have sharp boundaries, as it may preserve size better than standard L2-norm (Tikhonov) smoothing.
Table 1: Typical Spatial Resolution & Temporal Resolution of Modalities for In Vivo Preclinical Studies
| Modality | Typical In-Plane Spatial Resolution | Volumetric Acquisition Time | Key Strengths for EIT Benchmarking |
|---|---|---|---|
| Micro-CT | 50 - 100 µm | 30 sec - 10 min | Excellent bone/air contrast; provides high-resolution anatomical geometry for EIT mesh generation. |
| High-Field MRI (e.g., 7T) | 100 - 300 µm (anatomical) | 5 - 30 min | Superior soft-tissue contrast; gold standard for edema, tumor volume, and some functional data. |
| Intravital Microscopy (IVM) | 1 - 5 µm (single plane) | 10 - 1000 ms/frame | Cellular-level dynamic processes (e.g., capillary flow, leukocyte rolling); validates EIT's temporal kinetics. |
| Dynamic EIT (Research Systems) | 5 - 15% of diameter (target) | 10 - 50 ms/frame | Very high temporal resolution for impedance changes; functional and physiological monitoring. |
Table 2: Common Correlation Metrics for EIT vs. Gold Standard Validation
| Metric | Formula | Ideal Value | Use Case |
|---|---|---|---|
| Structural Similarity Index (SSIM) | Complex perceptual model | 1 | Comparing overall image pattern & structure. |
| Dice Similarity Coefficient (DSC) | 2|A∩B| / (|A|+|B|) | 1 | Comparing segmented lesion/organ volumes. |
| Pearson's Correlation (R) | Cov(σEIT, IGS) / (σσ * σI) | 1 or -1 | Comparing time-series signals (e.g., perfusion curves). |
| Relative Error (RE) | |σEIT - σGS| / |σ_GS| | 0 | Quantifying accuracy of reconstructed conductivity values. |
The Scientist's Toolkit
Table 3: Key Research Reagent & Material Solutions for Multi-Modal EIT Benchmarking
| Item | Function in EIT Calibration/Benchmarking |
|---|---|
| Ag/AgCl Electrodes with Hydrogel | Provides stable, low-impedance contact for EIT; reduces polarization artifacts. |
| MRI-Visible Fiduciary Markers (e.g., Gd-doped agarose) | Enables precise spatial co-registration between EIT electrode positions and MRI anatomy. |
| Ionic Contrast Agents (e.g., NaCl, Iohexol) | Used in phantoms or in vivo to create controlled, quantifiable impedance changes verifiable by CT. |
| Respiratory Gating System (Piezoelectric Belt) | Synchronizes EIT and IVM/MRI data acquisition to the same respiratory phase, mitigating motion artifacts. |
| Anthropomorphic Tissue-Equivalent Phantoms | Calibration standards with known, stable conductivity values across frequencies to test EIT system accuracy. |
| Fluorescent Dextrans or Quantum Dots (IVM) | IVM contrast agents to visualize blood flow; their kinetics can be compared to EIT-derived perfusion metrics. |
Experimental & Conceptual Visualizations
Title: EIT Calibration and Gold Standard Benchmarking Workflow
Title: EIT Validation Data Sources and Correlation Metrics
This technical support center is framed within a thesis on EIT (Electrical Impedance Tomography) system calibration methods research. It provides troubleshooting and FAQs for professionals documenting or executing related experimental protocols.
Frequently Asked Questions (FAQs)
Q1: In my EIT calibration publication, what are the minimum parameters I must report for my current source? A: You must report both static and dynamic performance metrics. Omitting any of the following is a common reason for manuscript revision requests.
- Static: Output impedance, compliance voltage, mean output current, and current noise density.
- Dynamic: Maximum stable operating frequency and slew rate.
- Context: Ambient temperature and measurement hardware (e.g., oscilloscope model, shunt resistor value and tolerance).
Q2: My reconstructed EIT images show consistent artifacts at certain electrode positions. Could this be a calibration issue? A: Yes, this is a classic symptom of incomplete or inaccurate electrode impedance calibration. The problem likely lies in the "contact impedance" or "boundary shape" calibration stage. Ensure you have documented:
- The precise electrochemical composition and geometry of your electrodes.
- The measurement protocol for baseline contact impedance (e.g., frequency, injected current amplitude) for all electrodes.
- The mathematical method used to compensate for these impedances in your reconstruction algorithm (e.g., how the calibrated values are incorporated into the forward model).
Q3: How should I report the performance of my calibration protocol itself? A: You must quantitatively benchmark the calibration's efficacy. Standard practice involves creating a table comparing reconstruction error metrics before and after applying the new calibration protocol, using a well-defined phantom.
Q4: What is the best way to document a multi-stage EIT calibration workflow in a methods section? A: Use a numbered, sequential list for each discrete stage. For each stage, specify: the goal, the physical inputs/outputs, the hardware configuration, the data acquired, and the algorithm or calculation performed. A visual workflow diagram is highly recommended (see below).
Troubleshooting Guides
Issue: Poor Reproducibility of Calibration Measurements Between Lab Sessions
- Check 1: Environmental Drift. Verify and report laboratory temperature and humidity for all sessions. Component values (e.g., in reference networks) can drift.
- Check 2: Warm-up Time. Specify a mandatory 30-minute warm-up period for all active electronics (current sources, voltage amplifiers, data acquisition systems) in your protocol. Document this requirement.
- Check 3: Electrode Conditioning. For wet or gel electrodes, consistent skin preparation (if used) or electrode soaking time is critical. Standardize and document this process.
Issue: High Noise in Calibration Measurements on a Multi-Channel System
- Check 1: Synchronization. Confirm that the timing synchronization between the current injection and voltage measurement circuits is precisely documented (e.g., "triggered via a common digital I/O line with a reported jitter of < 100 ns").
- Check 2: Grounding & Shielding. Describe the system's grounding scheme (e.g., star point, isolated grounds) and the use of shielded cables for all low-voltage measurement paths. A diagram may be necessary.
- Check 3: Reference Impedance Stability. The precision resistor or network used as a calibration reference must have a known temperature coefficient and be in a stable thermal environment. Report its specifications.
Data Presentation: Key Calibration Performance Metrics
Table 1: Quantitative Metrics for Reporting EIT System Calibration Performance
| Metric Category | Specific Parameter | Example Value (Post-Calibration) | Measurement Protocol |
|---|---|---|---|
| System Noise | Voltage Noise Floor (RMS) | 0.8 µV | Short-circuited inputs, 1000-frame average. |
| Current Source | Output Impedance @ 10 kHz | 1.2 MΩ | Measured with variable load resistor, calculated from voltage drop. |
| Current Source | Deviation from Set Current | < 0.3% | Across all channels, with 10 different resistive loads. |
| Electrode Contact | Impedance Range (all electrodes) | 1.2 kΩ - 1.8 kΩ @ 50 kHz | Measured in saline tank with standardized spacing. |
| Image Reconstruction | Relative Image Error (vs. known phantom) | 4.5% | Calculated using ‖σ_true - σ_recon‖ / ‖σ_true‖. |
| Image Reconstruction | Position Error of inclusion | 2.1 mm | Distance between known and reconstructed centroid. |
Table 2: Research Reagent & Essential Materials Toolkit
| Item | Function in EIT Calibration Research |
|---|---|
| Saline Phantom with Insulated Inclusions | Provides a known, stable resistivity distribution to validate geometric accuracy and amplitude reconstruction post-calibration. |
| Precision Reference Resistor Network | A traceable, stable impedance network used to calibrate the absolute scale of the measurement system. |
| Electrode Impedance Test Fixture | A standardized holder to measure contact impedance of single electrodes under controlled conditions. |
| Low-Noise, High-Precision Data Acquisition (DAQ) System | Converts analog voltage measurements to digital data; its resolution and noise floor limit system performance. |
| Programmable Current Source | Injects the known, stable excitation current required for EIT; its output impedance is critical. |
| Agar or Gelatin-Based Tissue Mimicking Phantoms | Used for more advanced validation, simulating the conductive and capacitive properties of biological tissue. |
Experimental Protocols
Protocol 1: Characterizing a Multi-Frequency EIT Current Source
- Objective: To document key performance parameters of a constant current source for EIT.
- Setup: Connect the source output in series with a precision shunt resistor (Rshunt) and a variable load resistor (Rload). Measure voltage across both using a differential amplifier and locked-in amplifier.
- Procedure: a. Set Rload to a nominal value (e.g., 1 kΩ). For frequencies from 10 Hz to 1 MHz, record Vshunt and Vload. b. Calculate output current: Iout = Vshunt / Rshunt. c. Calculate output impedance: Zout = ( (Vload / Iout) - Rload ). d. Repeat for 5 R_load values (e.g., 500Ω to 10 kΩ). e. With inputs shorted, measure the RMS voltage noise at the amplifier output across the same frequency range.
- Reporting: Create plots of Z_out vs. Frequency and Noise vs. Frequency. Report compliance voltage.
Protocol 2: Electrode Contact Impedance Calibration
- Objective: To measure and document the baseline impedance of all electrodes in an array.
- Setup: Place electrode array in a uniform saline tank (conductivity σ_saline). Connect to EIT system.
- Procedure: a. Using a single drive pair (e.g., electrodes 1-2), inject a small, fixed current (I) at the primary operating frequency. b. Measure the resulting voltage on all other adjacent electrode pairs (e.g., 3-4, 4-5, etc.). c. Apply a simplified model or known-field method to estimate the contact impedance for each driven and measured electrode relative to a reference. d. Repeat steps a-c, rotating the drive pair around the boundary. e. Use a least-squares approach to solve for the unique impedance of each electrode.
- Reporting: Report the mean, standard deviation, and range of contact impedances across all electrodes. State the reconstruction algorithm used (e.g., EIDORS, custom FEM) and how these values were incorporated (e.g., as a prior in the forward model).
Mandatory Visualizations
Title: EIT System Calibration Workflow
Title: Troubleshooting Image Problems via Calibration
Conclusion
Effective EIT calibration is not a one-size-fits-all procedure but a multifaceted process integral to data integrity. This guide has traversed from foundational principles, through practical methodological protocols, to advanced troubleshooting and rigorous validation. The key takeaway is that a robust calibration strategy—tailored to the specific EIT system, imaging mode (time vs. absolute), and biomedical application—is essential for producing quantifiable, reproducible, and biologically meaningful results. For the future, the integration of machine learning for adaptive calibration, the development of standardized phantom libraries and validation protocols, and the creation of universal reporting guidelines are critical next steps. These advances will accelerate the translation of EIT from a promising research tool into a reliable technology for therapeutic monitoring, preclinical drug development, and ultimately, personalized clinical diagnostics.