From Bioengineering to Biomedical Engineering: A Strategic Career Transition Guide for Research and Pharma Professionals
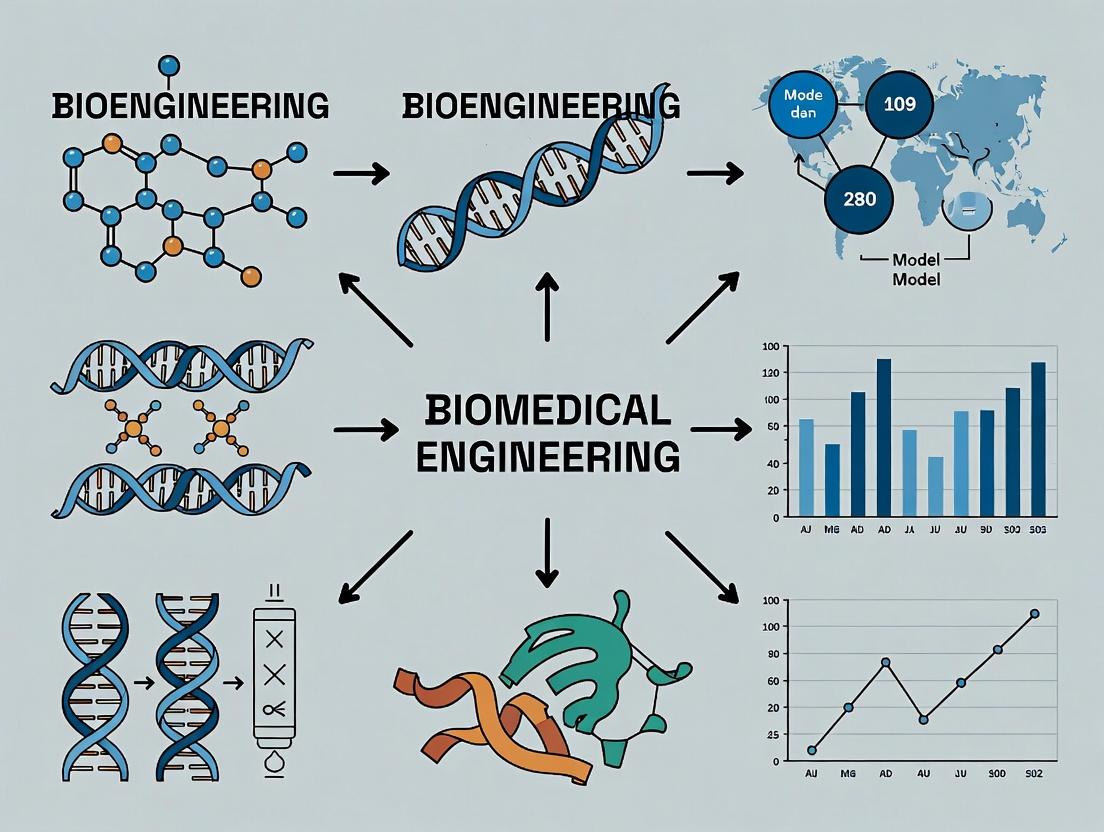
This article provides a comprehensive roadmap for bioengineers, researchers, and drug development professionals transitioning into biomedical engineering roles.
From Bioengineering to Biomedical Engineering: A Strategic Career Transition Guide for Research and Pharma Professionals
Abstract
This article provides a comprehensive roadmap for bioengineers, researchers, and drug development professionals transitioning into biomedical engineering roles. It explores the core distinctions between the fields, outlines actionable steps for skills translation and application, addresses common challenges in the transition, and validates the career move through industry demand and success metrics. The guide is informed by current job market trends and academic pathways to equip professionals with the knowledge needed to navigate this strategic shift successfully.
Bioengineering vs. Biomedical Engineering: Decoding the Distinctions for Career Changers
Technical Support Center
Troubleshooting Guide: Common Experimental Hurdles
Issue 1: Poor Cell Seeding Efficiency on Novel Biomaterial Scaffold
- Problem: Cells aggregate rather than dispersing evenly across a 3D-printed polymer scaffold.
- Potential Causes & Solutions:
- Surface Hydrophobicity: Treat scaffold with oxygen plasma for 60 seconds to increase surface energy.
- Inadequate Pre-wetting: Submerge scaffold in 70% ethanol for 30 minutes, then rinse 3x with PBS before soaking in cell culture medium overnight.
- Cell Suspension Viscosity: Mix cell suspension with an equal volume of cold, liquid Matrigel (4°C) and seed immediately before gelation at 37°C.
Issue 2: Low Signal in Electrochemical Biosensor for Protein Detection
- Problem: Amperometric response is below detection limit despite confirmed target presence.
- Potential Causes & Solutions:
- Antibody/Oligonucleotide Probe Orientation: Use cysteine-tagged capture probes and immobilize on gold electrodes via thiol-gold self-assembled monolayer (SAM). Ensure probe solution is in Tris-EDTA buffer with 10 mM TCEP (freshly prepared) to reduce disulfide bonds.
- Non-Specific Binding: Block electrode with 3% BSA + 0.05% Tween-20 in PBS for 2 hours.
- Redox Mediator Depletion: Increase concentration of the redox mediator (e.g., Potassium Ferricyanide) to 5 mM in the running buffer.
Issue 3: High Batch-to-Batch Variability in Organoid Differentiation
- Problem: Inconsistent morphology and marker expression between batches of cerebral organoids.
- Potential Causes & Solutions:
- Initial Cell Cluster Size: Use a cell strainer to select aggregates between 40-70 μm diameter after embryoid body formation.
- Growth Factor Stability: Aliquot all small molecule inhibitors and growth factors (e.g., SB431542, CHIR99021) in single-use vials at -80°C. Avoid more than 3 freeze-thaw cycles.
- Matrigel Lot Variability: Pre-test each new lot of Basement Membrane Matrix for organoid embedding. Standardize protein concentration across lots by dilution with cold medium.
FAQs for Researchers Transitioning Fields
Q1: My background is in metabolic pathway engineering in yeast. How can I adapt my skills to mammalian cell therapy process development? A: The core skill of quantitative modeling of metabolic fluxes is directly transferable. Shift your focus from the Crabtree effect to the Warburg effect in immune cells (e.g., T-cells, CAR-T). Learn to use Seahorse XF Analyzer data to model oxidative phosphorylation vs. glycolysis in activated T-cells. Key new variables include IL-2 concentration and glucose exhaustion rates in bioreactors.
Q2: I'm experienced with microfluidic device fabrication (PDMS) for environmental sensing. What's the biggest change when designing chips for patient serum analysis? A: The primary shift is the regulatory and contamination control mindset. You must now design for:
- Single-Use or Easy Sterilization: Consider materials like cyclic olefin copolymer (COC) over PDMS for better solvent resistance and compatibility with autoclaving/gamma irradiation.
- Biofouling Prevention: Incorporate surface chemistries (e.g., PEGylation) to prevent non-specific protein adsorption from complex biofluids.
- Integration with Clinical Equipment: Ensure chip dimensions conform to standard microtiter plate footprints (e.g., ANSI/SLAS 4-2004) for compatibility with automated liquid handlers.
Q3: In my bioprocessing work, I optimize for yield (g/L). What metrics are critical in translational biomedical device research? A: Your optimization target shifts from volumetric yield to safety, efficacy, and reproducibility metrics. Key performance indicators (KPIs) include:
| Metric | Bioengineering (Typical Target) | Biomedical Engineering (Clinical/Translational Target) |
|---|---|---|
| Primary Output | Titer (g/L), Specific Productivity (pg/cell/day) | Biocompatibility (ISO 10993), Clinical Sensitivity/Specificity (>95%) |
| Process Variance | Acceptable if yield is maintained within 10-15% | Must be minimized (CV < 5% for critical quality attributes) |
| Scale-Up Concern | Mass transfer, shear stress | Sterility assurance level (SAL of 10^-6), Good Manufacturing Practice (GMP) documentation |
| Material Selection | Cost, scalability | FDA master file, USP Class VI certification |
Experimental Protocols for Core Methodologies
Protocol 1: Functional Validation of a Novel Hydrogel for 3D Cell Culture
Title: Assessing Hydrogel Stiffness & Ligand Presentation Impact on Fibroblast Activation. Method:
- Hydrogel Synthesis: Synthesize a polyethylene glycol (PEG)-based hydrogel with a tunable MMP-sensitive crosslinker (e.g., GCVPMSMRGG) and integrin-binding RGD peptide (1-2 mM).
- Mechanical Characterization: Perform rheology (oscillatory frequency sweep, 0.1-10 Hz) to confirm storage modulus (G') is in the range of 0.5 kPa to 20 kPa.
- 3D Cell Encapsulation: Suspend primary human dermal fibroblasts at 5 x 10^6 cells/mL in the pre-gel solution. Pipette 50 μL drops into a 48-well plate and polymerize at 37°C for 30 minutes.
- Culture & Stimulation: Add complete DMEM +/- TGF-β1 (10 ng/mL). Change media every 3 days.
- Endpoint Analysis (Day 7):
- Fixation: Use 4% PFA for 4 hours at 4°C.
- Immunostaining: Permeabilize with 0.5% Triton X-100, block, and stain for α-SMA (Cy3) and F-actin (Phalloidin-FITC). Image using confocal microscopy (z-stacks).
- qPCR: Extract RNA and analyze expression of ACTA2 (α-SMA), COL1A1, and FN1.
Protocol 2: Developing a Point-of-Care Electrochemical Immunosensor
Title: Fabrication & Calibration of a Sandwich-Format Amperometric Biosensor. Method:
- Electrode Modification:
- Clean screen-printed carbon electrodes (SPCEs) with 10 cyclic voltammetry (CV) scans from 0 to +1.2 V in 0.5 M H₂SO₄.
- Incubate with 10 μL of 1 μM thiolated capture antibody in PBS (pH 7.4) for 16h at 4°C.
- Block with 1 M ethanolamine for 1 hour.
- Assay Procedure:
- Apply 10 μL of calibrant/sample (e.g., serum in 10x diluted PBS) for 30 minutes.
- Apply 10 μL of detection antibody conjugated with Horseradish Peroxidase (HRP) for 30 minutes.
- Wash 3x with PBS + 0.1% Tween-20.
- Electrochemical Detection:
- Add 50 μL of TMB substrate solution.
- Apply a constant potential of -0.1 V vs. on-board Ag/AgCl reference and record the amperometric current (i) after 60 seconds.
- Data Analysis: Plot current (μA) vs. log[analyte concentration]. Fit a 4-parameter logistic curve. Determine limit of detection (LOD) as 3*SD of the blank/slope.
Scientist's Toolkit: Key Research Reagent Solutions
| Item | Function in Transitional Research |
|---|---|
| Recombinant Human Proteins (e.g., TNF-α, VEGF) | Used as precise, GMP-like stimuli in cell-based assays to mimic disease states and test therapeutic interventions. |
| CRISPR/Cas9 Gene Editing Kit (RNP Format) | Enables rapid knock-out of disease-relevant genes in primary cells (e.g., PCSK9 in hepatocytes) to model genetic therapies. |
| Liquid Chromatography-Mass Spectrometry (LC-MS) Grade Solvents | Essential for generating reproducible, high-quality metabolomic or proteomic data from patient-derived samples. |
| Programmable Syringe Pump (Dual-Channel) | Allows for precise, automated formation of microfluidic gradients for chemotaxis assays or drug combination studies. |
| Annexin V / Propidium Iodide Apoptosis Kit | Gold-standard assay for quantifying cell death, a critical safety readout for any novel therapeutic (drug or device). |
Visualizations
Diagram 1: Career Transition Skill Mapping
Diagram 2: Translational Therapeutic Development Workflow
Diagram 3: Key Signaling Pathway in Mechanotransduction
As you transition from bioengineering to biomedical engineering research, you will find significant overlap in foundational skills, but also critical gaps in specialized knowledge. This technical support center addresses common experimental pitfalls, bridging your existing toolkit with new requirements in biomaterials synthesis, characterization, and bioprocessing.
Troubleshooting Guides & FAQs
Q1: My synthesized polyethylene glycol (PEG) hydrogel for a 3D cell culture model is too brittle and fractures during mechanical testing. What could be wrong?
A: This is often due to an incorrect crosslinker-to-monomer ratio or insufficient polymerization time. For PEG-diacrylate (PEGDA) hydrogels, ensure precise stoichiometry.
- Troubleshooting Steps:
- Verify the molecular weight of your PEGDA precursor. Lower MW (e.g., 3.4 kDa) produces stiffer, more brittle gels than higher MW (e.g., 6-10 kDa).
- Re-calculate your photoinitiator (e.g., Irgacure 2959) concentration. Standard is 0.1% (w/v) in the precursor solution.
- Ensure UV wavelength is 365 nm and exposure time is consistent (typically 2-5 minutes under 5-10 mW/cm² intensity).
- Degas your precursor solution before polymerization to remove oxygen, which inhibits free radical crosslinking.
Q2: During mammalian cell bioreactor runs for monoclonal antibody production, I observe a rapid drop in dissolved oxygen (DO) and viability after 60 hours. Where should I start?
A: This suggests a metabolic shift or nutrient limitation. The most common cause is lactate accumulation.
- Troubleshooting Steps:
- Immediate Action: Take a sample and measure lactate and ammonia concentrations. Lactate > 20 mM is typically inhibitory.
- Check: Calibrate your DO and pH probes. Ensure temperature control is stable at 37.0°C ± 0.2°C.
- Review Feed Strategy: Your bolus glucose feed may be causing the "feast-famine" cycle. Transition to a controlled, continuous feed or use metabolite sensors for feedback control.
- Analyze: Run a spent media analysis (HPLC or similar) to identify other depleted nutrients (e.g., glutamine, amino acids).
Q3: The bioactivity of my surface-immobilized RGD peptide on a polylactic acid (PLA) scaffold is inconsistent between batches. How can I improve reproducibility?
A: Inconsistent covalent grafting is likely due to variable surface activation.
- Troubleshooting Steps:
- Surface Activation: Standardize your plasma treatment (e.g., oxygen plasma at 100 W for 60 seconds) or wet chemistry (e.g., NaOH hydrolysis) step. Measure water contact angle for every batch; it should be consistently low (<30°) post-activation.
- Coupling Chemistry: If using carbodiimide (EDC/NHS) chemistry, maintain a strict pH of 5.5-6.0 during the activation step. Use fresh buffers.
- Quantification: Implement a colorimetric assay (e.g., BCA for residual amine groups, or a fluorescently-tagged RGD) to quantify immobilization density for every batch.
Q4: My protein purification yield via affinity chromatography (His-tag) is low, and the elution fraction shows multiple bands on SDS-PAGE. What's the issue?
A: This indicates non-specific binding or protein degradation.
- Troubleshooting Steps:
- Optimize Binding Conditions: Increase imidazole in the binding/wash buffer from 5-20 mM to reduce weak non-specific interactions.
- Check Lysis: Ensure complete cell lysis and consider adding a protease inhibitor cocktail (e.g., PMSF, leupeptin) to the lysis buffer.
- Increase Stringency: Perform a gradient wash (e.g., 20-50 mM imidazole) before elution.
- Column Cleaning: Strip the column with 0.5 M NaOH and re-equilibrate to remove accumulated debris.
Table 1: Core Skill Overlap & Gaps in Career Transition
| Skill Domain | Bioengineering (Source Field) Proficiency | Biomedical Research (Target Field) Requirement | Gap Analysis |
|---|---|---|---|
| Biomaterial Synthesis | High (Polymer chemistry, scaffold fabrication) | Very High (Biofunctionalization, in-situ gelling) | Moderate. Need skills in peptide conjugation, responsive material design. |
| Cell Culture | High (2D, standard cell lines) | Very High (3D co-culture, primary/stem cells) | Moderate-High. Need expertise in complex models and differentiation assays. |
| Bioprocessing / Scale-up | Very High (Bioreactor operation, downstream processing) | Medium (Micro-scale systems, organ-on-chip perfusion) | Critical Gap. Shift from large-scale to microfluidic process design & control. |
| Data Analysis | High (Process statistics, kinetics modeling) | Very High (Omics analysis, live-cell imaging analysis) | Moderate. Need proficiency in bioinformatics tools (e.g., ImageJ/Fiji, RNA-seq pipelines). |
| Regulatory & Translation | Medium (cGMP, quality by design) | High (ISO 13485, FDA pre-clinical requirements) | Moderate. Deepen knowledge of medical device/drug specific pathways. |
Experimental Protocols
Protocol 1: Synthesis and Characterization of RGD-Modified PEGDA Hydrogel Purpose: Create a reproducible, bioactive 3D cell culture matrix. Materials: PEGDA (6 kDa), RGD-SH peptide, Irgacure 2959, DPBS, UV lamp (365 nm). Method:
- Dissolve PEGDA at 10% (w/v) and Irgacure at 0.1% (w/v) in DPBS. Degas for 15 minutes.
- Add RGD-SH peptide to a final concentration of 2.0 mM to the precursor solution.
- Pipette 100 µL into a mold (e.g., 8 mm diameter disc). Cover with a glass coverslip.
- Expose to UV light (365 nm, 5 mW/cm²) for 3 minutes.
- Swell gels in DPBS overnight at 4°C. Characterize via swelling ratio, compressive modulus, and FTIR for covalent incorporation.
Protocol 2: Microcarrier-Based Cell Expansion in a Bioreactor Purpose: Scale adherent cell production for tissue engineering. Materials: Cytodex 3 microcarriers, hMSCs, stirred-tank bioreactor, DMEMM/F12+10% FBS. Method:
- Hydrate and sterilize microcarriers (1 g/L) according to manufacturer's instructions.
- Seed hMSCs at 5 cells per microcarrier in a spinner flask at 40 rpm for 4 hours.
- Transfer to a controlled 0.5L bioreactor. Set conditions: 37°C, pH 7.2, DO at 40%.
- Use an intermittent agitation protocol (e.g., 60 rpm for 2 min, stop for 30 min) for first 24h.
- Monitor glucose daily. Perform a partial media exchange (50%) when glucose < 4 mM.
- Harvest at confluence (typically day 5-7) using trypsin/EDTA.
Visualizations
Career Transition Skill Mapping
Hydrogel Synthesis Troubleshooting Workflow
The Scientist's Toolkit: Key Research Reagent Solutions
| Item | Function in Experiment |
|---|---|
| PEG-Diacrylate (PEGDA) | A biocompatible, hydrophilic polymer precursor that forms hydrogels via UV-induced free radical polymerization, creating tunable 3D networks for cell encapsulation. |
| Irgacure 2959 | A cytocompatible photoinitiator that generates free radicals under 365 nm UV light to crosslink PEGDA solutions into solid hydrogels. |
| RGD Peptide | A short peptide sequence (Arg-Gly-Asp) that mimics cell adhesion proteins; when covalently grafted to materials, it promotes integrin-mediated cell attachment and signaling. |
| Cytodex 3 Microcarriers | Collagen-coated dextran beads providing a high surface-area substrate for the scalable expansion of anchorage-dependent cells in stirred bioreactors. |
| EDC / NHS Crosslinker | Carbodiimide chemistry reagents used to activate carboxyl groups for stable amide bond formation with amine-containing molecules (e.g., peptides), enabling surface biofunctionalization. |
| HisTrap FF Column | Immobilized metal affinity chromatography (IMAC) column packed with Ni²⁺ charged resin for the rapid, one-step purification of polyhistidine (His)-tagged recombinant proteins. |
Technical Support Center
FAQs & Troubleshooting for Biomedical Research Experiments
Q1: My cell viability assay (e.g., MTT) shows high background noise or inconsistent results across plates. What are the key troubleshooting steps? A: High background often stems from incomplete removal of formazan crystals or reagent precipitation. Follow this protocol:
- Aspiration: After stopping the assay, ensure all media is gently aspirated. Leave plates inverted on absorbent paper for 2 minutes.
- Solubilization: Use fresh DMSO or acidified isopropanol (0.04M HCl in isopropanol). Add solvent, cover plate with foil, and place on an orbital shaker for 15-20 minutes. Ensure complete dissolution by checking under a microscope.
- Measurement: Read absorbance immediately after solubilization. If using a multi-well plate reader, perform a quick plate scan before full read to identify wells with bubbles (pop with a fine needle).
- Controls: Always include a "media-only" control (no cells, plus reagents) to subtract background. Normalize data to untreated control wells on each individual plate to account for inter-plate variation.
Q2: I'm encountering low transfection efficiency in primary endothelial cells. How can I optimize this? A: Primary cells are notoriously difficult. Use this optimized workflow:
- Cell Health: Passage cells at 90-95% confluency only. Use early passages (P3-P6). Transfect at 70-80% confluency.
- Reagent Selection: For endothelial cells, lipid-based transfection reagents often outperform polymer-based. Test 3-4 different commercial reagents.
- Protocol Adjustment: Reduce serum concentration to 2% during transfection complex formation and incubation. Use Opti-MEM or similar reduced-serum media.
- Complex Formation: Incubate DNA-reagent complexes for 20-25 minutes at room temperature (not 5 mins as per many standard protocols) for more stable complex formation.
- Validation: Always co-transfect with a GFP plasmid (e.g., 10:1 ratio of target:GFP) to visually confirm efficiency 24-48 hours post-transfection.
Experimental Protocol: Optimizing Protein Immobilization for a Biosensor Surface Objective: To functionalize a gold SPR (Surface Plasmon Resonance) chip with an antibody for ligand-binding studies. Materials: Gold sensor chip, 1 mM 11-Mercaptoundecanoic acid (11-MUA) in ethanol, 100 mM NHS (N-Hydroxysuccinimide), 400 mM EDC (1-Ethyl-3-(3-dimethylaminopropyl)carbodiimide), 1 M ethanolamine-HCl pH 8.5, 10 mM sodium acetate pH 5.0, target antibody (0.1 mg/mL in sodium acetate buffer), PBS running buffer. Methodology:
- Chip Cleaning: Sonicate gold chip in ethanol for 10 minutes, dry under nitrogen stream.
- Self-Assembled Monolayer (SAM): Immerse chip in 1 mM 11-MUA solution for 24 hours at 4°C to form a carboxyl-terminated SAM. Rinse thoroughly with ethanol and Mill-Q water.
- Activation: Inject a 7-minute pulse of a 1:1 mixture of NHS and EDC over the chip surface in the SPR instrument to activate carboxyl groups to NHS esters.
- Ligand Coupling: Immediately inject the antibody solution (in pH 5.0 acetate buffer) for 15 minutes. The low pH ensures antibody orientation via charge attraction to the positively charged surface.
- Quenching: Inject 1 M ethanolamine-HCl for 7 minutes to deactivate and block remaining NHS esters.
- Baseline Stabilization: Flow PBS buffer at 30 µL/min for at least 1 hour until a stable baseline is achieved before analyte injection.
Quantitative Data Summary: Common Biomaterial Characterization Results
Table 1: Typical Mechanical Properties of Engineered Tissue Scaffolds
| Material | Young's Modulus (MPa) | Tensile Strength (MPa) | Key Application |
|---|---|---|---|
| Polycaprolactone (PCL) | 0.2 - 0.5 | 20 - 40 | Hard tissue (bone) scaffolds |
| Poly(L-lactic acid) (PLLA) | 1.5 - 3.0 | 50 - 70 | Load-bearing implants |
| Collagen Type I Gel | 0.002 - 0.02 | 0.001 - 0.01 | Soft tissue (skin, cartilage) models |
| Polyethylene Glycol (PEG) Hydrogel | 0.001 - 0.1 | 0.001 - 0.5 | Drug delivery, cell encapsulation |
| Decellularized ECM | Varies by source | Varies by source | Organ-specific regenerative medicine |
Table 2: Comparison of Common High-Throughput Screening Readouts
| Assay Type | Detection Method | Throughput (wells/day) | Cost per Well | Typical Z'-Factor* |
|---|---|---|---|---|
| Luminescence | Photon Count | 10,000 - 50,000 | Low | 0.6 - 0.8 |
| Fluorescence Intensity | Fluorophore Excitation/Emission | 5,000 - 30,000 | Medium | 0.5 - 0.7 |
| Fluorescence Polarization | Polarized Light | 5,000 - 20,000 | Medium-High | 0.4 - 0.7 |
| Time-Resolved FRET | Donor/Acceptor Lifetime | 3,000 - 15,000 | High | 0.5 - 0.8 |
| Imaging (High-Content) | Automated Microscopy | 1,000 - 10,000 | Very High | 0.2 - 0.5 |
*Z'-Factor >0.5 indicates an excellent assay suitable for screening.
The Scientist's Toolkit: Key Research Reagent Solutions
Table 3: Essential Materials for 3D Cell Culture & Organoid Work
| Item | Function | Example/Note |
|---|---|---|
| Basement Membrane Extract (BME) | Provides a biologically active 3D scaffold rich in ECM proteins (laminin, collagen IV). | Cultrex Basement Membrane Matrix, Matrigel. Must be kept on ice. |
| Rho-associated kinase (ROCK) Inhibitor | Improves single-cell survival and prevents anoikis during organoid seeding and passaging. | Y-27632 dihydrochloride. Use at 10 µM for first 48-72h after passage. |
| Recombinant Growth Factors | Mimic niche signaling for stem cell maintenance and directed differentiation. | EGF, FGF-10, Noggin, R-spondin-1. Critical for intestinal/organoid media. |
| Gentle Cell Dissociation Reagent | Enzymatically breaks cell-cell junctions while preserving surface proteins for passaging. | TrypLE Express, Accutase. Preferable to trypsin for sensitive cells. |
| 96-well U-bottom Ultra-Low Attachment Plate | Forces cells to aggregate in the well center, facilitating 3D spheroid formation. | Corning Costar Spheroid Microplates. Essential for consistent spheroid size. |
Visualizations
Technical Support Center: Troubleshooting for Bioengineering to Biomedical Research Transitions
Frequently Asked Questions (FAQs)
Q1: My background is in device-focused bioengineering. I'm struggling to design cell-based assays for drug screening. What foundational knowledge am I missing? A1: The primary gap is often in molecular and cellular biology principles applied to a therapeutic context. Targeted graduate programs or certificate courses in Cell Culture Techniques, Pharmacology, and Assay Development are critical. Key missing protocols often include:
- Proper aseptic technique for long-term culture.
- Cell line authentication and mycoplasma testing.
- Designing controls for high-content screening (e.g., appropriate positive/negative controls for a cytotoxicity assay).
Q2: When transitioning to biomed research, how do I validate that my engineered tissue model is pharmacologically relevant for preclinical testing? A2: Validation is a multi-parameter process. You must establish key performance indicators (KPIs) against primary human tissue or gold-standard models.
- Histological Validation: Use H&E staining and immunohistochemistry for key structural proteins.
- Functional Validation: Perform dose-response curves with known reference compounds and confirm the expected IC50/EC50 values.
- Omics Correlation: Conduct RNA-seq on your model and compare its transcriptomic profile to human tissue databases.
Q3: I'm encountering high variability in my ELISA results when testing candidate drug sera. What are the most common technical pitfalls? A3: Variability in immunoassays typically stems from these issues, ranked by frequency:
| Rank | Issue | Solution |
|---|---|---|
| 1 | Inconsistent plate washing | Use a calibrated multichannel pipette or automated washer; increase wash buffer volume and soak time. |
| 2 | Improper sample dilution | Perform serial dilutions in assay buffer (not PBS alone) to match matrix effects. |
| 3 | Antibody incubation times/temp | Standardize all incubation steps using a timer and thermal plate sealer. |
| 4 | Signal development timing | Use exact timing for substrate addition and stop solution across all plates. |
Q4: What are the essential certifications a bioengineer should obtain to be competitive in GLP (Good Laboratory Practice) preclinical research? A4: Beyond the core degree, targeted certifications significantly bridge the credibility gap.
| Certification/Graduate Program Focus | Key Skill Validated | Typical Provider |
|---|---|---|
| GLP & Regulatory Compliance | Conducting audits, data integrity, protocol adherence | University professional studies, AALAS, RQA |
| Principles of PK/PD Modeling | Quantitative drug disposition analysis | APS, ISoP, targeted MSc modules |
| Advanced Cell Culture & Stem Cell Cert. | iPSC-derived model generation | ISSCR, ATCC workshops, university labs |
| Statistical Design of Experiments (DoE) | Optimizing assays and minimizing runs | SAS, JMP, university biostatistics departments |
Experimental Protocols
Protocol 1: Establishing a 3D Spheroid Co-culture Model for Tumor Microenvironment Drug Screening Application: Test efficacy of immunotherapeutics or chemotherapeutics in a more physiologically relevant model. Materials: See "Research Reagent Solutions" below. Methodology:
- Cell Preparation: Harvest HCT-116 (colon carcinoma) and HS-27A (stromal fibroblast) cells at 80% confluence.
- Spheroid Formation: Mix cells at a 5:1 (cancer:fibroblast) ratio. Seed 5,000 total cells/well in a 96-well ultra-low attachment (ULA) plate in 150µL of complete medium.
- Centrifugation: Centrifuge plate at 300 x g for 3 minutes to aggregate cells at well bottom.
- Culture: Incubate at 37°C, 5% CO2 for 72 hours to form compact spheroids.
- Drug Treatment: On day 3, add 50µL of medium containing 4X concentration of test drug (e.g., 5-Fluorouracil) or vehicle control. Final spheroid volume is 200µL.
- Viability Assay: At 96 hours post-treatment, add 20µL of CellTiter-Glo 3D reagent per well. Shake orbitally for 5 minutes, incubate for 25 minutes, and record luminescence.
- Data Analysis: Normalize luminescence of treated wells to vehicle control (100% viability). Fit dose-response curves using a four-parameter logistic model in Prism or similar software.
Protocol 2: Western Blot Troubleshooting for Phospho-Protein Detection in MAPK Pathway Application: Validate target engagement of a novel kinase inhibitor in HEK293 cells. Key Troubleshooting Steps:
- Problem: High background. Solution: Increase blocking time to 2 hours with 5% BSA in TBST. Optimize primary antibody dilution in the same blocking buffer.
- Problem: No signal for phospho-target. Solution: Include lysis buffer fresh with 2x concentration of phosphatase inhibitors (sodium orthovanadate, β-glycerophosphate). Process samples on ice immediately. Use a positive control lysate (e.g., EGF-stimulated HeLa cells for p-ERK).
- Problem: Band smearing. Solution: Ensure samples are not boiled if detecting membrane proteins; instead, incubate at 37°C for 10 minutes before loading. Use a freshly prepared resolving gel.
Visualizations
MAPK/ERK Signaling Pathway
3D Spheroid Drug Screening Workflow
The Scientist's Toolkit: Research Reagent Solutions
| Item | Function in Transition Experiments | Example/Catalog Note |
|---|---|---|
| Ultra-Low Attachment (ULA) Plates | Enables 3D spheroid formation by minimizing cell adhesion. | Corning Costar Spheroid Plates. |
| CellTiter-Glo 3D Reagent | Optimized lytic reagent for ATP-based viability in 3D models. | Promega G9681. |
| Phosphatase/Protease Inhibitor Cocktail | Preserves labile post-translational modifications (e.g., phosphorylation) during lysis. | Use fresh; Roche cOmplete, PhosSTOP. |
| Validated Phospho-Specific Antibodies | Critical for detecting dynamic signaling pathway modulation by drugs. | Source from CST, Thermo Fisher; check validation citations. |
| Recombinant Growth Factors/Cytokines | For positive control stimulation in pathway assays (e.g., EGF for MAPK). | Use carrier-free, lyophilized formats for precise dosing. |
| ECM Hydrogels (e.g., Matrigel) | Provides a biomimetic scaffold for advanced organoid or invasion assays. | Keep on ice; aliquot to avoid freeze-thaw cycles. |
| Data Analysis Software (Prism, JMP) | Essential for robust statistical analysis and dose-response modeling. | Graduate programs often offer institutional licenses. |
I. Market Data Summary
The demand for biomedical engineers, particularly in drug development and diagnostics, is driven by technological convergence and industry growth.
| Metric | Data | Source / Period | Implication for Biomedical Engineers |
|---|---|---|---|
| Overall Job Growth (Projected) | 5% (2022-2032) | U.S. BLS, Faster than average | Steady demand across all sectors. |
| Diagnostic & Medical Device Manufacturing Employment | 22,920 jobs (2023) | U.S. BLS, 2023 | Primary industrial employer for the field. |
| Average Annual Wage in Pharmaceutical & Medicine Manufacturing | $107,720 | U.S. BLS, May 2023 | Competitive compensation in core drug development. |
| Key Driver: AI in Drug Discovery Market Size | $1.5 billion (2023) | Precedence Research, 2023 | High demand for skills in computational modeling, data analysis, and AI-integrated device/diagnostic design. |
| Key Driver: Point-of-Care Diagnostics Market Growth | CAGR of 9.7% (2024-2032) | Grand View Research, 2024 | Demand for engineers skilled in microfluidics, biosensors, and rapid test system development. |
II. Technical Support Center: Troubleshooting Guides & FAQs for Biomedical Assays
FAQ Context: These issues are common in a research setting for a scientist transitioning from bioengineering to targeted biomedical research.
FAQ 1: My ELISA standard curve has a poor R² value (<0.98). How can I improve it?
- Potential Causes & Solutions:
- Inaccurate Serial Dilution: Use fresh, calibrated pipettes and change tips between each dilution. Prepare dilutions in a clean, dedicated workspace.
- Protein Adsorption to Tubes: Use low-protein-binding tubes for standard preparation. Add a carrier protein (e.g., 0.1% BSA) to the dilution buffer if compatible with the assay.
- Inconsistent Incubation Times/Temperatures: Ensure all standards and samples are incubated for exactly the same time. Use a water bath or calibrated heat block for consistent temperature.
- Edge Effect in Microplate: Avoid using outer wells for critical standards. If necessary, pre-incubate the plate at room temperature with PBS in all wells to minimize evaporation disparities.
FAQ 2: My qPCR amplification plot shows late Ct values and inconsistent replicates.
- Troubleshooting Steps:
- Check RNA Integrity: Verify RNA quality via Bioanalyzer or gel electrophoresis. RIN > 8 is optimal.
- Optimize cDNA Synthesis: Use an appropriate reverse transcriptase and ensure no genomic DNA contamination (include a no-RT control).
- Prepare a Fresh Master Mix: Aliquot primers and probe to avoid freeze-thaw cycles. Thoroughly mix the master mix before dispensing into wells.
- Validate Primer Efficiency: Run a standard curve with serial dilutions of cDNA. Efficiency should be 90-110%.
- Experimental Protocol: qPCR Master Mix Preparation (20µL reaction)
- Component | Volume | Function
- --- | --- | ---
- 2X qPCR Master Mix | 10 µL | Contains polymerase, dNTPs, buffer, Mg²⁺
- Forward Primer (10µM) | 0.4 µL | Target-specific amplification
- Reverse Primer (10µM) | 0.4 µL | Target-specific amplification
- Probe (10µM) or SYBR Green | 0.2 µL | Detection chemistry
- Nuclease-free H₂O | 8.0 µL | Solvent
- Template cDNA | 1.0 µL | Target nucleic acid
- Method: 1) Thaw all components on ice. 2) Calculate volumes for N+2 reactions. 3) Combine all components except template in a 1.5 mL tube. 4) Mix gently by pipetting 10 times. 5) Dispense 19 µL into each PCR well. 6. Add 1 µL of respective template to each well. 7. Seal plate, centrifuge briefly, and run.
FAQ 3: Cell viability is unexpectedly low in my drug treatment assay.
- Systematic Check:
- Drug Solubility & Vehicle Control: Ensure the drug is properly dissolved. Run a vehicle-only control (e.g., DMSO at the same final concentration) to rule out solvent toxicity.
- Cell Health Pre-Assay: Cells should be in log-phase growth and >90% viable before seeding. Optimize seeding density.
- Assay Reagent Toxicity: Time the addition of viability assay reagents (e.g., MTT, CCK-8) precisely according to protocol. Some reagents are toxic with prolonged incubation.
III. Visualization: Key Signaling Pathway & Workflow
IV. The Scientist's Toolkit: Key Research Reagent Solutions
| Reagent / Material | Function in Biomedical Research |
|---|---|
| Recombinant Human Proteins (e.g., cytokines, growth factors) | Used as assay standards, for cell stimulation, and in target protein production for inhibitor screening. |
| Phospho-Specific Antibodies | Critical for detecting activation states of signaling pathway proteins (e.g., p-Akt, p-ERK) in Western blot or flow cytometry. |
| CRISPR/Cas9 Gene Editing Kits | Enable targeted gene knock-out/in for functional validation of drug targets or disease mechanisms. |
| Luminescence-Based Viability/Cytotoxicity Assays (e.g., CellTiter-Glo) | Provide sensitive, high-throughput measurement of cell health in response to experimental compounds. |
| Low-Protein-Binding Microtubes & Plates | Minimize analyte loss due to surface adsorption, crucial for accurate quantification of proteins, especially at low concentrations. |
| SPR (Surface Plasmon Resonance) Chips Coated with Protein A/G | Used in biacore systems for label-free, real-time analysis of biomolecular interactions (e.g., antibody-antigen kinetics). |
The Transition Playbook: Actionable Steps to Reposition Your Bioengineering Expertise
Technical Support Center
Troubleshooting Guide: Bioreactor Operation for Cell Culture in Medical Device Testing
Q1: My mammalian cell cultures in a benchtop stirred-tank bioreactor show a sudden drop in viability (>20% in 12 hours). What are the primary parameters to check? A: This is a critical process parameter (CPP) deviation. Follow this systematic check:
- Dissolved Oxygen (DO): Calibrate the probe. A malfunctioning probe or inadequate sparging can cause anoxia. Target is typically 20-40% air saturation.
- pH: Check and calibrate pH probe. Drift can indicate CO₂ sparging issues or metabolic byproduct accumulation.
- Metabolites: Measure glucose and lactate immediately. A spike in lactate and rapid glucose consumption suggests metabolic stress.
- Contamination: Take an aseptic sample for Gram stain and rapid mycoplasma test.
- Agitation & Shear: Verify impeller speed has not changed. Excessive shear can damage cells.
Table 1: Key Bioreactor Parameters and Alarm Ranges for Mammalian Cell Culture
| Parameter | Target Range | Critical Low | Critical High | Primary Impact |
|---|---|---|---|---|
| Dissolved Oxygen | 20-40% air sat. | <10% | >80% | Cell viability, metabolism |
| pH | 7.0 - 7.4 | <6.8 | >7.6 | Enzyme activity, cell health |
| Temperature | 36.5 - 37.5°C | <35.5°C | >38.5°C | Growth rate, protein folding |
| Agitation Rate | 50-150 rpm* | <40 rpm | >200 rpm* | Mixing, shear stress |
| Vessel size dependent |
Q2: When seeding cells onto a 3D-printed polymer scaffold for a bone tissue engineering application, cell attachment is poor (<30% after 24h). How can I improve this? A: Poor attachment often relates to scaffold surface properties. Implement this protocol: Protocol: Scaffold Surface Functionalization for Enhanced Cell Adhesion
- Surface Treatment: Plasma treat scaffolds (O₂ or Ar gas, 100W, 5 minutes) to increase surface hydrophilicity and introduce reactive groups.
- Coating: Immediately incubate scaffolds in a solution of 10 µg/mL fibronectin or 0.1% (w/v) gelatin in PBS for 2 hours at 37°C.
- Rinsing: Gently rinse 3x with sterile PBS to remove unbound coating.
- Seeding Optimization: Use a low-attachment centrifuge method. Suspend cells in a small volume (e.g., 50 µL per scaffold), apply to scaffold, and centrifuge at 300 x g for 5 minutes.
- Validation: Perform a DNA quantification assay (e.g., PicoGreen) 24h post-seeding vs. a control scaffold to quantify attachment efficiency.
FAQs: Translating Processes to Device Development
Q3: How do I translate a lab-scale bioreactor protocol for producing extracellular vesicles (EVs) to a scalable, GMP-compliant process for a therapeutic EV product? A: Translation requires a focus on process control and standardization:
- Upstream: Move from T-flasks to controlled, single-use bioreactors. Define CPPs (pH, DO, temp, agitation) and key performance indicators (KPIs: cell viability, EV yield/particle count).
- Downstream: Replace ultracentrifugation with scalable techniques like tangential flow filtration (TFF) and size-exclusion chromatography (SEC) for purification. Establish clear critical quality attributes (CQAs): EV size distribution (NTA), surface markers (flow cytometry), and absence of process contaminants.
- Analytics: Implement in-line monitoring (e.g., glucose/lactate analyzers) and rigorous, validated release assays.
Q4: When testing a novel drug-eluting stent coating in a simulated vascular flow bioreactor, what are the essential mechanical and biological validation tests? A: A combined bioengineering approach is needed:
- Mechanical: Coating adhesion under shear stress (ASTM F2459), stent fatigue resistance under pulsatile flow.
- Biological: Elution kinetics of the drug in flowing media (HPLC sampling over 30 days). Endothelial cell proliferation and migration assays downstream of the stent to assess functional recovery. Anti-thrombogenicity assay (platelet adhesion under flow).
The Scientist's Toolkit: Research Reagent Solutions for Biomaterial-Cell Interaction Studies
Table 2: Essential Materials for 3D Cell-Scaffold Experiments
| Item | Function | Example Product/Catalog # |
|---|---|---|
| Synthetic Polymer Scaffold | 3D structural support with tunable degradation. | Poly(L-lactide-co-glycolide) (PLGA) foam, 85:15 ratio. |
| Extracellular Matrix (ECM) Coating | Mimics native tissue to improve cell adhesion and signaling. | Fibronectin, from human plasma, 1 mg/mL solution. |
| Live/Dead Viability/Cytotoxicity Kit | Dual fluorescence stain to quantify cell viability in 3D constructs. | Thermo Fisher L3224 (Calcein AM / Ethidium homodimer-1). |
| DNA Quantitation Kit | Quantifies cell number/DNA content in scaffolds for seeding efficiency & proliferation. | Invitrogen P11496 (PicoGreen dsDNA assay). |
| Cytokine ELISA Kit | Measures inflammatory response (e.g., IL-6, TNF-α) to scaffold materials. | R&D Systems DY206 (Human IL-6 DuoSet ELISA). |
| Triton X-100 | Detergent for cell lysis in DNA assays or creating positive controls for cytotoxicity. | Sigma-Aldrich T8787. |
Experimental Protocol: Evaluating Macrophage Polarization on Biomaterials
Objective: To assess the immunomodulatory profile (M1 pro-inflammatory vs. M2 pro-healing) of a new biomaterial by quantifying macrophage cytokine secretion and surface markers.
Detailed Methodology:
- Cell Isolation & Culture: Isolate primary human mononuclear cells from buffy coats using Ficoll density gradient centrifugation. Differentiate monocytes to macrophages (M0) using 50 ng/mL M-CSF in RPMI-1640 + 10% FBS for 7 days.
- Material Seeding: Seed M0 macrophages (50,000 cells/well) onto test biomaterial discs (12mm diameter) in 24-well plates. Include tissue culture plastic (TCP) as a control.
- Stimulation & Polarization: After 24h, stimulate cells:
- M1 Control: 100 ng/mL LPS + 20 ng/mL IFN-γ.
- M2 Control: 20 ng/mL IL-4.
- Test Groups: Biomaterial only, Biomaterial + LPS/IFN-γ, Biomaterial + IL-4.
- Analysis at 48h:
- Secreted Cytokines: Collect supernatant. Analyze for TNF-α (M1) and IL-10 (M2) via ELISA.
- Surface Markers: Detach cells, stain for CD80 (M1) and CD206 (MMR, M2) using flow cytometry.
- Imaging: Fix and stain for iNOS (M1) and Arg-1 (M2) using immunofluorescence.
Visualizations
Diagram 1: Biomaterial Immune Response Assessment Workflow
Diagram 2: Key Signaling Pathways in Macrophage Polarization
FAQs & Troubleshooting Guide for the Transitioning Bioengineer
FAQ Category 1: FDA Regulatory Pathways
- Q: Our benchtop prototype works, but what is the first formal FDA step to begin testing in humans?
- A: The first major step is submitting an Investigational Device Exemption (IDE) for devices or an Investigational New Drug (IND) application for drugs/biologics. These submissions require robust preclinical data (biocompatibility, sterilization, bench testing, animal studies) to demonstrate safety and a rationale for initial human testing. A common troubleshooting issue is insufficient biocompatibility data per ISO 10993 series. Ensure your testing covers cytotoxicity, sensitization, and implantation endpoints relevant to your device's tissue contact.
- Q: We have a novel software as a medical device (SaMD). How do we classify it and what FDA controls apply?
- A: FDA software classification depends on its intended use and risk. Use the FDA's "Digital Health Center of Excellence" pre-submission process for clarity. A frequent problem is inadequate cybersecurity and documentation. Follow IEC 62304 for software lifecycle processes and provide a detailed traceability matrix linking requirements to design to testing.
FAQ Category 2: ISO 13485 Quality Management System
- Q: As a research-focused startup, our procedures are informal. What are the most critical gaps to address first for ISO 13485?
- A: The most critical gaps are typically in Document Control and Design Controls. Implement a formal system for document approval, distribution, and revision. For Design Controls, establish and maintain a Design History File (DHF) from the project's inception. A common error is back-filling the DHF; it must be a live, contemporaneous record.
- Q: Our design verification failed. What's the next step in the QMS process?
- A: This triggers Corrective and Preventive Action (CAPA). Document the non-conformance in detail. Perform a root cause analysis (use a Fishbone diagram or 5 Whys). Implement and verify corrective actions. Update risk management files (per ISO 14971) and ensure the fix is validated. Do not simply repeat the test without addressing the root cause.
FAQ Category 3: Clinical Trial Design & Execution
- Q: For our pilot clinical study, how do we determine sample size without prior clinical data?
- A: For early feasibility or pilot studies (e.g., FDA IDE Early Feasibility Study pathway), sample size is often based on practical constraints (e.g., 10-20 subjects) rather than formal power calculations. The goal is to gather initial safety and device functionality data to inform a larger pivotal study design. Justify your sample size with a statistical rationale, even if it's not powered for hypotheses.
- Q: How do we handle an unexpected adverse event (AE) during our trial?
- A: Immediately follow your protocol-specified reporting procedures. Assess the event's severity and relatedness to the intervention. Report any Serious Adverse Event (SAE) that is possibly, probably, or definitely related to the study device/drug to the FDA (or relevant authority) and your Institutional Review Board (IRB) per mandated timelines (e.g., 10 calendar days for device-related SAEs in the US).
Quantitative Data Summary
| Regulatory Pathway | Typical Review Clock (FDA) | Key Success Metric | Average Cost (Pivotal Study) |
|---|---|---|---|
| 510(k) Premarket Notification | 90-150 Days | Substantial Equivalence to Predicate | $20M - $40M+ |
| De Novo Classification Request | 150-360 Days | Safety & Effectiveness with Special Controls | $30M - $60M+ |
| Premarket Approval (PMA) | 180-360 Days | Reasonable Assurance of Safety & Effectiveness | $75M - $200M+ |
| Investigational New Drug (IND) - Phase 3 Trial | 30-Day Review (to hold) | Safety & Efficacy for New Indication | $50M - $150M+ |
Experimental Protocol: Designing a Biocompatibility Testing Suite per ISO 10993-1
Objective: To assess the biological safety of a new polymeric implantable device for FDA submission. Materials:
- Test article (final processed device material).
- Positive controls (e.g., latex, zinc diethyldithiocarbamate).
- Negative controls (e.g., HDPE, saline).
- Cell line: L-929 mouse fibroblast cells.
- Culture media and extraction vehicles (saline, MEM with serum). Methodology:
- Sample Preparation: Extract test article in polar (saline) and non-polar (vegetable oil) solvents at 37°C for 72h per ISO 10993-12.
- Cytotoxicity Test (ISO 10993-5):
- Culture L-929 cells in 96-well plates.
- Replace medium with 100µL of extract (test, positive, negative) or fresh medium (control).
- Incubate for 24-48 hours at 37°C, 5% CO₂.
- Assess cell viability using the MTT assay. Measure absorbance at 570nm.
- Acceptance Criterion: Cell viability ≥ 70% vs. negative control.
- Sensitization Test (ISO 10993-10, Maximization or LLNA):
- (Guinea Pig Maximization) Perform intradermal induction with Freund's Complete Adjuvant and test article extract.
- After 10-14 days, perform a topical challenge.
- Score skin reactions at 24h and 48h post-challenge.
- Acceptance Criterion: Mean score <1 for test group.
- Documentation: Record all data in the DHF. Link results to the risk management file (ISO 14971) for residual risk assessment.
Visualization: Simplified Medical Device Development Workflow
Title: Medical Device Development & Regulatory Pathway
Visualization: Key ISO 13485:2016 Clausal Relationships
Title: Core ISO 13485 Clause Interaction Map
The Scientist's Toolkit: Key Research Reagent Solutions for Translational Studies
| Reagent / Material | Function in Translational Research | Key Consideration for Regulation |
|---|---|---|
| Primary Cells (Human) | Provide physiologically relevant models for efficacy & toxicity screening. | Donor consent, traceability, and biohazard safety documentation are critical for regulatory audits. |
| ELISA / Multiplex Assay Kits | Quantify biomarkers (cytokines, proteins) in serum/tissue from animal or human trials. | Must be validated for use in your specific sample matrix. Data may support clinical trial endpoints. |
| GMP-Grade Growth Factors | For cell-based therapy manufacturing or in vitro models of tissue integration. | Raw material sourcing and Certificate of Analysis are part of the Device Master File/Drug Master File. |
| IVD-Labeled Antibodies | Used in companion diagnostic development or to characterize device retrieval samples. | Ensures reproducibility and standardization required for clinical data generation. |
| Reference Standards | (e.g., USP standards) Calibrate analytical equipment for drug release or impurity testing. | Mandatory for demonstrating assay accuracy and precision in submission dossiers. |
This technical support center is designed to aid researchers, scientists, and drug development professionals in troubleshooting common experimental roadblocks. Framed within a career transition from bioengineering to biomedical engineering research, this guide translates device and systems-level problem-solving into wet-lab and translational contexts.
FAQs & Troubleshooting Guides
Q1: My qPCR data for validating a gene target in a disease model shows high Ct values and poor amplification efficiency. What are the primary culprits? A: This often stems from RNA quality or reverse transcription issues.
- Troubleshooting Steps:
- Assess RNA Integrity: Run RNA on a bioanalyzer or agarose gel. The RNA Integrity Number (RIN) should be >8.0 for sensitive applications. Low RIN indicates degradation.
- Check Primer Specificity: Use BLAST to confirm primer sequences are specific to your target. Design primers spanning an exon-exon junction to avoid genomic DNA amplification.
- Optimize cDNA Synthesis: Ensure no carryover of RNA isolation inhibitors (e.g., alcohols, salts). Include a no-reverse transcriptase (-RT) control to check for genomic DNA contamination.
- Validate PCR Efficiency: Perform a standard curve with a serial dilution of template. Efficiency should be between 90-110%.
Q2: My Western blot for a phosphorylated signaling protein (e.g., p-AKT) shows a weak or absent signal despite high total protein load. A: Phospho-epitopes are highly labile, and detection requires careful sample handling.
- Troubleshooting Steps:
- Lysis Conditions: Use freshly prepared, ice-cold lysis buffer containing appropriate phosphatase and protease inhibitors. Process cells/tissues immediately.
- Sample Preparation: Boil samples at 95-100°C for 5-10 minutes immediately after adding Laemmli buffer to denature phosphatases.
- Antibody Validation: Confirm the phospho-specific antibody is validated for your application (e.g., ELISA, IHC). Check literature for the specific activation state you are probing.
- Blocking Buffer: Use 5% BSA (not milk) in TBST for blocking and antibody dilution, as milk contains phosphoproteins that can cause high background.
Q3: My cell viability assay (e.g., MTT) shows inconsistent results when testing a novel nanoparticle drug delivery system. A: Nanomaterials can directly interfere with colorimetric or fluorescent readouts.
- Troubleshooting Steps:
- Assay Interference Test: Incubate nanoparticles with assay reagents in the absence of cells. Any signal change indicates direct interference.
- Use Orthogonal Assays: Confirm results with a non-colorimetric method (e.g., ATP-based luminescence assay, calcein AM live staining).
- Wash Steps: Include thorough wash steps (with PBS) before adding assay reagents to remove un-internalized nanoparticles that may cause interference.
- Control Nanoparticles: Include control (e.g., empty, non-targeting) nanoparticles at the same concentration to isolate the effect of the material from the drug.
Q4: My animal study data has high variability, masking the therapeutic effect of my lead compound. A: Inconsistent in vivo results often originate from preclinical model selection or pharmacokinetic factors.
- Troubleshooting Steps:
- Model Characterization: Ensure the disease model (e.g., xenograft, genetic) is well-characterized and has a predictable progression timeline.
- Randomization: Randomize animals into treatment/control groups based on baseline measurements (e.g., tumor volume, weight) to ensure equivalent starting points.
- Compound Administration: Document and standardize the route, time of day, and formulation of drug administration precisely. Monitor for consistent injection volumes.
- PK/PD Analysis: Measure blood/tissue levels of your compound at various time points to confirm it reaches the target site at a therapeutic concentration.
Table 1: Common Assay Interferences & Solutions
| Assay Type | Common Interference | Recommended Solution | Typical Impact on Data |
|---|---|---|---|
| Colorimetric (MTT, SRB) | Nanoparticle absorbance, redox activity | Switch to luminescent (ATP) assay, include material-only controls | False low viability (overestimation of toxicity) |
| Fluorescent (Calcein AM) | Autofluorescence of test material, quenchers | Use dye with different Ex/Em spectrum, perform spectral scan | False high/low fluorescence signal |
| ELISA | Non-specific binding of therapeutic antibody | Optimize blocking buffer (e.g., use protein-free blocker), increase wash stringency | High background, false positive signal |
| Flow Cytometry | Cell clumping, dead cell uptake of probe | Filter cells through mesh, use viability dye exclusion | Data loss, inaccurate population percentages |
Table 2: Key Biomarker Validation Assay Parameters
| Assay | Key Quality Metric | Optimal Range | Consequence of Deviation |
|---|---|---|---|
| qPCR | Amplification Efficiency | 90-110% | Inaccurate relative quantification |
| Western Blot | Signal-to-Noise Ratio | >5:1 | Inability to distinguish specific band |
| IHC/IF | Stain Specificity Index | High (validated controls) | False localization, uninterpretable results |
| NGS (RNA-Seq) | Phred Quality Score (Q30) | >80% of bases | High sequencing error rate, unreliable variant calls |
Experimental Protocol: Validating a Drug TargetIn Vitro
Objective: To assess the functional role and therapeutic modulation of a candidate protein (e.g., Kinase X) in a cancer cell line.
Methodology:
- Gene Knockdown (Loss-of-Function):
- Transfection: Seed cells in a 12-well plate. At 60-70% confluency, transfert with 50nM ON-TARGETplus siRNA targeting Kinase X or non-targeting control siRNA using Lipofectamine RNAiMAX according to manufacturer's protocol.
- Incubation: Harvest cells 72 hours post-transfection.
- Validation: Confirm knockdown via Western blot (≥70% reduction) and qPCR.
Phenotypic Assays:
- Viability: Plate transfected cells in 96-well plates (2000 cells/well). 24h later, measure viability using CellTiter-Glo Luminescent Assay. Read luminescence after 10-minute incubation.
- Migration: Seed transfected cells in serum-free medium into the top chamber of an 8.0µm Transwell insert. Place insert in a well containing medium with 10% FBS as a chemoattractant. After 24h, fix migrated cells with methanol, stain with 0.1% crystal violet, image, and count.
Pharmacological Inhibition (Gain-of-Control):
- Treatment: Treat wild-type cells with a known small-molecule inhibitor of Kinase X (e.g., Compound Y) across a 6-point dose range (e.g., 0.1 µM to 10 µM) for 48 hours.
- Downstream Signaling: Harvest treated cells. Perform Western blot analysis for phosphorylated downstream substrates (e.g., p-Substrate Z) to confirm target engagement and pathway inhibition.
Data Analysis: Normalize all data to controls. Perform statistical analysis (e.g., Student's t-test, ANOVA) with p < 0.05 considered significant.
Signaling Pathway Diagram
Title: Target Inhibition in a Signaling Pathway
Experimental Workflow Diagram
Title: In Vitro Target Validation Workflow
The Scientist's Toolkit: Research Reagent Solutions
| Reagent/Material | Function in Experiment | Key Consideration for Biomedical Angle |
|---|---|---|
| ON-TARGETplus siRNA | Induces specific mRNA degradation for loss-of-function studies. | Human genome-targeting pools ensure relevance to human disease biology. |
| Lipofectamine RNAiMAX | Transfection reagent for efficient siRNA delivery into cells. | Optimized for low cytotoxicity, preserving physiological readouts. |
| CellTiter-Glo Assay | Measures ATP as a proxy for metabolically active cells. | Luminescent readout minimizes interference from test compounds. |
| Corning Transwell Inserts | Provides a porous membrane to assay cell migration/invasion. | 8.0µm pores standard for epithelial cancer cell migration studies. |
| Phosphatase Inhibitor Cocktail | Preserves labile phosphorylation states during protein extraction. | Critical for accurate analysis of signaling pathway modulation by drugs. |
| Validated Phospho-Specific Antibody | Detects activated (phosphorylated) form of a target protein. | Confirms direct target engagement and mechanism of action of inhibitor. |
To facilitate a career transition from bioengineering to biomedical engineering research, proficiency in specific digital tools is critical. This technical support center provides troubleshooting and FAQs for researchers, scientists, and drug development professionals.
FAQs & Troubleshooting Guides
Q1: My CAD model (SolidWorks/Fusion 360) for a microfluidic chip is failing during simulation due to mesh errors. What are the common fixes? A: This is often due to non-manifold geometry or extremely small features.
- Run a Geometry Check: Use the software's built-in inspection tool (e.g., "Check" in SolidWorks).
- Simplify the Model: Remove microscopic fillets/chamfers not essential for the simulation.
- Adjust Global Mesh Size: Start with a coarser mesh, then refine.
- Apply Local Mesh Control: Refine mesh only at critical regions (channels, inlets).
- Ensure Watertight Model: All surfaces must be sealed. Use the "Knit Surface" or "Stitch" command to close gaps.
Q2: My Python script for scRNA-seq analysis (using Scanpy) is running out of memory. How can I optimize it? A: Single-cell datasets are large. Implement these strategies:
- Use Sparse Matrices: Ensure your
AnnDataobject stores counts in a sparse format (scipy.sparse.csr_matrix). - Downsample: For initial testing, use
sc.pp.subsampleto work with a fraction of cells. - Filter Genes: Remove lowly expressed genes aggressively with
sc.pp.filter_genes(min_cells=10). - Release Memory: Use
gc.collect()after removing large intermediate variables. - Consider Dask: For extremely large datasets, use Dask-integrated functions for out-of-core computation.
Q3: My CellProfiler pipeline incorrectly segments overlapping nuclei in fluorescence images. How can I improve segmentation? A: Over-segmentation or under-segmentation is common.
- Pre-processing: Apply "Gaussian Filter" or "Median Filter" to reduce noise.
- Adjust Primary Object Identification:
- Try the "IdentifyPrimaryObjects" module with different methods (Otsu, Adaptive Otsu, Watershed).
- Increase the "Typical diameter of objects" parameter.
- Adjust the "Threshold smoothing scale" and "Threshold correction factor".
- Use a Declumping Method: The "Watershed" or "Shape" declumping methods within the module are designed for this.
- Post-processing: Use "FilterObjects" by size/shape to remove debris or incorrectly small/large objects.
Q4: My ImageJ macro fails when batch-processing a folder of TIFFs with different dimensions. How do I make it robust? A: The macro likely assumes fixed image sizes. Implement checks:
- Get Image Properties Dynamically:
- Use
forloops: Iterate through slices without assuming a fixed number. Check for Open Image: Before processing, ensure an image is active:
Use Virtual Stacks: For very large batches, use
run("Image Sequence...", "open=[path] sort use")with thevirtualoption to conserve RAM.
Quantitative Data: Certification Comparison
| Certification | Issuing Body | Focus Area | Typical Cost (USD) | Time Commitment | Recognition / Value Proposition |
|---|---|---|---|---|---|
| CAD Associate (SolidWorks) | Dassault Systèmes | Mechanical CAD, Assembly, Drawings | $100 - $200 | 40-60 hours | Industry-standard validation of core 3D modeling skills for device design. |
| Professional in Python (PCPP1) | Python Institute | Advanced Python, OOP, File Processing | ~$295 | 80-100 hours | Demonstrates deep programming proficiency for custom analysis scripts and tool development. |
| CellProfiler Analyst | Broad Institute | Image Analysis, Machine Learning Classification | Free (Course) | 20-30 hours | Specific, respected credential for high-throughput biological image analysis. |
| AWS Certified Cloud Practitioner | Amazon Web Services | Cloud Computing Concepts & Services | $100 | 20-40 hours | Validates understanding of cloud infrastructure for large-scale computational work. |
Experimental Protocol: Automated 3D Cell Culture Analysis Workflow
This protocol details an integrated methodology using CAD, imaging, and computational biology to characterize 3D bioprinted structures.
1. Design & Fabrication (CAD/Bioprinting):
- Design a multi-well scaffold mold using SolidWorks. Export as STL.
- Sterilize the 3D-printed mold (70% ethanol, UV exposure).
- Cast hydrogel (e.g., 5 mg/mL Collagen I) into the mold and polymerize at 37°C for 1 hour.
- Seed cells (e.g., 50,000 MCF-7 cells/construct) in 50 µL medium on top of each hydrogel.
2. Imaging (Live-Cell Microscopy):
- At 72-hour post-seeding, add 5 µM Calcein-AM (live) and 2 µM Propidium Iodide (dead) to each well.
- Incubate for 45 minutes at 37°C.
- Acquire z-stacks (10 slices, 20 µm interval) on a confocal microscope using 10x objective. Use 488 nm and 561 nm laser lines.
3. Image Analysis (CellProfiler Pipeline):
- Input Modules:
Images(load z-stacks),Metadata(tag well positions),NamesAndTypes. - Pre-processing:
ColorToGray,CorrectIlluminationCalculate,CorrectIlluminationApply. - Object Identification:
IdentifyPrimaryObjects(Otsu method) for live and dead channels. - Measurement:
MeasureObjectSizeShape,MeasureObjectIntensity. - Export:
ExportToSpreadsheet. Key metrics: ObjectCount, MeanIntensity, IntegratedIntensity.
4. Computational Analysis (Python/Scanpy-like Workflow):
- Load the aggregated CSV from CellProfiler into a Pandas DataFrame.
- Calculate viability:
(Live_Count / (Live_Count + Dead_Count)) * 100. - Perform statistical testing (t-test/ANOVA) between experimental groups using SciPy.
- Generate visualizations: bar plots (viability), scatter plots (size vs. intensity) using Matplotlib/Seaborn.
Visualization Diagrams
EGFR Signaling Pathway in Cancer Research
Biomedical Image Analysis Workflow
The Scientist's Toolkit: Research Reagent Solutions
| Item | Function in Featured 3D Culture Protocol |
|---|---|
| Collagen I, Rat Tail (5 mg/mL) | Extracellular matrix hydrogel providing a 3D scaffold that mimics tissue for cell growth and migration. |
| Calcein-AM (5 µM) | Cell-permeant fluorescent dye converted by intracellular esterases to green-fluorescent calcein, labeling viable cells. |
| Propidium Iodide (PI) (2 µM) | Cell-impermeant red-fluorescent nucleic acid stain that only labels cells with compromised membranes (non-viable). |
| Dulbecco's Modified Eagle Medium (DMEM), High Glucose | Complete cell culture medium providing nutrients, salts, and buffers necessary for maintaining MCF-7 cell line viability. |
| MCF-7 Cell Line | A standard human adenocarcinoma breast cancer cell line used as a model system for studying tumor biology and drug response in 3D. |
Technical Support Center: Troubleshooting for Common Research Hurdles
FAQs for Networking and Project Development
Q1: I am transitioning from device-focused bioengineering to molecular biomedical research. My network is entirely in the former. How do I systematically identify and connect with key principal investigators (PIs) in my new target field? A: Use a layered approach combining database searches and community engagement.
- Keyword & Grant Search: Use NIH RePORTER with targeted keywords (e.g., "CAR-T," "fibrosis signaling") and filter by your geographic or institutional preferences. This identifies actively funded PIs.
- Publication Analysis: Use PubMed or Google Scholar. Identify recent high-impact papers in your target area. Note corresponding authors and their institutions.
- Conference Mining: Scan agendas for major conferences (e.g., ASCB, AACR, Keystone Symposia) for session chairs and speakers.
- Strategic Connection: Do not send a generic email. Reference their specific work, articulate how your unique engineering skills (e.g., quantitative modeling, microfluidics) could bring a new perspective to their biological questions.
Q2: I've identified potential mentors, but my outreach emails are ignored. What is the specific protocol for an effective outreach message? A: Follow this direct, structured template. Adherence increases response rates.
| Section | Content Guideline | Example (Target: Dr. Chen, working on TGF-β signaling) |
|---|---|---|
| Subject Line | Clear, specific, and reference-based. | "Question regarding your 2023 Cell paper on TGF-β latency" |
| Greeting | Formal. | "Dear Dr. Chen," |
| Introduction | Your current status and purpose. | "I am a bioengineer transitioning into fibrosis research and have closely followed your work on..." |
| Specific Reference | Demonstrate detailed reading. | "Your finding that [specific finding] was particularly compelling. It made me wonder if an engineering approach using [your skill] could help elucidate..." |
| Clear Ask | Minimal, actionable request. | "Would you be available for a brief 15-minute conversation in the coming weeks? I would value your perspective on the field." |
| Professional Closing | Attach relevant materials. | "Thank you for your time and consideration. My CV is attached for your reference. Sincerely, [Your Name]" |
Q3: How do I leverage online communities to solve specific, technical experimental problems that arise during my transition? A: Platform-specific protocols yield the best results.
- For Protocol Troubleshooting (e.g., Western Blot issues):
- Platform: ResearchGate, Twitter/X (using #AcademicChatter, #LabHack).
- Protocol: Post a detailed, structured question. Include: (1) Exact experiment and cell line/ tissue, (2) Specific reagent catalog numbers and dilutions, (3) Observed vs. expected result, (4) Image of gel/blot (if applicable). This detail enables actionable advice.
- For Conceptual/Strategic Guidance:
- Platform: LinkedIn Groups (e.g., "The Biomedical Scientist Network"), specialized Slack/Discord communities.
- Protocol: Engage in existing discussions before posting. Frame questions around bridging fields: "How would a signaling pathway specialist approach the quantification of [my engineering problem]?"
Q4: What are the quantitative metrics I should use to evaluate the potential of a research group or community before investing time? A: Assess using the following criteria in a table for comparison.
| Metric Category | Specific Data Points to Collect | Tool/Source for Data |
|---|---|---|
| Group Productivity | Publications per year (last 5 yrs); journal impact/rank; first-author roles for post-docs. | PubMed, Group Website, Google Scholar |
| Funding Stability | Active grants (PI role); grant sources (NIH, NSF, foundation). | NIH RePORTER, NSF Award Search |
| Trainee Success | Alumni placement (academia, industry); time to graduation for PhDs. | Group Website, LinkedIn |
| Community Engagement | Frequency of posting/answering; quality of discussions; member demographics. | Direct observation on Twitter, LinkedIn, Slack |
Experimental Protocol: Systematic Literature Network Analysis
Objective: To map the key players and intellectual landscape of a target biomedical research sub-field. Methodology:
- Define Search Parameters: Identify 3-5 core papers as "seed articles" using a precise PubMed query (e.g., "optogenetics AND glioma 2020:2024"[DP]).
- Citation Network Generation:
- Input seed article DOIs into a tool like Citation Gecko or Connected Papers.
- Export data for articles that are highly co-cited or cite the seed articles.
- Data Extraction & Tabulation: For the top 20 resulting papers, extract: Author Names (PI), Author Affiliations, Journal, Publication Year, and Number of Citations.
- Network Visualization: Use the extracted data to create an adjacency list and visualize key PIs and their institutional connections (see diagram below).
Visualization: Key Player Network Mapping Workflow
Title: Workflow for Mapping Research Networks
The Scientist's Toolkit: Research Reagent Solutions for Cell Signaling Assays
Common Assay in Biomedical Research: Phosphoprotein Analysis via Western Blot
| Reagent/Tool | Function & Specificity | Transition Note for Bioengineers |
|---|---|---|
| RIPA Lysis Buffer | Cell membrane disruption, solubilizes proteins while maintaining phospho-epitopes. Contains protease/phosphatase inhibitors. | Similar to extraction buffers used in protein-based biosensor work, but inhibitor cocktails are critical for phospho-studies. |
| Phospho-Specific Primary Antibodies | Binds only to the phosphorylated form of a target protein (e.g., p-ERK1/2 (Thr202/Tyr204)). | Key difference: Must validate specificity using appropriate controls (kinase stimulation/inhibition). |
| Phosphatase Inhibitor Cocktails | Essential additive to lysis buffers to prevent dephosphorylation of proteins post-lysis. | A new variable not typically emphasized in structural protein work. |
| ECL or SuperSignal Chemiluminescent Substrate | Enzyme (HRP)-catalyzed reaction producing light for detection on film/imager. Sensitivity varies. | Analogous to detection in immunoassays. Understanding linear range is crucial for quantification. |
| Normalization Control Antibodies | Antibodies against total protein (e.g., Total ERK) or housekeeping proteins (β-Actin, GAPDH). | Critical for ensuring equal loading and interpreting phospho-signal changes. Similar concept to controls in qPCR. |
Visualization: Simplified MAPK/ERK Signaling Pathway
Title: Core MAPK/ERK Signal Transduction Pathway
Navigating Transition Hurdles: Solving Common Challenges for Bioengineering Professionals
Overcoming the 'Lack of Clinical Experience' Barrier in Job Applications
Technical Support Center
Troubleshooting Guide: Common Application Errors for Career Transitioners
Error Code: APP-EXP-01 – Application filtered out by ATS.
- Root Cause: Resume lacks clinical/biomedical keywords from the job description.
- Solution: Perform a keyword alignment protocol. Extract key terms from target job postings (e.g., "clinical data," "IRB," "GMP," "patient samples," "translational research") and integrate them naturally into your skills and project descriptions.
Error Code: APP-INT-02 – Stumbling on clinical relevance questions in interviews.
- Root Cause: Inability to map bioengineering projects to patient-impact outcomes.
- Solution: Use the "Bio-to-Bedside" framework. For every technical skill (e.g., microfluidics, biomarker detection), prepare a statement: "My experience in [SKILL] enabled [TECHNICAL ACHIEVEMENT], which in a clinical research context can be applied to [CLINICAL PROBLEM] to potentially impact [PATIENT OUTCOME]."
Error Code: APP-NET-03 – Network fails to provide relevant referrals.
- Root Cause: Network is concentrated in core bioengineering (devices, materials) rather than biomedical research (therapeutics, diagnostics).
- Solution: Execute a targeted networking protocol. Identify professionals in target companies via LinkedIn, analyze their work, and engage with specific questions about bridging engineering and clinical research.
FAQs
Q1: My PhD and postdoc are in biosensor development. How do I answer "Why do you want to move into cancer research?" convincingly? A1: Structure your answer using a Translational Hypothesis. Frame your past work as developing a platform technology. "My expertise in high-sensitivity biosensor development is directly applicable to the critical need for detecting minimal residual disease (MRD) in oncology. I aim to apply this platform to validate novel circulating tumor DNA (ctDNA) targets, directly impacting patient monitoring and relapse prediction."
Q2: What are the most efficient ways to gain credible, resume-worthy clinical research experience while still in my current lab? A2: Pursue strategic cross-training.
- Clinical Data Analysis: Complete a certified short course (e.g., Coursera's "Genomics and Precision Medicine") and re-analyze a public clinical dataset (e.g., from TCGA) using your computational skills.
- Collaborative Projects: Propose a pilot project with a clinical lab in your institution. Offer your technical skills (e.g., building an analysis pipeline) in exchange for co-authorship and exposure to clinical sample handling protocols.
- Shadowing: Systematically shadow a clinical researcher or a biobank manager for 4-8 hours per week over a month to understand workflows and regulatory constraints.
Q3: How critical are wet-lab skills with patient-derived samples (e.g., PDXs, organoids) compared to computational skills? A3: Demand is high for both, but the balance varies. The table below summarizes quantitative data from recent job postings.
| Skill Category | Prevalence in Job Postings (Biomedical Research, Q1 2024) | Notes & Strategic Recommendation |
|---|---|---|
| Computational/Bioinformatics (NGS analysis, clinical data mining) | ~65% | Often listed as "required" or "strongly preferred." Action: Showcase analysis of any clinically relevant data. |
| Wet-Lab with Clinical Samples (PDX, organoid, primary cell culture) | ~45% | Frequently a "preferred" qualification. Action: Gain even limited hands-on experience via collaboration; highlight transferable aseptic and assay development skills. |
| Regulatory Knowledge (GCP, ICH guidelines, IRB) | ~30% | A key differentiator. Action: Complete free online NIH or FDA modules on human subjects research and GCP. |
Experimental Protocol: Validating a Bioengineering Assay for Clinical Sample Analysis
Title: Protocol for Transitioning an In-House ELISA to Clinical Serum Sample Analysis.
Objective: To adapt a lab-developed assay for quantifying a soluble biomarker from research-grade to clinically relevant matrix (human serum), establishing preliminary precision and recovery metrics.
Materials (Research Reagent Solutions):
| Item | Function in Protocol |
|---|---|
| Human Serum Samples (Commercial pooled, de-identified) | The target clinical matrix for assay validation. |
| Assay Diluent (Matrix-Matched) | A buffer spiked with naive serum to mimic sample matrix and minimize background. |
| Recombinant Human Protein (Calibrator) | Used to generate the standard curve in the target matrix. |
| Precision Controls (Low, Mid, High) | Quality Control (QC) samples made by spiking analyte into serum, run in replicates to assess CV%. |
| Sample Collection Tubes (SST) | Standard for serum separation; critical to specify for pre-analytical consistency. |
| Plate Washer & Microplate Reader | Standardized equipment for reproducible liquid handling and detection. |
Methodology:
- Sample Preparation: Thaw frozen human serum aliquots on ice. Centrifuge at 10,000xg for 10 minutes at 4°C to remove precipitates.
- Matrix Interference Test: Prepare the standard curve in both standard assay buffer and in 50% pooled human serum diluted in assay buffer. Compare slopes to assess matrix suppression/enhancement.
- Spike-and-Recovery Experiment: Spike known concentrations of recombinant protein into five individual serum samples at low, mid, and high levels within the assay's range. Calculate % Recovery = (Measured Endogenous+Spiked – Measured Endogenous) / Known Spike Amount * 100. Target: 80-120%.
- Precision Assessment: Run the Low, Mid, and High QC samples in triplicate across three independent runs (inter-assay precision). Calculate the Coefficient of Variation (CV%) for each. Target: CV% < 15%.
- Data Normalization: Report all sample concentrations relative to the standard curve generated in matrix-matched diluent. Document any sample dilution factors used to fall within the linear range.
Interpretation: Successful completion of this protocol provides concrete, quantitative evidence of your ability to handle clinical samples and generate reliable data, a key point to highlight in job applications and interviews.
Visualizations
Title: From Bioengineering Skills to Clinical Impact Narrative
Title: Clinical Serum Sample Analysis Workflow
Addressing Knowledge Gaps in Human Physiology and Disease Mechanisms
Technical Support Center: Troubleshooting Guides & FAQs
FAQ 1: My CRISPR-Cas9 gene knockout in a human iPSC-derived cardiomyocyte model has low efficiency. What are the primary causes and solutions?
Answer: Low CRISPR efficiency in differentiated cell models is common. Current data (2024) indicates average knockout efficiency in iPSC-cardiomyocytes ranges from 20-60%, depending on methodology.
- Primary Cause 1: Poor gRNA Design & Validation.
- Solution: Use updated algorithms (CRISPRscan, CHOPCHOP v3) that account for epigenetic states in differentiated cells. Always validate gRNA cutting efficiency in vitro using a T7E1 assay or digital PCR before cellular experiments.
- Primary Cause 2: Inefficient Delivery & Expression in Post-Mitotic Cells.
- Solution: Cardiomyocytes are difficult to transfect. Switch to ribonucleoprotein (RNP) electroporation. Protocols show RNP delivery increases knockout rates by 1.5-3x compared to plasmid transfection in these cells.
- Primary Cause 3: Low HDR for knock-ins.
- Solution: For precise edits, use HDR enhancers like small molecules (SCR7, RS-1) or employ newer base-editing/prime-editing techniques that don't require double-strand breaks or donor templates.
FAQ 2: My multi-omics data (scRNA-seq and proteomics) from patient-derived samples show poor correlation between transcript and protein levels for key targets. How should I proceed?
Answer: Discrepancy is expected and biologically informative. A 2023 meta-analysis found median transcript-protein correlation across studies is only ~0.4-0.6.
- Troubleshooting Steps:
- Technical Validation: Confirm proteomics data with orthogonal methods (e.g., Western Blot, targeted MS/SRM) for your key discordant targets.
- Analyze Post-Transcriptional Regulation: The gap often points to regulatory mechanisms. Integrate miRNA expression data or use tools like OmniPath to investigate known phosphorylation/ubiquitination networks affecting your target proteins.
- Temporal Dynamics: Consider half-life differences. Use metabolic labeling (e.g., SILAC, puromycin incorporation) to measure protein synthesis and degradation rates specifically in your sample system.
FAQ 3: When establishing a new disease model (e.g., organoid), what are the critical checkpoints to validate physiological relevance before proceeding to drug screening?
Answer: A phased validation protocol is essential to avoid costly late-stage failures.
- Checkpoint 1 (Genotypic/Phenotypic): Confirm disease-associated genetic variant is present and leads to expected molecular phenotype (e.g., mutant protein aggregation, pathway disruption).
- Checkpoint 2 (Functional Biomimicry): Demonstrate key functional deficits matching human disease (e.g., reduced contractile force in cardiac organoids, aberrant network bursts in neural organoids).
- Checkpoint 3 (Pharmacological Response): Test with 2-3 known clinically used therapeutics (positive/negative controls). The model should recapitulate known efficacy or resistance profiles at physiologically relevant doses.
Experimental Protocols
Protocol 1: High-Efficiency CRISPR-Cas9 Knockout in iPSC-Derived Cells using RNP Electroporation.
Application: Creating isogenic disease models in difficult-to-transfect differentiated lineages.
Methodology:
- gRNA Preparation: Synthesize chemically modified sgRNAs (e.g., with 2'-O-methyl 3' phosphorothioate) to enhance stability.
- RNP Complex Formation: Incubate 60 pmol of purified Cas9 protein with 240 pmol of sgRNA (1:4 molar ratio) in duplex buffer for 10 min at 25°C.
- Cell Preparation: Harvest 1-2x10^5 iPSC-derived cells (e.g., cardiomyocytes, neurons) at the desired differentiation stage. Wash with PBS.
- Electroporation: Use the Neon Transfection System (Thermo Fisher). Resuspend cell pellet in 10µL R buffer mixed with RNP complex. Electroporate (Cardiomyocytes: 1400V, 20ms, 1 pulse; Neurons: 1100V, 30ms, 2 pulses).
- Recovery & Analysis: Plate cells immediately in pre-warmed, antibiotic-free medium. Allow 72 hours for protein turnover before assessing knockout efficiency via flow cytometry (for fluorescent reporters) or NGS (for bulk population).
Protocol 2: Integrated Multi-Omic Workflow for Patient-Derived Xenograft (PDX) Tissue.
Application: Uncovering discordant regulatory layers in oncology or metabolic disease research.
Methodology:
- Tissue Processing: Snap-frozen PDX tissue is cryopulverized and split into aliquots for DNA/RNA/protein.
- Parallel Extraction:
- DNA/RNA: Use AllPrep DNA/RNA/miRNA Universal Kit (Qiagen) for simultaneous co-isolation.
- Protein: Lyse separate aliquot in 8M urea buffer for mass spectrometry.
- Library Preparation & Sequencing:
- DNA: Whole exome sequencing (150bp paired-end, ~100x depth).
- RNA: Stranded mRNA-seq (Illumina NovaSeq, 50M reads/sample).
- miRNA: Use QIAseq miRNA Library Kit for quantitative profiling.
- Proteomics: Perform tryptic digestion, TMT 16-plex labeling, high-pH fractionation, and LC-MS/MS on an Orbitrap Eclipse.
- Data Integration: Map all data to a unified reference (GRCh38). Use tools like COSMOS for causal integration of transcriptomics, phosphoproteomics, and metabolomics data.
Table 1: CRISPR Editing Efficiencies Across Cell Types (2023-2024 Aggregate Data)
| Cell Type | Delivery Method | Average Knockout Efficiency | Average HDR Efficiency | Key Challenge |
|---|---|---|---|---|
| HEK293T | Plasmid Transfection | 75-90% | 20-40% | Low relevance to physiology |
| iPSCs | Lipofection | 60-80% | 10-30% | Clonal variability |
| iPSC-Cardiomyocytes | RNP Electroporation | 45-70% | <5% (Use Base Editor) | Post-mitotic state, toxicity |
| iPSC-Neurons | RNP Electroporation | 40-65% | <2% (Use Base Editor) | Fragility, low survival post-electroporation |
| Primary T Cells | RNP Electroporation | 80-95% | 15-25% | Activation state dependency |
Table 2: Correlation Coefficients Between Omics Layers in Human Tissue Studies
| Tissue/Cell Type | Transcript vs. Protein (Pearson's r) | Key Regulatory Layer Identified | Common Discrepancy Example |
|---|---|---|---|
| Pan-Cancer (TCGA) | 0.39 - 0.47 | Phosphoproteomics | High kinase transcript, low active phospho-protein |
| Liver Tissue | 0.52 - 0.61 | miRNA & Metabolic Flux | Transporter mRNA stable, protein levels highly variable |
| Brain Tissue (Post-mortem) | 0.41 - 0.55 | Long-term protein stability | Neurodegenerative disease aggregates (e.g., Tau) |
| Immune Cells (PBMCs) | 0.58 - 0.67 | Rapid protein turnover | Cytokine mRNA spikes not always reflected in secretion |
Visualizations
Diagram Title: cAMP-PKA-CREB Signaling Pathway
Diagram Title: Integrated Multi-Omic Analysis Workflow
The Scientist's Toolkit: Research Reagent Solutions
Table 3: Essential Reagents for Advanced Disease Modeling & Target Validation
| Reagent/Material | Supplier Examples | Primary Function | Critical Application Notes |
|---|---|---|---|
| Chemically Modified sgRNAs | Synthego, IDT | Increased stability and reduced immunogenicity in primary & iPSC-derived cells. Essential for RNP workflows. | Use 2'-O-methyl 3' phosphorothioate modifications at first 3 and last 3 bases. |
| Alt-R S.p. Cas9 Nuclease V3 | Integrated DNA Technologies (IDT) | High-purity, recombinant Cas9 protein for RNP assembly. Consistently high editing efficiency with low toxicity. | Aliquot to avoid freeze-thaw cycles. Always complex with sgRNA before delivery. |
| TMTpro 16plex Label Reagent Set | Thermo Fisher Scientific | Multiplexed isobaric labeling for quantitative proteomics. Allows 16-sample comparison in a single MS run. | Requires high-resolution mass spectrometer (Orbitrap Eclipse/Tribrid) for accurate quantification. |
| CellRox Deep Red Reagent | Thermo Fisher Scientific | Fluorescent probe for measuring oxidative stress in live cells. Compatible with high-content imaging. | Signal can be confounded by changes in cell metabolism; use with mitochondrial-specific dyes (MitoSOX) for confirmation. |
| Geltrex or Matrigel (GFR) | Thermo Fisher, Corning | Defined, growth-factor reduced basement membrane matrix for 3D organoid culture. | Lot-to-lot variability is high. For reproducibility, test new lots and bulk purchase a qualified lot. |
| SMART-Seq v4 Ultra Low Input RNA Kit | Takara Bio | Ultra-sensitive full-length cDNA synthesis and amplification for low-input or single-cell RNA-seq. | Critical for sequencing rare cell populations from organoids or limited patient biopsies. |
Technical Support Center
This support center addresses common technical challenges faced by researchers transitioning from bioengineering design to translational biomedical research. The focus is on experiments critical for generating the robust data packages required for regulatory submissions (e.g., to the FDA or EMA).
FAQs & Troubleshooting Guides
Q1: My engineered tissue construct shows excellent mechanical properties in vitro, but fails to integrate or causes a severe inflammatory response in my small animal model. What should I troubleshoot? A: This is a classic transition challenge from in vitro to in vivo. Focus on host-biomaterial interaction.
- Checklist:
- Sterility & Endotoxins: Use an LAL assay to test for endotoxin contamination. Levels must be <0.5 EU/mL for implants.
- Surface Characterization: Re-characterize the implant surface post-sterilization (e.g., gamma irradiation, EtO) using XPS or contact angle measurement. Sterilization can alter surface chemistry critical for biocompatibility.
- Immune Response Profiling: Harvest the implant site and perform:
- Histology: H&E staining for general morphology and inflammation. Use specific stains (e.g., for macrophages: CD68+ immunohistochemistry).
- Cytokine Array: Analyze peri-implant fluid for pro-inflammatory cytokines (IL-1β, IL-6, TNF-α) vs. regenerative cytokines (IL-4, IL-10).
Q2: I am developing a cell-based therapy. My potency assay (e.g., secretion of a specific factor) shows high batch-to-batch variability, which is a major concern for Chemistry, Manufacturing, and Controls (CMC) documentation. How can I standardize this? A: Potency assay variability is a critical regulatory hurdle.
- Actionable Steps:
- Implement In-Process Controls (IPCs): Monitor critical quality attributes (CQAs) like viability, population doublings, and surface marker expression during culture, not just at the end.
- Adopt a Multi-Faceted Potency Assay: A single assay is often insufficient. Develop a matrix of assays as per ICH Q6B guidance.
- Table: Example Potency Assay Matrix for a Hypothetical Mesenchymal Stromal Cell (MSC) Product
Assay Type Specific Method Target CQA Acceptance Criterion Functional ELISA for VEGF secretion Angiogenic potency >500 pg/10^6 cells/24h Biochemical IDO enzyme activity assay Immunomodulatory potency >20 nmol/kynurenine/10^6 cells/4h Genomic qPCR for TSG-6 expression Anti-inflammatory potential Ct value <28 Cellular Inhibition of PBMC proliferation in co-culture Overall immunomodulation >40% inhibition vs. control
- Table: Example Potency Assay Matrix for a Hypothetical Mesenchymal Stromal Cell (MSC) Product
- Use Reference Standards: Use a master cell bank or a qualified commercial cell line as an internal control in every assay run to normalize results.
Q3: My drug-loaded nanoparticle shows promising efficacy in a 2D cell culture, but the effect is lost in a 3D spheroid model. What parameters should I optimize? A: This highlights the need for physiologically relevant models early in development.
- Troubleshooting Protocol:
- Characterize Penetration: Use fluorescently labelled nanoparticles and perform confocal microscopy z-stacking on spheroids over time. Quantify fluorescence intensity from the spheroid rim to the core.
- Modify Nanoparticle Properties: The 3D extracellular matrix is a significant barrier. Systematically vary:
- Size: Aim for <100 nm for better diffusion.
- Surface Charge: Shift from highly positive (may bind ECM) to slightly negative or neutral.
- Surface Functionalization: Incorporate protease-sensitive or hyaluronidase-sensitive linkers to enable ECM degradation and penetration.
- Experimental Workflow: Follow the detailed protocol below.
Detailed Experimental Protocol: Evaluating Nanoparticle Penetration in 3D Tumor Spheroids
Title: Protocol for 3D Spheroid Penetration & Efficacy Assay
Objective: To quantitatively assess the penetration and efficacy of therapeutic nanoparticles in a high-fidelity 3D tumor spheroid model.
Materials (The Scientist's Toolkit):
| Reagent/Material | Function/Explanation |
|---|---|
| U-87 MG Cell Line | Human glioblastoma cells, forming compact spheroids. |
| Ultra-Low Attachment (ULA) Plate | Prevents cell adhesion, forcing spheroid self-assembly. |
| Fluorescently-labelled Nanoparticles | Allows visualization via confocal microscopy. |
| Matrigel (or similar ECM) | Optional overlay to increase diffusion barrier fidelity. |
| Live/Dead Cell Stain (e.g., Calcein AM/Propidium Iodide) | Assesses spheroid viability post-treatment. |
| Confocal Microscope with Z-stack capability | Enables 3D imaging of spheroid penetration. |
| Image Analysis Software (e.g., Fiji/ImageJ) | For quantitative analysis of fluorescence distribution. |
Methodology:
- Spheroid Generation: Seed U-87 MG cells at 1000 cells/well in a 96-well ULA plate. Centrifuge at 300 x g for 3 minutes to promote aggregate formation. Culture for 72 hours to form mature spheroids.
- Nanoparticle Treatment: Add fluorescent nanoparticles at the desired therapeutic concentration to the spheroid culture medium.
- Incubation & Penetration: Incubate for 4, 24, and 48 hours. Include untreated controls.
- Imaging:
- Gently wash spheroids with PBS.
- For penetration analysis: Image live spheroids using a confocal microscope. Capture z-stack images at 10µm intervals from top to bottom.
- For efficacy analysis: Perform Live/Dead staining according to manufacturer protocol, then image.
- Quantitative Analysis (Using Fiji):
- Penetration: Use the "Plot Profile" function on a maximum intensity z-projection to generate a fluorescence intensity curve from the spheroid periphery to the core.
- Efficacy: Calculate the percentage of dead cells (red fluorescence) within the total spheroid area (green + red fluorescence).
Visualization: Signaling Pathway & Experimental Workflow
Diagram 1: Key Signaling Pathways in Host-Biomaterial Interaction
Diagram 2: 3D Spheroid Nanoparticle Testing Workflow
Financial and Timeline Considerations for Mid-Career Transitioners and Researchers
Technical Support Center
Troubleshooting Guides & FAQs
Q1: I am transitioning from a bioengineering industry role to academic biomedical research. My first experiment, a western blot to detect phosphorylated signaling proteins from cell lysates, shows high background noise across all lanes. What are the systematic troubleshooting steps?
A1: High background is often due to non-specific antibody binding or insufficient blocking. Follow this protocol:
- Re-block the membrane: Incubate the membrane in 5% non-fat dry milk in TBST for 1 hour at room temperature on a shaker.
- Re-optimize Antibody Dilution: Prepare fresh primary antibody dilutions in blocking buffer. Test a range (e.g., 1:500, 1:1000, 1:2000) in a pilot experiment.
- Increase Wash Stringency: Perform all TBST washes for 10 minutes each, with vigorous shaking. Consider adding 0.1% Tween-20.
- Check Substrate Freshness: Ensure your chemiluminescent substrate is not expired and was prepared correctly.
Q2: My qPCR data for gene expression analysis in a new disease model shows inconsistent Ct values between technical replicates. What could be the issue?
A2: Inconsistent replicates typically point to pipetting errors or reaction setup issues.
- Create a Master Mix: Always prepare a master mix containing the SYBR Green qPCR master mix, primers, and water for all replicates plus 10% extra to account for pipetting loss. Vortex and centrifuge briefly.
- Aliquot Template Precisely: Use calibrated pipettes to aliquot the cDNA template separately into each well.
- Validate Primer Specificity: Run a melt curve analysis. A single sharp peak indicates specific amplification; multiple peaks suggest primer-dimer or non-specific products.
Q3: When transitioning my skills to cell migration (scratch/wound healing) assays, I find inconsistent wound width measurements even at time zero. How can I standardize this?
A3: Inconsistency at T0 indicates poor initial wound creation.
Detailed Protocol for Consistent Scratch Assay:
- Cell Seeding: Seed cells in a 24-well plate to achieve 100% confluence at the time of scratching.
- Scratch Tool: Use a sterile, fixed-width tool (e.g., a 200µL pipette tip with the end cut off straight with a razor blade). Do not use standard tapered tips.
- Scratch Motion: Place the tip perpendicular to the plate bottom. Apply firm, even pressure and drag in a single, straight, continuous line across the well diameter. Do not lift the tip mid-scratch.
- Wash: Immediately after scratching, wash wells 2x with warm PBS to remove dislodged cells, then add low-serum (e.g., 0.5-2% FBS) medium for the assay duration.
Key Research Reagent Solutions Table
| Item | Function in Transition-Relevant Assays | Example & Notes |
|---|---|---|
| Phospho-Specific Antibodies | Detect activated (phosphorylated) signaling proteins (e.g., p-AKT, p-ERK) in western blot/IF. Critical for mechanistic research. | Select validated antibodies for IHC/IF or WB. Always run a total protein control. |
| Cell Viability/Proliferation Assay Kits | Quantify cell health (MTT, CCK-8, ATP-based). Essential for drug toxicity screening. | CCK-8 allows non-radioactive, kinetic measurement without solubilization steps. |
| Recombinant Growth Factors/Cytokines | Precisely stimulate signaling pathways in vitro to model disease states or test interventions. | Human Recombinant TGF-β1, EGF, VEGF. Aliquot to avoid freeze-thaw cycles. |
| Selective Small Molecule Inhibitors/Agonists | Pharmacologically perturb specific targets (kinases, receptors) to establish causal links in experiments. | LY294002 (PI3K inhibitor), SB431542 (TGF-β receptor inhibitor). Verify specificity and use DMSO controls. |
| Fluorescent Cell Tracking Dyes | Label cells for migration, co-culture, or in vivo homing experiments. | CFSE, CellTracker dyes. Optimize concentration to avoid cytotoxicity. |
Quantitative Data on Career Transition
Table 1: Financial & Timeline Benchmarks for Mid-Career Transition to BME Research
| Consideration | Industry to Academic Postdoc | Industry to Research Scientist (Industry) | Notes & Strategies |
|---|---|---|---|
| Typical Timeline | 2-4 years | 6-18 months | Academic path is longer due to publishing & grant-writing needs. |
| Salary Change | Potential 30-50% decrease | Lateral move or 0-15% increase | Academic salaries are public; negotiate based on NIH postdoc stipend scales. |
| Skill Gap Closure | 12-24 months | 6-12 months | Focus on in vivo models, advanced microscopy, and grant writing (academic). |
| Start-Up Funding | Limited (lab's existing grants) | Often included in role | For academia, explicitly discuss project-specific resources during interviews. |
| Key ROI Metrics | First-author publications, Fellowships (F32/K99) | Successful project transfer, patent disclosures, internal grant awards | Build a tangible "research capital" portfolio. |
Experimental Protocol: Phospho-Kinase Profiling Array
Purpose: To simultaneously screen the activation status of multiple signaling pathways in a new cellular model, a common first experiment for a transitioner characterizing a system.
Methodology:
- Cell Stimulation: Culture cells to 80% confluence in 6-cm dishes. Serum-starve for 18-24 hours. Stimulate with your cytokine/growth factor of interest (e.g., 50ng/mL EGF) for 15 minutes. Include an unstimulated control.
- Lysis: Immediately place dishes on ice, aspirate medium, and rinse with cold PBS. Lyse cells using the kit's provided lysis buffer (containing phosphatase/protease inhibitors) with gentle rocking for 10 minutes on ice.
- Array Incubation: Clarify lysate by centrifugation. Determine protein concentration. Pipette 500µg of lysate into the provided detection antibody cocktail. Incubate this mixture with the pre-spotted nitrocellulose array membrane (blocked per kit instructions) overnight at 4°C on a rocking platform.
- Detection: Wash membrane. Incubate with Streptavidin-HRP conjugate for 30 minutes. Develop using chemiluminescent substrate and image. Spot intensity correlates with phospho-protein level.
Visualization: Common Signaling Pathway in BME Research
Title: EGF-Induced PI3K-Akt and RAS-MAPK Signaling Pathways
Experimental Workflow for Transitioner's First Project
Title: Workflow for Initial Signaling Pathway Characterization Project
Optimizing Your Resume and LinkedIn Profile for ATS and Biomedical Hiring Managers
Troubleshooting Guides & FAQs
Technical Support Center
FAQ 1: Why is my resume getting rejected by applicant tracking systems (ATS) before a human sees it?
- Answer: ATS scans for specific keywords, skills, and clear formatting. Common failures include:
- File Type: Using a .PDF from an image scan or a graphic-heavy .DOCX.
- Formatting: Using headers/footers, text boxes, columns, or non-standard fonts.
- Keyword Mismatch: Not mirroring the terminology from the job description (e.g., "Cell Culture" vs. "Aseptic Technique").
- Logical Structure: Lack of clear, hierarchical section headings (e.g., "Experience," "Skills").
FAQ 2: How can I effectively translate my bioengineering project management experience for a biomedical research manager role?
- Answer: Reframe your technical bioengineering deliverables (e.g., device prototypes, sensor data) within the context of the biomedical research pipeline. Emphasize transferable processes like experimental design, data analysis, quality control, and regulatory considerations. Use action verbs like "Validated," "Characterized," "Optimized," and "Documented."
FAQ 3: What are the most critical "hard skills" hiring managers in target biomedical research labs are looking for?
- Answer: Based on current job postings, the following technical skills are highly sought after:
Table: High-Demand Technical Skills in Biomedical Research (2024 Analysis)
| Skill Category | Specific Technique/Tool | Frequency in Job Ads (%)* | Relevance to Career Transition |
|---|---|---|---|
| Molecular Biology | PCR (qRT-PCR, ddPCR), Molecular Cloning | 78% | Core assay competency for validation. |
| Cell Biology | Mammalian Cell Culture, Aseptic Technique | 92% | Foundational for in vitro models. |
| Imaging & Analysis | Fluorescence Microscopy, Confocal, ImageJ/Fiji | 85% | Directly transferable from device characterization. |
| Data Analysis | Python/R, GraphPad Prism, Statistical Testing | 81% | Bioengineering strength; highlight. |
| Specialized Assays | ELISA, Flow Cytometry, Western Blot | 74% | Common in immunology & drug development. |
*Frequency data aggregated from recent searches on major job boards and society career pages.
FAQ 4: How should I structure the "Experience" section on my LinkedIn profile to appeal to both ATS and hiring managers?
- Answer: Use a hybrid approach. Start each bullet point with a strong action verb. Integrate keywords naturally, and quantify achievements. Follow the "Challenge-Action-Result" (CAR) framework.
- Example: "Optimized a microfluidic device (Action) to improve shear stress uniformity for endothelial cell studies (Challenge), resulting in a 35% increase in viable cell yield for downstream RNA-seq analysis (Quantified Result)."
FAQ 5: What specific keywords should I embed for a transition into cancer therapeutics research?
- Answer: Incorporate terms from the target field's ecosystem:
- Therapeutic Areas: Oncology, Immuno-oncology, Tumor Microenvironment, Metastasis.
- Model Systems: 3D Spheroid Culture, Patient-Derived Xenografts (PDX), Organoids.
- Key Assays: Cell Viability (MTT/CTGlow), Apoptosis Assay (Annexin V), Migration/Invasion Assay (Transwell).
- Core Concepts: Translational Research, Preclinical Development, Biomarker Validation.
Experimental Protocols for Skills Validation
To demonstrate relevant hands-on capability during your transition, proficiency in foundational assays is key.
Protocol 1: Cell Viability and Proliferation Assay (MTT Method)
- Objective: To quantify the metabolic activity of cells as a proxy for viability and proliferation, often used in drug screening.
- Materials: Cell line of interest, complete growth medium, 96-well tissue culture plate, test compound(s), MTT reagent (3-(4,5-dimethylthiazol-2-yl)-2,5-diphenyltetrazolium bromide), DMSO, plate reader.
- Methodology:
- Seed cells in a 96-well plate at an optimized density (e.g., 5,000 cells/well) and incubate overnight.
- Treat cells with a dilution series of the test compound. Include vehicle controls and blank wells (medium only).
- After incubation (e.g., 48-72h), add MTT solution to each well and incubate for 2-4 hours to allow formazan crystal formation.
- Carefully aspirate the medium and solubilize the crystals with DMSO.
- Measure the absorbance at 570 nm (reference ~690 nm) using a microplate reader.
- Calculate % viability relative to untreated controls.
Protocol 2: Western Blot for Protein Expression Analysis
- Objective: To detect specific proteins in a complex sample, assessing expression levels or post-translational modifications.
- Materials: Cell lysates, BCA assay kit, Laemmli buffer, electrophoresis system, PVDF/nitrocellulose membrane, blocking buffer, primary & HRP-conjugated secondary antibodies, chemiluminescent substrate, imaging system.
- Methodology:
- Prepare cell lysates in RIPA buffer with protease inhibitors. Quantify protein concentration using the BCA assay.
- Denature equal protein amounts in Laemmli buffer at 95°C for 5 minutes.
- Load samples and a molecular weight marker onto an SDS-PAGE gel. Electrophorese.
- Transfer proteins from the gel to a PVDF membrane using a wet or semi-dry transfer system.
- Block membrane in 5% non-fat milk/TBST for 1 hour.
- Incubate with primary antibody diluted in blocking buffer overnight at 4°C.
- Wash membrane and incubate with HRP-conjugated secondary antibody for 1 hour at room temperature.
- Develop using a chemiluminescent substrate and image.
The Scientist's Toolkit: Research Reagent Solutions
Table: Essential Materials for Featured Biomedical Research Assays
| Item | Function in Experiment | Example Brand/Type |
|---|---|---|
| MTT Reagent | Yellow tetrazolium salt reduced to purple formazan by metabolically active cells; indicates viability. | Sigma-Aldrich M2128, Cayman Chemical 20798 |
| RIPA Lysis Buffer | Cell lysis and extraction of total cellular proteins for downstream analysis (Western, ELISA). | Thermo Scientific 89900, Cell Signaling Technology #9806 |
| Protease Inhibitor Cocktail | Added to lysis buffer to prevent degradation of proteins during extraction. | Roche cOmplete, EDTA-free |
| HRP-Conjugated Secondary Antibody | Binds to primary antibody; Horseradish Peroxidase (HRP) enzyme produces light for detection. | Cell Signaling Technology anti-rabbit #7074 |
| Chemiluminescent Substrate | HRP substrate that produces sustained light upon reaction, captured by imaging. | Thermo Scientific SuperSignal West Pico PLUS |
| BCA Protein Assay Kit | Colorimetric method for quantifying total protein concentration in a lysate. | Thermo Scientific Pierce BCA |
Visualizations
Career Transition Strategy Pathway
MTT Viability Assay Workflow
Success Metrics and Career Outlook: Why the Shift to Biomedical Engineering Pays Off
For the researcher or drug development professional considering a transition from bioengineering to biomedical engineering research, understanding the salary landscape and the technical support needed for experimental work is crucial. This guide serves a dual purpose: providing a comparative salary benchmark and establishing a technical support center for common experimental issues encountered in both fields. The shift often involves moving from a broader engineering focus (bioengineering) to a more medically application-oriented one (biomedical engineering), which is reflected in both compensation and daily technical challenges.
Technical Support Center: Troubleshooting Guides & FAQs
FAQ 1: My cell viability assay (e.g., MTT) shows inconsistent absorbance readings between replicates. What could be the issue?
- Answer: Inconsistent readings are often due to uneven cell seeding or reagent distribution.
- Troubleshooting Guide:
- Check Seeding Protocol: Ensure cell suspension is mixed thoroughly before seeding. Use an automated cell counter for accuracy.
- Incubation Conditions: Verify the incubator is level, and CO₂/temperature is stable. Avoid placing plates near the edge or door.
- Reagent Addition: Use a multichannel pipette calibrated for viscous solutions like MTT. Add reagents slowly to avoid disturbing the cell monolayer.
- Solubilization Step: After adding the solubilization buffer (e.g., DMSO), place the plate on an orbital shaker for 15 minutes in the dark to ensure complete crystal dissolution before reading.
FAQ 2: I'm observing high background noise in my Western blot for a phosphorylated protein target (p-protein).
- Answer: High background typically indicates non-specific antibody binding or incomplete blocking.
- Troubleshooting Guide:
- Optimize Blocking: Use 5% BSA in TBST for phosphorylated proteins, as milk contains phospho-proteins that can cause interference.
- Antibody Dilution & Washing: Titrate your primary and secondary antibodies. Increase wash frequency and duration (e.g., 4 x 10 min with vigorous shaking).
- Membrane Handling: Ensure the membrane does not dry out at any step. Always keep it submerged in buffer or sealed with wrapping film during antibody incubation.
FAQ 3: My PCR for gene expression analysis from tissue samples yields no product or non-specific bands.
- Answer: This is commonly due to poor RNA quality, primer issues, or suboptimal reaction conditions.
- Troubleshooting Guide:
- RNA Integrity: Check RNA quality on a bioanalyzer or gel. A260/A280 ratio should be ~2.0. Always work in an RNase-free environment.
- Primer Design: Verify primer specificity using BLAST. Check for primer-dimer formation in no-template controls.
- Protocol Precision: Use a master mix to minimize pipetting error. Follow a standardized two-step protocol: Reverse Transcription (cDNA synthesis), followed by PCR amplification with optimized annealing temperatures (determined by gradient PCR).
Experimental Protocol: Gene Expression Analysis via qPCR
Methodology:
- RNA Extraction: Homogenize tissue sample in TRIzol reagent. Add chloroform, separate phases by centrifugation, and precipitate RNA from the aqueous phase with isopropanol. Wash with 75% ethanol.
- DNase Treatment: Treat purified RNA with DNase I to remove genomic DNA contamination.
- cDNA Synthesis: Use 1 µg of RNA, random hexamers, and a reverse transcriptase enzyme (e.g., SuperScript IV) in a 20 µL reaction. Incubate at 25°C for 10 min, 50°C for 30 min, 80°C for 10 min.
- qPCR Setup: Prepare reactions with SYBR Green master mix, forward and reverse primers (250 nM final concentration), and cDNA template (diluted 1:10). Run in triplicate.
- Cycling Conditions: 95°C for 3 min; 40 cycles of 95°C for 15 sec, 60°C for 30 sec; followed by a melt curve analysis.
- Data Analysis: Calculate relative gene expression using the 2^(-ΔΔCt) method, normalizing to a housekeeping gene (e.g., GAPDH).
The Scientist's Toolkit: Research Reagent Solutions
| Reagent/Material | Function in Experiment |
|---|---|
| TRIzol Reagent | A monophasic solution of phenol and guanidine isothiocyanate for the simultaneous disruption of cells and denaturation of proteins, enabling RNA isolation. |
| DNase I (RNase-free) | Enzyme that catalyzes the hydrolytic cleavage of phosphodiester bonds in DNA, eliminating genomic DNA contamination from RNA samples. |
| SuperScript IV Reverse Transcriptase | A genetically engineered enzyme with increased thermal stability and processivity for robust and reliable cDNA synthesis from RNA templates. |
| SYBR Green I Dye | A fluorescent dsDNA-binding dye used in qPCR to monitor amplicon accumulation in real-time. Emits fluorescence only when bound. |
| Phospho-Specific Primary Antibody | An antibody specifically raised to recognize an epitope containing a phosphorylated amino acid residue (e.g., phospho-serine), used in detecting post-translational modifications. |
| Polyvinylidene Difluoride (PVDF) Membrane | A porous membrane used in Western blotting to which proteins are transferred and immobilized for antibody probing. Requires pre-wetting in methanol. |
Visualizations
Diagram 1: qPCR Experimental Workflow
Diagram 2: Phospho-Protein Signaling Pathway
Table 1: Salary Comparison by Role (Annual, USD)
| Job Title | Bioengineering Median Salary | Biomedical Engineering Median Salary | Key Differentiating Responsibilities |
|---|---|---|---|
| Research Scientist | $92,000 | $96,500 | BE: Broader process development. BME: Focused on medical device/diagnostic research. |
| Senior Scientist | $118,000 | $122,000 | BE: Leads bioprocess or biomaterials projects. BME: Leads preclinical studies for FDA submissions. |
| Principal Scientist | $145,000 | $152,000 | BE: Strategic R&D in agri-bio or industrial enzymes. BME: Strategic R&D in therapeutic devices. |
| Process Development Engineer | $86,000 | $89,000 | BE: Scaling up fermentation/bioreactor systems. BME: Scaling up implant or sensor manufacturing. |
| Staff Engineer | $105,000 | $108,000 | BE: Core technology/platform development. BME: Design control & verification for medical hardware. |
Table 2: Salary Comparison by Industry Sector (Annual, USD)
| Sector | Bioengineering Median Salary | Biomedical Engineering Median Salary | Prevalence Notes |
|---|---|---|---|
| Pharmaceuticals & Medicine | $103,000 | $110,000 | BME roles are more prevalent in drug delivery & combinational product divisions. |
| Scientific R&D Services | $95,000 | $98,000 | Common entry-point for research roles in both fields. |
| Medical Equipment & Supplies | $89,000 | $102,000 | The core sector for BME, offering a salary premium for specialized device knowledge. |
| Agriculture & Industrial Bio | $88,000 | N/A | Primary sector for BE applications in biofuels, biomaterials, and genetic crops. |
| Academic/Government Research | $78,000 | $82,000 | Often lower base salary but includes grant funding and publication-focused work. |
Data sourced from U.S. Bureau of Labor Statistics (May 2023), Glassdoor (2024), and professional society surveys (BMES, AICHE). Salities represent national median base pay for experienced professionals (5-10 years).
Career Trajectory and Growth Potential in Academic, Industry, and Clinical Settings
Technical Support Center
FAQs & Troubleshooting for Researchers Transitioning from Bioengineering to Biomedical Research
FAQ 1: How do I adapt my bioengineering skills to design valid in vitro disease models for drug screening?
- Issue: Bioengineers are adept at building systems but may lack specific biological context for clinically relevant models.
- Solution: Your strength is in quantitative design and control. Frame the biological problem as a system requiring precise inputs (cell type, matrix, stimuli) and measurable outputs (gene expression, metabolite production, force). Collaborate with a cell biologist or pathologist to define the critical hallmarks of the disease state you are modeling. Start with a well-characterized cell line before moving to primary cells.
- Experimental Protocol: Establishing a 3D Cancer Spheroid Model for Drug Penetration Studies
- Cell Seeding: Use a low-adhesion, U-bottom 96-well plate. Seed HCT-116 colorectal cancer cells at 1,000-2,000 cells/well in 100 µL of complete growth medium.
- Spheroid Formation: Centrifuge the plate at 300 x g for 3 minutes to aggregate cells. Incubate at 37°C, 5% CO₂ for 72 hours.
- Treatment: On day 4, add 100 µL of medium containing your test compound at 2X the desired final concentration. Include a vehicle control (e.g., 0.1% DMSO).
- Viability Assay: After 96 hours of treatment, add 20 µL of CellTiter-Glo 3D Reagent per well. Shake on an orbital shaker for 5 minutes to induce lysis, then incubate for 25 minutes at room temperature. Measure luminescence.
- Analysis: Normalize luminescence of treated spheroids to vehicle controls. Calculate IC₅₀ values using nonlinear regression (log(inhibitor) vs. response) in software like GraphPad Prism.
FAQ 2: My engineered tissue construct lacks the native tissue's mechanical properties. What are key troubleshooting steps?
- Issue: Scaffold stiffness, polymer crosslinking, or cell-matrix interactions are not recapitulating the target tissue's biomechanics.
- Solution: Systematically isolate variables. First, mechanically test your acellular scaffold using a rheometer or tensile tester. Then, assess the contribution of cellular components and extracellular matrix (ECM) deposition over time.
- Experimental Protocol: Stepwise Troubleshooting of Construct Mechanical Failure
- Characterize Base Material: Perform uniaxial tensile testing on hydrated, acellular scaffolds (n=5). Record Young's Modulus, ultimate tensile strength, and strain at failure.
- Optimize Crosslinking: If stiffness is low, vary crosslinker concentration (e.g., genipin for collagen, glutaraldehyde for synthetic polymers) or UV exposure time. Repeat step 1.
- Assess Cellular Contribution: Seed constructs with cells (e.g., fibroblasts for soft tissue). Culture for 1, 2, and 3 weeks.
- Quantify ECM Deposition: At each time point, perform biochemical assays: hydroxyproline assay for collagen, sulfated glycosaminoglycan (sGAG) assay for proteoglycans.
- Correlate Structure-Function: Mechanically test the cell-laden constructs at the same time points. Correlate mechanical properties with ECM content data.
FAQ 3: I am getting high variability in my biomarker detection assay from engineered tissue samples. How can I improve reproducibility?
- Issue: Inconsistent cell seeding, sample lysis, or assay normalization leads to high coefficient of variation (%CV).
- Solution: Implement rigorous process controls and use a dual-normalization strategy common in biomedical research.
- Experimental Protocol: Standardized Protocol for Quantitative Protein Analysis from 3D Constructs
- Uniform Seeding: Use an automated cell counter and dispenser. Pre-wet scaffolds with medium before seeding.
- Controlled Lysis: At assay endpoint, wash constructs 2x in cold PBS. Lyse in 200 µL of RIPA buffer with protease inhibitors on ice for 30 minutes with gentle agitation. Homogenize using a handheld micro-tip homogenizer (10 sec bursts, 3 times, on ice).
- Dual Normalization: Centrifuge lysate at 12,000 x g for 10 minutes at 4°C.
- Normalization 1 (to total protein): Use a 10 µL aliquot of supernatant for a BCA or Bradford assay.
- Normalization 2 (to DNA content): Use a separate 10 µL aliquot for a fluorescent DNA quantification assay (e.g., Hoechst 33258 or PicoGreen).
- Target Assay: Perform your target ELISA or Western blot using an equal amount of total protein from each sample (e.g., 20 µg per lane). Report final biomarker concentration both per µg total protein and per ng DNA.
Data Presentation
Table 1: Comparison of Career Pathway Attributes (Typical Metrics)
| Attribute | Academic (University Lab) | Industry (Pharma/Biotech) | Clinical (Hospital/Medical Center) |
|---|---|---|---|
| Primary Driver | Knowledge, Publication | Product, Profit | Patient Care, Translation |
| Funding Source | Grants (NIH, NSF) | Corporate R&D Budget | Grants, Clinical Revenue |
| Key Output | Papers, Patents, Trainees | IP, Protocols, Products | Clinical Data, Protocols, Patents |
| Growth Timeline | Longer (5-7 yrs to tenure) | Defined (Fast-paced promotions) | Variable (Tied to clinical & research roles) |
| Avg. Salary Range (USD)* | $75,000 - $120,000 (Asst. Prof) | $95,000 - $150,000 (Sci II) | $90,000 - $140,000 (Research Sci) |
| Collaboration Style | Open, Publication-focused | Proprietary, Team-based | Interdisciplinary, Patient-focused |
Note: Salary data is approximate and varies by geography, experience, and organization size.
The Scientist's Toolkit: Research Reagent Solutions for 3D Tissue Modeling
| Reagent / Material | Function in Experiment |
|---|---|
| Low-Adhesion U-bottom Plates | Promotes cell aggregation into a single spheroid per well via forced floating. |
| Basement Membrane Extract (e.g., Matrigel) | Provides a biologically active 3D hydrogel scaffold rich in ECM proteins for cell culture. |
| RIPA Lysis Buffer | A robust buffer for efficient extraction of total protein from cells and soft 3D constructs. |
| CellTiter-Glo 3D | A luminescent ATP assay optimized for penetration and signal stability in 3D microtissues. |
| Recombinant Human Growth Factors (e.g., TGF-β1, FGF-2) | Precisely control cell differentiation and tissue maturation pathways in a defined medium. |
| Slow-Fading Antifade Mountant with DAPI | Preserves fluorescence and stains nuclei for high-resolution imaging of 3D structures. |
Visualizations
Title: Skill Translation from Bioengineering to Biomedical Research
Title: Simplified TGF-β/Smad Signaling Pathway in Fibrosis
Technical Support Center: Troubleshooting Common Translational Research Hurdles
This support center addresses frequent technical and methodological challenges encountered when translating bioengineering concepts into biomedical research prototypes, framed by the career transition from bioengineering to applied biomedical engineering research.
FAQs & Troubleshooting Guides
Q1: In my microfluidic organ-on-a-chip model, I'm observing high cell death rates in the perfusion channels. What are the primary causes and solutions? A: This is often related to shear stress or nutrient deficiency.
- Check Shear Stress: Calculate wall shear stress (τ) using: τ = (6μQ)/(w*h²), where μ=dynamic viscosity, Q=flow rate, w=channel width, h=channel height. For endothelial cells, physiological τ typically ranges from 1-20 dyn/cm².
- Troubleshooting Protocol:
- Reduce Flow Rate: Decrease Q by 50% and monitor for 24 hours.
- Validate Media Composition: Ensure complete culture medium (including serum/growth factors) is used for perfusion, not just basal buffer.
- Prime Channels: Confirm channels are fully primed with medium before seeding cells to avoid air bubble embolisms.
- Check Surface Coating: Verify appropriate extracellular matrix (e.g., fibronectin, collagen) coating is present under flow conditions.
Q2: My nanoparticle-based therapeutic shows excellent in vitro efficacy but fails in early murine models due to rapid clearance. How can I diagnose the issue? A: This points to potential opsonization and immune clearance.
- Diagnostic Experimental Protocol:
- Protein Corona Analysis: Isolate nanoparticles from plasma post-injection (via centrifugation) and analyze adsorbed proteins using SDS-PAGE and mass spectrometry.
- Pharmacokinetics (PK) Assay: Take serial blood samples post-IV injection. Process plasma, lyse particles, and quantify drug payload via HPLC. Fit data to a two-compartment model.
Table 1: Key Pharmacokinetic Parameters from Murine Study
| Parameter | In-Vitro Ideal | Initial In-Vivo Result | Target for Stealth Coating |
|---|---|---|---|
| Half-life (t₁/₂,β) | N/A | 0.8 hours | >6 hours |
| Area Under Curve (AUC) | N/A | 150 ng·h/mL | >1000 ng·h/mL |
| Clearance (CL) | N/A | 120 mL/h/kg | <20 mL/h/kg |
| Volume of Distribution (Vd) | N/A | 150 mL/kg | ~50 mL/kg |
- Solution: Implement surface PEGylation or use "self" markers like CD47 mimetics. Re-run PK assay post-modification.
Q3: The sensitivity of my electrochemical biosensor drops by >70% when moving from buffer to complex clinical serum samples. How do I restore performance? A: This is classic fouling and matrix interference.
- Systematic Troubleshooting Guide:
- Test Anti-fouling Layers: Compare sensor response in serum after applying different surface chemistries:
- Protocol: Immobilize a monolayer of (a) 11-mercaptoundecanoic acid + PEG, (b) Bovine Serum Albumin (BSA) block, (c) Zwitterionic polymer (e.g., carboxybetaine).
- Employ a Standard Addition Method: To quantify and correct for matrix effects.
- Protocol: Spike the serum sample with 3-4 known increments of the analyte. Plot the sensor response vs. spike concentration. The negative x-intercept of the linear fit represents the original analyte concentration in the sample.
- Test Anti-fouling Layers: Compare sensor response in serum after applying different surface chemistries:
Key Experimental Protocols
Protocol 1: Evaluating Targeted Drug Delivery Specificity In Vivo Objective: Quantify tumor vs. off-target organ accumulation of a ligand-conjugated therapeutic. Methodology:
- Labeling: Tag your therapeutic (e.g., nanoparticle, antibody) with a near-infrared (NIR) dye (e.g., Cy5.5) or radionuclide (e.g., ⁸⁹Zr for antibodies, ⁶⁴Cu for nanoparticles).
- Animal Model: Use mice with subcutaneous xenograft tumors.
- Administration: Inject labeled compound intravenously (n=5 per group).
- Imaging & Ex Vivo Analysis: At 24h and 48h post-injection:
- Perform live NIR/ PET/CT imaging.
- Euthanize animals, harvest tumor and major organs (liver, spleen, kidneys, lungs, heart).
- Weigh tissues and measure fluorescence/radioactivity using an IVIS scanner or gamma counter.
- Data Analysis: Calculate % Injected Dose per Gram of tissue (%ID/g).
Protocol 2: Optimizing CRISPR-Cas9 Ribonucleoprotein (RNP) Delivery for Gene Editing in Primary Cells Objective: Achieve high knockout efficiency with minimal cytotoxicity in hard-to-transfect primary cells (e.g., T cells, stem cells). Methodology:
- RNP Complex Formation:
- Combine 10 µg of purified Cas9 protein with 4 µg of synthetic sgRNA (targeting your gene of interest) in nuclease-free duplex buffer.
- Incubate at 25°C for 10 minutes.
- Electroporation Optimization (Using a 96-well Nucleofector system):
- Use 2x10⁵ cells per condition.
- Test 3 different manufacturer-recommended primary cell electroporation buffers.
- Test 3 voltage/pulse parameters (e.g., 1350V, 1 pulse; 1100V, 2 pulses).
- Transfer RNP complex + cells to cuvette, select program, and electroporate.
- Immediately add pre-warmed media.
- Analysis:
- Viability: Measure at 48h using flow cytometry with Annexin V/PI staining.
- Efficiency: Harvest cells at 72h. Isolate genomic DNA and assess editing via T7 Endonuclease I assay or next-generation sequencing (NGS).
The Scientist's Toolkit: Research Reagent Solutions
| Reagent / Material | Function in Translational Research |
|---|---|
| LIVE/DEAD Viability/Cytotoxicity Kit | Distinguishes live (calcein-AM, green) from dead (ethidium homodimer-1, red) cells in 3D cultures or on devices under flow. |
| Matrigel Basement Membrane Matrix | Provides a physiologically relevant, bioactive scaffold for 3D cell culture, tumor spheroid, and organoid models. |
| Amine-reactive PEGylation Kits (e.g., mPEG-NHS) | Adds polyethylene glycol (PEG) chains to proteins or nanoparticles to reduce immunogenicity and prolong circulation half-life. |
| Protease Inhibitor Cocktail Tablets | Essential for stabilizing protein samples (e.g., from lysed organ-chips) by inhibiting a broad spectrum of proteases. |
| MSD (Meso Scale Discovery) Multi-array Assays | Electrochemiluminescence-based immunoassays for sensitive, multiplexed quantification of cytokines/ biomarkers in small volume samples. |
| Click Chemistry Kits (e.g., DBCO-Azide) | For bioorthogonal conjugation of tracking labels (fluorophores, radionuclides) to therapeutics without disrupting biological function. |
Visualizations
Title: Career Transition Skills Application Map
Title: CRISPR RNP Delivery Workflow
Title: Two-Compartment Pharmacokinetic Model
Technical Support Center: Troubleshooting Impact Measurement Experiments
FAQs on Quantifying Research Impact
Q1: My publication's Altmetric Attention Score is high, but I see no correlation with downstream grant funding. What could be the issue? A: A high Altmetric score measures online attention (news, social media), which doesn't always align with peer-review priorities for grants. Ensure you are tracking the right metrics for your career stage and funders' strategic goals (e.g., translational potential, patient engagement). Use the NIH RePORTER or similar databases to analyze funded projects similar to yours.
Q2: When tracking a technology's path to a product launch, how do I establish a causal link between my foundational research and the final FDA approval? A: This is a complex attribution problem. Implement a contribution tracing protocol:
- Document the Chain: Use tools like PubMed, clinical trial registries (ClinicalTrials.gov), and patent databases (USPTO) to create a direct citation chain from your publication to later patents, pre-clinical studies, and eventual Investigational New Drug (IND) applications.
- Key Evidence: Look for explicit citations in regulatory documents (FDA Advisory Committee Briefings) or licensing agreements from your institution.
- Metric: Calculate the "translation latency" (time from publication to first clinical trial) as an intermediate outcome metric.
Q3: My patient-reported outcome (PRO) data from a clinical study is noisy and shows high variability. How can I improve signal detection? A: High variability in PROs is common. Follow this troubleshooting guide:
- Check Instrument Validity: Ensure the PRO measure (e.g., PROMIS, EQ-5D) is validated for your specific patient population and condition.
- Assess Data Collection: Was it collected electronically (ePRO) to minimize missing data? Consider implementing compliance alerts.
- Statistical Control: Use anchor-based methods (linking PRO change to a clinical measure) to define a meaningful change threshold. Apply mixed-effects models to account for repeated measures and patient-specific variability.
Q4: I am transitioning from device prototyping (bioengineering) to translational research. What are the key performance indicators (KPIs) I should track beyond citations? A: Your KPIs should shift from device specifications to pathway milestones. See the table below for a structured comparison.
Quantitative Data on Impact Pathways
Table 1: Comparative Impact Metrics Across Career Stages
| Career Stage / Focus | Traditional Metric | Translational/Development Metric | Typical Benchmark (Current) |
|---|---|---|---|
| Academic Research (Bioengineering) | Journal Impact Factor, Citation Count, h-index | Invention Disclosures, Patents Filed | ~4-6 patents filed per 100 publications in top unis* |
| Pre-Clinical Development | Number of animal studies | IND-Enabling Studies Completed, Licensing Deal Value | Avg. cost of IND-enabling studies: $1.5 - $4M (therapeutic dependent) |
| Clinical Phase | Clinical trial publications | Patient Recruitment Rate, PRO Improvement Score, Phase Transition Probability | Avg. Phase 3 patient recruitment: 30-40 patients/site/month |
| Regulatory & Launch | N/A | FDA Review Timeline (Standard vs. Priority), Time-to-Market, Market Share Year 1 | FDA Priority Review: 6 months; Standard: 10 months* |
| Source: Analysis of AUTM stats. Source: Bioindustry studies (2023-24).* Source: FDA performance reports. |
Experimental Protocols for Impact Measurement
Protocol 1: Mapping a Publication's Downstream Clinical Impact Objective: To quantitatively trace the influence of a foundational research paper on active clinical trials. Methodology:
- Seed Publication: Identify the DOI of your target publication.
- Citation Expansion: Use the NIH's iCite tool to generate a list of all articles citing the seed. Filter for articles with the publication type "Clinical Trial."
- Trial Linkage: For each clinical trial article, extract the NCT number (ClinicalTrials.gov identifier).
- Status Analysis: Query the ClinicalTrials.gov API for each NCT number to retrieve the trial's status (e.g., Completed, Recruiting), phases, and outcomes.
- Attribution Metric: Calculate the "Clinical Trial Attribution Ratio": (Number of active/completed trials citing the seed) / (Total citations of the seed).
Protocol 2: Calculating a Composite Translational Impact Score Objective: Create a single score that combines academic, commercial, and clinical impact for a technology or research portfolio. Methodology:
- Gather Data Points:
- Academic (A): Field-Weighted Citation Impact (FWCI) from SciVal/Scopus.
- Commercial (C): Number of patent families generated, scaled by IP5 jurisdiction coverage.
- Clinical (L): Number of patients enrolled in trials directly using the technology.
- Normalize: Scale each value (A, C, L) from 0-1 relative to a predefined benchmark in your sub-field (e.g., top 10% performance).
- Apply Weights: Assign weights based on strategic goals (e.g., for product launch: A=0.2, C=0.3, L=0.5). Weights must sum to 1.
- Calculate: Composite Score = (Anorm * Aweight) + (Cnorm * Cweight) + (Lnorm * Lweight). Score ranges from 0 (low) to 1 (high translational impact).
Visualizations: Impact Measurement Pathways
Title: Impact Measurement Pathway from Bench to Market
Title: Attribution Chain from Research to Regulatory Approval
The Scientist's Toolkit: Research Reagent Solutions for Translation
Table 2: Essential Tools for Tracking Translational Impact
| Item / Solution | Function in Impact Measurement | Example / Provider |
|---|---|---|
| Bibliometric Suites | Quantify academic reach and influence of publications. | Scopus, Web of Science, Dimensions, NIH iCite |
| Altmetric Aggregator | Track online attention across news, social media, policy. | Altmetric.com, PlumX |
| Patent Database | Trace intellectual property development and licensing. | USPTO, Espacenet, Google Patents |
| Clinical Trial Registry | Monitor downstream clinical research triggered by your work. | ClinicalTrials.gov, WHO ICTRP |
| Regulatory Document Archive | Link research to specific drug/device approval packages. | FDA Drugs@FDA, FDA Advisory Committee Materials |
| PRO Measurement Instruments | Capture patient-centric outcomes in clinical studies. | PROMIS, EQ-5D, Disease-specific PROs (e.g., HAQ-DI) |
| Market Analytics Database | Assess commercial impact post-launch (sales, market share). | IQVIA, Evaluate Pharma, Citeline |
Technical Support Center: Troubleshooting Guides & FAQs
This support center is designed for researchers and drug development professionals transitioning their careers into biomedical engineering research, specifically within AI-driven medicine, personalized therapeutics, and digital health. The guides address common technical and experimental issues.
FAQs: AI in Medicine & Computational Biology
Q1: My convolutional neural network (CNN) for medical image classification (e.g., tumor detection in histopathology slides) is overfitting despite using dropout layers. What are other specific regularization strategies for biomedical imaging data? A1: Overfitting in biomedical image analysis is common due to limited, imbalanced datasets. Implement these strategies:
- Spatial Dropout: Use
SpatialDropout2D(in frameworks like TensorFlow/Keras) instead of standard dropout. This drops entire feature maps, forcing the network to learn robust, distributed representations, which is effective for histology images where local correlations are high. - Heavy Data Augmentation: Go beyond simple flips and rotations. Use domain-specific augmentations: elastic deformations, simulated staining variations (via color jitter in HED color space), and adding realistic noise models.
- Transfer Learning & Fine-Tuning: Start with a model (e.g., ResNet, DenseNet) pre-trained on large natural image datasets (ImageNet). Freeze the early convolutional layers and only fine-tune the later layers on your medical dataset. This leverages general feature detectors while adapting to specific medical features.
- Test-Time Augmentation (TTA): Apply augmentations to validation/test images and average the predictions. This smooths the model's output and can improve generalizability metrics.
Q2: When using a random forest or gradient boosting model (like XGBoost) on multi-omics data (genomics, proteomics) for patient stratification, my feature importance analysis yields thousands of "important" genes. How can I refine this to a clinically actionable biomarker panel? A2: This is a high-dimensionality problem. Follow a stringent pipeline:
- Pre-filtering: Remove low-variance features (variance threshold < 0.01) and use univariate statistical tests (ANOVA, chi-squared) to select top-k features before model input.
- Iterative Feature Elimination: Use
Recursive Feature Elimination (RFE)with cross-validation, leveraging the model's intrinsicfeature_importances_attribute. RFE recursively removes the least important features and rebuilds the model. - Biological Pathway Enrichment: Take the top 100-200 features and run enrichment analysis (using tools like DAVID, g:Profiler, or Enrichr). Prioritize features that cluster in known disease-relevant pathways (e.g., apoptosis, immune response). This adds biological plausibility.
- Stability Selection: Use subsampling of both data and features. A feature is considered "stable" only if it is consistently selected across multiple iterations. This reduces noise.
Table 1: Comparison of Feature Selection Methods for Multi-Omics Data
| Method | Principle | Pros | Cons | Best For |
|---|---|---|---|---|
| Variance Threshold | Removes low-variance features. | Simple, fast. | May remove biologically relevant low-variance signals. | Initial data cleanup. |
| Recursive Feature Elimination (RFE) | Recursively removes weakest features. | Model-agnostic, effective. | Computationally expensive with many features. | Medium-dimensional data post-filtering. |
| LASSO Regression | Uses L1 penalty to shrink coefficients to zero. | Provides built-in selection, good for linear relationships. | Assumes linearity; may select one from correlated features. | Transcriptomic data, linear models. |
| Stability Selection | Uses subsampling to measure feature selection frequency. | Robust to noise, reduces false positives. | Very computationally intensive. | Final validation of biomarker panels. |
FAQs: Personalized Therapeutics & Wet-Lab Integration
Q3: I am establishing a patient-derived organoid (PDO) model for high-throughput drug screening. My viability assay (e.g., CellTiter-Glo) shows high variability between technical replicates. What are critical protocol steps to optimize? A3: Organoid screening variability stems from organoid size, shape, and handling. Standardize this protocol:
Protocol: Standardized PDO Preparation for 384-Well Drug Screening
- Harvesting & Dissociation: Culture PDOs in Matrigel domes. At harvest, use a gentle cell recovery solution (4°C, 30-45 min) to dissolve Matrigel. Mechanically dissociate into single cells/small clusters using wide-bore pipette tips.
- Size Filtering: Pass the cell suspension through a 40 µm cell strainer. This creates a more uniform starting population.
- Re-plating for Assay: In a 384-well ultra-low attachment spheroid plate, seed a defined number of cells (e.g., 500-1000 cells/well) in 50 µL of medium containing 2-5% reduced-growth factor Matrigel. This supports consistent re-aggregation into uniform micro-organoids over 48-72 hours.
- Drug Treatment: Using a liquid handler, pin-transfer 100 nL of compound from a source plate. Include DMSO controls on every plate.
- Viability Assay: At endpoint, equilibrate plates to room temperature for 30 min. Add an equal volume (50 µL) of CellTiter-Glo 3D reagent. Shake orbitally for 5 min, then incubate in the dark for 25 min before reading luminescence. Critical: Use plate sealers to prevent evaporation in edge wells.
Q4: When performing targeted NGS for pharmacogenomics (e.g., detecting CYP2D6 polymorphisms to predict drug metabolism), my amplicon-based library prep has low coverage in GC-rich exons, leading to allelic dropout. How do I troubleshoot? A4: This is often due to inefficient PCR amplification of challenging genomic regions.
Troubleshooting Steps:
- PCR Enzyme: Switch to a high-fidelity, GC-enhanced polymerase mix (e.g., Q5 High-Fidelity GC, KAPA HiFi HotStart ReadyMix with GC Buffer). These contain additives that melt secondary structures.
- Primer Design: Redesign primers using software that penalizes secondary structure formation at the 3' end. Avoid primers spanning known SNP sites. Consider increasing primer length (22-30 bp) for higher specificity in GC-rich regions.
- Thermocycling Conditions: Implement a touchdown PCR protocol or a slow ramp rate (e.g., 1°C/sec) during annealing/extension to improve primer binding. Add a DMSO final concentration of 3-5% to the PCR master mix to reduce secondary structure.
- Probe-Based Enrichment: For persistent issues, consider switching from amplicon-seq to a hybrid-capture target enrichment approach, which is less sensitive to local GC content.
The Scientist's Toolkit: Research Reagent Solutions
Table 2: Essential Reagents for AI-Integrated Biomedical Experiments
| Item (Supplier Example) | Function in Context | Application Notes |
|---|---|---|
| Cultrex Reduced Growth Factor Basement Membrane Extract (RGF BME) (Bio-Techne) | Provides a defined, consistent 3D extracellular matrix for organoid culture. | Critical for standardizing PDO screens for AI model training. Lower growth factor content reduces batch variability. |
| CellTiter-Glo 3D Cell Viability Assay (Promega) | Luminescent ATP quantitation optimized for 3D microtissues. | Provides the primary endpoint quantitative data for drug response models. Must use the "3D" formulation for organoid/spheroid lysis. |
| QIAseq Targeted DNA Panels (Qiagen) | Single-tube, amplicon-based NGS library prep with unique molecular indices (UMIs). | Enables high-sensitivity detection of low-frequency variants from liquid biopsies for minimal residual disease monitoring algorithms. |
| 10x Genomics Chromium Single Cell Immune Profiling | Captures paired V(D)J sequences, cell surface protein expression (Feature Barcode), and gene expression from single cells. | Generates multi-modal datasets for AI-driven discovery of predictive immune biomarkers for immunotherapy. |
| Codex Multiplex Protein Imaging Reagent Kit (Akoya Biosciences) | Enables cyclic immunofluorescence imaging of 40+ markers on a single tissue section. | Produces high-dimensional spatial proteomics data for training AI models on tumor microenvironment architecture. |
Experimental Workflow & Pathway Visualizations
Title: AI-Driven Personalized Drug Discovery Workflow
Title: AI-Predicted Resistance Pathway & Combo Therapy
Conclusion
Transitioning from bioengineering to biomedical engineering represents a strategic, impactful career move that aligns deep engineering principles with direct clinical and therapeutic applications. This journey requires a clear understanding of the distinct focal points, a methodical approach to translating and augmenting one's skill set, and proactive strategies to overcome common entry barriers. As validated by strong market demand, competitive compensation, and the profound satisfaction of contributing to patient-centered solutions, the shift is both viable and rewarding. For researchers and drug development professionals, this path offers a powerful conduit to see foundational work evolve into tangible medical innovations, positioning them at the forefront of the future of healthcare technology and treatment.