Power Management Strategies for Implantable Medical Devices: From Batteries to Self-Sustaining Systems
This article provides a comprehensive analysis of power management strategies for the next generation of implantable medical devices (IMDs).
Power Management Strategies for Implantable Medical Devices: From Batteries to Self-Sustaining Systems
Abstract
This article provides a comprehensive analysis of power management strategies for the next generation of implantable medical devices (IMDs). Targeting researchers, scientists, and drug development professionals, it explores the entire spectrum of power solutions, from the foundational principles of energy consumption and current battery technologies to advanced energy harvesting methodologies and wireless power transfer. The scope includes a detailed examination of the design considerations for longevity and safety, troubleshooting common power failure points, and a comparative validation of different power solutions against clinical and regulatory requirements. The goal is to serve as a foundational resource for developing high-efficiency, reliable, and battery-free portable medical devices that enable enduring precision healthcare.
The Critical Challenge: Understanding Energy Demands and Current Limitations in IMDs
The Evolution and Growing Power Needs of Implantable Device Technology
Power Source Troubleshooting Guide
Common Power Issues & Solutions
| Problem Symptom | Possible Cause | Recommended Solution |
|---|---|---|
| Rapid power drain in conventional devices | Battery capacity and longevity limitations [1] | Investigate alternative energy harvesting techniques like electromagnetic generation or biofuel cells [1]. |
| Inconsistent device performance | Fluctuating power output from energy harvester [1] | Characterize the energy source (e.g., tissue motion, thermal gradient) for consistent power budgeting; implement power conditioning circuits. |
| Device cannot be miniaturized further | Battery occupies >80% of device volume [2] [3] | Research and integrate miniature glucose fuel cells to leverage the body's natural energy sources [2] [3]. |
| Premature battery depletion | Inefficient power management algorithms | Review device pacing data and therapy delivery logs; optimize algorithms for lowest power consumption. |
| In-vivo fuel cell underperforms | Poor bio-integration or fouling of components [2] | Verify material biocompatibility and electrode catalysis efficiency through in-vitro testing before proceeding to in-vivo trials [2]. |
Experimental Protocol: Characterizing a Glucose Fuel Cell
Objective: To measure the electrical output of a glucose fuel cell in a simulated physiological environment.
Materials Needed:
- Glucose fuel cell prototype
- Phosphate-buffered saline (PBS) solution or simulated body fluid
- D-Glucose
- Potentiostat/Galvanostat
- Data acquisition system
- Temperature-controlled bath (maintained at 37°C)
Methodology:
- Solution Preparation: Prepare a glucose solution in PBS at a physiologically relevant concentration (e.g., 5 mM).
- System Setup: Immerse the glucose fuel cell anode and cathode in the solution within an electrochemically isolated cell. Place the cell in the temperature-controlled bath.
- Baseline Measurement: Connect the fuel cell to the potentiostat. Record the open-circuit voltage (OCV) for 1 hour to establish a baseline.
- Load Testing: Apply a series of electrical loads to the system and measure the resulting voltage and current. Calculate power output (P = I x V).
- Data Collection: Record metrics including steady-state voltage, current density (µA/cm²), and power density (µW/cm²) over a minimum 48-hour period to assess stability.
- Validation: The research goal is to demonstrate power generation stably exceeding 1µW to simulate powering a cardiac device [2].
Frequently Asked Questions for Researchers
Q1: What are the most promising alternatives to conventional batteries for implantable devices? Several alternative energy harvesting techniques are under active investigation. The table below summarizes their key characteristics and quantitative performance targets for comparison [1].
| Energy Harvesting Technique | Principle | Key Advantage | Target Power Scale |
|---|---|---|---|
| Electromagnetic Harvesting | Converts body movement/motion to electricity | Access to inexhaustible energy from bodily movements [1] | µW to mW scale (context-dependent) |
| Ultrasound Wireless Power Transfer | Uses ultrasonic waves for transcutaneous transfer | Enhanced penetration depth capabilities [1] | µW to mW scale (context-dependent) |
| Mechanical (Tissue/Heartbeat) | Harnesses kinetic energy from heartbeats/tissue motion | Utilizes perpetual intrinsic mechanical energy [1] | µW scale (context-dependent) |
| Thermoelectric Generators | Converts body thermal gradients to power | Leverages stable, always-present thermal differential [1] | µW scale (context-dependent) |
| Glucose Biofuel Cells | Electrochemical oxidation of bodily glucose | Utilizes ubiquitous biochemical fuel (glucose); enables miniaturization [1] [2] [3] | µW scale (e.g., >1µW for cardiac devices [2]) |
Q2: Our research involves human trials. What are the key regulatory classifications for implantable devices? Medical devices are classified based on risk. Implantable devices like pacemakers and neurostimulators are typically Class III. This classification requires the most stringent regulatory controls, including general controls, special controls, and premarket approval to ensure safety and effectiveness [4].
Q3: What is the fundamental difference between design verification and validation for an implantable device?
- Design Verification: Answers "Did we design the device correctly?" It is an internal process confirming that design outputs meet the specified design input requirements (e.g., "The device must output 3V").
- Design Validation: Answers "Did we design the right device?" It proves that the device meets the user needs and intended uses in the actual or simulated use environment, often involving clinical evaluation [4].
Q4: How can we effectively visualize complex device data for clinical researchers? Engage in participatory design (PD) sessions with end-users. In one study, researchers and clinicians prioritized key data for a main dashboard, including average percent pacing with alerts for abnormal values, battery life, and recorded events. This ensures the visualization is tailored to their specific workflow and cognitive needs [5].
The Scientist's Toolkit: Research Reagent Solutions
| Item | Function in Research |
|---|---|
| Glucose Fuel Cell Prototype | Core component that converts chemical energy from glucose into electrical energy [2] [3]. |
| Potentiostat/Galvanostat | Essential instrument for applying controlled electrical loads and precisely measuring the voltage and current output of fuel cells or energy harvesters. |
| Simulated Body Fluid | A solution that mimics the ionic composition of human blood plasma, used for in-vitro testing of biocompatibility and device performance. |
| Biocompatible Encapsulation | Materials used to hermetically seal the electronic components, protecting them from the body's corrosive environment and protecting the body from the device. |
| Data Acquisition System | Hardware and software for logging long-term performance data (voltage, current, temperature) from the implanted or tested device. |
Experimental Workflow & System Diagrams
Glucose-Powered Implantable Device Workflow
Research Protocol for Glucose Fuel Cell Characterization
FAQs: Energy Consumption in Implantable Medical Devices
What are the primary factors that determine the energy consumption of an implantable medical device?
The energy consumption of an implantable medical device is influenced by its functionality, operational modes, and the complexity of its tasks [6]. Key factors include the device's size, its expected lifespan, and the patient's activity level [6]. Devices that perform sophisticated monitoring and control, or those with wireless communication capabilities for data transmission and remote monitoring, have higher energy demands [7]. The operational mode—whether in active high-consumption states or low-power standby modes—also significantly impacts power requirements [6].
How do power requirements differ between diagnostic, therapeutic, and closed-loop implantable systems?
Power requirements scale with system complexity. Simple diagnostic sensors that monitor a single parameter (e.g., temperature or pressure) typically have the lowest energy consumption, often operating in the microwatt range [7]. Therapeutic devices, such as pacemakers or neurostimulators, which deliver electrical pulses, require more power, generally in the milliwatt range [8] [7]. Closed-loop systems, which combine continuous sensing with on-demand therapy (like an artificial pancreas), have the most variable and often the highest energy demands because they integrate the constant power draw of sensors with the periodic high-power needs of actuators [7].
What are the typical voltage and current requirements for a common pacemaker PCB?
Pacemaker printed circuit boards (PCBs) typically operate within a narrow voltage range, often between 2.5V to 3.3V [9]. Current consumption varies with activity. During a pacing pulse, the circuit may generate pulses with specific widths (e.g., 0.5ms to 1.5ms) and amplitudes ranging from 2V to 5V [9]. Monitoring these values with an oscilloscope is a standard part of troubleshooting, as deviations can indicate power supply or component issues [9].
What is the expected lifespan of a typical battery in an Implantable Cardioverter-Defibrillator (ICD)?
The battery in an ICD typically lasts for five years or more [10]. The actual lifespan is highly dependent on the device's therapy delivery; an ICD that delivers a large number of high-energy shocks will deplete its battery sooner than one that rarely provides therapy [10]. Battery voltage is checked routinely during clinical follow-ups, and replacement is planned well before the battery is fully depleted [10].
Troubleshooting Guide: Common Experimental Power Issues
Problem: Unexpected Voltage Drop or Device Reset
- Step 1 - Visual Inspection: Examine the PCB or prototype under magnification. Look for cracked solder joints, burnt components, or signs of corrosion, which can indicate moisture ingress [9].
- Step 2 - Power Supply Test: Use a multimeter to measure the voltage output from the battery and any voltage regulators. Ensure it is within the required range (e.g., 2.5V to 3.3V). Check for excessive ripple voltage (e.g., above 50mV) on the power rail using an oscilloscope, as this can indicate capacitor failure [9].
- Step 3 - Component Test: Perform a component failure analysis. Test resistors, capacitors, and diodes with a multimeter. A capacitor measuring significantly below its rated value (e.g., a 10μF capacitor reading below 8μF) indicates degradation and should be replaced [9].
Problem: Signal Integrity Issues and Noise
- Step 1 - Signal Monitoring: Use an oscilloscope to monitor key signals, such as pacing pulses or sensing inputs from the implant. Compare the observed pulse width, amplitude, and shape to expected values [9].
- Step 2 - EMI Isolation: If malfunction occurs in specific environments, Electromagnetic Interference (EMI) may be the cause. Test the device in a controlled setting like a Faraday cage. If issues persist, inspect shielding components and filters on the PCB for damage [9].
- Step 3 - Impedance Check: Use precision measurement tools to check for subtle variations in impedance, as small changes (e.g., from 50Ω to 75Ω) can disrupt sensitive pacing or sensing signals [9].
Experimental Protocols for Power Profiling
Protocol for Measuring In-Vitro Device Consumption
Objective: To accurately characterize the power consumption profile of an implantable device prototype across its various operational modes.
Materials:
- Device Under Test (DUT)
- Precision programmable DC power supply
- Digital storage oscilloscope with current probe
- Data logging software
- Environmental chamber (for temperature cycling)
Methodology:
- Setup: Connect the DC power supply to the DUT's power input. Place a current probe in series with the power supply lead and connect it to the oscilloscope.
- Baseline Measurement: Place the DUT in its lowest-power sleep or standby mode. Record the baseline current consumption (
I_standby). - Active Mode Profiling: Activate each primary function of the DUT independently (e.g., sensing, data processing, wireless transmission, therapy delivery). Record the current draw and duration for each activity.
- Cycle Calculation: Calculate the average current consumption (
I_avg) over a complete operational cycle using the formula:I_avg = (Sum of (Current_n * Time_n)) / Total Cycle Time. - Environmental Stress Testing: Subject the DUT to temperature cycling (e.g., -20°C to 60°C) and high humidity (up to 95% RH) within the environmental chamber while monitoring for power anomalies or performance degradation [9].
Protocol for Characterizing Energy Harvester Output
Objective: To evaluate the performance and efficiency of an energy harvesting unit (e.g., TEG, piezoelectric) under simulated physiological conditions.
Materials:
- Energy harvesting unit
- Programmable load bank
- Source meter unit (SMU)
- Vibration shaker or thermal plate (to simulate body motion or heat)
Methodology:
- Open-Circuit Voltage (
V_oc): Under a defined stimulus (e.g., specific temperature gradient or vibration frequency), measure the voltage across the harvester's terminals with no connected load. - Short-Circuit Current (
I_sc): Under the same stimulus, measure the current flowing from the harvester when its terminals are shorted. - Power Curve Generation: Sweep the load resistance (
R_load) across a wide range (e.g., from 10Ω to 10MΩ) using the load bank. For eachR_load, measure the output voltage (V_out) and current (I_out). Calculate output power (P_out) asP_out = V_out * I_out. - Maximum Power Point (MPP): Plot
P_outversusR_load. The peak of this curve indicates the MPP, which is the optimal operating point for the harvester (R_opt = V_MPP / I_MPP).
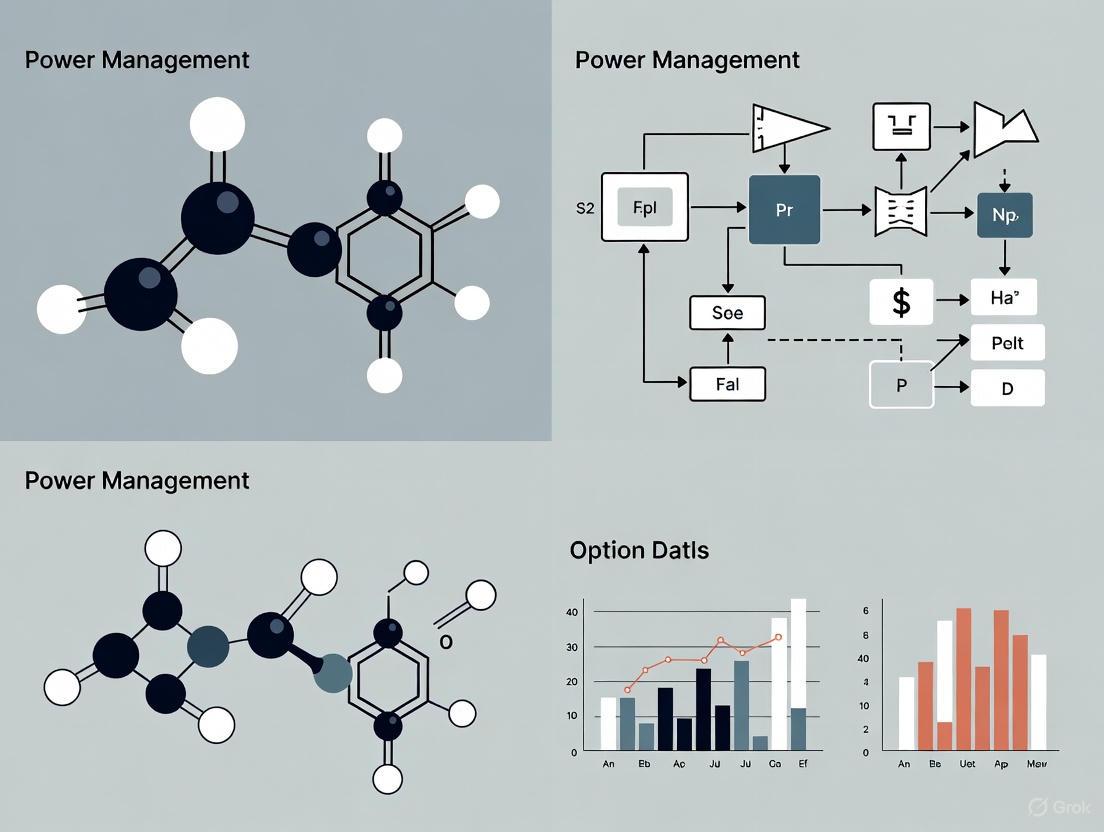
Visualization of Power Management Strategies
The following diagram illustrates the core strategies for powering implantable medical devices, highlighting the relationships between energy sources, management, and device applications.
Quantitative Data on Energy Consumption
The table below summarizes the typical power requirements for various types of implantable medical devices, demonstrating the range from microwatts to milliwatts.
Table 1: Typical Power Consumption of Implantable Medical Devices
| Device Type | Power Range | Voltage Range | Primary Application | Key Power Influencing Factors |
|---|---|---|---|---|
| Diagnostic Sensors (e.g., pressure, temperature monitors) [7] | Microwatts (µW) | Low voltage (e.g., 1.8 - 3.3V) | Monitoring physiological signals | Sensing frequency, data processing, and duty cycle. |
| Pacemakers [9] [10] | Milliwatts (mW) | 2.5 - 3.3V (typical for PCB) | Cardiac rhythm management | Pacing pulse amplitude/width, rate, and percentage of time pacing. |
| Neurostimulators (e.g., Deep Brain Stimulation) [7] | Milliwatts (mW) | Not Specified | Neurological disorder treatment | Stimulation amplitude, frequency, pulse width, and electrode impedance. |
| Implantable Cardioverter Defibrillators (ICDs) [10] | Milliwatts (mW) | Battery-specific | Sudden cardiac death prevention | Background monitoring power; major consumption during high-energy shocks. |
| Closed-Loop Systems (e.g., artificial pancreas) [7] | Microwatts to Milliwatts (µW - mW) | Not Specified | Combined diagnosis & therapy | Continuous sensor power + periodic high-power actuator use (pump/stimulator). |
The Scientist's Toolkit: Research Reagent Solutions
Table 2: Essential Materials for Implantable Device Power Research
| Item / Reagent | Function in Research |
|---|---|
| Lithium-based Batteries (Li/I2, Li/SVO) [8] | Serve as the benchmark power source for long-term, active implants due to high volumetric energy density and reliability. |
| Thermoelectric Generators (TEGs) [1] [8] | Harvest energy from the body's thermal gradients to power low-energy devices, generating hundreds of microwatts from a ΔT of 8°C. |
| Piezoelectric Materials [8] | Convert kinetic energy from body motion (e.g., breathing, heartbeats) into electrical energy for harvesting applications. |
| Biofuel Cells [1] [8] | Generate electric power (milliwatt level) from renewable body fuels like glucose and oxygen under mild physiological conditions. |
| Medical-Grade Encapsulation (e.g., silicone, parylene) [9] [6] | Provides a hermetic or stable barrier to protect sensitive electronics and power sources from the corrosive in-vivo environment. |
For researchers in bioelectronic medicine, power management is a pivotal challenge that directly influences the design, functionality, and clinical viability of implantable medical devices (IMDs). The power source is often the most voluminous component of an IMD, and its limitations can constrain device longevity, miniaturization, and therapeutic potential [1] [2]. Effective power management requires a deep understanding of the interconnected triad of device functionality, physical size, and anatomical location. This technical support article provides a structured guide to navigating these factors, offering experimental protocols and troubleshooting advice to advance your research in next-generation IMDs.
FAQ: Fundamental Power Management Questions
1. What are the primary power source options for implantable devices, and how do I choose? The choice of power source is a fundamental decision that dictates the device's operational lifespan and design constraints. The landscape is divided between conventional batteries and emerging energy harvesting technologies.
- Batteries: Traditional batteries are a reliable power source but present a significant trade-off between energy capacity and device size. In many current implants, batteries can account for over 80% of the device's volume and weight [2]. Their finite lifespan necessitates invasive replacement surgeries, which carry risks of infection and patient discomfort [11].
- Energy Harvesting: These technologies aim to create self-sustaining devices by converting energy from the body or external sources.
- Glucose Biofuel Cells: These generate electricity by oxidizing glucose, a sugar naturally present in bodily fluids. The UK's GLUTRONICS project is developing such cells that operate at the microwatt (µW) scale, mimicking how organs extract energy [2].
- Wireless Power Transfer (WPT): This method uses external transmitters to send power to an implanted receiver without physical connections.
- Mid-field WPT: Systems operating at frequencies like 1.5 GHz can efficiently transfer power to millimeter-sized implants at distances of several centimeters. Recent systems have achieved a power transfer efficiency (PTE) of 0.56% at 51 mm [12].
- Inductive Coupling: A common near-field technique effective for short ranges but highly sensitive to coil misalignment [11].
- Other Modalities: Research also explores harnessing energy from tissue motion, heartbeats, and body thermal gradients using thermoelectric generators (TEGs) [1].
Table 1: Comparison of Implantable Device Power Sources
| Power Source | Typical Power Output / Efficiency | Key Advantages | Key Limitations & Research Challenges |
|---|---|---|---|
| Conventional Batteries | Varies by size | High reliability, proven technology | Limited lifespan, bulky, requires replacement surgery [2] |
| Glucose Biofuel Cells | µW scale [2] | Uses abundant bodily fuel, enables miniaturization | Low power output, long-term stability in biological environment [1] [2] |
| Mid-field WPT | ~0.56% PTE at 51 mm [12] | Powers deep-tissue implants, good misalignment tolerance | Low overall efficiency, safety (SAR) considerations [12] |
| Inductive Coupling | Up to 92.6% PTE (short range) [11] | High efficiency for short distances | Highly sensitive to misalignment, limited range [11] |
| Thermal Energy (TEGs) | Research stage | Access to inexhaustible heat gradient | Very low power density, requires significant thermal gradient [1] |
2. How does device functionality directly impact power needs? The device's job determines its energy budget. It is crucial to distinguish between the power requirements for sensing, data processing, and therapeutic action.
- Sensing vs. Stimulation: Passive diagnostic devices that only sense physiological signals (e.g., implantable cardiac monitors) generally have lower power demands than active therapeutic devices that deliver stimulation (e.g., pacemakers, deep brain stimulators). For instance, stimulating nerves or muscles requires significantly more power than monitoring them [13] [14].
- Active vs. Passive Implants: The "active implantable" segment, which includes devices like defibrillators and infusion pumps, is experiencing rapid growth due to their complex, power-intensive functions [13].
- Device Intelligence: Integrating intelligent features like closed-loop feedback systems, where the device senses a physiological signal and adjusts stimulation in real-time, increases computational load and power consumption. However, it also enables more precise and efficient therapy [15] [14].
3. What is the relationship between device size, location, and power sourcing? Size and location are critically linked and directly influence the choice of power source.
- The Miniaturization Drive: The trend is toward smaller, less invasive implants. However, smaller device size means less space for a battery, which forces a trade-off between device lifetime and volume [2]. This push for miniaturization is a key driver for adopting energy harvesting and WPT.
- Anatomical Location: The implant environment dictates available energy sources and safety constraints.
- Depth: Devices implanted deep within the body (e.g., for deep brain stimulation) are difficult to power via near-field WPT, making mid-field or biofuel cells more viable options [12] [11].
- Local Environment: A device near a major blood vessel has access to a rich glucose supply for a biofuel cell [2]. An implant near the skin's surface can use a thermoelectric generator if a sufficient thermal gradient exists [1].
- Dynamic Movement: Implants in joints or the heart require flexible, stretchable, and mechanically robust power solutions to maintain function [14].
Table 2: Power Source Suitability by Device Location and Function
| Implant Location | Example Devices | Suitable Power Sources | Rationale & Considerations |
|---|---|---|---|
| Deep Brain | Deep Brain Stimulators | Mid-field WPT [12], Biodegradable batteries | Depth challenges near-field WPT; minimizes replacement surgeries. |
| Heart | Pacemakers, ICDs | Inductive Coupling, Glucose Biofuel Cells [2] | High-reliability needs; constant motion and access to blood. |
| Subcutaneous | Glucose Monitors, Neurostimulators | Thermoelectric Generators (TEGs) [1], Near-field WPT | Proximity to skin allows for thermal gradient and easier WPT. |
| Spinal Cord | Spinal Cord Stimulators | Flexible & Stretchable WPT [11] | Must withstand biomechanical stress and flexion. |
| Peripheral Nerves | Vagus Nerve Stimulators | Glucose Biofuel Cells, Miniaturized WPT | Often target for closed-loop bioelectronic therapies [15]. |
Troubleshooting Common Experimental Challenges
Challenge 1: Rapid Power Drain in a Miniaturized Prototype
- Problem: Your small-scale implantable device exhausts its power much faster than modeled.
- Investigation Protocol:
- Profile Power Modes: Use a precision source measurement unit (SMU) to characterize the current draw of each functional block (microcontroller, sensor, stimulator) in active, sleep, and idle modes. The actual power consumption often exceeds theoretical estimates.
- Analyze Duty Cycling: A primary source of excess drain is inefficient duty cycling (how often the device switches on/off). Use an oscilloscope to measure the actual on/off timings of your control signals. Optimize firmware to maximize the time spent in the deepest sleep mode possible.
- Check for DC-DC Converter Efficiency: If you are using a voltage regulator or DC-DC converter, measure its input and output power at your typical load. A poorly chosen converter can have low efficiency (e.g., <80%), wasting a significant portion of your energy [16].
- Solution: Redesign the firmware for aggressive duty cycling, select a DC-DC converter with >90% efficiency at your expected load, and power down unused peripherals on the chip.
Challenge 2: Inconsistent Performance of a Wireless Power Transfer (WPT) Link
- Problem: The power received by your implantable rectenna fluctuates dramatically with small changes in position or environment.
- Investigation Protocol:
- Characterize the Channel: Systematically measure the S21 parameter (transmission coefficient) between your external transmitter and implanted receiver using a vector network analyzer (VNA). Create a map of efficiency vs. distance and lateral/angular misalignment.
- Validate Biocompatible Encapsulation: The dielectric properties of your encapsulation material (e.g., Parylene C, medical-grade silicone) significantly affect antenna performance. Re-measure your antenna's return loss (S11) and tuning frequency after it is fully encapsulated, as these parameters will shift [12].
- Test in a Tissue-Emulating Phantom: Performance in air is not representative. Conduct WPT experiments in a phantom gel that mimics the dielectric properties (permittivity, conductivity) of the target tissue (e.g., skin, muscle, fat) at your operating frequency [12].
- Solution: Design the antenna to be matched while encapsulated and immersed in a tissue-equivalent medium. For alignment-sensitive systems like inductive coupling, consider using a metasurface between the Tx and Rx to enhance coupling and misalignment tolerance [11].
Challenge 3: Unstable Output from an Implantable Glucose Fuel Cell
- Problem: The power output of your biofuel cell decays unpredictably during in-vitro or in-vivo testing.
- Investigation Protocol:
- Monitor Electrode Biofouling: A primary cause of failure is the non-specific adsorption of proteins and cells onto the electrode surface, blocking catalytic sites. Use microscopy (e.g., SEM) to inspect electrode surfaces after explantation.
- Characterize Electrolyte Environment: Fluctuations in local glucose and oxygen concentrations in the physiological environment will directly cause power output variations. In a controlled in-vitro setup, systematically vary these concentrations to create a performance baseline.
- Check Catalyst Stability: Analyze the electrode's electrocatalytic activity before and after long-term testing using cyclic voltammetry to detect catalyst degradation or poisoning.
- Solution: Investigate antifouling coatings (e.g., hydrogels, zwitterionic polymers) for the electrode. Focus on electrode chemistry and nanostructuring to improve catalyst durability and tolerance to concentration fluctuations [2].
The Scientist's Toolkit: Key Research Reagents & Materials
Table 3: Essential Materials for Implantable Power Device Research
| Material / Component | Function in Research | Critical Considerations |
|---|---|---|
| Flexible Polyimide Substrate | Base material for fabricating flexible antennas and electronics [12]. | Biocompatibility, moderate dielectric constant (εr ~4.3), mechanical flexibility, and stability in hydrated environments [12]. |
| Parylene C | A common conformal coating for encapsulating and insulating implanted electronics. | Excellent biocompatibility, moisture barrier properties, and ability to form pinhole-free, thin films via chemical vapor deposition (CVD). |
| Platinum-Iridium Electrodes | Electrocatalysts for glucose biofuel cells and stimulation electrodes [2]. | High catalytic activity, corrosion resistance, and biostability. Critical for long-term functionality in oxidative environments. |
| Liquid Metal (e.g., Galinstan) | Filler material for stretchable conductors and antennas. | Maintains electrical conductivity under large strain, enabling robust connections in soft, stretchable devices [14]. |
| Tissue-Emulating Phantom Gel | A simulant for human tissue (skin, muscle, fat) for in-vitro testing of WPT and antennas. | Must replicate the dielectric properties of real tissue at the operating frequency (e.g., 1.5 GHz) for valid pre-clinical data [12]. |
| Biocompatible Hydrogels | Used as interfaces between hard electronics and soft tissue, and in biofuel cells. | Mimics the modulus of natural tissue, reduces inflammatory response, and can allow for metabolite transport (e.g., glucose) [14]. |
Experimental Protocol: Validating a Mid-Field WPT System
This protocol outlines the key steps for characterizing a midfield wireless power transfer system designed to power a small implant, based on established methodologies [12].
Objective: To measure the Power Transfer Efficiency (PTE) and validate the operational capability of a WPT system using a flexible transmitter and a miniaturized, rectifier-integrated implantable receiver.
Materials & Equipment:
- Flexible Tx antenna and implantable Rx antenna (rectenna), designed for 1.5 GHz.
- Vector Network Analyzer (VNA)
- Tissue-emulating phantom gel (formulated for 1.5 GHz)
- Power meter and spectrum analyzer
- RF signal generator
- IoT-based sensor module (e.g., BLE temperature sensor) as a dummy load.
Procedure:
- S-Parameter Characterization:
- Connect the Tx and Rx antennas to the VNA ports.
- Immerse the Rx antenna in the phantom gel at the target implantation depth (e.g., 51 mm).
- Place the flexible Tx antenna conformally on the surface of the phantom.
- Measure the transmission coefficient (S21) in dB. Calculate the PTE as: PTE (%) = 10^((S21 (dB))/10) * 100.
Rectifier Efficiency Measurement:
- Power the Rx rectenna circuit using an RF signal generator.
- Sweep the input power (e.g., from -20 dBm to +5 dBm) and measure the resulting DC output voltage and current across a known load resistor.
- Calculate the RF-to-DC conversion efficiency (ηRF-DC) using the formula: ηRF-DC = (PDC / PRF) * 100, where PDC = VDC * I_DC.
System Integration & Functional Test:
- Use the Tx antenna driven by a signal generator to wirelessly power the implanted rectenna system within the phantom.
- Connect the rectenna's DC output to a power management unit (PMU) and then to a low-power IoT sensor module.
- Verify that the sensor module powers on and successfully transmits data (e.g., temperature readings via Bluetooth Low Energy), demonstrating the system's ability to support a functional device.
Safety Validation:
- Perform Specific Absorption Rate (SAR) simulations or measurements to ensure the EM exposure levels in the tissue phantom remain within regulatory safety limits (e.g., < 1.6 W/kg averaged over 1g of tissue).
The workflow for this experimental protocol is summarized in the following diagram:
Frequently Asked Questions (FAQs) for Researchers
FAQ 1: What are the primary limitations of using conventional batteries in implantable medical devices?
Conventional batteries, primarily lithium-based, present three core limitations that create a fundamental bottleneck for the advancement of implantable medical devices (IMDs):
- Size and Energy Density: The battery often constitutes over 80% of the volume and weight of an entire implantable device [2]. This severely restricts device miniaturization, despite the availability of extremely small commercial batteries (e.g., some measuring 0.299 inches in length) [17].
- Longevity and Reliability: Finite battery lifespan necessitates replacement surgeries, posing risks of surgical complications, infections, and patient trauma [12]. While lifespans range from 5-25 years depending on the device (e.g., implantable cardioverter-defibrillators average 10.8 years), this remains a limiting factor for long-term chronic disease management [17].
- Biocompatibility and Safety: Batteries must be hermetically sealed to prevent electrolyte leakage, which is toxic to bodily tissues [18]. The materials used must not trigger adverse immune responses, and the entire power system must operate reliably and safely for years inside the human body [17] [19].
FAQ 2: What emerging battery chemistries and power solutions are showing promise for IMDs?
Research is progressing on multiple fronts to overcome the limitations of conventional batteries. Key emerging solutions include:
- Biodegradable Batteries: These transient batteries, such as those based on magnesium (Mg) or zinc (Zn) alloys (e.g., Mg-Fe cells, Zn-Cu cells), dissolve after their operational life, eliminating the need for surgical removal [18]. However, challenges remain in controlling their lifespan and improving their relatively poor electrochemical performance [18].
- Energy Harvesting Systems: These systems aim to power devices by scavenging energy from the human body itself. Promising techniques include:
- Glucose Biofuel Cells: These generate electricity by oxidizing naturally occurring glucose in bodily fluids, mimicking how organs extract energy [2]. Projects like GLUTRONICS are developing these for ultra-low-power implants [2].
- Wireless Power Transfer (WPT): This involves transmitting energy through tissues using electromagnetic fields, either in the near-field or midfield ranges (e.g., at 1.5 GHz) [12]. This can be used for continuous power or to recharge implanted batteries non-invasively.
- Mechanical and Thermal Harvesters: These convert energy from tissue motion, heartbeats, or the body's natural thermal gradients into electricity [1].
- Advanced Primary (Non-rechargeable) Batteries: Innovations in primary battery chemistry are also underway. For example, researchers are developing new catholyte materials (combining cathode and electrolyte functions) that could increase the energy density of primary batteries by up to 50%, significantly extending the life of devices like pacemakers without increasing their size [20].
FAQ 3: What are the key experimental considerations when testing new power sources for implantable applications?
When evaluating new power sources in a research setting, a multi-faceted experimental protocol is essential.
- 1. In Vitro Characterization: Begin with benchtop testing to establish baseline electrochemical performance (energy density, cycle life, discharge rates) and material stability in simulated physiological fluids (e.g., phosphate-buffered saline at 37°C) [18] [2].
- 2. Biocompatibility Assessment: Following standards like ISO 10993, test for cytotoxicity, sensitization, and irritation using established cell cultures to ensure material safety before any in vivo studies [17] [19].
- 3. In Vivo Validation: Progress to animal models to validate performance in a real physiological environment. This includes monitoring for immune response (e.g., dendritic cell maturation, T-cell activity, macrophage polarization) and ensuring stable power delivery under realistic load conditions [17] [2].
- 4. Power Management Integration: Integrate the power source with a full system, including sensors, processing units, and communication modules (e.g., MICS-band radios). Characterize the entire system's power budget and efficiency using dynamic power adjustment and duty cycling to minimize energy waste [21] [12].
Experimental Protocol: Evaluating a Novel Glucose Fuel Cell
Aim: To characterize the performance and biocompatibility of a miniature glucose fuel cell for powering an implantable sensor.
Methodology:
- Cell Fabrication: Fabricate the fuel cell using biocompatible electrocatalysts (e.g., nanoporous gold) and a flexible polyamide substrate to allow for conformal integration [2] [12].
- In Vitro Testing:
- Immerse the cell in a solution of glucose in PBS (concentration mimicking interstitial fluid) at 37°C.
- Connect to a potentiostat and perform chronoamperometry and cyclic voltammetry to measure open-circuit voltage, current density, and power density.
- Test longevity by continuously operating the cell under a simulated load (e.g., 1-10 µW) for several weeks [2].
- Biocompatibility Screening:
- Functional Demonstration:
- Integrate the fuel cell with a low-power temperature sensor and a Bluetooth Low Energy (BLE) communication module.
- Measure the system's ability to perform continuous sensing and wireless data transmission using the harvested energy [12].
Troubleshooting Guide for Common Research Challenges
| Challenge | Possible Cause | Solution Approach |
|---|---|---|
| Low Output Voltage/Current | Inefficient electrocatalysts, suboptimal ion transport in electrolyte, high internal resistance. | Experiment with high-surface-area catalysts (e.g., nanoporous gold [17]), optimize hydrogel electrolyte composition [18], and ensure low-resistance current collectors. |
| Rapid Performance Degradation | Catalyst fouling (e.g., by proteins), dissolution of electrode materials, unstable electrolyte pH. | Apply protective, selectively permeable membranes (e.g., Nafion), use more corrosion-resistant alloys (e.g., Mg- or Zn-based [18] [17]), and implement buffer systems in the electrolyte. |
| Significant Immune Response In Vivo | Leaching of toxic ions, surface properties that promote protein adsorption and inflammation. | Select highly biocompatible or biodegradable materials (gelatin/polycaprolactone composites [17], zinc [18]), and ensure a complete, hermetic seal for non-degradable components [18]. |
| Difficulty with Device Integration | Mismatch between rigid battery and soft tissue, excessive heat generation from power management circuits. | Pursue flexible/bendable power source designs [12], use low-power mixed-signal ASICs for efficient power management, and incorporate thermal shutdown separators [17] [21]. |
The Scientist's Toolkit: Key Research Reagents & Materials
| Item | Function in Research | Key Considerations |
|---|---|---|
| Mg-based & Zn-based Alloys | Anode/Cathode materials for biodegradable batteries (e.g., Mg-Fe, Zn-MnO2 cells) [18]. | Biodegradation rate, hydrogen gas evolution, and biocompatibility of dissolution products must be characterized. |
| Conductive Polymers (CPs) | Cathode materials for biocompatible batteries (e.g., zinc-air cells) and flexible electronics [18]. | Offer flexibility and biocompatibility; research focuses on improving their conductivity and stability in physiological conditions. |
| Hydrogel Electrolytes | Serve as the ion-conducting medium in flexible batteries; can be tailored for biocompatibility and degradability [18] [17]. | Ionic conductivity, mechanical strength, and swelling behavior in physiological fluids are critical performance parameters. |
| Fluorinated Catholyte | A novel electrolyte material that is electrochemically active, replacing "dead weight" in primary batteries to boost energy density by up to 50% [20]. | Voltage must align with the anode material (e.g., CFx) for maximum energy extraction; safety and shelf-life are key. |
| Nanoporous Gold | A catalytic cathode material with high surface area and excellent biocompatibility for devices like glucose fuel cells [17]. | High catalytic activity for glucose oxidation and oxygen reduction; fabrication process and long-term stability under load are important. |
| Flexible Polyamide Substrate | A base material for constructing flexible and conformal antennas for Wireless Power Transfer (WPT) and other implantable electronics [12]. | Biocompatibility, moderate dielectric constant, and mechanical durability for withstanding flexing in vivo. |
Workflow and System Diagrams
Diagram 1: Material Selection for Implantable Batteries
Diagram 2: Wireless Power Transfer System for IMDs
Implantable Medical Devices (IMDs) have revolutionized the treatment of chronic diseases and in vivo physiological monitoring. A critical challenge for these devices is ensuring a permanent and sufficient power supply for continuous operation. The power system of an IMD is typically composed of three key elements: the energy source, the energy storage unit, and the Power Management Unit (PMU) that regulates and distributes the power. The inaccessibility of implants, biocompatibility requirements, and the need for long-term operation create unique constraints for IMD power systems. This technical resource center provides researchers with troubleshooting guides and experimental protocols for developing robust power solutions for next-generation medical devices [8] [1].
IMD power approaches are broadly categorized into two groups: independent systems with integrated energy storage (like batteries), and batteryless systems that are powered continuously from an external source [8].
The table below summarizes the primary energy sources and storage technologies used in IMDs.
Table 1: Quantitative Comparison of Energy Sources and Storage for IMDs
| Technology | Power Output Range | Key Advantages | Primary Limitations | Suitable IMD Examples |
|---|---|---|---|---|
| Lithium-Iodine (Li/I2) Battery [8] | Microamperes (µA) | High reliability & safety; Energy density up to 210 W·h/kg; Easy to monitor remaining charge. | Cardiac pacemakers | |
| Lithium/SVO Battery [8] | Amperes (A) (in pulses) | High capacity (>300 W·h/kg); High electronic conductivity. | Implantable Cardioverter Defibrillators (ICDs) | |
| Bio-Fuel Cells [8] [1] | Milliwatt (mW) level | Utilizes abundant glucose/O2 in blood; Biocompatible operation. | Low power density; Limited longevity. | Pacemakers, Drug Delivery Systems |
| Thermoelectric Generators (TEGs) [8] [1] | Hundreds of Microwatts (µW) | Exploits stable body heat; Continuous power generation. | Low power output. | Low-power sensors |
| Piezoelectric Generators [8] | Milliwatt (mW) level | High power output from body motion. | Requires massive motion; Not suitable for all implant sites. | Devices near lungs/diaphragm |
| Inductive Coupling [8] | Milliwatt to Watt (mW - W) | High, continuous power delivery; Well-established technology. | Limited penetration depth; Antenna alignment critical. | High-power devices, rechargeable systems |
| Ultrasound Wireless Power Transfer (US-WPT) [8] [1] | Efficient; Immune to electromagnetic interference. | Deep implants |
Experimental Protocol: Testing Bio-Fuel Cell Performance in Simulated Physiological Conditions
Objective: To evaluate the power generation, stability, and longevity of an enzyme-based glucose bio-fuel cell under conditions mimicking the human body.
Materials:
- Research Reagent Solutions:
- Glucose Solution: Primary fuel source for the cell.
- Phosphate Buffered Saline (PBS), pH 7.4: Maintains physiological pH and ionic strength.
- Enzyme Catalysts (e.g., Glucose Oxidase for anode): Biocatalysts that oxidize glucose to generate electrons.
- Electrolyte: Conducts ions within the cell.
- Potentiostat/Galvanostat: Instrument for applying a load and measuring voltage/current output.
Methodology:
- Cell Assembly: Construct the bio-fuel cell with anode and cathode chambers separated by a membrane. Immobilize the enzyme catalysts on the electrodes.
- Environment Setup: Place the cell in a temperature-controlled chamber set to 37°C. Continuously circulate the glucose-containing PBS solution to simulate blood flow.
- Polarization Curve: Use the potentiostat to perform a linear sweep voltammetry (LSV) measurement. Sweep the cell voltage from open-circuit condition to short-circuit while measuring the current. This determines the cell's current-voltage (I-V) characteristic curve.
- Power Density Calculation: Calculate power density from the I-V data (Power = Voltage × Current, normalized by electrode area or cell volume). Plot the power density curve to identify the maximum power point.
- Longevity Test: Connect the cell to a constant load resistor corresponding to its maximum power point. Continuously monitor the voltage and current output over days or weeks to assess performance decay.
Troubleshooting FAQ:
- Q: The bio-fuel cell's power output is significantly lower than expected. What could be the cause?
- A: This is a common issue. First, verify the activity and immobilization of the enzymes; they may have denatured during fabrication or operation. Second, check for mass transport limitations—ensure the glucose concentration and flow rate are sufficient. Finally, inspect for high internal resistance within the cell, which can be caused by poor ion conductivity in the electrolyte or high electron transfer resistance at the electrodes.
The Power Management Unit (PMU): From Grids to Implants
While the term "PMU" in high-voltage electrical engineering refers to a "Phasor Measurement Unit" for monitoring grid stability [22], in the context of integrated circuits and IMDs, a Power Management Unit (PMU) is a critical system-on-a-chip component. Its function is to manage the power flow from the source to the storage and other device components, ensuring stable and efficient operation.
The core functions of a PMU in an IMD include:
- Voltage Regulation: Converting the variable voltage from harvesters or batteries to a stable level required by sensitive sensors and microprocessors.
- Battery Charging/Protection: For rechargeable systems, it controls the charging cycle (trickle, constant current, constant voltage) and protects against overcharging and deep discharge.
- Maximum Power Point Tracking (MPPT): Dynamically adjusting the electrical load to ensure energy harvesters (like TEGs or piezoelectrics) are always operating at their point of maximum power output.
- Power Multiplexing: Seamlessly switching the device's power source between the energy harvester and the backup battery based on availability.
- Low-Power Management: Implementing sleep modes and dynamic power scaling to minimize energy consumption during idle periods.
The diagram below illustrates the logical architecture and power flow within a typical self-sustaining IMD power system.
Diagram 1: IMD Power System Architecture
Experimental Protocol: Characterizing PMU Efficiency
Objective: To measure the power conversion efficiency of a PMU under different load conditions, which is critical for maximizing IMD operational life.
Materials:
- Research Reagent Solutions:
- Programmable DC Power Supply: Simulates a energy harvester or battery.
- Electronic Load: To draw controlled current from the PMU.
- Digital Multimeters (x2): For precise voltage and current measurement at input and output.
- Oscilloscope: To monitor voltage ripple and transient response.
Methodology:
- Setup: Connect the DC power supply to the input of the PMU. Connect the electronic load to the regulated output of the PMU. Place one multimeter in series with the input to measure input current (Iin), and another in series with the output to measure output current (Iout). Monitor input voltage (Vin) and output voltage (Vout) with the multimeters or the oscilloscope.
- Efficiency Sweep: Set the PMU's input voltage to a typical operating point (e.g., 3.0V). Program the electronic load to sweep the output current from a low (e.g., 10 µA) to a high value (e.g., 10 mA) in logarithmic steps, covering the IMD's expected sleep and active modes.
- Data Collection: At each load step, record the precise values of Vin, Iin, Vout, and Iout.
- Calculation: Calculate efficiency (η) at each point using the formula: η = (Pout / Pin) × 100% = ( (Vout × Iout) / (Vin × Iin) ) × 100%.
- Analysis: Plot efficiency versus output current. This curve reveals the PMU's quiescent current overhead at low loads and its peak efficiency point, which is vital for system design.
Troubleshooting FAQ:
- Q: The overall system efficiency is poor, especially at very low load currents. What is the primary culprit?
- A: The most likely cause is the quiescent current (IQ) of the PMU itself. This is the current the PMU consumes to operate its internal circuitry. If IQ is a significant fraction of the total input current, efficiency plummets. Select a PMU specifically designed for ultra-low-power applications with an IQ in the nanoampere range.
- Q: The regulated output voltage becomes unstable when a high-current stimulator is activated. How can this be mitigated?
- A: This is a transient response issue. The PMU cannot react quickly enough to the sudden current demand. To troubleshoot, ensure the use of low-ESR (Equivalent Series Resistance) decoupling capacitors at both the input and output of the PMU, as close to the pins as possible. These capacitors act as local energy reservoirs to supply instantaneous current.
System Integration and The Researcher's Toolkit
Integrating the energy source, storage, and PMU into a cohesive, reliable, and biocompatible system is the final challenge. The following workflow outlines the decision process for selecting a power system architecture based on the IMD's power requirements and location.
Diagram 2: Power System Selection Workflow
The Scientist's Toolkit: Essential Research Reagents and Materials
Table 2: Key Research Reagents and Materials for IMD Power System Development
| Item / Reagent | Function / Application in Research |
|---|---|
| Potentiostat/Galvanostat | Essential for electrochemical characterization of bio-fuel cells and battery cells (e.g., cycling tests, impedance spectroscopy). |
| Programmable Electronic Load | Used to simulate the dynamic power consumption profile of an IMD, enabling battery life and PMU efficiency testing. |
| Phosphate Buffered Saline (PBS) | Standard solution for simulating the ionic and pH environment of the human body during in-vitro testing. |
| Flexible/Stretchable Substrate Materials | Polymers like Polyimide or PDMS used as a base for building flexible energy harvesters (TEGs, piezoelectric) and electronics. |
| Biocompatible Encapsulation | Materials (e.g., Parylene-C, medical-grade silicone) used to protect electronic components from the harsh bio-environment and prevent toxicity. |
| Simulation Software (e.g., COMSOL, SPICE) | For modeling and optimizing systems before fabrication (e.g., thermal gradients for TEGs, magnetic fields for inductive coupling). |
| Enzyme Catalysts (e.g., Glucose Oxidase) | Key biocatalysts for constructing bioanodes in glucose bio-fuel cells. |
Powering the Future: A Deep Dive into Battery Tech, Energy Harvesting, and Wireless Transfer
Troubleshooting Guides
Troubleshooting Lithium-ion Batteries for Implantable Devices
Q: Observed rapid capacity fade in a custom-designed lithium-ion cell for a pacemaker. What could be the cause? A: Rapid capacity fade in small-format Li-ion cells can stem from several issues:
- Lithium Plating: Occurring at high charge rates or low temperatures, metallic lithium deposits on the anode, consuming active lithium ions and leading to capacity loss. This can also pose a safety risk [23].
- Electrode Degradation: Repeated lithium insertion and extraction can cause mechanical stress (e.g., particle cracking) in the anode material, destroying the stable Solid Electrolyte Interphase (SEI) and leading to its continuous reformation, which consumes lithium ions [23].
- Electrolyte Breakdown: Operating at voltages outside the stable window of the electrolyte can cause its decomposition, leading to gas formation and increased impedance [23].
- Solution: Implement a formation cycling protocol with a low initial charge current. Characterize the electrode materials post-mortem using techniques like scanning electron microscopy (SEM) to inspect for cracks and energy-dispersive X-ray spectroscopy (EDS) to analyze surface composition changes [24].
Q: The battery in a prototype implantable drug pump exhibits voltage fluctuations during operation. How should I diagnose this? A: Voltage instability often points to interfacial or connection problems.
- Diagnostic Protocol:
- Check Internal Impedance: Use electrochemical impedance spectroscopy (EIS) to detect a rise in internal resistance, which can indicate poor interfacial stability or a failing connection [24].
- Micro-short Circuits: Inspect the separator for metallic lithium dendrite penetration, a common cause of internal short circuits and self-discharge [25] [23]. Analysis of the separator post-testing is crucial.
- Contact Integrity: Verify the integrity of all internal welds and tabs, as high resistance in these connections can cause significant voltage drops under load [26].
Troubleshooting Solid-State Batteries for IMD Research
Q: My solid-state pouch cell shows exceptionally high interface resistance. What are the primary mitigation strategies? A: High interfacial resistance is a central challenge in solid-state batteries due to poor solid-solid contact.
- Strategies:
- Apply Isostatic Pressure: Use a press or jig to maintain consistent stack pressure on the cell, which improves contact between the solid electrolyte and electrode particles [26].
- Engineer Composite Electrodes: Create electrodes by mixing active material particles with the solid electrolyte and conductive carbon. This creates a continuous ion-conduction network and reduces interfacial resistance [26].
- Interface Modification: Introduce an ultra-thin functional coating (e.g., lithium boron oxynitride) between the electrode and solid electrolyte to enhance compatibility and stabilize the interface [26].
Q: Cracks are forming in the solid electrolyte layer during cell cycling. What is the cause and remedy? A: Crack formation is a known technical challenge that increases resistance and reduces performance.
- Cause: The cracks can be initiated by mechanical stress from volume changes in the electrodes during cycling or due to the inherent brittleness of certain inorganic solid electrolytes (e.g., oxides) [27] [28].
- Remedy:
- Material Selection: Transition to more flexible polymer-solid electrolyte composites or sulfide-based electrolytes, which are less brittle [27] [28].
- Operational Control: Implement cycling protocols that use lower currents to minimize stress.
- Microstructure Engineering: Develop finer-grained, more homogeneous electrolyte microstructures that can better distribute mechanical stress [26].
Troubleshooting Li/I2 and Li/SVO Chemistries
Q: An implantable neurostimulator using a Li/I2 battery shows a gradual increase in internal resistance over its shelf life. Is this normal? A: Yes, a gradual increase in resistance is characteristic of Li/I2 chemistry. The battery operates by forming a lithium iodide (LiI) layer between the lithium anode and the iodine-containing cathode. This LiI layer is the electrolyte itself. As the battery discharges, this layer thickens, leading to a predictable and steady increase in internal resistance and a corresponding decrease in voltage. This behavior is well-understood and allows for a very reliable and predictable battery lifespan, which is why it has been a cornerstone for long-life cardiac pacemakers for decades.
Q: During a high-power pulse discharge test for a Li/SVO battery, the delivered capacity is lower than specified. Why? A: This is likely due to voltage delay.
- Mechanism: Under high-current pulses, the voltage of a Li/SVO cell can temporarily sag. This phenomenon, called voltage delay, occurs because a passivating layer forms on the lithium anode. When a high-current pulse is demanded, this layer causes a temporary voltage drop until it is broken down, which can result in insufficient power delivery at the beginning of the pulse.
- Solution: For applications requiring frequent high-power pulses, a periodic, small "conditioning" pulse can be applied to maintain the lithium surface in an active state and minimize the passivation layer's effect. Device electronics can be designed to account for this known characteristic.
Frequently Asked Questions (FAQs)
Q: From a power management perspective, what are the key trade-offs when selecting a battery chemistry for an implantable medical device? A: The selection involves balancing several critical factors specific to the device's clinical application:
- Energy Density vs. Power Density: Li/I2 and Li/SVO offer high energy density for long life but moderate power. Lithium-ion offers a good balance. Solid-state promises high energy and power.
- Longevity vs. Self-discharge: Li/I2 has an extremely low self-discharge rate, which is key for its multi-decade lifespan. Lithium-ion has a higher self-discharge rate.
- Safety & Reliability vs. Performance: Li/I2 and Li/SVO are exceptionally reliable and safe but operate at lower voltages. Lithium-ion offers higher voltage and energy but requires more complex protection circuits. Solid-state batteries potentiall offer enhanced safety by using non-flammable solid electrolytes [27] [28].
- Biocompatibility: The battery casing must be hermetically sealed (e.g., with titanium) to prevent any leakage of materials into the body, making the internal chemistry safe for implantation [17].
Q: Why is miniaturization a primary challenge for batteries in implantable devices? A: Miniaturization is crucial because the battery often dictates the overall size of the implantable device [17]. Engineers must design power sources that fit inside extremely compact spaces without sacrificing energy density or reliability. The smallest commercially available batteries for medical devices measure only a few millimeters in dimension [17]. As devices get smaller, providing sufficient power and lifespan from a tiny power source becomes a significant engineering challenge, impacting the device's usability and application, especially in pediatric cases [17].
Q: Are solid-state batteries currently a viable option for commercial implantable medical devices? A: As of late 2024 and early 2025, solid-state batteries are not yet widely used in commercial implantable medical devices but are a major focus of research and development [26] [27]. They show tremendous promise due to their potential for higher energy density and enhanced safety from non-flammable solid electrolytes [27] [28]. However, technical challenges such as achieving stable interfaces between solid components, high manufacturing costs, and scalability need to be overcome before they can be reliably deployed in long-life implants [26] [27]. They are considered a future successor technology.
Q: What does "biocompatibility" mean in the context of an implanted battery, and how is it achieved? A: For an implanted battery, biocompatibility ensures that the device does not trigger an adverse immune response or cause harm to surrounding tissues, even in the event of a hermetic seal failure [17]. This is achieved through:
- Hermetic Sealing: Using inert and robust casing materials like titanium to completely isolate the battery internals from the body [17].
- Material Selection: Ensuring that all internal and external materials are non-toxic and non-corrosive. Research is also ongoing into biodegradable materials like zinc and magnesium-based alloys for temporary implants [17].
Quantitative Data Comparison
Table 1: Comparison of Key Parameters for Advanced Battery Chemistries in Implantable Medical Devices
| Parameter | Lithium-Ion (LiFePO4) | Lithium/Iodine (Li/I2) | Lithium/Silver Vanadium Oxide (Li/SVO) | Solid-State (Future Projection) |
|---|---|---|---|---|
| Nominal Voltage | 3.2 V [17] | 2.8 V | 3.2 V (or multi-step ~3.2/2.9 V) | 3.2-3.7 V [17] [27] |
| Energy Density | 90-160 Wh/kg [17] | Very High (for low power) | High | 200-400 Wh/kg (Potential) [17] [27] |
| Power Capability | Moderate to High | Very Low | Very High (pulse) | High (Potential) [27] |
| Typical Lifespan | 5-10+ years | >10 years (for pacemakers) | 5-10 years | Projected to be long [27] |
| Self-Discharge | Low | Extremely Low | Low | Expected to be very low |
| Key Safety Features | Stable chemistry, requires protection circuit. Risk of thermal runaway if damaged [29]. | Very safe, solid-state reaction. | Very safe, solid-state reaction. | Non-flammable electrolyte, potentially much safer [27] [28]. |
| Primary IMD Use Cases | Drug pumps, neurostimulators, some ICDs | Long-life, low-power pacemakers | Implantable Cardioverter Defibrillators (ICDs) | Next-generation all types of IMDs |
Experimental Protocols & Workflows
Protocol 1: Formation Cycling for Custom Lithium-ion Cells
Objective: To stabilize the electrode-electrolyte interface (form the SEI) in a new Li-ion cell.
- Assembly: Assemble the coin or pouch cell in an argon-filled glove box.
- First Charge (Constant Current, Constant Voltage - CCCV): Apply a low constant current (e.g., C/20 rate) until the cell voltage reaches the upper limit (e.g., 3.6V for LiFePO4). Hold at this voltage until the current drops to C/100.
- Rest: Allow the cell to rest for 60 minutes.
- First Discharge (Constant Current - CC): Discharge the cell at the same C/20 rate to the lower voltage cut-off (e.g., 2.0V).
- Cycle Repeat: Repeat steps 2-4 for 2-3 full cycles.
- Characterization: Perform EIS before and after formation cycling to measure the reduction in interfacial resistance.
Protocol 2: Pulse Testing for High-Power Cells (e.g., Li/SVO)
Objective: To characterize the voltage delay and power delivery capability of a cell under simulated implantable cardioverter defibrillator (ICD) loads.
- Setup: Place the cell in a temperature chamber set to 37°C. Connect to a potentiostat or battery tester.
- Background Load: Apply a continuous, low background current (e.g., 20 µA) to simulate the device's monitoring circuit.
- Pulse Train: Every 30 days, apply a series of high-current pulses (e.g., 2-3A for 10-20 ms) every 2 seconds for 10 pulses.
- Data Acquisition: Record the cell voltage at a high sampling rate throughout the pulse train, noting the minimum voltage at the start of each pulse.
- Analysis: Measure the magnitude of the voltage delay (the initial voltage sag) and observe its change over the simulated months of testing.
Visualizations
Diagram 1: Solid-State Battery Interface Challenge
Diagram 2: IMD Battery Selection Workflow
The Scientist's Toolkit: Research Reagent Solutions
Table 2: Essential Materials for Advanced Battery Research
| Material / Reagent | Function | Example Use Case |
|---|---|---|
| Poly(ethylene oxide) (PEO) | Polymer matrix for solid polymer electrolytes. Facilitates lithium ion transport when complexed with lithium salts. | Research on flexible solid-state battery prototypes [28]. |
| LLZO (Li₇La₃Zr₂O₁₂) | Oxide-based inorganic solid electrolyte. High ionic conductivity and stability against lithium metal. | Developing solid-state cells with lithium metal anodes for high energy density [28]. |
| Lithium Bis(trifluoromethanesulfonyl)imide (LiTFSI) | Lithium salt for electrolytes. High solubility and stability in polymer and some solid electrolyte systems. | Formulating solid polymer electrolytes with improved ionic conductivity [28]. |
| Silicon Nanowires | High-capacity anode material. Offers much greater capacity than graphite but suffers from volume expansion. | Research into next-generation anodes for higher energy density Li-ion and solid-state cells [28]. |
| NMC (LiNiMnCoO₂) | High-energy cathode material. Provides a balance of high capacity and voltage. | Fabricating high-performance cathodes for lithium-ion cells [17] [26]. |
| LiFePO₄ | Cathode material known for safety and long cycle life. Stable olivine structure. | Designing very safe and durable lithium-ion cells for implantable applications [17] [27]. |
Technical Support Center: Troubleshooting & FAQs
This technical support center provides practical guidance for researchers developing energy harvesters for implantable medical devices. The following troubleshooting guides and FAQs address common experimental challenges, framed within the broader thesis of advanced power management strategies.
Troubleshooting Guides
Glucose Biofuel Cell (G-BFC) Experimental Issues
Table 1: Troubleshooting Glucose Biofuel Cells
| Problem | Potential Cause | Suggested Solution |
|---|---|---|
| Low or decaying power output | Enzyme (GOx, BOD) denaturation or instability [30] [31] | Optimize immobilization matrix (e.g., PEGDG, CNT). Test different cross-linking agents [30]. |
| Inconsistent voltage/current | Fluctuating glucose or oxygen concentration in test medium [31] | Use a controlled flow-cell system or buffer with well-regulated analyte levels to mimic physiological stability. |
| Poor electron transfer | Inefficient electron mediator or direct electron transfer pathway [30] | Experiment with mediators like PQQ or TTF-TCNQ, or use nanostructured electrodes (e.g., CNT, CF) to enhance direct transfer [30]. |
| Biofouling or immune response | Lack of biocompatible coating on implantable component [30] [2] | Apply a biocompatible layer (e.g., PDA-MPC, PLGA, SEBS) and validate in increasingly complex media (PBS -> serum -> in vivo) [30]. |
Biomechanical Energy Harvester Experimental Issues
Table 2: Troubleshooting Biomechanical Energy Harvesters
| Problem | Potential Cause | Suggested Solution |
|---|---|---|
| Low power generation from motion | Mismatch between harvester resonance frequency and body motion frequency [32] [33] | Characterize the frequency spectrum of the target body motion (e.g., walking, breathing) and tune harvester mechanics accordingly. |
| Inconsistent power output in vivo | Variable user activity levels and harvester positioning [32] [34] | Design for a wide bandwidth of motion. Secure the device firmly to minimize movement artifacts relative to the energy source (e.g., muscle, joint). |
| Device failure in physiological environment | Material degradation or corrosion from bodily fluids [32] | Use hermetically sealed packaging and biocompatible, corrosion-resistant materials (e.g., PDMS, Parylene-C) for encapsulation. |
| High metabolic cost to user | Harvester imposes excessive mechanical load [34] | Focus on harvesting energy during negative work phases (e.g., braking during knee extension) to partially replace muscle action and lower COH [34]. |
General Implantable Device Power Management Issues
Table 3: General Power Management Troubleshooting
| Problem | Potential Cause | Suggested Solution |
|---|---|---|
| Rapid discharge of storage element | High quiescent current in power management IC or leakage in storage capacitor [33] | Characterize power management unit (PMU) load profile. Select ultra-low-power components and high-quality, low-leakage storage capacitors. |
| In-vivo validation failing prematurely | Inadequate harvester-storage-load coupling or unanticipated bio-interface issues [2] | Conduct extensive in-vitro testing simulating real-world conditions (e.g., variable nutrient levels, mechanical stress) before proceeding to in-vivo trials. |
Frequently Asked Questions (FAQs)
Q1: What are the typical power output ranges I can expect from different harvester types in a physiological environment?
- Glucose Biofuel Cells: Typically produce power in the microwatt (µW) to milliwatt (mW) range, sufficient for ultra-low-power implants like sensors and micro-pacemakers [2] [31].
- Biomechanical Harvesters: Output is highly motion-dependent. Harvesting from the knee can generate milliwatts (mW) of power, while more subtle sources like respiration yield less [32] [33].
- Thermoelectric Generators (TEGs): Exploit the body-skin temperature gradient. Outputs are generally on the order of microwatts (µW) per square centimeter [33].
Q2: How do I quantitatively evaluate the efficiency of a biomechanical energy harvester from a user-centric perspective? Use the Cost of Harvesting (COH) metric. It is defined as the change in the user's metabolic power (measured via oxygen consumption) divided by the electrical power output of the device: COH = ΔMetabolic Power / Electrical Power Output [34]. A lower COH indicates a more efficient harvester that places less burden on the user. For example, a harvester with a COH of 5 is less efficient than one with a COH of 0.7 [34].
Q3: My implantable glucose fuel cell works well in buffer solution but fails in serum. What should I investigate? This is a classic biofouling and biocompatibility challenge. Your focus should be on:
- Biocompatible Encapsulation: Develop a membrane that is permeable to glucose and oxygen but blocks larger proteins and lipids that cause fouling. Investigate materials like polymers (PLGA, PDMS) or hydrogels [30] [2].
- Enzyme Stability: Ensure your enzymes are securely immobilized and protected from denaturation by reactive species in the complex serum environment [31].
Q4: When is it more beneficial to use an energy harvester instead of a battery for a wearable device? A mathematical model exists to guide this decision, which considers the total metabolic energy required to carry the batteries versus the metabolic cost of using the harvester [34]. Key parameters include:
- Device mass and its location on the body.
- Electrical power requirement.
- Cost of Harvesting (COH).
- Total usage/walking time.
- Specific energy of the battery. As a rule of thumb, for current technology, harvesters become beneficial over batteries only after very long use periods (e.g., ~100 hours of walking for a knee harvester) [34].
Q5: What are the key material considerations for the long-term stability of implantable harvesters?
- Biocompatibility: Materials must be non-toxic, non-carcinogenic, and not provoke an immune response. Common choices include platinum, iridium oxide, PEDOT:PSS, PDMS, and PLGA [30] [33].
- Biostability: Materials must resist degradation (e.g., corrosion, hydrolysis) in the body's saline environment for the device's intended lifespan.
- Hermetic Sealing: The entire electronic package needs a robust, moisture-proof barrier to prevent fluid ingress and failure [32].
Experimental Protocols & Methodologies
Protocol 1: In-Vitro Characterization of a Glucose Biofuel Cell
Objective: To measure the key performance metrics (Open-Circuit Voltage, Power Density) of a fabricated glucose biofuel cell under physiologically relevant conditions.
Workflow:
- Cell Assembly: Integrate the bio-anode and bio-cathode into a test cell chamber. Use a reference electrode (e.g., Ag/AgCl) for three-electrode measurements if needed.
- Buffer Introduction: Fill the chamber with a phosphate buffer solution (PBS, pH 7.4) containing a controlled concentration of glucose (e.g., 5-10 mM to mimic blood levels).
- Polarization Curve: Connect the anode and cathode to a potentiostat/galvanostat.
- Use linear sweep voltammetry (LSV) or chronoamperometry while applying a series of external loads.
- Measure the voltage (V) and current (I) across the cell for each load.
- Data Analysis:
- Calculate Power (P) as P = V * I for each data point.
- Plot Voltage vs. Current Density and Power Density vs. Current Density.
- The peak of the power density curve indicates the maximum power output.
Protocol 2: Evaluating the Metabolic Cost of a Biomechanical Harvester
Objective: To determine the "Cost of Harvesting (COH)" for a wearable biomechanical energy harvester on human subjects.
Workflow:
- Baseline Measurement: Subject walks on a treadmill at a set speed while wearing the harvester in a "locked" or disengaged state. Measure their metabolic rate via indirect calorimetry (oxygen consumption rate).
- Harvesting Measurement: Subject walks at the same speed with the harvester fully active and generating electrical power. Measure metabolic rate again.
- Data Processing: Calculate the difference in metabolic power between the two states (ΔMetabolic Power). Precisely measure the average electrical power output of the device during the test.
- COH Calculation: Compute the Cost of Harvesting using the formula: COH = ΔMetabolic Power / Electrical Power Output.
The Scientist's Toolkit: Research Reagent Solutions
Table 4: Essential Materials for Implantable Energy Harvester Research
| Category | Item / Reagent | Function / Application | Examples / Notes |
|---|---|---|---|
| Enzymes & Biocatalysts | Glucose Oxidase (GOx), Bilirubin Oxidase (BOD) | Catalyze glucose oxidation and oxygen reduction in biofuel cells [30] [31]. | Select for high specific activity and stability; often immobilized on electrodes [30]. |
| Electrode Materials | Carbon Nanotubes (CNT), Carbon Fiber (CF), PEDOT:PSS | Provide high surface area, conductivity, and substrate for enzyme immobilization [30]. | CNTs facilitate direct electron transfer. PEDOT:PSS is a conductive, biocompatible polymer [30]. |
| Mediators | Pyrroloquinoline Quinone (PQQ), TTF-TCNQ | Shuttle electrons between the enzyme's active site and the electrode surface [30]. | Crucial for enzymes without direct electron transfer pathways. Must be stable and biocompatible. |
| Polymers & Encapsulants | PLGA, PDMS, Parylene-C, SEBS | Form biocompatible coatings, encapsulation layers, and flexible substrates/hermetic seals [30] [32]. | PLGA is biodegradable. PDMS and Parylene-C are excellent, stable barrier materials. |
| Piezoelectric Materials | Polyvinylidene Fluoride (PVDF), Lead Zirconate Titanate (PZT) | Generate electrical charge in response to mechanical stress for biomechanical harvesting [32] [33]. | PVDF is flexible and biocompatible. PZT offers higher efficiency but contains lead. |
| Testing & Characterization | Phosphate Buffered Saline (PBS), Simulated Body Fluid (SBF) | Provide a controlled, physiologically relevant ionic environment for in-vitro testing [31]. | SBF more closely mimics the mineral content of blood plasma for long-term stability tests. |
This technical support guide is framed within a broader research thesis on power management for Implantable Medical Devices (IMDs). The pursuit of reliable, safe, and efficient power sources is a cornerstone of next-generation IMD development, influencing device longevity, patient safety, and therapeutic efficacy [8] [1]. Wireless Power Transfer (WPT) technologies offer a promising solution to the limitations of batteries, such as finite lifespan and the need for surgical replacement [35]. This document provides researchers with a practical guide to the predominant WPT techniques—Inductive Coupling, Ultrasonic, and RF Energy Transfer—focusing on experimental troubleshooting and standardized protocols to accelerate your research in powering bio-implants.
Technical Support Center: Troubleshooting Guides and FAQs
This section addresses common practical challenges encountered when developing WPT systems for implantable devices.
Inductive Coupling WPT
Inductive coupling transfers power via a time-varying magnetic field between two coils—a transmitter (Tx) outside the body and a receiver (Rx) inside the body [36] [37]. It is currently the most mature and widely used WPT method for IMDs [35].
FAQ: Why is my inductive coupling system's Power Transfer Efficiency (PTE) dropping sharply with even small misalignments? The PTE in inductive links is highly dependent on the magnetic coupling coefficient (k), which is very sensitive to the axial and lateral alignment of the Tx and Rx coils [35]. A slight misalignment significantly reduces the mutual inductance between the coils, leading to a drastic efficiency loss.
Troubleshooting Guide: Common Issues with Inductive Links
Problem Symptom Potential Root Cause Recommended Diagnostic & Resolution Action Low Power Transfer Efficiency (PTE) Coil misalignment; Operation at incorrect resonant frequency; Excessive distance between coils. Verify coil alignment using magnetic field simulation software (e.g., ANSYS Maxwell). Use a network analyzer to characterize and tune the system to its precise resonant frequency [38]. Tissue Heating / High Specific Absorption Rate (SAR) Operation at too high a frequency; Use of excessive power; Suboptimal coil design leading to stray fields. Measure local temperature rise with phantom tissue models. Adhere to IEEE C95.1 standards for safety limits. Re-optimize coil geometry and shielding to concentrate the magnetic field [35] [39]. Inconsistent Output Voltage Load variations detuning the resonant circuit; Fluctuations in coupling. Implement an impedance-matching network or a closed-loop control system on the transmitter side that can adapt to changing load conditions [38].
Ultrasonic WPT
Ultrasonic Wireless Power Transfer (US-WPT) uses mechanical pressure waves, typically at frequencies above 20 kHz, to transmit energy through tissues [1] [40]. It is less susceptible to electromagnetic interference and can be advantageous for powering deep-seated implants [39].
FAQ: My ultrasonic WPT setup is yielding very low efficiency. What are the primary loss mechanisms? The main sources of loss are acoustic impedance mismatches at different material interfaces (e.g., transducer to tissue, tissue to implant casing) causing energy reflection, and absorption of acoustic energy by the tissue itself, which converts into heat [40]. The low coupling coefficient in air makes airborne characterization particularly challenging [40].
Troubleshooting Guide: Common Issues with Ultrasonic Links
Problem Symptom Potential Root Cause Recommended Diagnostic & Resolution Action Low Output Power & Efficiency Significant acoustic impedance mismatch; High absorption losses in the medium (e.g., air); Incorrect electrical compensation. Model the acoustic stack to minimize impedance gaps. For systems operating in air, employ a novel hybrid S-parameter model and a double-side CL compensation scheme to enhance performance [40]. Failure to Power Miniaturized Implants The size of the piezoelectric receiver is too small to capture sufficient energy. Consider using a sectored-multi-ring ultrasonic transducer (S-MRUT) design, which can improve power transmission efficiency and enable multi-node interrogation [39]. Temperature Rise in Tissue Overly high acoustic intensity; Operation at a resonant frequency that leads to localized heating. Measure the acoustic intensity output. Ensure it is within safe limits defined by regulatory standards (e.g., FDA). Optimize the operating frequency and duty cycle to minimize thermal effects [35].
RF Energy Transfer
Radiative or far-field RF energy transfer operates by beaming electromagnetic waves, such as microwaves, from a transmitter to a receiver antenna (rectenna) [36]. This method is suited for longer-distance powering but faces challenges with efficiency and tissue safety for implants [37].
FAQ: Why is the efficiency of my far-field RF link so low, and the received power unstable? Far-field RF systems are inherently susceptible to path loss, which increases with the square of the distance, and multipath fading, where reflected waves cancel out the main signal at the receiver [36]. The body's tissues also absorb a significant portion of the radiated energy, reducing what is available to the implant and raising safety concerns [35].
Troubleshooting Guide: Common Issues with RF Energy Transfer
Problem Symptom Potential Root Cause Recommended Diagnostic & Resolution Action Low DC Output from Rectenna Weak RF signal at the receiver; Poor efficiency of the rectifying circuit; Impedance mismatch at the antenna. Use a spectrum analyzer to measure received RF power. Re-design the rectifier circuit using Schottky diodes for lower forward voltage. Implement an impedance-matching network optimized for the specific frequency band [38]. Inconsistent Device Operation Changes in the environment causing signal fading; Movement of the subject. Incorporate a power management unit (PMU) with a small rechargeable battery or supercapacitor to smooth out power interruptions [39]. SAR Exceeds Safety Limits Excessive transmitted power; Poor antenna design focusing energy into tissues. Conduct SAR simulations using computational phantoms (e.g., in SEMCAD X). Re-design the antenna pattern to direct energy away from sensitive tissues and strictly control the transmit power [35].
The following table provides a consolidated comparison of the key performance metrics for the three WPT techniques, based on current research findings. This data serves as a benchmark for evaluating your experimental results.
Table 1: Performance Comparison of WPT Techniques for IMDs
| Technique | Typical Power Transfer Efficiency (PTE) | Typical Range / Depth | Output Power Capability | Key Safety Concerns |
|---|---|---|---|---|
| Inductive Coupling | Up to 85.8% (at 10 mm) [39]; Commonly 40-80% in near-field [35] | Short-Range (Near-field, <~100 mm) [35] | Up to 10 W [37] | Tissue heating from EMF exposure; High Specific Absorption Rate (SAR) [35] |
| Ultrasonic (UPT) | ~21-35% [37]; Up to 2.14% in air (recent study) [40] | Mid-range (can penetrate 100-500 mm) [35] | Limited (e.g., 13.5 mW in air [40]); ~100 mW in tissue [37] | Mechanical heating from acoustic absorption; Potential for cavitation at high intensities [39] |
| RF Energy Transfer | <48% for near-field RF [37]; Lower for far-field | Long-Range (Far-field, >500 mm) [35] | < 1 W [37] | Tissue heating from radiative absorption; Must comply with strict international RF exposure limits [36] [35] |
Standardized Experimental Protocols
To ensure reproducible and comparable results across different research setups, follow these standardized experimental methodologies.
Protocol for Characterizing an Inductive Power Link
Aim: To determine the Power Transfer Efficiency (PTE) and optimal operating frequency of a custom inductive coupling system.
Materials: Function/Arbitrary Waveform Generator, Power Amplifier, Tx and Rx Coils, Oscilloscope, Load Resistors, Network Analyzer, Tissue Phantom.
Procedure:
- Coil Characterization: Use a Vector Network Analyzer (VNA) to measure the self-inductance (L), series resistance (R), and self-resonant frequency of both Tx and Rx coils in air.
- System Assembly: Connect the Tx coil to the generator via the power amplifier. Connect the Rx coil to a known resistive load (RL). Place the coils at the desired separation distance, aligned axially.
- Frequency Sweep: Apply a constant input voltage (Vin) to the Tx coil. Sweep the operating frequency across a range (e.g., 100 kHz to 20 MHz). At each frequency, use the oscilloscope to measure the RMS voltage across the load (Vout) and the input current (Iin).
- Data Recording: Record Vin, Iin, and Vout for each frequency. Calculate input power (Pin = Vin * Iin) and output power (Pout = Vout² / RL). Compute PTE as (Pout / Pin) * 100%.
- In-Vitro Testing: Repeat steps 2-4 with the coil pair immersed in or placed on a standard tissue phantom (e.g., saline-based or semisolid phantom mimicking muscle electrical properties) to assess performance in a biological analog.
Protocol for Evaluating an Ultrasonic Power Link
Aim: To measure the efficiency and output power of a UPT system through a tissue-mimicking material.
Materials: Ultrasonic Function Generator, Power Amplifier, Matching Network, Piezoelectric Transmitter (PZT), Piezoelectric Receiver, Oscilloscope, Acoustic Phantom, Hydrophone (optional).
Procedure:
- Transducer Characterization: Model the PZT using a hybrid S-parameter approach or traditional Butterworth-Van Dyke (BVD) model parameters [40]. Use a VNA to find the resonant frequency and impedance.
- Compensation & Matching: Design and implement a double-side CL compensation network based on the S-parameter model to minimize reflection coefficients (ΓIN and ΓL) and maximize power delivery [40].
- System Setup: Align the PZT transmitter and receiver in an acoustic tank filled with degassed water or directly couple them to a standardized acoustic phantom (e.g., Zerdine). Ensure perpendicular alignment for maximum energy transfer.
- Power Measurement: Drive the Tx PZT at its resonant frequency. Measure the electrical input power (Pin) to the Tx and the electrical output power (Pout) from the Rx.
- Efficiency Calculation: Calculate the end-to-end efficiency as η = (Pout / Pin) * 100%.
- Safety Check: Use a hydrophone to map the pressure field and ensure acoustic intensity is within safe limits (e.g., FDA diagnostic limits as a reference).
Visual Workflows and System Diagrams
Generalized WPT System Workflow
The following diagram illustrates the logical workflow for designing, implementing, and troubleshooting any WPT system for implantable devices.
Inductive Coupling System Diagram
This diagram shows the core components and signal flow in a typical resonant inductive coupling WPT system.
The Scientist's Toolkit: Research Reagent Solutions
Table 2: Essential Materials and Equipment for WPT Experimentation
| Category | Item | Primary Function in WPT Research |
|---|---|---|
| Simulation & Design | ANSYS HFSS / Maxwell; COMSOL Multiphysics | Models electromagnetic fields (for inductive/RF) or acoustic fields (for ultrasonic); predicts efficiency, SAR, and optimizes component geometry before fabrication [35]. |
| Fabrication | Printed Spiral Coils (PSCs); Lithography Equipment | Creates miniaturized, batch-fabricated receiver coils for implants [35]. Piezoelectric Transducers (PZTs) are the core elements for ultrasonic energy conversion [40]. |
| Characterization | Vector Network Analyzer (VNA) | Critically measures S-parameters to determine resonant frequency, impedance, and coupling strength of coils and transducers [40] [38]. |
| Testing & Validation | Tissue Phantoms (EM & Acoustic) | Semisolid or liquid materials that mimic the dielectric or acoustic properties of human tissues (e.g., muscle, skin) for in-vitro performance and safety testing [35]. |
| Safety & Compliance | SAR Measurement System; Thermal Camera | Quantifies Specific Absorption Rate to ensure compliance with safety standards (e.g., IEEE, ICNIRP). Monitors surface temperature rises in phantoms or during in-vivo tests [35] [39]. |
Troubleshooting Guides
Troubleshooting Acute Inflammatory Response and Fibrous Encapsulation
Problem: The implanted device triggers a severe foreign body response (FBR), leading to thick, dense fibrous capsule formation that isolates the device and impairs its function (e.g., by blocking analyte diffusion for sensors or increasing electrical impedance for electrodes).
Solutions:
- Verify Biocompatibility of Materials: Ensure all materials meet ISO 10993 standards for biocompatibility. Use materials with surface chemistries that minimize protein adsorption, such as hydrophilic polymers like poly(ethylene glycol) (PEG) or polyzwitterions [41].
- Optimize Device Mechanics: Address mechanical mismatch between the stiff device and soft tissue. Consider using flexible substrates (e.g., polyimide, parylene C) or ultra-soft materials like hydrogels to reduce micromotion and chronic inflammation [42] [41].
- Implement Anti-Fibrotic Coatings: Apply local drug delivery coatings that release anti-inflammatory or anti-fibrotic agents (e.g., dexamethasone) to modulate the immune response at the implant-tissue interface [41].
Troubleshooting Insufficient Device Lifetime and Premature Failure
Problem: The device ceases to function long before its intended operational lifespan, potentially due to biofouling, hermeticity failure of the encapsulation, or power source depletion.
Solutions:
- Enhance Encapsulation Barrier Properties: For long-term implants, use high-quality, dense inorganic barrier layers (e.g., silicon carbide, aluminum oxide) deposited via chemical vapor deposition alongside hermetic metal or ceramic packages. For flexible devices, multi-layer stacks of polymers and thin inorganic films can improve performance [43].
- Adopt a Self-Powered Strategy: Integrate energy harvesting modules like triboelectric nanogenerators (TENGs) or piezoelectric nanogenerators (PENGs to create self-powered implantable medical devices (SIMDs). This reduces or eliminates dependence on finite battery capacity, enhancing long-term stability [44].
- Utilize Biodegradable Materials for Short-Term Implants: If the device is for short-term monitoring (e.g., post-operative recovery), fabricate it using biodegradable materials (e.g., poly(lactic-co-glycolic acid), silk). The device will harmlessly degrade after its function is complete, making device lifetime a non-issue and eliminating the need for extraction surgery [43].
Troubleshooting Unreliable Physiological Signal Acquisition
Problem: Recorded signals from sensors or electrodes are noisy, unstable, or drift over time, compromising data quality and clinical utility.
Solutions:
- Ensure Stable Device-Tissue Interface: Unstable interfaces caused by fibrotic encapsulation or device movement lead to motion artifacts and signal degradation. Improving biocompatibility and mechanical compliance, as outlined in previous guides, is foundational to stable signal acquisition [42].
- Select the Appropriate Sensing Mechanism: Choose a sensing principle that aligns with the target signal and implantation site.
- Piezoelectric Sensors: Advantageous for dynamic monitoring (e.g., blood pressure, respiratory signals) due to self-powering capability and fast response. A limitation is their feeble output signal, which requires amplification [43].
- Capacitive Sensors: Ideal for low-pressure monitoring due to high sensitivity. A key challenge is their susceptibility to parasitic capacitance and relatively large area [43].
- LC Resonant Sensors: Useful for wireless sensing without internal batteries and are amenable to miniaturization. A significant drawback is the substantial attenuation of wireless signals within the human body [43].
- Validate Sensor in a Biorelevant Model: Before animal studies, test the sensor in a laboratory setup that mimics the biological environment (e.g., using phosphate-buffered saline at 37°C) to identify issues with baseline drift, calibration, or biofouling [45].
Frequently Asked Questions (FAQs)
FAQ 1: What are the primary design principles for miniaturizing implantable medical devices while ensuring reliable power and performance?
The core design principles focus on system-level integration and efficient power management:
- Miniaturization and Integration: The device must be miniaturized to fit within the target tissue without interfering with physiological functions. This requires highly integrated circuitry and the use of advanced, compact materials [42].
- Intelligent Power Management: Traditional batteries are a major limiting factor for miniaturization. Strategies include minimizing circuit power consumption, employing efficient wireless power transfer (e.g., NFC), and integrating self-powered energy harvesting systems like TENGs and PENGs [44] [42].
- Thermal Control: The device must not generate excessive heat. Even a 1–2°C temperature increase can damage surrounding tissues or internal components, necessitating careful thermal design [42].
FAQ 2: How do I select between biodegradable and non-biodegradable materials for my implantable device?
The choice hinges on the device's intended duration of use and its clinical purpose [43]:
- Use Biodegradable Materials for devices designed for short-term monitoring or therapy (e.g., weeks to months), such as post-operative recovery assessment. These devices degrade spontaneously after their functional period, avoiding a second surgery for explanation. Examples of materials include poly(lactic-co-glycolic acid) (PLGA), polycaprolactone (PCL), and silk.
- Use Non-Biodegradable, Biostable Materials for devices intended for long-term or permanent implantation (e.g., pacemakers, deep brain stimulators). These materials, such as titanium, medical-grade silicone, and parylene, must exhibit long-term durability, excellent hermeticity, and sustained biocompatibility over decades.
FAQ 3: What are the most common failure points for implantable medical devices during the proof-of-concept stage, and how can I avoid them?
Common failure points often involve technical feasibility, biological integration, and regulatory planning [45]:
- Unclear Objectives and Success Criteria: Define specific, measurable success criteria for the POC study upfront. Focus on validating the core technical and biological risks rather than every device feature.
- Underestimating Biocompatibility and Integration: The device-tissue interface is a critical failure point. Conduct early in vitro biocompatibility tests and use realistic animal or benchtop models that simulate the clinical environment, including mechanical stresses and biofluid chemistry.
- Ignoring Regulatory Pathways: Engage with regulatory experts early. Misclassification of the device (Class I, II, or III) can lead to incorrect testing assumptions. For high-risk Class III implants, POC studies must be designed to generate data that will support future Investigational Device Exemption (IDE) submissions.
FAQ 4: What wireless communication and power transfer methods are best suited for different implantation depths?
The optimal method depends on the required communication range, data rate, and power needs, all of which are influenced by implantation depth [43]:
- Near-Field Communication (NFC) and Electromagnetic Induction (LC Resonance): Best for devices implanted just beneath the skin. They offer short-range, low-power communication and efficient wireless power transfer. Signals experience significant attenuation in deeper tissues.
- Bluetooth Low Energy (BLE): Suitable for subcutaneous implants that need to transmit data over a longer range than NFC, but requires an integrated power source (battery or energy harvester).
- Ultrasonic Energy Transfer: A promising solution for powering devices implanted deep within the body (e.g., in the brain or cardiovascular system), as ultrasonic waves attenuate less in human tissue compared to electromagnetic waves.
Data Presentation
Key Material Properties for Device Encapsulation
Table 1: Comparison of encapsulation materials for implantable electronic devices.
| Material | Key Properties | Advantages | Limitations | Typical Applications |
|---|---|---|---|---|
| Parylene C [43] [41] | Conformal polymer coating, flexible, excellent dielectric properties, high biocompatibility. | Ultra-thin, pinhole-free coating, chemical inertness, low permeability to moisture and gases. | Limited long-term ( >5 years) barrier property in vivo for active implants, can be difficult to pattern. | Neural interfaces, flexible circuits, chronic sensors. |
| Medical Silicone (e.g., PDMS) [42] [41] | Soft elastomer, high flexibility, biocompatible, gas permeable. | Excellent mechanical compliance with soft tissue, easy to fabricate and mold. | Can absorb moisture and lipids, prone to biofouling, may not provide a sufficient hermetic barrier. | Soft electrodes, cosmetic implants, insulation layers. |
| Titanium [42] | Metal, high strength-to-weight ratio, biocompatible, corrosion-resistant. | Provides a true hermetic seal for long-term implants, excellent durability. | Rigid, expensive to machine, can cause MRI artifacts, not suitable for flexible devices. | Hermetic enclosures for pacemakers, implantable cardioverter-defibrillators. |
| Biodegradable Polymers (e.g., PLGA) [43] | Degrades by hydrolysis into biocompatible byproducts, degradation rate is tunable. | Eliminates need for explanation surgery, ideal for temporary implants. | Degradation products can alter local pH, mechanical and barrier properties change over time. | Short-term implants, drug-eluting stents, temporary sensors. |
Performance Metrics of Commercial and Emerging Implantable Devices
Table 2: Performance metrics of select commercial and emerging implantable devices across different organ systems.
| Device Category / Name | Target Organ/Location | Size/Dimensions | Key Performance Metrics | Clinical Status |
|---|---|---|---|---|
| Leadless Pacemaker (Micra) [42] | Right ventricle of the heart | 25.9 mm × 6.7 mm, 2.0 g | Battery longevity: 12–17 years, Capture threshold: <1.25 V | FDA Approved (2016) |
| CardioMEMS HF System [42] | Pulmonary artery | 15 mm × 3.5 mm × 2 mm | Pressure monitoring accuracy: ±2 mmHg, Wireless range: ~1.5 m | FDA Approved (2014) |
| Neuralink N1 [42] | Cerebral cortex | 23 mm × 8 mm chip | Channels: 1024, Wireless data rate: 10 Mbps | Clinical Trial (PRIME) |
| Self-Powered Implantable Devices (SIMDs) [44] | Various (Heart, Brain, Skin) | Miniaturized, varies | Autonomous power via TENGs/PENGs, Enhanced energy conversion efficiency, Multifunctional integration | Research & Development |
Experimental Protocols
Protocol: In Vitro Biocompatibility and Cytotoxicity Assessment (ISO 10993-5)
This protocol outlines a standard method for evaluating the cytotoxic potential of device materials or extracts.
1. Sample Preparation:
- Prepare extracts by incubating the device material(s) in a cell culture medium (e.g., DMEM) supplemented with serum at 37°C for 24 hours. Use a surface area-to-volume ratio as specified in ISO 10993-12.
- As a control, prepare an extract of a known biocompatible material (e.g., medical-grade silicone) under identical conditions.
2. Cell Culture:
- Use a standardized cell line such as L-929 mouse fibroblast cells.
- Culture cells in an appropriate medium and harvest them during the logarithmic growth phase.
3. Assay Procedure:
- Seed cells into a 96-well plate at a density of 1x10⁴ cells per well and incubate for 24 hours to allow cell attachment.
- Replace the culture medium in the test wells with the material extracts. Wells with fresh culture medium serve as a negative control, and wells with a cytotoxic substance (e.g., latex extract) serve as a positive control.
- Incubate the plate for 48 hours at 37°C in a 5% CO₂ atmosphere.
4. Viability Assessment (MTT Assay):
- Add MTT (3-(4,5-dimethylthiazol-2-yl)-2,5-diphenyltetrazolium bromide) solution to each well and incubate for 4 hours.
- Carefully remove the medium and add a solvent (e.g., DMSO) to dissolve the formed formazan crystals.
- Measure the absorbance of each well at 570 nm using a microplate reader.
5. Data Analysis:
- Calculate the cell viability relative to the negative control group:
(Absorbance of test group / Absorbance of negative control) × 100%. - A cell viability reduction of more than 30% is typically considered a cytotoxic effect.
Protocol: Electrochemical Impedance Spectroscopy (EIS) for Evaluating Electrode-Tissue Interface Stability
EIS is used to characterize the electrical properties of an electrode interface, which is critical for sensing and stimulation applications.
1. Setup:
- Use a standard three-electrode setup in a phosphate-buffered saline (PBS) solution at 37°C, pH 7.4, to simulate the physiological environment.
- The device electrode serves as the working electrode. A platinum wire acts as the counter electrode, and an Ag/AgCl electrode is the reference electrode.
- Connect the electrodes to a potentiostat/impedance analyzer.
2. Measurement:
- Apply a sinusoidal AC voltage with a small amplitude (e.g., 10 mV RMS) superimposed on the open-circuit potential.
- Sweep the frequency logarithmically across a wide range, typically from 100 kHz down to 0.1 Hz or lower.
- Record the impedance magnitude (|Z|) and phase angle (θ) at each frequency.
3. Data Modeling:
- Fit the resulting Nyquist and Bode plots to an equivalent circuit model. A common model for a coated or tissue-integrated electrode is a modified Randles circuit, which includes solution resistance (Rₛ), a constant phase element (CPE) representing the double-layer capacitance, and charge transfer resistance (Rₛₜ).
- Monitor changes in Rₛₜ and CPE over time; an increasing Rₛₜ and a decreasing effective capacitance can indicate the buildup of a fibrotic tissue layer (increased impedance) around the electrode in vivo.
4. Accelerated Aging:
- To test encapsulation reliability, perform EIS measurements before and after subjecting the device to accelerated aging conditions (e.g., 85°C/85% relative humidity) for a set period. A significant shift in impedance indicates a potential failure of the encapsulation.
Mandatory Visualization
Diagram: Workflow for Developing a Biocompatible Implantable Device
Diagram: Foreign Body Response and Device Integration Strategies
The Scientist's Toolkit
Table 3: Essential research reagents and materials for developing biocompatible implants.
| Item Name | Function / Application | Key Considerations |
|---|---|---|
| Parylene C | A conformal polymer coating used for insulating and encapsulating microelectronic implants. | Provides excellent barrier properties and biocompatibility. Deposition requires specialized vapor deposition equipment. |
| Poly(lactic-co-glycolic acid) (PLGA) | A biodegradable polymer for constructing temporary implants that resorb after their function is complete. | Degradation rate is tunable by adjusting the lactide to glycolide ratio. Degradation products can alter local pH. |
| Dexamethasone | A corticosteroid used in local drug delivery coatings to suppress the inflammatory foreign body response at the implant site. | Effective in reducing fibrosis but requires controlled release kinetics to be effective over the critical period. |
| Hydrogels (e.g., PEG-based) | Used to create soft, hydrated, and mechanically compliant interfaces between stiff devices and soft tissue. | High water content can mimic tissue mechanics and reduce irritation. May limit diffusion of analytes to sensors. |
| Triboelectric Nanogenerator (TENG) | An energy harvesting module that converts mechanical energy (e.g., from heartbeats or breathing) into electricity for self-powered devices. | Enables autonomous operation. Challenges include long-term stability and efficient energy conversion in the body [44]. |
| Iridium Oxide (IrOx) | A coating for neural stimulation and recording electrodes that significantly lowers electrochemical impedance and increases charge injection capacity. | Improves signal-to-noise ratio for recording and safety for stimulation. Stability under long-term pulsing must be verified. |
Architecting the Power Management Unit (PMU) for Maximum Efficiency and Regulation
Troubleshooting Guides
Q1: My PMU's RF-to-DC conversion efficiency is significantly lower than expected. What could be wrong? This is often due to impedance mismatches or suboptimal rectifier design.
- Check the Impedance Matching Network: Use a vector network analyzer to verify that the impedance between your receiving antenna and rectifier circuit is matched at your operating frequency (e.g., 1.5 GHz). A mismatch causes power reflection, drastically reducing efficiency [12].
- Test the Rectifier Independently: Characterize your rectifier circuit separately from the antenna. A peak measured efficiency of 80% at an input power of 0 dBm is achievable with a well-designed rectifier [12]. If your measurements are lower, inspect component values and soldering.
- Verify Input Power Levels: RF-to-DC conversion efficiency is highly dependent on input power. Efficiency can drop to 15.7% at low input powers like -20 dBm [12]. Ensure your wireless power transfer (WPT) system delivers sufficient power to the PMU.
Q2: The DC output from my PMU is too noisy for my sensitive implantable sensor. How can I stabilize it? Noise often originates from the rectification stage or is coupled from the WPT system.
- Implement Filtering: Use a combination of bypass capacitors and a low-dropout regulator (LDO) after the rectifier stage. This smooths the rectified DC and suppresses high-frequency noise [46].
- Re-evaluate Your Grounding: A poor grounding strategy in a compact PMU layout can introduce common-mode noise. Ensure a single-point star ground for analog and power sections [47].
- Check for Interference: The wireless power carrier signal (e.g., 1.5 GHz) can couple into other circuits. Use shielding and ensure all signal lines are properly impedance-controlled [12].
Q3: My glucose-powered fuel cell generates micro-watts, but my PMU fails to start up. What is the issue? This indicates that the PMU's cold-start voltage or quiescent current is not optimized for ultra-low-power sources.
- Select a PMU with Ultra-Low Quiescent Current: The power management IC itself consumes power. For energy harvesters producing µW-scale power (e.g., 1µW from a glucose fuel cell), the PMU must have a quiescent current in the nanoamp range to avoid draining the source [2] [7].
- Implement a Cold-Circuit with Low Leakage: The initial charge pump that "wakes up" the PMU must be designed with low-leakage components to accumulate enough energy from the weak source to begin operation [7].
Q4: After implantation, the wireless power transfer efficiency to my device drops. How can I diagnose this? This is typically related to changes in the operating environment.
- Re-evaluate Antenna Coupling: The properties of surrounding tissues affect antenna performance. Measure the transmission coefficient ((|{\text {S}}_{\text {21}}|)) in the simulated biological environment. A flexible transmitter antenna can improve coupling to non-planar body surfaces, maintaining an efficiency of around 0.56% at a 51 mm distance [12].
- Check for Specific Absorption Rate (SAR) Compliance: High SAR can indicate energy loss in tissues. SAR must be analyzed and kept within safe limits; exceeding them not only poses a safety risk but also points to inefficient power transfer [12].
- Verify Link Budget: Use the Friis transmission equation to calculate the expected received power ((Pr)), accounting for distance ((d)), frequency ((f)), and antenna gains ((Gt, G_r)). Compare this with your measurements to isolate the loss [46].
Frequently Asked Questions (FAQs)
Q: What are the key performance parameters for a PMU in an implantable device? Key parameters include:
- Power Conversion Efficiency (PCE): The ratio of output power to input power, crucial for maximizing device runtime [46].
- Sensitivity: The minimum input power required for the PMU to begin operation [46].
- Quiescent Current: The current the PMU draws while active but lightly loaded; it must be extremely low for energy-harvesting applications [7].
- Output Voltage Stability: The ability to maintain a constant voltage despite variations in load or input power [7].
Q: Why is a matching network critical in an RF-powered PMU system? The matching network ensures maximum power transfer from the antenna to the rectifier circuit by transforming the rectifier's complex impedance to the antenna's characteristic impedance (typically 50Ω). Without it, a significant portion of the captured RF energy is reflected, rather than converted and used [12] [46].
Q: What is the role of a rectifier in an RF energy harvesting PMU? The rectifier is the core circuit that converts the alternating current (AC) from the received radio waves into direct current (DC) that can be used to charge a battery or supercapacitor and power the electronic load [12] [46].
Q: How do I choose between near-field and midfield wireless power for my implant?
- Use Near-Field WPT (inductive coupling) for short-range, high-efficiency power transfer to larger implants. Its efficiency is highly sensitive to coil alignment and distance [12] [7].
- Use Mid-field WPT (lower gigahertz frequencies, e.g., 1.5 GHz) for powering millimeter-sized deep-tissue implants over distances comparable to or exceeding the wavelength, with higher misalignment tolerance than near-field [12].
Table 1: Performance Metrics of Wireless Power Transfer Technologies for Implantable Devices
| Technology | Typical Frequency | Reported Efficiency | Operational Distance | Key Challenges |
|---|---|---|---|---|
| Mid-field WPT [12] | 1.5 GHz | 0.56% (PTE) | 51 mm | Miniaturization, tissue absorption |
| RF Rectifier [12] | 1.5 GHz | 80% (RF-to-DC) | N/A | Efficiency drops at low input power |
| Glucose Fuel Cell [2] | N/A (Chemical) | >1 µW power level | N/A | Low output power, long-term stability |
Table 2: Key Research Reagent Solutions for PMU Experimentation
| Item / Component | Function / Specification | Experimental Role |
|---|---|---|
| Flexible Polyamide Substrate [12] | (\varepsilon_r) = 4.3, tanδ = 0.004 | Substrate for flexible, biocompatible implantable antennas. |
| Vector Network Analyzer | Measures S-Parameters (e.g., (S_{21}), Return Loss) | Characterizing antenna performance and impedance matching. |
| Schottky Diodes (e.g., HSMS-285x) [12] | Low forward voltage, high switching speed | Core component of efficient rectifier circuits for RF-DC conversion. |
| Tissue-Equivalent Phantom Gel | Mimics electrical properties of human tissues (permittivity, conductivity) | Validating antenna and WPT performance in a simulated biological environment [12]. |
| Power Management IC (Ultra-low Iq) [7] | Quiescent current in nanoamp range | Regulates and manages harvested µW-level power for sensor/load. |
Experimental Protocols
Protocol 1: Characterizing an RF Energy Harvesting PMU Link Budget
Objective: To quantitatively measure the end-to-end efficiency of a wireless power transfer and PMU system.
- Setup: Position the transmitter ((Tx)) antenna (e.g., a flexible antenna operating at 1.5 GHz) at a fixed distance from the receiver ((Rx)) antenna, which is integrated with the rectifier and PMU. A tissue-equivalent phantom can be placed between them for realism [12].
- Measure Transmitted Power ((Pt)): Use a power meter at the output of the signal generator to record (Pt).
- Measure Received Power ((Pr)): Disconnect the (Rx) antenna from the rectifier and connect it to the power meter to measure (P_r).
- Calculate Power Transfer Efficiency (PTE): Compute PTE as (Pr / Pt). This isolates the efficiency of the wireless link [12].
- Measure DC Output Power ((P{dc})): Reconnect the rectifier and PMU. At the PMU output, measure the DC voltage ((V{dc})) across a known load resistor ((RL)). Calculate (P{dc} = V{dc}^2 / RL).
- Calculate RF-to-DC Conversion Efficiency: Compute the rectifier efficiency as (P{dc} / Pr) [46].
- Calculate Overall System Efficiency: The total system efficiency is (P{dc} / Pt) or the product of PTE and RF-to-DC efficiency.
Protocol 2: In-Vitro Validation of a PMU Powering a Biotelemetric Sensor
Objective: To demonstrate that the PMU can power a functional load, such as a sensor and communication module, under realistic conditions.
- System Integration: Connect the output of your PMU to a low-power biotelemetric module (e.g., a BLE-based temperature sensor like the Nano 33 BLE) [12].
- Embed in Phantom: Place the entire system (PMU, sensor, and implantable antenna) within a tissue-equivalent phantom gel [12].
- Apply Wireless Power: Activate the external (T_x) antenna.
- Monitor Sensor Operation: Use an external device (e.g., a smartphone or computer) to scan for and receive data packets transmitted by the BLE module.
- Data Collection: Record metrics such as the Received Signal Strength Indicator (RSSI) at various distances and the stability of the sensor readings, confirming the PMU is providing consistent power [12].
System Architecture and Troubleshooting
WPT and PMU System Dataflow
PMU Low Output Power Diagnosis
Ensuring Reliability and Safety: Overcoming Power Failure and System Degradation
Foundational Safety Concepts for Implantable Power Systems
In high-risk fields like medical device design, redundancy is a core principle of safety engineering. It ensures that no single point of failure can lead to a system-wide failure or accident [48]. For implantable medical devices, whose failure can have dire consequences for patient health, implementing multiple, independent safety systems is not optional—it is essential [6] [48].
Redundancy in safety system design can be broken down into several key types [48]:
- Hardware Redundancy (Physical Backup Systems): Involves having duplicate physical components, such as sensors, valves, or control systems, that function as backups. An example is a pressure relief system with two separate relief valves instead of one [48].
- Functional Redundancy (Different Safety Measures for the Same Hazard): Uses multiple independent safety mechanisms to protect against the same potential failure. An example is a fire suppression system that uses both automated sprinklers and a gas-based extinguishing system [48].
- Power Supply Redundancy (Uninterruptible Systems): Ensures that backup power sources are available in case of a primary power failure. This is critical for maintaining the operation of safety-critical systems [48].
- Human Redundancy (Manual Backup Procedures): Involves training personnel to execute manual backup procedures in case of automated system failure. For an implantable device, this could mean providing patients with a manual way to trigger a device shutdown or reset [48].
The principle of "Two is One, and One is None" guides this approach, meaning that designers must always assume one system will fail and have at least one backup ready to take over [48]. For an implantable medical device, a reliable power supply is the cornerstone of its function, making these redundant design principles paramount.
Table 1: Types of Redundancy in Safety System Design
| Redundancy Type | Description | Example in Implantable Devices |
|---|---|---|
| Hardware Redundancy | Duplicate physical components acting as backups. | A device with a secondary, identical battery module that engages if the primary fails. |
| Functional Redundancy | Different safety mechanisms for the same hazard. | A power system protected by both a voltage supervisor circuit and a separate, current-limiting fuse. |
| Power Supply Redundancy | Backup power sources for primary power failure. | A primary battery coupled with a supercapacitor that can power essential functions during a brief interruption. |
| Human Redundancy | Manual backup procedures operated by users. | A patient-use magnet or external controller that can place the device into a safe, low-power mode. |
Troubleshooting Guides and FAQs: Power System Failures
This section provides a technical knowledge base for researchers and engineers to diagnose and address common power-related issues during the development and testing of power systems for implantable devices.
Frequently Asked Questions
Q1: What are the primary safety mechanisms to prevent catastrophic power failure in an implantable device? The primary mechanisms are layered and include redundant power sources, smart power management circuits, and fail-safe operational modes [6]. Redundant sources ensure a backup is available. Power management circuits continuously monitor voltage and current, and can isolate faulty subsystems. Fail-safe modes are pre-programmed states that the device enters upon detecting a critical power anomaly, prioritizing patient safety over full functionality—for example, by shutting down non-essential functions and maintaining only life-sustaining therapy [6] [7].
Q2: During testing, our device exhibits a sudden and unexpected shutdown. What is a logical sequence to diagnose this? A systematic, logical problem-solving approach is critical [49]. Follow these steps:
- Identify and Define the Problem: Precisely document the conditions under which the shutdown occurs (e.g., during a specific high-power operation, after a set duration).
- Gather Relevant Information: Collect data from system logs, measure voltage rails under load, and check for error codes from the power management unit.
- Evaluate Potential Causes: Test the most probable causes first, such as a depleted or faulty primary battery, an overload condition tripping protection circuitry, or a software bug in the power management algorithm.
- Implement and Verify a Solution: Based on your analysis, you might replace the energy source, adjust current limits, or update device firmware. After implementing a fix, verify the solution under the same conditions that initially caused the failure [49].
Q3: How can we test the effectiveness of our redundant power systems in a laboratory setting? A robust testing protocol involves simulating single-point failures. Using a specialized test setup, you can physically disconnect the primary power source (e.g., a battery) and verify that the secondary source (e.g., a capacitor or redundant battery) engages seamlessly and maintains all critical device functions without interruption. This test should be repeated multiple times to statistically validate reliability and ensure the fail-over circuitry triggers at the correct voltage threshold [48].
Q4: What are the common causes of premature battery depletion in implantable device prototypes? Common causes include:
- Software Issues: Inefficient code that prevents the microcontroller from entering low-power sleep modes.
- Hardware Design Flaws: High quiescent current in voltage regulators or peripheral circuits that drain power even when idle.
- Inaccurate Power Budgeting: Underestimating the energy demands of high-current activities like wireless data transmission or therapeutic stimulation pulses [6] [7].
- Battery Defects: Manufacturing variations or defects in the battery cells themselves.
Troubleshooting Common Power Issues
Table 2: Troubleshooting Guide for Implantable Device Power Systems
| Problem | Potential Causes | Diagnostic Steps | Solutions & Best Practices |
|---|---|---|---|
| Unexpected Shutdown | - Battery end-of-life- Overcurrent protection triggered- Fault in power management IC | - Monitor battery voltage under load with an oscilloscope.- Check power management IC status registers.- Review device logs for error codes. | - Implement a "graceful degradation" mode that disables non-critical functions as voltage drops.- Ensure overcurrent limits are set appropriately for in-vivo conditions. |
| Slow System Performance | - Insufficient available power- High internal impedance of depleted battery- Voltage rail sagging under load | - Measure voltage on all key power rails during operation.- Perform an energy audit to ensure power source matches consumption. | - Increase decoupling capacitance near high-current components.- Re-evaluate the power budget and consider a higher-capacity source [49]. |
| Failure to Activate Redundant System | - Faulty isolation circuitry (e.g., diode, MOSFET)- Undervoltage lockout (UVLO) set incorrectly- Depleted redundant power source | - Simulate a primary power failure and probe the redundant system activation node.- Verify the UVLO threshold of the redundant system's power path. | - Design redundant systems with truly independent control and power paths to avoid common failure points [48].- Regularly test backup system health. |
| Inaccurate Battery Level Reporting | - Degraded battery causing voltage sag- Faulty fuel gauge algorithm or circuitry- High impedance in sensing path | - Compare reported battery level with a measured, direct voltage reading under a known load.- Calibrate the fuel gauge system. | - Use a coulomb counting fuel gauge for more accurate state-of-charge estimation over the battery's lifetime. |
Experimental Protocols for Power System Validation
To ensure the safety and reliability of a power system for an implantable device, rigorous and standardized experimental validation is required. Below are detailed methodologies for key experiments.
Protocol: Redundant Power Source Fail-Over Test
Objective: To verify that a secondary power source seamlessly and reliably takes over when the primary source fails, maintaining uninterrupted operation of critical device functions.
Materials:
- Device Under Test (DUT)
- Programmable DC power supply and electronic load
- Data acquisition unit (e.g., National Instruments DAQ)
- Oscilloscope
- Environmental chamber (for temperature-variant testing)
Methodology:
- Setup: Place the DUT in a simulated operational state within the environmental chamber (e.g., at 37°C). Connect the programmable power supply to emulate the primary battery. Connect the electronic load to the DUT's power input to simulate its dynamic current consumption. Use the DAQ and oscilloscope to monitor the primary and secondary power rail voltages, as well as a "system OK" signal from the DUT's microcontroller.
- Simulate Primary Failure: Program the DC power supply to simulate a primary battery failure. This is typically a controlled voltage ramp-down from the nominal operating voltage (e.g., 3.6V) to below the DUT's minimum operational voltage (e.g., 2.5V).
- Data Collection: The data acquisition system must record the voltage of the primary source, the voltage of the secondary (redundant) source, and the "system OK" signal throughout the test. The oscilloscope should be triggered on the primary voltage drop to capture the precise timing and any glitches during the transition.
- Analysis: Analyze the captured data to determine:
- Fail-over Time: The time delay between the primary source falling below a specified threshold and the secondary source taking full load.
- Voltage Dip: The magnitude of any voltage dip on the power rail during the transition.
- System Stability: Confirmation that the "system OK" signal remained stable and that no device resets or errors occurred.
- Validation Criteria: The test is successful if the fail-over time is less than the DUT's power-hold-up time (often determined by bulk capacitance), the voltage dip remains within the operating range of all critical components, and the device continues its core functions without interruption or data corruption.
Protocol: Accelerated Lifecycle Testing of a Rechargeable System
Objective: To estimate the long-term reliability and capacity degradation of a rechargeable battery system under repeated charge-discharge cycles.
Materials:
- DUT with rechargeable battery (e.g., Lithium-ion)
- Custom test jig for continuous cycling
- Battery cycler/tester
- Temperature monitoring system
Methodology:
- Baseline Characterization: Fully charge the DUT's battery using its integrated charging circuitry. Then, perform a controlled discharge at a specified rate (e.g., C/2) to measure its initial total capacity.
- Accelerated Cycling: Place the DUT in the test jig, which will automatically and continuously charge and discharge the battery. The discharge should simulate a typical daily usage profile for the device. To accelerate the test, cycles can be run back-to-back, and the depth of discharge can be set to 80-100%.
- Periodic Check-points: At every 100-cycle interval, pause the test and perform another full capacity measurement (as in Step 1) to track capacity fade over time.
- Data Analysis: Plot the measured capacity against the number of cycles. The data will show a degradation curve. The experiment can be concluded when the battery's capacity falls below 80% of its initial rated capacity, which is a common industry endpoint for a battery's useful life.
- Extrapolation: Use the collected data to model and extrapolate the expected battery lifespan under normal, in-vivo usage conditions.
Visualization: Safety System Logic and Experimental Workflow
To aid in the understanding and implementation of these concepts, the following diagrams illustrate the logical flow of a safety system and the experimental workflow for power validation.
Power Failure Mitigation Logic
Diagram 1: Power failure mitigation logic flowchart.
Redundant Power System Test Workflow
Diagram 2: Redundant power system test workflow.
The Scientist's Toolkit: Key Research Reagents & Materials
Table 3: Essential Materials for Power System Research & Testing
| Item / Reagent | Function / Explanation |
|---|---|
| Programmable DC Power Supply & Electronic Load | Emulates battery behavior (charge/discharge curves) and simulates the dynamic power consumption of the implantable device for controlled bench testing. |
| Biocompatible Encapsulation Material | Protects the internal electronics, including the power source, from the harsh environment of the human body, preventing corrosion and failure. Materials include medical-grade silicone, polyurethane, and parylene [6]. |
| Supercapacitor or Secondary Battery | Acts as the redundant or auxiliary power source in a power supply redundancy scheme, providing energy for fail-safe operations or during primary source interruption [7]. |
| Safety Integrated Circuits (ICs) | Includes Power Management ICs (PMICs) with voltage monitoring, watchdog timers, and dedicated sequencers for safe power-up/power-down, as well as battery fuel gauge ICs for accurate state-of-charge reporting [50]. |
| Electrochemical Impedance Spectroscopy (EIS) Equipment | Used to characterize the health and aging of batteries by measuring their impedance across a range of frequencies, a key metric for predicting end-of-life. |
| Environmental Chamber | Allows for testing the power system's performance and reliability under various simulated in-vivo conditions, such as a stable 37°C and high humidity. |
Frequently Asked Questions (FAQs)
Q1: Within the context of implantable medical devices, what is the specific scope of IEC 62133, and what are its key testing requirements? IEC 62133 is an international safety standard specifically for secondary (rechargeable) lithium cells and batteries. For implantable medical devices, it sets the benchmark for safety testing to prevent hazards like thermal runaway, fire, or leakage. Its key testing requirements include electrical tests (such as short-circuit and overcharge tests) and mechanical tests (like vibration and shock), ensuring batteries can withstand both normal and abusive conditions [51].
Q2: How do the principles of ISO 10993-1 integrate into a risk management process for a new implantable power source? ISO 10993-1 defines the principles for the biological evaluation of medical devices within a risk management process. For a new implantable power source, this means you must systematically identify and assess the biological risks arising from its materials. The evaluation is based on the nature and duration of the device's contact with body tissues. This process helps determine the necessary level of biocompatibility testing, aiming to demonstrate safety and, where possible, reduce the need for animal testing [52]. The U.S. FDA also provides guidance on using this standard for regulatory submissions [53].
Q3: Our research team is selecting a battery chemistry for a long-term implantable device. What are the critical performance metrics we should compare? Selecting a battery chemistry requires a careful trade-off between several critical performance metrics. The key parameters to compare are energy density (which impacts battery size and runtime), cycle life (which determines how long the battery can last before replacement), and platform voltage. The following table summarizes these metrics for common lithium-based chemistries considered for medical implants [51]:
| Chemistry | Platform Voltage (V) | Energy Density (Wh/kg) | Cycle Life (cycles) |
|---|---|---|---|
| LiFePO4 | 3.2 | 90–160 | 2,000–5,000 |
| NMC | 3.6 | 150–220 | 1,000–2,000 |
| LCO | 3.7 | 150–200 | 500–1,000 |
| LTO | 2.4 | 70–80 | 7,000–10,000 |
Q4: What are the primary regulatory safety standards that a battery for a portable or implantable medical device must comply with? Medical device batteries must adhere to a strict set of international safety standards. The primary ones include:
- IEC 62133: Safety requirements for secondary (rechargeable) lithium cells and batteries [51].
- ANSI/AAMI ES60601-1: General requirements for basic safety and essential performance of medical electrical equipment [51].
- UL 1642: Safety standard for lithium batteries in the North American market [51].
- ISO 10993-1: The cornerstone standard for biological evaluation of medical devices to ensure biocompatibility, which is critical for implants [52].
Q5: What does a basic biocompatibility testing workflow look like for materials used in an implantable energy harvester? A biocompatibility assessment follows a structured, risk-based workflow. It begins with a thorough characterization of all materials and their intended use (including the nature and duration of body contact). This information is used to identify potential biological hazards (e.g., cytotoxicity, sensitization). A testing plan is then developed to evaluate these risks, which may include in vitro and, if necessary, in vivo tests. The entire process is documented within the device's risk management file [52].
Troubleshooting Guides
Guide 1: Troubleshooting Battery Performance and Safety Testing
This guide addresses common issues encountered during the validation of battery performance and safety against standards like IEC 62133.
Problem 1: Low Cycle Life During Validation Testing
- Symptoms: The battery capacity falls below 80% of its initial capacity well before the expected number of charge-discharge cycles.
- Investigation & Resolution:
- Review Charge/Discharge Parameters: Confirm that the test is using the manufacturer-specified charging voltage, current, and cut-off voltage. Even slight deviations can drastically reduce longevity.
- Analyze Electrolyte & Separator: Use microscopy to inspect for separator degradation or signs of metallic lithium plating (lithiation) on the anode, which consumes cycle life [54].
- Check Test Environment: Ensure the cycle life test is conducted in a temperature-controlled environment, as elevated temperatures accelerate degradation.
Problem 2: Battery Overheating During Overcharge/Short-Circuit Test
- Symptoms: The battery temperature exceeds limits defined in the safety standard, leading to test failure.
- Investigation & Resolution:
- Verify Battery Management System (BMS): The BMS is the primary defense. Check that the overcharge protection circuit is triggering at the correct voltage and that the short-circuit protection responds quickly enough [51].
- Inspect Internal Components: After a failed test, a post-mortem analysis using micro-CT or microscopy can reveal internal shorts, separator damage, or other faults [54].
- Confirm Cell Quality: Ensure the battery cells are from a reputable source and are not counterfeit or damaged from prior handling.
Problem 3: Unexpected Voltage Output or Rapid Self-Discharge
- Symptoms: The battery's open-circuit voltage is incorrect, or it loses charge much faster than specified while idle.
- Investigation & Resolution:
- Check for Internal Leakage: Use a multimeter to check for a high-resistance current path between the battery terminals and its casing.
- Test Individual Cells: In a multi-cell pack, test the voltage of each cell individually to identify a single faulty cell that is degrading the performance of the entire pack [55].
- Visual Inspection: Remove covers and inspect for signs of fluid spills, corrosion on connectors, or damaged insulation on wires that could create a parasitic load [47].
Guide 2: Troubleshooting Biocompatibility and Material Integration
This guide helps resolve challenges related to the biological safety and integration of novel materials in implantable power systems.
Problem 1: Failed Cytotoxicity Test (In-Vitro)
- Symptoms: Extracts from your device material cause excessive cell death in standardized cell culture assays.
- Investigation & Resolution:
- Identify Leachables: Perform chemical analysis (e.g., GC-MS) on the extraction medium to identify toxic substances leaching from the polymer, metal, or adhesive.
- Review Manufacturing Process: Residual solvents, sterilants (e.g., EtO), or machining lubricants from the manufacturing process can be the source of toxicity. Ensure proper cleaning and validated sterilization cycles [54].
- Reformulate Material: Consider using a higher purity resin, a different polymer, or a modified encapsulation material that has a known history of biocompatibility.
Problem 2: Foreign Body Reaction Upon Implantation (In-Vivo)
- Symptoms: Histological analysis of implant sites shows excessive inflammation or thick fibrous encapsulation, which can isolate the device and impair its function.
- Investigation & Resolution:
- Analyze Material Surface: A rough or irregular surface texture can provoke a stronger immune response. Use microscopy and surface profilometry to characterize and, if necessary, polish the material surface to a smoother finish [54].
- Check Material Stability: Ensure the material is not degrading in vivo in an unexpected way, releasing particulates or chemicals that sustain inflammation.
- Verify Sterility: Aseptic implantation is critical. An infection will cause a severe inflammatory response that is indistinguishable from a material-based reaction.
The Scientist's Toolkit: Research Reagent & Material Solutions
The following table details key materials and instruments essential for experimental research in power management for implantable medical devices [51] [8] [54].
| Item | Function / Rationale |
|---|---|
| Stereo Microscope | For visual inspection of battery components, welds, and for identifying physical defects like burrs, chips, or scratches on device housings [54]. |
| Lithium Iron Phosphate (LiFePO4) | A lithium-ion battery chemistry known for its long cycle life and enhanced safety, making it a candidate for implants requiring medium-term reliability [51]. |
| Battery Management System (BMS) Test Rig | A custom setup to validate the safety functions of the BMS, including overcharge protection, cell balancing, and short-circuit response [51]. |
| Multimeter / Data Logger | For basic electrical testing, checking for power supply issues, continuity, and proper voltage levels in device components and circuits [55]. |
| Thermoelectric Generator (TEG) | A device that converts body heat into electricity, explored as a sustainable power source for implants by harvesting energy from thermal gradients [8] [1]. |
| Biocompatible Encapsulation (e.g., Parylene, Titanium) | Materials used to hermetically seal the implantable device, protecting internal electronics from body fluids and shielding the body from potentially toxic materials [51] [8]. |
Core Concepts and Quantitative Data
Table 1: Primary Degradation Mechanisms and Mitigation Strategies in Implantable Device Batteries
| Degradation Mechanism | Impact on Device Performance | Proven Mitigation Strategy | Supporting Data / Model |
|---|---|---|---|
| Capacity Fade | Reduced device runtime; potential therapy interruption. | Operate within partial state-of-charge (e.g., 20-80%) [56]. | Models show over 85% capacity retention after 8 years with proper management versus 60% with poor practices [56]. |
| Power Fade (Increased Internal Resistance) | Inability to deliver high-power pulses (e.g., for cardiac defibrillation). | Minimize exposure to extreme temperatures and high discharge rates [56]. | A 100% increase in internal resistance typically indicates end-of-life [57]. |
| Chemical Stress from High/Low Voltage | Accelerated aging and permanent capacity loss. | Implement smart charging algorithms to avoid voltage extremes [58]. | Consistently charging to 100% can reduce battery life by up to 25% over five years [56]. |
Table 2: Economic and Health Impact of Extended Battery Longevity in Cardiac Implantable Electronic Devices (CIEDs) [59]
| Outcome Metric | Improvement with Extended Battery Life (ICDs) | Improvement with Extended Battery Life (CRT-Ds) |
|---|---|---|
| Battery Replacement Procedures | 44% reduction | 32% reduction |
| Device-Related Infections | 23% reduction | 22% reduction |
| Non-Infectious Complications | 10% reduction | 8% reduction |
| Total Healthcare Costs per Patient | 9% reduction | 10% reduction |
Troubleshooting Guide: Frequently Asked Questions
FAQ 1: What are the primary failure modes for batteries in implantable applications, and how can they be diagnosed?
Failure modes include abnormal capacity fade, increased internal resistance, and sudden failure. Diagnosis relies on continuous monitoring of State of Charge (SoC) and State of Health (SoH) [58]. A key diagnostic indicator is a sustained 100% increase in internal resistance, which signals the end of usable life [57]. Researchers should implement real-time monitoring systems that track voltage, current, and temperature to identify these failure modes early [58].
FAQ 2: How does temperature specifically impact battery longevity in vivo?
Temperature is a critical accelerant of degradation. Operating outside the optimal range of 20-25°C (68-77°F) can reduce battery life by up to 30% over time [56]. High temperatures increase the rate of deleterious side reactions within the cell, while low temperatures temporarily reduce range and can increase internal resistance [56]. For every 10°C increase in temperature, the rate of many chemical degradation reactions doubles.
FAQ 3: What experimental parameters are most critical when modeling battery lifespan for a new implantable device?
Key parameters include:
- Charge/Discharge Cycle Depth: Cycling between 20% and 80% capacity, rather than 0-100%, significantly extends cycle count [56].
- Charge/Discharge Rate (C-rate): High currents during charging (fast charging) or discharging generate more heat and stress, accelerating degradation [56].
- Operating Temperature: As above, this is a primary accelerator [56].
- Calendar Age: Chemical degradation occurs even when the device is not in use.
FAQ 4: What emerging power solutions could eliminate battery replacement surgeries?
Research is focused on energy harvesting techniques that use the body's own energy:
- Glucose Fuel Cells: Devices that convert sugars in bodily fluids into electrical energy at the microwatt scale, mimicking how organs extract energy [2] [1].
- Ultrasound Wireless Power Transfer (US-WPT): An external wearable transmitter sends ultrasound waves to an implanted device, which converts the mechanical energy to electrical power via the piezoelectric effect, eliminating the need for an implanted battery [60] [1].
- Thermoelectric Generators (TEGs): These generate electricity from the body's natural thermal gradient [1].
Experimental Protocols for Longevity Assessment
Protocol 1: Remaining Useful Life (RUL) Assessment Using a Hybrid Data-Driven/Model-Based Method [61]
This protocol enables online capacity estimation and RUL prediction for lithium-ion batteries in implantable applications.
- Data Acquisition: Continuously collect time-synchronized voltage, current, and temperature data from the battery cell during charge/discharge cycles under typical use conditions.
- Feature Extraction: For each cycle, extract characteristic features (e.g., voltage curve shapes, time constants) from the capacity versus voltage (Q-V) charge curve.
- Capacity Estimation (Data-Driven): Use a sparse Bayesian learning model (a type of kernel regression) to infer the cell's capacity from the extracted features. This model approximates the relationship between the features and the actual capacity.
- State-Space Model Definition (Model-Based): Define a discrete-time state-space model that describes the capacity fade behavior of the cell. Example models include a single exponential function or a sum of exponential and power functions.
- Model Updating and RUL Prediction (Recursive Bayesian Filtering): Employ a filtering technique (e.g., Particle Filter, Gauss-Hermite Particle Filter) to recursively update the state-space model parameters as new capacity estimates arrive. The RUL is predicted by extrapolating the updated model forward until the capacity reaches a predefined failure threshold.
Protocol 2: In Vitro Validation of Energy Harvesting Systems [2] [1]
This protocol validates the performance of glucose fuel cells as a sustainable power source.
- Setup: Assemble a glucose fuel cell in a sterile, temperature-controlled chamber simulating physiological conditions (37°C, pH 7.4).
- Simulate Physiological Environment: Use a solution containing glucose and oxygen at concentrations mimicking those found in target bodily fluids (e.g., cerebrospinal fluid, blood).
- Load Characterization: Connect the fuel cell to an electronic load and measure the open-circuit voltage, short-circuit current, and maximum power point. The goal is to consistently generate power exceeding 1µW to simulate powering a cardiac device [2].
- Lifetime and Stability Testing: Operate the fuel cell under a continuous or pulsed load for an extended period (e.g., weeks to months) while monitoring power output degradation over time.
- Biocompatibility Testing: Following power validation, subject the fuel cell materials to standardized in vitro biocompatibility tests (e.g., ISO 10993-5) to assess cytotoxicity.
Workflow Visualization
Hybrid Methodology for Battery RUL Prognostics [61]
The Scientist's Toolkit: Research Reagent Solutions
Table 3: Essential Materials for Implantable Battery and Energy Harvesting Research
| Item | Function / Application in Research | Key Characteristics |
|---|---|---|
| Lithium-based Cells (Li/I2, Li/SVO) | Benchmark power sources for long-term IMD studies [8] [59]. | High volumetric energy density; proven multi-year longevity in devices like pacemakers and ICDs [8]. |
| Piezoelectric Elements (PZT) | Core component for ultrasound-based wireless power transfer; converts mechanical waves to electricity [60]. | High conversion efficiency; enables creation of batteryless, flexible implants for pain management and other therapies [60]. |
| Glucose Fuel Cell Prototypes | Sustainable power source research; converts biochemical energy from bodily sugars to electricity [2] [8]. | Operates under mild physiological conditions; aims for µW-scale power for miniaturization [2]. |
| Sparse Bayesian Learning Algorithms | Data-driven capacity estimation from operational data without destructive testing [61]. | Creates highly sparse regression models; infers battery health from voltage/current features [61]. |
| Particle Filtering Software | Recursive Bayesian filtering for updating empirical capacity fade models and predicting RUL [61]. | Effectively handles non-Gaussian noises and non-linear models for accurate prognostics [61]. |
Core Challenges in Implantable Medical Devices
The development of next-generation implantable medical devices is constrained by three interconnected fundamental challenges: ensuring long-term biocompatibility, managing extreme size constraints, and achieving sufficient energy density for continuous operation. Overcoming these hurdles is essential for realizing devices that are safe, compact, and long-lived [7].
Table 1: Quantitative Overview of the Implantable Medical Devices Market and Key Challenges
| Aspect | Metric | Details / Impact |
|---|---|---|
| Market Growth | Global Market Size (2024) | USD 97.55 Billion [62] |
| Projected Market Size (2034) | USD 179.70 Billion [62] | |
| Compound Annual Growth Rate (CAGR) | 6.3% (2025-2034) [62] | |
| Key Challenges | Biocompatibility & Biofouling | Persistent issues with tissue-material interfacial interactions, foreign body response, and microbial colonization hinder long-term performance [63]. |
| Power Source Limitations | Conventional battery technologies limit device longevity, necessitate replacement surgeries, and pose safety concerns [1]. | |
| Device Miniaturization | Continuous demand for smaller, less invasive devices conflicts with the space required for adequate power storage [7]. |
Troubleshooting Guide: Biocompatibility and the Foreign Body Response
Q1: What are the primary biological challenges causing the failure of my chronically implanted sensor? The most common biological challenges are biofouling (the non-specific adsorption of proteins and cells on the device surface), the foreign body response (FBR) (a chronic inflammatory reaction that can lead to fibrotic encapsulation), and microbial colonization (bacterial infection and biofilm formation) [63]. This fibrotic capsule can isolate the device, severely degrading its function by impairing its ability to sense physiological signals or deliver therapy.
Q2: What experimental methodologies can I use to evaluate and mitigate the foreign body response? A multi-faceted experimental approach is required to assess and improve biocompatibility.
Experimental Protocol: In Vivo Assessment of Biocompatibility
- Objective: To evaluate the tissue-material interface and foreign body response to a novel implantable electrode or sensor over a defined period.
- Materials:
- Test implant device (e.g., electrode, sensor).
- Control implant (e.g., a material with known biocompatibility, such as medical-grade silicone or titanium).
- Animal model (e.g., rodent, subcutaneous or target tissue implantation).
- Standard surgical equipment and facilities.
- reagents for histology (e.g., formalin, paraffin, stains like H&E, Masson's Trichrome for collagen).
- Methodology:
- Implantation: Perform a sterile surgical implantation of both test and control devices in the target tissue according to an approved animal protocol.
- Explanation: At predetermined time points (e.g., 1, 4, and 12 weeks), explant the devices along with the surrounding tissue.
- Histological Analysis:
- Fix tissue samples in formalin and embed in paraffin.
- Section the tissue and perform staining.
- H&E Staining: Assess general tissue morphology and inflammatory cell infiltration (e.g., macrophages, neutrophils).
- Masson's Trichrome Staining: Specifically visualize and quantify the extent of fibrous capsule formation (collagen deposition) around the implant.
- Functional Testing: For explanted sensors/electrodes, perform in vitro functional tests to quantify any degradation in performance (e.g., sensitivity, impedance) compared to pre-implantation baseline.
- Expected Outcome: A successful novel material/coating will show a significantly reduced thickness of the fibrous capsule and lower density of chronic inflammatory cells compared to the control, correlating with preserved device functionality.
Diagram 1: The cascade of the Foreign Body Response (FBR) leading to device failure.
Research Reagent Solutions for Biocompatibility Studies
| Reagent / Material | Function in Experiment |
|---|---|
| Medical-Grade Silicone | A common control material with known, stable biocompatibility for baseline comparison [63]. |
| Titanium or CoCr Alloys | Metallic biomaterials used as controls for orthopedic and cardiovascular implants; provide benchmarks for corrosion resistance and biocompatibility [62] [64]. |
| Masson's Trichrome Stain | A key histological stain used to differentiate and quantify collagen fibers (blue/green) in the developing fibrous capsule from muscle and cytoplasm (red) [63]. |
| CD68 Antibody | An antibody for immunohistochemical staining to specifically identify and quantify macrophages, the key immune cells driving the foreign body response. |
Troubleshooting Guide: Power Management and Energy Harvesting
Q3: The limited lifespan of batteries is a major constraint for my long-term implant design. What are the leading alternatives? The field is moving beyond traditional batteries toward energy harvesting (converting the body's innate energy into electricity) and wireless power transfer. Leading alternatives include [1] [7]:
- Kinetic/Triboelectric Harvesters: Convert mechanical energy from tissue motion, muscle stretching, or heartbeats.
- Biofuel Cells: Generate electricity through the electrochemical oxidation of endogenous fuels like glucose.
- Thermoelectric Generators (TEGs): Utilize the thermal gradient between the body core and the skin surface.
- Ultrasound Wireless Power Transfer (US-WPT): Uses ultrasonic waves transmitted through tissue to deliver power externally.
Q4: How do I select and prototype an appropriate energy harvesting strategy for my specific application? Selection is based on the implant's location, power demands, and size constraints. A systematic experimental workflow is required for validation.
Diagram 2: A workflow for selecting and validating an energy harvesting strategy.
Experimental Protocol: In Vitro Characterization of a Glucose Biofuel Cell
- Objective: To measure the continuous power output and stability of a biofuel cell prototype in a physiologically relevant environment.
- Materials:
- Biofuel cell prototype (anode, cathode, membrane).
- Phosphate-buffered saline (PBS) solution or simulated body fluid.
- D-Glucose.
- Potentiostat/Galvanostat for electrochemical characterization.
- Environmental chamber for temperature control.
- Methodology:
- Setup: Place the biofuel cell prototype in a solution of PBS with a glucose concentration matching the target tissue (e.g., ~5 mM for blood, higher for subcutaneous).
- Polarization Curve: Use the potentiostat to perform a linear sweep voltammetry to determine the open-circuit voltage, short-circuit current density, and maximum power point.
- Stability Test: Operate the cell at its maximum power point voltage for an extended period (e.g., 24-72 hours) while monitoring the current output to assess performance decay.
- Environmental Variation: Repeat measurements at different pH levels and temperatures to simulate physiological fluctuations.
- Expected Outcome: A viable biofuel cell will demonstrate a stable power density (e.g., µW/cm² to mW/cm²) sufficient to power the target electronic circuits (e.g., a sensor and low-power transmitter) over the test duration.
Table 2: Comparison of Emerging Energy Harvesting Techniques for Implants
| Energy Harvesting Technique | Principle | Key Advantages | Current Limitations / Research Focus |
|---|---|---|---|
| Glucose Biofuel Cells | Electrochemical oxidation of glucose [1]. | Accesses an inexhaustible fuel source in biofluids; potential for continuous power [1] [7]. | Low power density; long-term stability of enzymes/catalysts; voltage regulation [7]. |
| Triboelectric Nanogenerators (TENGs) | Generates electricity from friction-like contact (e.g., from heartbeats, lung motion) [1]. | High efficiency for low-frequency motions; wide range of materials [1]. | Long-term mechanical reliability and packaging for in vivo use; power output consistency. |
| Ultrasound Wireless Power Transfer (US-WPT) | Transmits power via ultrasonic waves through tissue [1]. | Deep tissue penetration; safety profile; no need for internal circuitry to be exposed [1]. | Requires external transmitter; alignment sensitivity; low energy conversion efficiency. |
| Thermoelectric Generators (TEGs) | Converts body heat to electricity using the skin-ambient temperature gradient [1]. | Continuous power source if gradient is maintained; highly reliable with no moving parts [1]. | Very low voltage and power output; highly dependent on placement and environment. |
Research Reagent Solutions for Energy Harvesting
| Reagent / Material | Function in Experiment |
|---|---|
| Simulated Body Fluid (SBF) | A solution with ion concentrations similar to blood plasma, used for in vitro testing of biofuel cells and material degradation [7]. |
| Potentiostat/Galvanostat | Essential electronic instrumentation for characterizing the electrochemical performance (e.g., power curves, impedance) of batteries and biofuel cells [7]. |
| Polylactic Acid (PLA) / Polyglycolic Acid (PGA) | Biodegradable polymers used to create the housing or structural components of temporary implants, aligning with the trend of biodegradable electronics [62]. |
| PDMS (Polydimethylsiloxane) | A biocompatible silicone polymer frequently used as a flexible substrate or encapsulant for soft, conformable implants and energy harvesters. |
FAQs on Device Integration and Real-World Operation
Q5: How can I design the user interface for an external device communicator to be effective for clinical staff and patients? For external device communicators (e.g., remote patient monitors), the UI must prioritize clarity and accessibility.
- High Color Contrast: Adhere to WCAG 2.2 guidelines, requiring a minimum contrast ratio of 4.5:1 for normal text against its background to ensure readability for users with low vision [65]. This is a legal requirement in many regions.
- Clear Iconography and Status Indicators: Use unambiguous icons and progress lights to guide users through troubleshooting steps, such as device interrogation and data transmission errors [66].
- Simple Troubleshooting Prompts: Provide clear, step-by-step instructions for common errors (e.g., "Can't send information"), such as checking cable connections or repositioning the communicator [66].
Q6: What are the key electromagnetic interference (EMI) considerations for implantable devices that my design must withstand? Implantable cardiac devices offer a well-documented framework for EMI risks, which all implantable electronics should consider [67] [68].
- Magnets: Strong magnets in consumer electronics (smartphones, smartwatches, headphones) can temporarily disrupt device function. A safe distance of at least 6 inches (15 cm) should be maintained [68].
- Security Systems: Passing through anti-theft detectors or airport metal detectors at a normal pace is generally safe, but lingering should be avoided. Hand-held wands should not be held over the implant [67].
- Industrial Equipment: Activities like arc welding (currents >160 amps) or using chainsaws carry a higher risk of interference due to strong electromagnetic fields. Specific safety precautions and consultation with a physician are required [67].
- MRI Compatibility: While some modern devices are MRI-conditional, many are not. The strong magnetic fields can alter settings or damage the device. Always confirm device-specific MRI safety [67] [68].
Thermal Management and Preventing Hazards like Thermal Runaway in Implantable Environments
Fundamental Hazard Mechanisms
Q1: What is thermal runaway and why is it a critical concern in implantable medical devices (IMDs)?
A: Thermal runaway is an uncontrolled, self-sustaining temperature increase within a battery, triggered by exothermic chain reactions that can lead to fire or explosion [69]. In the context of IMDs, this poses a direct risk to patient safety and device reliability.
The process evolves through distinct stages, often beginning with the decomposition of the Solid Electrolyte Interphase (SEI) at 70-120°C, followed by separator collapse at 135-200°C, and culminating in violent cathode material decomposition and gas release above 200°C [70] [71]. For researchers, a key challenge is the significant temperature difference between a battery's internal core and its external surface; internal temperatures can be hundreds of degrees Celsius higher and rise much faster than surface temperatures, making external monitoring insufficient for early warning [70] [69].
Q2: What are the primary temperature limits for human tissue exposed to implanted electronics?
A: While the search results do not provide a single definitive temperature threshold, they emphasize that thermal management is paramount for patient safety. The design goal is to maintain device surfaces at safe touch temperatures. Notably, the human skin can tolerate higher temperatures on plastics (up to ~85°C) than on metals (~60°C) due to differences in thermal conductivity [72]. Dissipating heat safely is a major engineering challenge, especially for high-power Brain-Machine Interface (BMI) implants, as excessive heat dissipation inside the body can cause tissue damage [73].
Troubleshooting Common Experimental Challenges
Q3: Our experimental battery cells show voltage fluctuations under mechanical stress, but no clear correlation to thermal runaway. Is this normal?
A: Yes, this is a documented experimental observation. Research has shown that under mechanical abuse conditions, voltage fluctuation may not be a reliable predictor of thermal runaway development [70]. Relying solely on voltage and current monitoring provides a minute-level lag, making it difficult to capture the second-level突变signals of thermal runaway onset [70]. You should implement additional sensing modalities, such as internal temperature or pressure monitoring, to capture a more accurate picture of the cell's state.
Q4: How can we effectively monitor internal temperature and pressure within a sealed cell during abuse testing?
A: Advanced "lab-on-fiber" optical fiber sensors are a state-of-the-art solution for this challenge. These sensors are compact (e.g., 125 µm in diameter) and can be implanted directly into commercial cells (e.g., 18650 formats) to survive extreme conditions during thermal runaway (up to 600°C) [69].
- Methodology: A common approach involves a multifunctional sensor integrating two optical elements on a single fiber:
- Experimental Workflow: The sensor is inserted into the cell's central hole, interrogated with a broadband light source, and its spectral response is continuously monitored during operation and abuse testing.
Implantable Optical Fiber Sensor Workflow for In-Situ Cell Monitoring
Advanced Monitoring & Experimental Protocols
Operando Monitoring of Internal Parameters for Early Warning
Objective: To capture the earliest signs of thermal runaway by monitoring internal physical changes within a lithium-ion battery, providing a critical window for safety interventions [69].
Experimental Protocol:
Sensor Fabrication and Calibration:
- Fabricate a multi-functional optical fiber sensor with co-located FBG and FPI elements.
- Calibrate the FBG's wavelength shift (
Δλ) against temperature in a controlled oven. - Calibrate the FPI's wavelength shift against pressure using a pressure chamber.
Cell Instrumentation:
- For cylindrical cells, carefully open the central hole and insert the optical fiber sensor.
- Securely fix the fiber at the entry point to prevent strain on the sensor and ensure proper sealing to maintain the cell's internal environment.
Test Setup:
- Place the instrumented cell in a temperature-controlled test chamber for thermal abuse testing (e.g., ramp heating).
- Connect the optical fiber to an interrogation system (broadband source and optical spectrum analyzer).
Data Collection and Analysis:
- Continuously record the wavelength data from the FBG and FPI during the test.
- Plot internal temperature and pressure versus time.
- Calculate the differential curves (dP/dt) to identify the abrupt "turning point" that signifies the transition from reversible to irreversible reactions, which is a reliable predictor of imminent thermal runaway before safety venting occurs [69].
Key Reagent Solutions for Internal Monitoring:
| Research Reagent / Material | Function in Experiment |
|---|---|
| FBG/FPI Optical Fiber Sensor | Survives harsh in-cell environment to provide direct, real-time measurements of internal temperature and pressure [69]. |
| Single-Mode Optical Fiber | Serves as the physical conduit for light transmission to and from the implanted sensor. |
| Optical Spectrum Analyzer | Interrogates the sensor by measuring minute shifts in the reflected light's wavelength. |
| Sealing Epoxy/Glass-to-Metal Seal | Ensures the cell remains hermetically sealed after sensor implantation, preventing electrolyte leakage. |
Material and System Design Solutions
Q5: What material and design strategies can prevent thermal runaway in IMD batteries?
A: A multi-layered approach integrating chemistry, electronics, and mechanical design is most effective.
Built-in Safety Features:
- Battery Management Systems (BMS): Actively monitor and control battery parameters to prevent overcharging, over-discharging, and short circuits [74].
- Advanced Chemistries: Use solid-state lithium-ion batteries or LiFePO4 cathodes, which are inherently more stable and significantly reduce the risk of thermal runaway [74] [71].
- Heat-Resistant Electrolytes: Formulations that can withstand higher temperatures minimize the risk of overheating and decomposition [74].
- Ceramic Separators: Replace traditional polyolefin separators to improve thermal stability and prevent meltdown-induced internal short circuits [71].
Summary of Key Material and Design Strategies:
| Strategy Category | Specific Example | Function & Benefit |
|---|---|---|
| Battery Chemistry | Solid-State Li-ion | Safer, more stable; eliminates flammable liquid electrolyte [74]. |
| LiFePO4 (LFP) Cathode | Strong P-O bonds enhance thermal stability; does not release oxygen at high temps [71]. | |
| System Electronics | Battery Management System (BMS) | Monitors voltage, current, temp; prevents unsafe operating conditions [74]. |
| Thermal Cutoffs | Halts current flow if a temperature threshold is exceeded [74]. | |
| Mechanical Design | Pressure Relief Mechanisms | Vents internal pressure safely during a failure, preventing rupture [74]. |
| Protective Enclosures | Shields battery from physical damage and helps manage thermal conditions [74]. | |
| Thermal Management | Heat Pipes / Vapor Chambers | Efficiently transfers heat away from sensitive components [75]. |
| Graphite Heat Spreaders | Distributes heat evenly, preventing localized hot spots [75]. |
Integrated Safety Strategy for Implantable Battery Systems
Benchmarks and Real-World Viability: Comparing Power Solutions for Clinical Use
This technical support center provides resources for researchers developing power solutions for implantable medical devices (IMDs). The following guides and data are framed within the context of advanced power management strategy research.
Troubleshooting Guides & FAQs
FAQ: Power Source Selection
Q: What are the key metrics for selecting a power source for a new implantable device? A: The primary metrics are Energy Density (Wh/kg or Wh/L), Power Output (µW to mW), Lifespan (years), and Safety (biocompatibility, risk of leakage or overheating). The optimal choice is a trade-off based on your device's application, size constraints, and power demands [1] [7].
Q: My glucose fuel cell prototype is not achieving the projected power output. What could be wrong? A: Common issues include suboptimal electrode catalysis, insufficient glucose concentration at the reaction site, or biofouling on the electrode surface. Ensure your in-vitro testing setup accurately mimics the target physiological environment (e.g., glucose concentration, flow rates) [2].
Q: The battery in my prototype shows a rapid drop in voltage. How should I diagnose this? A: Follow a systematic approach:
- Check the Load: Verify if the connected circuit is drawing higher current than expected.
- Measure Internal Resistance: A significant increase often indicates battery age or failure.
- Inspect for Short Circuits: Visually examine and test the device for potential micro-shorts.
- Review Charge/Discharge Cycles: The battery may have reached its end-of-life if cycled beyond its specification [76] [77].
Troubleshooting: Energy Harvester Performance
Issue: Low power output from a thermal energy harvester.
- Potential Cause 1: Poor thermal contact between the thermoelectric generator (TEG) and the heat source/sink.
- Solution: Re-apply thermal interface material and ensure mechanical pressure is adequate.
- Potential Cause 2: The thermal gradient across the TEG is smaller than designed for.
- Solution: Characterize the actual thermal environment in the implantation site and re-design the heat sink if necessary [1] [7].
Issue: Inconsistent voltage from a kinetic (motion) energy harvester.
- Potential Cause 1: The tissue motion frequency does not match the harvester's resonant frequency.
- Solution: Re-tune the mechanical resonant frequency of the harvester or select a different energy harvesting principle (e.g., piezoelectric).
- Potential Cause 2: The power management circuit is not efficiently rectifying and storing the irregular AC power.
- Solution: Test the harvester with a dedicated energy-harvesting power management IC [1].
The following tables summarize key quantitative data for comparing power technologies for IMDs.
Table 1: Performance Comparison of Current and Emerging Power Technologies
| Technology | Energy Density | Power Output | Typical Lifespan | Key Safety Considerations |
|---|---|---|---|---|
| Lithium-ion Battery [76] | 150-250 Wh/kg | Medium to High | 5-10 years | Requires robust BMS to prevent thermal runaway; potential for leakage. |
| Lithium Iron Phosphate (LFP) Battery [76] | 90-160 Wh/kg | Medium | >10 years | Enhanced thermal and chemical stability; safer chemistry. |
| Glucose Biofuel Cell [1] [2] | N/A (Continuous fuel) | 1 µW - 1 mW (Projected) | Potentially decades | Biocompatibility of materials and by-products; no toxic materials. |
| Thermal Energy Harvester (TEG) [1] [7] | N/A (Continuous source) | 10-100 µW/cm² (Body heat) | >20 years | Biocompatibility and thermal safety of implants. |
| Solid-State Battery [76] | 250-800 Wh/kg (Projected) | High | >15 years (Projected) | No liquid electrolyte; eliminates leakage and flammability risks. |
Table 2: Quantitative Metrics for Energy Harvesting Techniques
| Energy Harvesting Technique | Power Density / Output | Key Metric | Efficiency |
|---|---|---|---|
| Electromagnetic (Body Motion) [7] | 0.2 - 800 µW/cm³ | Volumetric Power Density | Highly motion-dependent |
| Ultrasound Wireless Power Transfer [1] | >100 µW (at depth) | Penetration Depth & Received Power | 1-5% (in tissue) |
| Piezoelectric (Heartbeat) [1] [7] | ~1 µW/cm² | Area Power Density | Low for single source |
| Thermoelectric (Body Heat) [1] [7] | 20-60 µW/cm² (for 5°C gradient) | Power per Unit Area | 0.1-1% (for small ΔT) |
Experimental Protocols for Power Source Evaluation
Protocol 1: In-Vitro Characterization of a Glucose Biofuel Cell
Objective: To determine the power output and stability of a glucose fuel cell prototype under simulated physiological conditions.
Essential Materials:
- Phosphate Buffered Saline (PBS) or simulated body fluid
- D-Glucose
- Potentiostat/Galvanostat
- 3-electrode electrochemical cell
- Temperature-controlled bath
Methodology:
- Solution Preparation: Prepare a standard solution (e.g., PBS) with a physiologically relevant glucose concentration (e.g., 5 mM) [2].
- Setup: Immerse the biofuel cell anode and cathode in the solution within the electrochemical cell. Maintain a constant temperature of 37°C.
- Polarization Curve: Use the potentiostat to perform a linear sweep voltammetry (LSV) or chronopotentiometry scan to generate a current-voltage (I-V) curve.
- Power Calculation: Calculate power output (P = I * V) from the I-V data to create a power-density curve and identify the maximum power point.
- Stability Test: Operate the cell at a constant voltage or current near the maximum power point and monitor the power output over an extended period (e.g., 100+ hours) to assess performance degradation.
Protocol 2: Accelerated Lifetime Testing of a Miniature Battery
Objective: To estimate the operational lifespan of a battery under simulated implant conditions.
Essential Materials:
- Battery cycler/tester
- Temperature/humidity chamber
- Device prototype or simulated load
Methodology:
- Define Baseline: Fully charge and discharge the battery at a standard rate (e.g., C/24) to establish its initial capacity.
- Apply Stressors: Subject the battery to accelerated aging conditions. This can include:
- Elevated Temperature: Store and cycle cells at temperatures above 37°C (e.g., 45°C, 60°C) to accelerate chemical degradation [76].
- High C-Rate Cycling: Use charge/discharge cycles faster than typical use to induce mechanical stress.
- Periodic Check-ups: At regular intervals (e.g., every 50 cycles), perform a reference performance test (capacity check at standard conditions) to track capacity fade.
- Data Extrapolation: Model the capacity fade over time and use an Arrhenius-based model for temperature-accelerated tests to extrapolate lifespan at body temperature (37°C).
Research Workflow and Technology Selection
Experimental Workflow for IMD Power Source Development
Power Source Selection Logic for IMDs
The Scientist's Toolkit: Research Reagent Solutions
Table 3: Essential Materials for IMD Power Source Research
| Item | Function in Research | Example Application / Note |
|---|---|---|
| Potentiostat/Galvanostat | Performs precise electrochemical measurements to characterize fuel cells and battery performance. | Critical for generating I-V curves and conducting cyclic voltammetry. |
| Simulated Body Fluid (SBF) | Provides an in-vitro environment that mimics the ionic composition of human blood plasma. | Testing biocorrosion of materials and the performance of biofuel cells [2]. |
| Biocompatible Encapsulation | Protects electronic components from the harsh bodily environment and prevents toxic leakage. | Materials like Parylene-C and medical-grade silicones are commonly used. |
| Thermal Chamber | Maintains a constant temperature environment for accelerated lifetime testing and stability studies. | Set to 37°C for physiological conditions or higher for accelerated aging tests [76]. |
| Battery Management System (BMS) IC | An integrated circuit that monitors and manages a battery's state, health, and safety. | Essential for protecting rechargeable batteries in a hybrid power system [76]. |
| 3D Printer (High Resolution) | Enables rapid prototyping of custom housings, microfluidic channels, and structural components. | Creating casings for energy harvesters or prototypes for surgical planning. |
Technical Comparison at a Glance
For researchers in implantable medical devices, selecting an appropriate power source is a critical design decision. The table below summarizes the core characteristics of the three primary power strategies.
| Feature | Primary (Non-Rechargeable) Batteries | Rechargeable Batteries | Energy Harvesting Systems |
|---|---|---|---|
| Energy Source | Internal, irreversible chemical reactions [78] | Reversible chemical reactions, reset by external electrical energy [78] | Ambient environmental energy (e.g., light, vibration, heat, RF waves, glucose) [79] [2] |
| Key Chemistry Examples | Alkaline, Lithium-Metal [78] | Nickel-Metal Hydride (NiMH), Lithium-ion [78] | Photovoltaic, Piezoelectric, Electromagnetic, Glucose Fuel Cells [80] [2] [81] |
| Typical Output Voltage | 1.5V (e.g., Alkaline) [78] | 1.2V (e.g., NiMH) [78] | Highly variable and often unstable; can be a few micro watts of power [79] |
| Lifespan / Endurance | Single-use; long shelf life, ideal for low-drain, infrequent replacement [78] [82] | 500-1,000 charge cycles; suffers from self-discharge during storage [78] [82] | Theoretically infinite, but dependent on continuous ambient energy availability [79] |
| Cost Profile | Low initial cost, high long-term cost with replacements [78] | High initial cost (battery & charger), significant long-term savings for high-drain devices [78] [82] | High initial cost for harvester elements and power conversion circuitry; minimal ongoing cost [83] |
| Form Factor & Size Impact | Compact, but can constitute a major portion of device volume [2] | Similar to primary cells, but may require more space for equivalent capacity | Can be bulky (e.g., solar panels); miniaturization is a key research challenge [79] [83] |
| Environmental Impact | High waste volume; toxic chemicals in landfills; ~98% of manufacturing energy is unused [78] [83] | Lower waste volume; contains heavy metals requiring recycling; more efficient resource use over many cycles [78] [82] | "Green" modality; minimal e-waste; reduces battery turnover [84] |
| Ideal Application Context in Implantables | Low-power, long-term implants where replacement surgery is feasible (e.g., some early pacemakers) | Medium-to-high power devices where periodic transcutaneous recharging is acceptable (e.g., modern neurostimulators) | Ultra-low-power micro-implants; targets for eliminating batteries entirely (e.g., miniature glucose-powered sensors) [2] |
Troubleshooting Guides and FAQs
Q1: For a new ultra-miniature implantable glucose monitor, we need to eliminate battery replacement surgeries. Should we use a primary battery or an energy harvester?
A1: For this application, energy harvesting is the superior strategic choice. Primary batteries would eventually deplete, necessitating invasive replacement surgery, which carries risk and discomfort for the patient [2]. A glucose fuel cell, which converts the body's natural sugars into electrical energy at the microwatt (µW) scale, is a promising solution under active research [2]. This approach enables a "set-it-and-forget-it" device, moving closer to the ideal of truly autonomous implants.
Q2: Our research team is developing a wearable patch that monitors muscle activity. The prototype uses disposable batteries that last only a week. Would rechargeable batteries be a better option?
A2: Yes, this is a classic use case for rechargeable batteries. Your device is a high-drain application, consuming power quickly. While disposable batteries have a low upfront cost, the economic and environmental benefits of rechargeables are realized rapidly in such scenarios [78] [82]. A set of NiMH batteries can be recharged hundreds of times, saving significant cost and reducing waste over the product's lifecycle. Ensure your design can accommodate the slightly lower nominal voltage of NiMH cells (1.2V vs. 1.5V) [78].
Q3: We integrated a piezoelectric energy harvester into our experimental implant, but the power output is too weak and unstable to reliably run the sensor. What are our options?
A3: This is a common challenge, as harvested energy is often minimal and intermittent [79]. You have two primary paths forward, both of which can be used together:
- Adopt a Hybrid System: The most pragmatic solution is to use the energy harvester to supplement a rechargeable battery. In this model, the harvester extends the battery's life by continuously providing small trickles of charge, drastically reducing the frequency of recharge cycles and bringing you closer to a perpetually powered device [84] [83]. The battery acts as a reliable buffer for periods of low ambient energy.
- Optimize the Power Budget: Conduct a rigorous analysis of your device's power consumption. Implement aggressive duty cycling, putting the device into deep sleep mode and only waking it for the shortest possible intervals to collect and transmit data [83]. This reduces the average power requirement, making it easier for the harvester to meet the load.
Experimental Protocols for Power Source Evaluation
Protocol 1: Validating a Glucose Fuel Cell for Cardiac Implants
This methodology is inspired by the GLUTRONICS project, which aims to power cardiac devices exceeding 1µW [2].
- 1. Objective: To demonstrate the in-vivo viability of a miniature glucose fuel cell for powering an implantable cardiac sensor.
- 2. Materials:
- Glucose fuel cell prototype
- Simulated physiological fluid or animal model
- Digital multimeter and data acquisition system
- Potentiostat for electrochemical characterization
- Custom-built electronic load to simulate the power demand of a cardiac sensor (>1µW)
- 3. Procedure:
- In-Vitro Characterization: Immerse the fuel cell in a controlled solution mimicking body fluid glucose levels. Use the potentiostat to perform cyclic voltammetry to characterize the electrochemical response and power output.
- Load Testing: Connect the fuel cell to the electronic load set to draw a constant power of 1-10 µW. Monitor the output voltage stability over a period of 24-72 hours.
- In-Vivo Validation (Animal Model): Surgically implant the fuel cell and the connected sensor emulator into an approved animal model.
- Data Collection: Continuously measure and log the voltage, current, and power generated by the fuel cell under real physiological conditions, correlating with blood glucose measurements.
- Failure Analysis: If power drops below the required threshold, analyze the fuel cell for biofouling, catalyst degradation, or membrane failure.
Protocol 2: Testing a Hybrid Piezoelectric-Battery System for a Pneumatic Sensor
This protocol adapts principles from industrial energy harvesting for biomedical applications, such as powering devices from bodily movements [81].
- 1. Objective: To quantify the extension of battery life achieved by integrating a kinetic energy harvester in a self-powered sensor node.
- 2. Materials:
- Target device (e.g., a sensor node with radio transmission)
- Primary or rechargeable battery
- Piezoelectric or electromagnetic energy harvester
- Power management circuit (e.g., LTC3108, ADP5091) [83]
- Data-logging power analyzer (e.g., coulomb counter like LTC3337) [83]
- Testbench setup to simulate vibrational energy input (e.g., shaker table)
- 3. Procedure:
- Baseline Measurement: Power the sensor node with the battery alone. Set the node to perform a sensing and transmission cycle at a fixed interval. Use the coulomb counter to measure the total charge depleted until the battery is exhausted.
- Hybrid System Setup: Connect the energy harvester to the power management circuit, which is set to charge the battery or directly power the load. The harvester is activated by the simulated vibration source.
- Hybrid System Measurement: Under identical conditions and input energy, run the test again. Use the coulomb counter to measure the new, slower rate of battery discharge.
- Data Analysis: Calculate the battery lifespan extension as a percentage:
((L_hybrid - L_baseline) / L_baseline) * 100.
The Scientist's Toolkit: Essential Research Reagents & Materials
| Item / Solution | Function in Research |
|---|---|
| Coulomb Counter (e.g., LTC3337) | Precisely monitors the health and remaining energy in a primary battery by measuring the total charge (in coulombs) drawn from it [83]. |
| Ultra-Low Power Buck Regulator (e.g., LTC3336) | Efficiently converts a battery's variable voltage to a stable system voltage with extremely low no-load quiescent current (e.g., 65 nA), crucial for extending battery life [83]. |
| Multi-Source Energy Harvester IC (e.g., ADP509x, LTC3108) | An integrated circuit that converts raw, unstable AC or low-voltage DC from harvesters (solar, thermal, piezo) into a usable form to charge a battery or supercapacitor [83]. |
| Potentiostat / Galvanostat | A core instrument for characterizing and developing electrochemical power sources like glucose fuel cells, used to perform techniques like cyclic voltammetry [2]. |
| Programmable Electronic Load | Simulates the dynamic power consumption of an implantable device during testing, allowing researchers to validate if a power source can handle real-world demands [2]. |
| Tomonaga-Luttinger (TL) Liquid Model | A theoretical model describing a special one-dimensional quantum electron system that does not thermalize, enabling research into surpassing classical thermodynamic efficiency limits (like Carnot) for future heat harvesting [85]. |
Fundamental Concepts in IMD Power Solutions
What are the primary categories of power solutions for Implantable Medical Devices (IMDs)?
Power solutions for IMDs can be broadly classified into three main categories: Energy Storage (batteries), Energy Harvesting (converting ambient energy from the body or environment), and Wireless Power Transfer (WPT) from an external source [8] [7].
Table: Comparison of Primary Power Solutions for IMDs
| Power Category | Specific Technology | Key Principle | Typical Power Output | Key Advantages | Key Challenges |
|---|---|---|---|---|---|
| Energy Storage | Lithium-based Batteries [8] | Chemical energy storage | Microamperes to Amperes [8] | High reliability, proven long-term use (5-10 years) [8] | Finite energy supply; requires surgical replacement [1] |
| Energy Harvesting | Thermoelectric Generators (TEGs) [1] | Converts body heat to electricity | Hundreds of microwatts [8] | Access to inexhaustible energy from bodily thermal gradients [1] | Low power density; requires significant temperature difference [8] |
| Biofuel Cells [1] | Biochemical conversion of glucose | Milliwatt level [8] | Utilizes abundant glucose and oxygen in blood [1] [8] | Long-term stability and biocompatibility [1] | |
| Piezoelectric Generators [8] | Converts kinetic energy from motion | On the order of milliwatts [8] | Higher power output from body movements [8] | Requires massive motion; not suitable for all implant sites [8] | |
| Wireless Power Transfer | Inductive Coupling [8] [86] | Energy transfer via magnetic fields | ~110 mW (demonstrated for capsules) [86] | Continuous power; no need for batteries [86] | Efficiency sensitive to distance, alignment, and SAR limits [86] |
| Ultrasound Wireless Power Transfer [1] | Energy transfer via ultrasonic waves | Not specified in results | Enhanced penetration depth; immunity to EM radiation [1] [86] | Challenges in efficiency and integration [1] |
Experimental Protocols for Power Solution Validation
What is a standard experimental workflow for validating a new Wireless Power Transfer (WPT) system in vivo?
A robust protocol for validating an inductive WPT system, as demonstrated in robotic capsule endoscopy, involves several critical phases from laboratory testing to in vivo assessment [86].
Validating a Wireless Power Transfer System
How should I design a pilot study to assess the feasibility of my energy-harvesting implant?
A pilot study for a new power solution should focus on feasibility rather than definitive efficacy testing [87]. Key aspects to evaluate include recruitment capability, implementation practicality, data collection procedures, and acceptability of the intervention to the subject [87].
Table: Key Feasibility Indicators for a Pilot Study on IMD Power Solutions
| Feasibility Aspect | Primary Question | Quantitative Indicators | Qualitative Indicators |
|---|---|---|---|
| Recruitment | Can suitable animal models be identified and enrolled? | Recruitment rate; percentage meeting inclusion/exclusion criteria [87] | Difficulties in finding appropriate models [87] |
| Implementation & Fidelity | Can the experimental protocol be delivered as intended? | # of completed training sessions; adherence to protocol steps [87] | Interviews on usefulness of procedures; suggestions for improvement [87] |
| Data Collection | Can participants/compliance with data collection protocols? | Completion rates and times for measurements; extent of missing data [87] | Perceived burden or inconvenience of assessments [87] |
| Acceptability & Adherence | Is the implantable power source and associated procedure acceptable? | Adherence rates to monitoring; dropout rates [87] | Semi-structured interviews on subject comfort and device function [87] |
What are the critical statistical considerations for a pilot study?
Pilot studies typically have small sample sizes, which means effect size estimates will be imprecise and have large confidence intervals [87]. The primary goal is not to obtain statistically significant p-values but to estimate feasibility parameters and their variability. For example, an adherence rate of 80% observed in 10 subjects yields a 95% confidence interval from 44% to 97%, clearly showing the uncertainty inherent in small samples [87]. Use confidence intervals to inform sample size calculations for the subsequent main study.
Troubleshooting Common Experimental Issues
Our energy harvesting device shows inconsistent power output in vivo. What could be the cause?
Inconsistent power generation is a common challenge. The root cause often lies in the dynamic physiological environment.
Problem: Variable Source Energy. The intrinsic energy of the human body (motion, thermal gradients, glucose levels) is not constant [1] [8]. Tissue motion and heartbeats are rhythmic but their magnitude can vary, and thermal gradients can be affected by ambient temperature and blood flow [1].
- Solution: Conduct long-term baseline measurements in your target model to characterize the natural variability of the energy source. Design your energy harvester and power management system to operate efficiently across this expected range, and include a small backup battery or capacitor for periods of low harvesting.
Problem: Device-Tissue Interface Changes. Post-implantation, factors like biofouling (formation of a fibrous capsule) or minor device migration can alter the coupling of your harvester with the energy source. For instance, a fibrotic capsule can insulate a thermoelectric generator, reducing its effectiveness [1].
- Solution: In your pilot studies, plan for terminal endpoints to visually inspect and histologically analyze the tissue-device interface. Use biocompatible coatings to minimize aggressive fibrotic responses.
Our wireless power transfer efficiency drops significantly during animal movement. How can we improve robustness?
This is a classic challenge in WPT, especially for untethered devices like capsule endoscopes [86].
- Problem: Coil Misalignment and Rotation. The efficiency of inductive coupling is highly sensitive to the distance, axial misalignment, and angular rotation between the transmitter (Tx) and receiver (Rx) coils [86].
- Solution:
- 3D Receiver Coils: Integrate a 3D coil system within the implant, where three coils are aligned along orthogonal axes (x, y, z). This ensures that regardless of capsule rotation, at least one coil will have sufficient coupling with the external magnetic field [86].
- Adaptive Closed-Loop Control: Implement a system like Load-Shift Keying (LSK) where the implant communicates received power levels back to the transmitter. The transmitter can then dynamically adjust its power or frequency to maintain stable power delivery despite varying coupling [86].
- Solution:
We are struggling with data fragmentation from our in-vivo power experiments. How can AI help?
Managing data from disparate sources (e.g., device telemetry, physiological sensors, video monitoring) is a major hurdle [88].
Problem: Fragmented Data Silos. Data exists in incompatible formats across electronic health records (EHR), device proprietary telemetry, imaging systems, and behavioral scoring software, making integrated analysis difficult [88].
- AI Solution: Automated Data Curation & Integration. Advanced Natural Language Processing (NLP) algorithms can extract structured information from unstructured clinical notes and reports. Computer vision can process video to quantify animal behavior or device location. These technologies enable the creation of unified data repositories, providing a 360-degree view of device performance [88].
Problem: Manual Data Cleaning is Slow and Error-Prone.
- AI Solution: Real-Time Data Standardization. Machine learning models can automatically map incoming heterogeneous data to standardized regulatory-compliant formats (e.g., CDISC, HL7 FHIR), dramatically reducing manual effort and ensuring data is "submission-ready" from the moment of collection [88].
The Scientist's Toolkit
Table: Essential Research Reagents and Materials for IMD Power Research
| Item / Solution | Function / Application | Key Considerations |
|---|---|---|
| Porcine Model | In-vivo validation model for gastrointestinal devices and power systems [86]. | Closely mimics human GI anatomy and physiology for realistic performance testing. |
| 3D Coil System | A receiver coil system with three orthogonal coils integrated into the implant [86]. | Mitigates power loss due to implant rotation; ensures robust power coupling. |
| Load-Shift Keying (LSK) Circuitry | Enables closed-loop communication from the implant back to the transmitter [86]. | Allows adaptive power control based on actual received power, optimizing efficiency and safety. |
| Litz Wire | A special type of wire used in constructing high-frequency coils for WPT systems [86]. | Reduces power losses due to the "skin effect" at high operating frequencies, improving coil quality factor. |
| SynergyLMM Framework | A comprehensive statistical framework and web-tool for analyzing in-vivo drug combination studies [89]. | Useful for complex studies where power systems are tested alongside pharmacological treatments; handles longitudinal data and inter-animal heterogeneity. |
| In Vivo V3 Framework | A validation framework for digital measures adapted for preclinical research [90]. | Provides a structure (Verification, Analytical Validation, Clinical Validation) to ensure reliability of digital power and sensor data collected in vivo. |
Regulatory and Data Integrity Considerations
How can we ensure our collected in-vivo data on power device safety will meet regulatory standards for a submission?
Adhering to structured frameworks and modern data management practices is crucial.
Adopt the In Vivo V3 Framework: This framework, adapted from clinical digital medicine, ensures the integrity of your data "supply chain" [90].
- Verification: Ensure your digital sensors and data acquisition systems accurately capture and store raw power and physiological data (e.g., voltage, current, temperature) [90].
- Analytical Validation: Prove that the algorithms processing your raw data (e.g., calculating efficiency, estimating battery state-of-charge) do so with precision and accuracy [90].
- Clinical Validation: Demonstrate that your digital measures (e.g., "stable power output") accurately reflect the true biological and functional state of the device in the animal model, within your specific context of use [90].
Implement AI-Driven Clinical Data Management (CDM): For high-risk devices, AI platforms can transform regulatory submissions [88]. They can:
- Automate the generation of comprehensive sections of Premarket Approval (PMA) applications.
- Continuously scan scientific literature and regulatory bulletins to ensure compliance.
- Use predictive algorithms to flag potential manufacturing deviations or adverse event patterns in post-market data, enabling proactive risk management [88].
What are the absolute safety limits for wireless power transfer in living tissue?
The most critical safety limit is the Specific Absorption Rate (SAR), which measures the rate at which energy is absorbed by body tissue [86]. Regulatory bodies define strict SAR limits to prevent tissue heating and damage. All WPT systems must be designed to comply with these limits. This is why closed-loop adaptive control systems are essential—they can dynamically adjust transmitted power to stay within safe SAR thresholds while still delivering sufficient power for the device to function [86].
Cost-Benefit and Scalability Analysis for Widespread Clinical Adoption
Technical Support Center: Troubleshooting Guides and FAQs
This section provides practical support for researchers and clinicians encountering issues with the peripheral systems of implantable medical devices, such as remote monitoring equipment. Proper functionality of these systems is critical for the continuous data collection required for long-term power management studies.
Frequently Asked Questions (FAQs)
Q: The remote monitor for my experimental implantable device is beeping. Does this indicate a problem with the implant itself?
- A: Typically, no. The beeping or flashing is almost always related to the external communicator or transmitter, not the implanted device itself. The implant continues to function based on its programmed settings. Press the unit's start or status button to silence the alarm and attempt to restart the data transmission [66] [91].
Q: What kind of data is transmitted from the implant to my research database?
- A: The transmitted information is the same device and physiological data that would be collected during an in-clinic visit. This can include battery status, lead impedance, sensing and pacing statistics, and stored episode data from arrhythmic events. This data is essential for assessing both device performance and patient status [66].
Q: Can the research team make remote changes to the implanted device's settings?
Q: What is the typical power source for the external monitor, and what happens during a power outage?
- A: The monitor is powered by a standard electrical outlet. During a power outage, it will not be able to send data but has internal memory to store the information. Once power is restored, it will automatically reset and attempt to transmit the stored data. There is no need to manually reset the unit [66] [91] [92].
Q: How can I verify that the remote monitoring system is functioning correctly for our clinical trial?
- A: Most communicators have a self-test or status check feature. For example, on the Boston Scientific LATITUDE Communicator, pressing the status button for one second will result in green lights if the unit is working properly. Furthermore, your research clinic or the device manufacturer's technical support can often verify connectivity and data receipt on the backend [92].
Troubleshooting Guide
The table below summarizes common issues with remote monitoring systems and their recommended solutions.
Table 1: Troubleshooting Guide for Remote Monitoring Systems
| Issue Description | Possible Cause | Recommended Action |
|---|---|---|
| Cannot read data from the implanted device [66]. | Communicator too far from implant; interrogation interrupted. | Hold communicator within 1 foot of the implant; ensure no buttons are pressed during the process; reattempt interrogation. |
| Cannot send data to the clinic [66] [91]. | Poor cellular/Wi-Fi signal; disconnected landline; loose cable. | Check connection strength and move the unit if needed; disconnect and reconnect all data cables (cellular, landline, or Ethernet). |
| "Call Doctor" icon is illuminated [66] [92]. | Communicator has a persistent connection problem. | Press the button to silence the alert. Unplug the power for one full minute, then reconnect. If the issue persists, contact technical support for a potential replacement unit. |
| Weak or No Connection error code [91]. | Weak or unavailable cellular/Wi-Fi signal. | Ensure connectivity; move the monitor to a location with a stronger signal. For cellular issues, consider switching to a landline or Wi-Fi connection if supported. |
| Reader/App Malfunction [91]. | Outdated app software; Bluetooth pairing issue; smartphone glitch. | Update the monitoring app to the latest version; power cycle the smartphone/tablet; delete and reinstall the app; ensure the correct reader is selected in the app. |
For persistent issues, researchers should contact the dedicated technical support for the device manufacturer:
- Abbott Remote Care Technical Support: (877) 696-3754 or
mymerlin@abbott.com[66] - Medtronic Stay Connected Support: 1-866-470-7709 [91]
Quantitative Data on the Implantable Medical Devices Market
A clear understanding of the market landscape is fundamental for evaluating the commercial viability and scalability of new power management technologies. The following tables summarize key quantitative data.
Table 2: Global Market Overview for Implantable Medical Devices [93] [94]
| Metric | Value | Time Period |
|---|---|---|
| Market Size in 2025 | USD 103.67 Billion | 2025 |
| Projected Market Size in 2034 | USD 178.15 Billion | 2034 |
| Compound Annual Growth Rate (CAGR) | 6.20% | 2025-2034 |
| North America Market Share | 43.11% | 2024 |
| U.S. Market Size in 2025 | USD 35.75 Billion | 2025 |
| U.S. Projected Market Size in 2034 | USD 61.90 Billion | 2034 |
Table 3: Market Characteristics and Segment Analysis [93] [94]
| Category | Detail | Market Share / Value |
|---|---|---|
| Leading Product Type | Orthopedic Implants | >46% share (2024) |
| Key Biomaterial | Metallic Biomaterials | 50% share (2024) |
| Market Concentration | Top 10 Companies (e.g., J&J, Medtronic, Abbott) | >60% of global market |
| M&A Activity | Annual transaction value | >$5 Billion |
| Cardiac Rhythm Management (CRM) Segment | Estimated market size | >$50 Billion |
| Orthopedic Implants Segment | Estimated market size | ~$80 Billion |
Experimental Protocols for Next-Generation Power Systems
Research into alternative energy sources aims to overcome the limitations of conventional batteries, which dominate device volume and require replacement surgeries. The following protocol details the development of glucose-powered bioelectronics, a leading-edge approach.
Detailed Methodology: In Vivo Validation of Glucose Fuel Cells
Objective: To validate the performance and biocompatibility of a miniature glucose fuel cell for powering implantable medical devices, using a live animal model.
Background: Glucose fuel cells (GFCs) convert chemical energy from the body's natural glucose and oxygen into electrical energy, mimicking the process used by human cells [1]. This approach promises a continuous, endogenous power source, potentially eliminating the need for batteries [2] [3].
Materials and Reagents: Table 4: Research Reagent Solutions for Glucose Fuel Cell Experimentation
| Item | Function in the Experiment |
|---|---|
| Glucose Fuel Cell Prototype | Core energy harvester; consists of anode and cathode with specialized electrocatalysts. |
| Potentiostat/Galvanostat | Instrument to apply a controlled electrical load and measure the power output (voltage & current) of the GFC. |
| Simulated Body Fluid (SBF) | In-vitro testing solution that mimics the ionic composition of human blood plasma. |
| Animal Model (e.g., Swine) | Provides a physiologically relevant in-vivo environment for testing device integration and power generation. |
| Data Acquisition System | For continuous, real-time monitoring of the GFC's electrical output and stability in vivo. |
| Histology Stains (e.g., H&E) | Used post-trial to analyze tissue samples for inflammatory response and biocompatibility. |
Procedure:
- In-Vitro Characterization: Prior to implantation, the GFC is immersed in a beaker of SBF maintained at 37°C. A potentiostat is connected to characterize its performance, measuring key parameters including open-circuit voltage, short-circuit current density, and peak power density under varying glucose concentrations.
- Surgical Implantation: Following IACUC-approved protocols, the GFC is surgically implanted into a predetermined site (e.g., subcutaneous, intramuscular, or intraperitoneal) in the anesthetized animal model. The device's electrodes are connected to percutaneous leads for external monitoring.
- In-Vivo Power Monitoring: The data acquisition system is connected to record the GFC's power output continuously over a predefined period (e.g., 4-12 weeks). The system logs voltage and current, allowing researchers to calculate power and assess stability in response to the animal's physiological states (e.g., fasting vs. fed).
- Functional Demonstration: To demonstrate clinical relevance, the GFC is used to power a low-energy cardiac sensing circuit (>1µW demand) that is implanted alongside it [2]. The circuit's operation is verified to confirm the GFC can meet real-world power needs.
- Explanation and Analysis: After the monitoring period, the animal is euthanized, and the GFC and surrounding tissue are explanted. The device is inspected for degradation, while the tissue is processed for histological analysis to assess the foreign body response and overall biocompatibility.
Logical Workflow: The diagram below illustrates the sequential and iterative process of developing and validating a glucose-powered bioelectronic system.
Analysis of Clinical Adoption Drivers and Barriers
The transition of innovative power solutions from the lab to widespread clinical use hinges on a clear cost-benefit and scalability analysis.
Driving Forces for Adoption
- Overcoming Battery Limitations: Conventional batteries account for over 80% of the volume and weight of many current implantable devices [2] [3]. Technologies like glucose fuel cells enable unprecedented miniaturization, leading to less invasive implantation procedures, improved patient comfort, and access to new anatomical sites [1] [3].
- Reducing Lifetime Healthcare Costs: While R&D costs are high initially, self-powered devices aim to eliminate the need for replacement surgeries, which are a significant cost driver. These surgeries carry risks of infection and complications, imposing a substantial burden on healthcare systems [2]. The long-term economic value proposition is a powerful adoption driver.
- Enabling New Therapeutic Modalities: Sustainable power sources are the gateway to next-generation bioelectronics. They can support devices with higher energy demands, such as closed-loop neuromodulation systems for neurodegenerative diseases, or chronic, high-resolution monitoring of metabolic conditions like diabetes [1] [2].
- Favorable Market Trajectory: The implantable medical device market is large and growing (see Table 2), creating a receptive environment for disruptive technologies. The high level of merger and acquisition activity indicates that large strategics are actively seeking innovation, providing a potential exit for startups [93] [94].
Challenges to Scalability and Widespread Use
- Regulatory Hurdles: Introducing a new power source, especially one that interacts with human physiology like a glucose fuel cell, faces a stringent regulatory pathway. Securing FDA or EMA approval requires extensive pre-clinical and clinical data to prove long-term safety, reliability, and biocompatibility, a process that can take years and cost millions [93] [95].
- Power Density and Reliability: A significant research challenge is achieving sufficient power density (µW/cm³) consistently over decades within the complex and dynamic environment of the human body. Factors like foreign body response (fibrous encapsulation) can limit glucose diffusion to the electrodes, reducing power output over time [1].
- Manufacturing and Sterilization: Developing scalable, cost-effective manufacturing processes that ensure the quality and sterility of sensitive bio-electrochemical systems is non-trivial. Standard sterilization methods (e.g., gamma irradiation, ethylene oxide) must not degrade the device's performance [94].
- Reimbursement Strategy: For successful commercialization, developers must early on engage with payers (e.g., Medicare) to define a reimbursement pathway. Demonstrating not just clinical efficacy but also a compelling economic value relative to the standard of care is critical for adoption by hospitals and clinics [95].
Troubleshooting Guides
Guide 1: Addressing Premature Battery Depletion in Implantable Devices
Problem: Unexpectedly short battery life in cardiac implantable electronic devices (CIEDs), leading to premature surgical replacement.
Background: Battery depletion is a primary factor determining surgical replacement intervals. Patient-centric factors and external device interactions can significantly accelerate battery consumption, moving replacement timelines earlier than projected.
Investigation Methodology:
- Check for Elevated Lead Impedance: High impedance increases power draw. Interrogate device diagnostics for abrupt or gradual changes in lead impedance values.
- Review High-Voltage Therapy History: Interrogate the device log to count the number of shocks delivered. Each defibrillation shock consumes substantial battery energy.
- Assess Pacing Output and Burden: Review programmed pacing parameters (voltage, pulse width) and the percentage of time the device is pacing. High-output settings and 100% ventricular pacing in pacemaker-dependent patients increase drain.
- Scan for Non-Cardiac Electrical Noise: High-rate, non-physiological sensing can inhibit pacing or trigger inappropriate therapies. Electrogram review can identify noise from lead fractures or external interference [9].
- Evaluate for Environmental Electromagnetic Interference (EMI): Inquire about patient exposure to strong magnetic fields from consumer electronics (e.g., smartphones with MagSafe, wireless chargers), which can inadvertently trigger device "magnet mode" and potentially disrupt normal, efficient device operation [96].
Solutions:
- Reprogramming: If clinically safe, reduce pacing output to the verified capture threshold and lower the maximum tracking/sensor rates.
- Lead Revision: If lead failure is the source of high impedance or noise, schedule a lead revision procedure.
- Patient Education: Counsel patients to maintain a safe distance (≥15 cm) between their CIED and consumer electronics with magnets and to avoid carrying phones in chest pockets [96].
Guide 2: Investigating Unexplained Pain or Poor Functional Outcomes Post-Orthopedic Implantation
Problem: Patient reports persistent pain, stiffness, or dissatisfaction following an objectively successful joint arthroplasty, complicating assessments of device longevity and need for revision.
Background: Up to 20% of patients may be dissatisfied with the outcomes of surgery like total knee arthroplasty despite radiographic evidence of a well-fixed and positioned implant [97]. This disconnect highlights the critical role of Patient-Reported Outcome Measures (PROMs).
Investigation Methodology:
- Administer Validated PROMs: Utilize standardized questionnaires (e.g., HOOS, KOOS for hips/knees) pre-operatively and at regular post-operative intervals to quantify pain and function from the patient's perspective [98].
- Analyze Patient Factor Subgroups: Statistically evaluate outcomes based on patient factors such as age, gender, body mass index (BMI), and psychological status. These factors are known to cause significant variability in PROMs, independent of the device's mechanical performance [97].
- Correlate with Clinical Data: Integrate PROMs data with clinical and radiographic findings to determine if the pain has a mechanical cause (e.g., loosening, wear) or is related to other patient-specific factors.
- Review Registry Data: Consult high-risk medical device registries, which are increasingly collecting PROMs to provide real-world evidence on long-term device performance and patient satisfaction across diverse populations [98].
Solutions:
- Pre-operative Counseling: Set realistic expectations based on the patient's specific factors (e.g., informing obese patients that they may experience smaller improvements in pain and function).
- Non-Surgical Management: For patients with poor PROMs but no signs of device failure, pursue physical therapy, pain management, or behavioral health interventions before considering revision surgery.
- Data-Driven Decisions: Use longitudinal PROMs data as a key metric in the shared decision-making process for or against revision surgery.
Frequently Asked Questions (FAQs)
Q1: What are the most common failure modes for the electronic components of implantable devices? Common electronic failure modes include component degradation (e.g., capacitors losing capacitance), solder joint failures from mechanical stress, moisture ingress leading to corrosion, and power supply issues from battery depletion or voltage regulator failure. Electromagnetic interference (EMI) can also disrupt signal integrity [9].
Q2: How can patient-reported outcomes (PROMs) predict the long-term survival of an implant? While PROMs are primarily used to measure a patient's quality of life, they are increasingly being studied for their predictive ability. In high-risk device registries, PROMs can identify cohorts with poorer outcomes, potentially signaling early device under-performance or failure to meet patient needs, which may precede the need for revision surgery. However, there is currently a paucity of studies using PROMs specifically to predict long-term implant survival, indicating a key area for future research [98].
Q3: What emerging power solutions could one day eliminate the need for battery replacement surgery? Research is focused on Self-powered Implantable Medical Devices (SIMDs) that harvest energy from the body. Promising technologies include:
- Triboelectric Nanogenerators (TENGs) and Piezoelectric Nanogenerators (PENGs) that convert mechanical motion (e.g., heartbeats, lung expansion) into electricity [1] [44].
- Biofuel Cells that generate electricity from biochemical reactions, such as glucose oxidation [1].
- Mid-field Wireless Power Transfer (WPT), which can efficiently transmit power through tissue to small, deeply implanted devices without percutaneous leads [12].
Q4: What is the single biggest challenge to the long-term stability of bioelectronic implants? The primary challenge is the mechanical mismatch between rigid, traditional electronic materials and the soft, dynamic environment of the human body. This mismatch can cause inflammation, fibrosis (scar tissue formation), and eventual device failure. The field is moving toward soft and flexible bioelectronics made from polymers and hydrogels that better conform to tissues, thereby improving long-term integration and stability [99].
Data Presentation: Key Failure Modes and Patient Concerns
The following tables summarize quantitative data relevant to device longevity and patient perspectives.
Table 1: Common Pacemaker PCB Failure Modes and Measurements [9]
| Failure Mode | Typical Measurement | Acceptable Range | Diagnostic Tool |
|---|---|---|---|
| Battery Depletion | Output Voltage | 2.5V - 3.3V | Multimeter |
| Capacitor Degradation | Capacitance Value | e.g., >8μF for a 10μF cap | Multimeter (LCR) |
| Power Supply Ripple | AC Ripple Voltage | <50mV | Oscilloscope |
| Pacing Pulse Abnormality | Pulse Width / Amplitude | 0.5-1.5ms / 2-5V | Oscilloscope |
| Moisture Ingress | Impedance Change | Stable Baseline | Impedance Spectroscopy |
Table 2: Patient Concerns Regarding Implanted Devices (n=24) [100]
| Concern | Percentage of Patients Finding it "Very" or "Somewhat" Worrisome |
|---|---|
| "No one is tracking the device nationally to find out problems" | Data not quantified in results |
| Lack of a clear process for long-term device tracking | |
| Lack of information on what to do if a device alert is issued | |
| Not being told the device's model name and serial number |
Experimental Protocols
Protocol 1: Assessing the Impact of Patient Factors on Orthopedic Device Outcomes
Objective: To determine the association between specific patient factors (e.g., BMI, age) and Patient-Reported Outcome Measures (PROMs) following joint arthroplasty.
Methodology:
- Study Design: Prospective, longitudinal cohort study.
- Participant Recruitment: Consecutive patients undergoing primary total joint arthroplasty.
- Data Collection:
- Pre-operative: Record patient factors (Age, Gender, BMI, Comorbidities). Administer baseline PROM (e.g., KOOS, HOOS).
- Post-operative: Administer the same PROMs at standardized intervals (e.g., 6 months, 1 year, 2 years, 5 years).
- Clinical Data: Record surgical details and collect radiographic data.
- Statistical Analysis:
- Calculate change in PROM scores from baseline to each follow-up.
- Use multiple regression analysis to identify which patient factors are independent predictors of the final PROM score, controlling for potential confounders.
- Stratify patients by factors like BMI (e.g., <30, 30-35, >35) and compare the proportion in each group that achieved the "Minimally Clinically Important Difference" (MCID) in their PROM scores [97].
Protocol 2: Validating Mid-field Wireless Power Transfer for Implantable Devices
Objective: To measure the power transfer efficiency (PTE) of a flexible midfield WPT system to an implantable receiver in a simulated biological environment.
Methodology:
- System Fabrication:
- Transmitter (Tx): Fabricate a flexible antenna on a polyamide substrate designed to operate at 1.5 GHz and conform to body surfaces.
- Receiver (Rx): Fabricate a miniaturized, implantable antenna (e.g., 7x7x0.1 mm) and integrate it with a high-efficiency rectifier circuit (to convert RF to DC).
- Experimental Setup:
- Place the Rx antenna inside a phantom tissue model (emulating electrical properties of muscle or skin).
- Position the flexible Tx antenna on the surface of the phantom at a fixed distance (e.g., 51 mm).
- Measurements:
- Use a Vector Network Analyzer (VNA) to measure the transmission coefficient (S21) between Tx and Rx, which correlates to PTE.
- Measure the RF-to-DC conversion efficiency of the rectifier using a spectrum analyzer and precision load.
- Assess Specific Absorption Rate (SAR) using a probe station to ensure compliance with safety limits (<1.6 W/kg averaged over 1g of tissue) [12].
- Validation:
- Use the WPT system to power a low-energy sensor (e.g., temperature sensor with BLE module) within the phantom to demonstrate real-world functionality.
Research Workflow Visualization
The diagram below outlines the logical workflow for a research program investigating patient-centric outcomes and their impact on device longevity.
The Scientist's Toolkit: Research Reagent Solutions
Table 3: Essential Materials for Implantable Device Longevity Research
| Research Tool | Function in Research | Example Application |
|---|---|---|
| Phantom Tissue Models | Simulates the dielectric properties (permittivity, conductivity) of human tissues for in-vitro testing. | Validating Wireless Power Transfer (WPT) efficiency and Specific Absorption Rate (SAR) safely [12]. |
| Flexible/Stretchable Substrates (e.g., Polyamide) | Serves as a base material for constructing soft bioelectronic devices that mechanically match biological tissues. | Fabricating conformal antennas and flexible PCBs for next-generation implants to reduce fibrotic encapsulation [99] [12]. |
| Triboelectric Nanogenerators (TENGs) | Converts biomechanical energy (e.g., heart motion, breathing) into electrical power for the device. | Developing self-powered implantable systems to extend operational life and avoid replacement surgery [44]. |
| Vector Network Analyzer (VNA) | Precisely measures the transmission efficiency (S-parameters) between antennas in a wireless system. | Characterizing the power transfer link budget of a midfield WPT system for implants [12]. |
| Validated Patient-Reported Outcome Measures (PROMs) | Standardized questionnaires that quantify a patient's health status from their own perspective. | Assessing the impact of device performance and patient factors on quality of life in clinical studies and registries [98] [97]. |
Conclusion
The future of implantable medical devices is inextricably linked to advancements in power management. While lithium-based batteries currently dominate, the trajectory points towards a hybrid and ultimately self-sustaining future, leveraging energy harvesting from the human body and wireless power transfer to create maintenance-free, long-lasting devices. Success hinges on multidisciplinary research that merges advancements in battery chemistry, materials science for biocompatibility, and sophisticated power management algorithms. The key takeaways for researchers are the critical need to design with a systems-level approach that balances power density with clinical viability and patient safety. Future directions must focus on improving the efficiency and miniaturization of energy harvesters, developing robust safety and regulatory frameworks for new technologies, and integrating smart, adaptive algorithms to dynamically manage power, ultimately unlocking the full potential of precision medicine and closed-loop therapeutic systems.
References
- 1. Sustainable power solutions for next-generation medical ... [https://www.sciencedirect.com/science/article/pii/S2590006425006258]
- 2. New £2.1 million project aims to revolutionise implantable ... [https://ibme.ox.ac.uk/2025/11/12/new-2-1-million-project-aims-to-revolutionise-implantable-medical-devices-by-harnessing-power-from-glucose-in-the-body/]
- 3. New project to transform implantable medical devices [https://www.ncl.ac.uk/press/articles/latest/2025/10/glutronics/]
- 4. FAQs on Medical Devices [https://www.einfochips.com/blog/faqs-on-medical-devices/]
- 5. Visualization of Cardiac Implantable Electronic Device Data ... [https://pmc.ncbi.nlm.nih.gov/articles/PMC6751067/]
- 6. Overcoming the Challenges of Powering Long-Term ... [https://www.iancollmceachern.com/single-post/overcoming-the-challenges-of-powering-long-term-implantable-devices]
- 7. Powering Implantable and Ingestible Electronics - PMC [https://pmc.ncbi.nlm.nih.gov/articles/PMC8553224/]
- 8. Power Approaches for Implantable Medical Devices - PMC [https://pmc.ncbi.nlm.nih.gov/articles/PMC4701313/]
- 9. Pacemaker PCB Troubleshooting Guide: Identifying and ... [https://www.allpcb.com/blog/pcb-knowledge/pacemaker-pcb-troubleshooting-guide-identifying-and-resolving-common-issues.html]
- 10. FAQ: Implantable Cardioverter Defibrillators [https://www.ucsfhealth.org/education/faq-implantable-cardioverter-defibrillators]
- 11. Challenges and Future Trends in Wireless Power Transfer ... [https://www.intechopen.com/chapters/1210391]
- 12. Development of an efficient mid-field wireless power ... [https://www.nature.com/articles/s41598-025-99609-1]
- 13. Implantable Medical Devices Market Size & Trends 2035 [https://www.researchnester.com/reports/implantable-medical-devices-market/6094]
- 14. Reliability and stability of Bioelectronic Medicine: a critical and ... [https://bioelecmed.biomedcentral.com/articles/10.1186/s42234-025-00179-4]
- 15. Bioelectronic medicine: wearable and implantable ... [https://pmc.ncbi.nlm.nih.gov/articles/PMC12447594/]
- 16. Comprehensive Overview of Medical Power Supply ... [https://www.marketreportanalytics.com/reports/medical-power-supply-equipment-61706]
- 17. Challenges of Batteries for Implantable Medical Devices [https://www.large-battery.com/blog/batteries-for-implantable-medical-devices-miniaturization-biocompat/]
- 18. Recent advances in implantable batteries: Development ... [https://www.sciencedirect.com/science/article/abs/pii/S0925838824001373]
- 19. Battery Safety & Risk Management for Medical Devices [https://www.exponent.com/capabilities/battery-safety-risk-management-medical-devices]
- 20. New materials could enable longer-lasting implantable ... [https://news.mit.edu/2022/nonrechargeable-batteries-electrolyte-1104]
- 21. Improving Data Transfer and Battery Life for Implanted ... [https://www.mddionline.com/implants/improving-data-transfer-and-battery-life-for-implanted-devices]
- 22. Planning Scheme for Optimal PMU Location Considering ... [https://www.mdpi.com/1996-1073/18/13/3283]
- 23. Failure Modes, Safety Concerns, Testing Protocol, and ... [https://www.sciencedirect.com/science/article/pii/S2950264025000929]
- 24. Advanced Battery Technology [https://www.thermofisher.com/us/en/home/materials-science/advanced-battery-technology.html]
- 25. Solid-state batteries: how they work [https://www.flashbattery.tech/en/blog/how-solid-state-batteries-work/]
- 26. Advanced Battery Technology Center (ABTC) - Fraunhofer IWS [https://www.iws.fraunhofer.de/en/centers/abtc.html]
- 27. Solid State Battery vs. Lithium-Ion: Which One Is Better? [https://www.ecoflow.com/us/blog/solid-state-battery-vs-lithium-ion]
- 28. Solid State Battery: Comprehensive and Detailed Introduction [https://www.neware.net/news/solid-state-battery/230/63.html]
- 29. New book on Safety Challenges and Strategies of Using ... [https://energy.umd.edu/news/story/new-book-on-safety-challenges-and-strategies-of-using-lithiumion-batteries]
- 30. Self-Powered Implantable and Ingestible Devices [https://www.sciencedirect.com/science/article/pii/S1369702125002032]
- 31. Glucose-based biofuel cells and their applications in ... [https://www.sciencedirect.com/science/article/pii/S2405844024096464]
- 32. Biomechanical Energy Harvesting for Implantable Medical ... [https://www.longdom.org/open-access/biomechanical-energy-harvesting-for-implantable-medical-devices-108743.html]
- 33. Energy Harvesting in Implantable and Wearable Medical ... [https://www.mdpi.com/1996-1073/15/20/7495]
- 34. Harvesting biomechanical energy or carrying batteries? An ... [https://pmc.ncbi.nlm.nih.gov/articles/PMC4375935/]
- 35. Wireless Power Transfer Techniques for Implantable ... [https://pmc.ncbi.nlm.nih.gov/articles/PMC7349694/]
- 36. Wireless power transfer [https://en.wikipedia.org/wiki/Wireless_power_transfer]
- 37. Wireless Power Transfer - an overview [https://www.sciencedirect.com/topics/engineering/wireless-power-transfer]
- 38. Approach-Based Analysis on Wireless Power ... [https://www.mdpi.com/2076-3417/13/1/415]
- 39. Comparative analysis of energy transfer mechanisms for ... [https://pmc.ncbi.nlm.nih.gov/articles/PMC10825050/]
- 40. Improving Ultrasonic Power Transfer in Air Through Hybrid ... [https://www.mdpi.com/1424-8220/25/11/3340]
- 41. Revolutionizing brain‒computer interfaces - PubMed Central [https://pmc.ncbi.nlm.nih.gov/articles/PMC12243264/]
- 42. From the Heart, Brain, and Skin to Gastrointestinal Organs [https://pmc.ncbi.nlm.nih.gov/articles/PMC12384755/]
- 43. Implantable Medical Electronic Devices: Sensing ... [https://www.mdpi.com/2076-3417/15/13/7599]
- 44. Recent advances in self-powered implantable medical ... [https://www.sciencedirect.com/science/article/pii/S3050913025000877]
- 45. Top 6 Reasons Medical Device Proof-of-Concept Studies Fail [https://namsa.com/resources/blog/reasons-medical-device-proof-of-concept-studies-fail/]
- 46. Self-Sustainable Biomedical Devices Powered by RF Energy [https://pmc.ncbi.nlm.nih.gov/articles/PMC9459858/]
- 47. Troubleshooting Medical Equipment - 24X7mag [https://24x7mag.com/maintenance-strategies/alternative-equipment-maintenance/prevailing-attitudes/troubleshooting-medical-equipment/]
- 48. The Role of Redundancy in Safety Design – Because One... System [https://www.linkedin.com/pulse/role-redundancy-safety-system-design-because-one-line-tamer-ramzy-6aqee]
- 49. IT Help Desk Troubleshooting Guide - 13 Common Solutions [https://www.suptask.com/blog/help-desk-troubleshooting-guide]
- 50. The Bylink Power Concept Management [https://www.powersystemsdesign.com/articles/the-bylink-power-management-concept/146/18336]
- 51. Battery Requirements Across Medical Devices [https://www.large-battery.com/blog/battery-requirements-medical-devices-safety-reliability/]
- 52. ISO 10993-1:2018 - Biological evaluation of medical devices [https://www.iso.org/standard/68936.html]
- 53. Use of International Standard ISO 10993-1, "Biological ... [https://www.fda.gov/regulatory-information/search-fda-guidance-documents/use-international-standard-iso-10993-1-biological-evaluation-medical-devices-part-1-evaluation-and]
- 54. Medical Device QA & QC Microscopy Solutions | Applications [https://www.leica-microsystems.com/applications/industrial-microscopy-markets/medical-device-qa-qc/]
- 55. Troubleshooting Basics: Medical Electrical Equipment [https://www.ebmesolutions.com/howtoguides/troubleshootingbasics]
- 56. How To Extend EV Battery Life in 2025? - CITA EV Charger [https://citaevcharger.co.uk/blog/how-to-extend-ev-battery-life-2025]
- 57. Troubleshooting - Battery Problems [https://support.digitalmatter.com/en_US/battery-powered-device-configuration/troubleshooting-battery-problems]
- 58. 9 Essential IoT Battery Optimization Strategies for Better ... [https://www.large-battery.com/blog/9-essential-iot-battery-optimization-strategies-for-better-performance/]
- 59. Effect of battery longevity on costs and health outcomes ... [https://pmc.ncbi.nlm.nih.gov/articles/PMC5705743/]
- 60. A Game-Changing Wireless Implant for Personalized ... [https://viterbischool.usc.edu/news/2025/06/a-game-changing-wireless-implant-for-personalized-chronic-pain-relief/]
- 61. Remaining useful life assessment of lithium-ion batteries in ... [https://www.sciencedirect.com/science/article/abs/pii/S0378775317315239]
- 62. Implantable Medical Devices Market Size to Surpass USD ... [https://www.biospace.com/press-releases/implantable-medical-devices-market-size-to-surpass-usd-179-70-billion-by-2034]
- 63. Clinical challenges and opportunities related to the ... [https://pubmed.ncbi.nlm.nih.gov/39675496/]
- 64. Implantable Medical Devices Market to Reach USD 176.33 ... [https://finance.yahoo.com/news/implantable-medical-devices-market-reach-130000809.html]
- 65. Color Contrast Accessibility: Complete WCAG 2025 Guide ... [https://www.allaccessible.org/blog/color-contrast-accessibility-wcag-guide-2025]
- 66. Troubleshooting the Merlin@home Transmitter and FAQs [https://www.cardiovascular.abbott/us/en/patients/cardiovascular-device-patient-services/remote-monitoring/merlin-home-transmitter/troubleshooting-faqs.html]
- 67. Cardiac Devices EMC Guide - Frequently Asked Questions [https://www.medtronic.com/en-us/l/patients/electromagnetic-guide/frequently-asked-questions.html]
- 68. FAQs About Pacemakers and Implantable Cardioverter… [https://www.coxhealth.com/treatment/faqs-about-pacemakers-and-implantable-cardioverter-defibrillators-icds/]
- 69. Operando monitoring of thermal runaway in commercial ... [https://www.nature.com/articles/s41467-023-40995-3]
- 70. Recent advanced implantable nano-micro sensing ... [https://www.sciencedirect.com/science/article/abs/pii/S2352152X25034073]
- 71. Research Progress on Thermal Runaway Warning ... [https://www.mdpi.com/2032-6653/16/2/81]
- 72. A Guide to Thermal Management Considerations for ... [https://www.boydcorp.com/about-boyd/resources/technical-papers-and-guides/guide-to-thermal-management-considerations-for-medical-devices.html]
- 73. Thermal Considerations for the Design of an Implanted ... - NCBI [https://www.ncbi.nlm.nih.gov/books/NBK3932/]
- 74. Designing Safety into Lithium Batteries for Critical Medical ... [https://www.large-battery.com/blog/safety-into-lithium-batteries-for-critical-medical-devices/]
- 75. Thermal Challenges in Medical Devices: Keeping Cool in a ... [https://resources.pcb.cadence.com/blog/thermal-challenges-in-medical-devices-keeping-cool-in-a-hot-and-evolving-tech-space-2]
- 76. Future Trends in Medical Batteries: High Energy Density ... [https://www.large-battery.com/blog/future-trends-medical-batteries-high-energy-density-monitoring/]
- 77. How to Troubleshoot and Fix Common Problems with ... [https://harmonyhomemedical.com/blogs/home-medical-resources/how-to-troubleshoot-and-fix-common-problems-with-home-medical-devices?srsltid=AfmBOooRLnwFxFwLOEvewm2Wgsz5vEpo5KREqYxbn6dqo-4bwlSj1LNu]
- 78. Rechargeable vs. Non-Rechargeable Batteries - Voniko [https://vonikoshop.com/blogs/blog/rechargeable-vs-non-rechargeable-batteries-which-should-you-use?srsltid=AfmBOop3GcVITzOaK6QGN2T9h5eVN0ptjebQVR2flvCGKiZK-d02ZgKm]
- 79. Power Generated by Environmental Harvesting [https://orbray.com/magazine_en/archives/1157]
- 80. Innovations in energy harvesting: A survey of low-power ... [https://www.sciencedirect.com/science/article/pii/S2352484725003889]
- 81. Theoretical and Experimental Study of Energy-Harvesting ... [https://pmc.ncbi.nlm.nih.gov/articles/PMC11644900/]
- 82. When to Use Rechargeable Batteries [https://www.consumerreports.org/electronics-computers/batteries/when-to-use-rechargeable-batteries-a1076298884/]
- 83. Power Management Solutions for IoT Device Design [https://www.allpcb.com/allelectrohub/power-management-solutions-for-iot-device-design]
- 84. Batteries or Energy Harvesting - Can't It Be Both? [https://www.onio.com/article/batteries-and-harvesting-can-itbe-both.html]
- 85. Quantum Energy Harvesters Exceed Carnot Efficiency [https://scitechdaily.com/surpassing-thermodynamic-limits-quantum-energy-harvesters-exceed-carnot-efficiency/]
- 86. In vivo validation of Wireless Power Transfer System ... [https://arxiv.org/html/2503.12850v1]
- 87. Guidelines for Designing and Evaluating Feasibility Pilot ... [https://pmc.ncbi.nlm.nih.gov/articles/PMC8849521/]
- 88. AI-Driven Clinical Data Management for High-Risk Devices [https://www.ideas2it.com/blogs/ai-clinical-data-management]
- 89. Improved analysis of in vivo drug combination experiments ... [https://www.nature.com/articles/s41467-025-65218-9]
- 90. Validation framework for in vivo digital measures [https://www.frontiersin.org/journals/toxicology/articles/10.3389/ftox.2024.1484895/full]
- 91. Error Codes and Troubleshooting - MyCareLink Smart [https://www.medtronic.com/en-us/l/patients/treatments-therapies/remote-monitoring/mycarelink-smart/troubleshooting.html]
- 92. LATITUDE indicator lights and troubleshooting [https://www.bostonscientific.com/en-US/patients-caregivers/device-support/remote-monitoring-system/indicator-lights-troubleshooting.html]
- 93. Advanced Implantable Medical Devices Strategic Insights [https://www.archivemarketresearch.com/reports/advanced-implantable-medical-devices-550445]
- 94. Implantable Medical Devices Market Size to Hit USD ... [https://www.precedenceresearch.com/implantable-medical-devices-market]
- 95. Raising Capital in 2026 for U.S. Medical Device Startups [https://www.alphasophia.com/blog-post/raising-capital-in-2026-for-us-medical-device-startups-20-essential-faqs-and-advanced-tactics]
- 96. Magnetic interference from consumer devices: a renewed ... [https://pmc.ncbi.nlm.nih.gov/articles/PMC12396592/]
- 97. The influence of patient factors on patient-reported ... [https://www.sciencedirect.com/science/article/abs/pii/S004901721400184X]
- 98. Patient-Reported Outcome Measures in High-Risk Medical ... [https://pmc.ncbi.nlm.nih.gov/articles/PMC11033681/]
- 99. Reliability and stability of Bioelectronic Medicine: a critical and ... [https://pmc.ncbi.nlm.nih.gov/articles/PMC12255127/]
- 100. Patient perspectives on the need for implanted device ... [https://pmc.ncbi.nlm.nih.gov/articles/PMC8369078/]